Altiumdesigner and clion tool learning
Altiumdesigner and clion tool learning
0
Components
Hardware components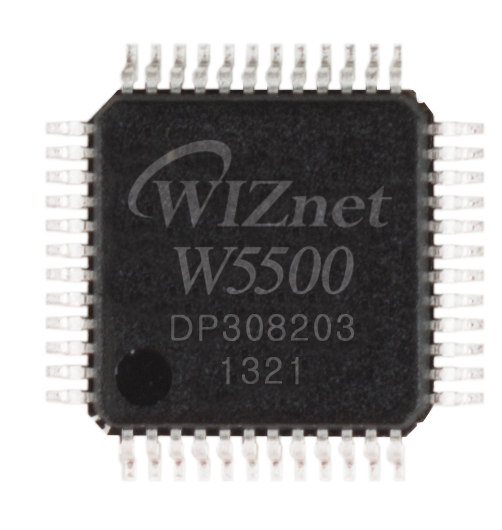
WIZnet - W5500
x 1

STM32
x 1
Clion Tool
x 1
STM Cube
x 1
STM IDE
x 1
Project description
One . Use Altium Designer Software complete STM32+W5500 System circuit schematic design
1. How to install Altium Designer
https://blog.csdn.net/weixin_42014622/article/details/83721000.2. Catalog download address
https://pan.baidu.com/s/1j8TW4BbuEHMBATg7ZncSTw. Extraction code :12343. draw stm32 The circuit diagram of the smallest system of
1. New project
File->New->Project->PCB Project
2. Add files
Right click Project , choice Add new to project, choice Schematic
3. Drawing process
1. Add chips 2. Place the needle
 3. Extension pin line
 4. Add tags

 Element rotation , Left click on the component , Press the spacebar to rotate 90°.
5. Draw all components
Element rotation , Left click on the component , Press the spacebar to rotate 90°.
5. Draw all components

4.STM32+W5500 System circuit schematic design
STM32F103C8T6 HS-NM5500A
 M_Board
 M_Board1

Two . Use Clion complete STM32F103 Lighten up LED
Clion Download address :https://blog.csdn.net/m0_58892312/article/details/121866325. Installation configuration arm-none-eabi-gcc: [GNU Toolchain | GNU-RM Downloads ? Arm Developerdeveloper.arm.com/open-source/gnutoolchain/gnu-rm/downloads](GNU Toolchain | GNU-RM Downloads ? Arm Developerdeveloper.arm.com/open-source/gnutoolchain/gnu-rm/downloads). install MinGW: [https://sourceforge.net/projects/mingw-w64/files/Toolchains targetting Win64/Personal Builds/mingw-builds/](https://sourceforge.net/projects/mingw-w64/files/Toolchains targetting Win64/Personal Builds/mingw-builds/). Installation configuration OpenOCD: https://gnutoolchains.com/arm-eabi/openocd/.1.Clion Related configuration
1. open CLion, New project Choose new C++ Executable, Just save the design path and project name . Click on File->Settings->Build->Toolchains, add to MinGW. Find the previously downloaded Clion. 2. Click on File->Settings->Build->Embedded Development, Well OpenOCD Change the file directory to your own download location , Click on Test, Green means the match is successful , By the way configuration CubeMX.

2. Realization LED Lighting procedure
1. New project , Use CubeMX Create a project , Set save path . 2. This process takes some time .
After the project is created , Click on open with STM32CubeMX.( This step may result in an error , This is related to JDK The version is about , To download and install 11.0.10 Above version , There is a simpler way to do this , take CubeMX Install under directory jre File copy to Clion Installation directory , Cover up the original jre Just file it )
open CubeMX Click here to select the chip , Use here STM32F103C8T6.
2. This process takes some time .
After the project is created , Click on open with STM32CubeMX.( This step may result in an error , This is related to JDK The version is about , To download and install 11.0.10 Above version , There is a simpler way to do this , take CubeMX Install under directory jre File copy to Clion Installation directory , Cover up the original jre Just file it )
open CubeMX Click here to select the chip , Use here STM32F103C8T6.
 3. To configure SYS:
 4.RCC:
 5. Pin PC13 For lighting LED The lamp :
 6. A serial port USART1:
 7. Clock tree :
 8. Engineering setup :
 9. The generated code .
go back to Clion, The following interface will pop up , choice st_nucleo_f103rb.cfg File and use ( If there is no such interface , Maybe just CubeMX Caused by inconsistent setting names , Reopen Clion, Just open the newly generated project ):
9. The generated code .
go back to Clion, The following interface will pop up , choice st_nucleo_f103rb.cfg File and use ( If there is no such interface , Maybe just CubeMX Caused by inconsistent setting names , Reopen Clion, Just open the newly generated project ):
 10. seek st_nucleo_f103rb.cfg file location

 11. Open the file , Note out the 10 That's ok

annotation : The first 4 The connection method selected in the line is stlink The first 6 The line is to choose swd Communication mode The first 8 The line is to choose stm32f1x Configuration file for The first 10 The line is to select the restart mode , It seems to be annotated , Do not comment out that the download may fail .

HAL_GPIO_WritePin(GPIOC,GPIO_PIN_13,GPIO_PIN_SET);
 HAL_Delay(500);
 HAL_GPIO_WritePin(GPIOC,GPIO_PIN_13,GPIO_PIN_RESET);
 HAL_Delay(500);

 14.
The successful running , Generate HEX file , Burning operation results :
14.
The successful running , Generate HEX file , Burning operation results :
Clion Realization LED flashing
3、 ... and . summary
This study , We make use of CLion Called STM32CubeMX It went straight on HAL Project establishment , Re pass CMake The compiler compiles the code , This function can completely replace keil , It can also carry out debugging and other functions , It can be seen that ,CLion It is a multi-functional cross platform IDE.Four . reference
https://blog.csdn.net/m0_58892312/article/details/121866325.
版??明
本文?[SomyloveLI]所?,????上原文?接,感?
https://chowdera.com/2021/12/202112270600411361.html

