esp32-controller
esp32-controller
0
Components
Hardware components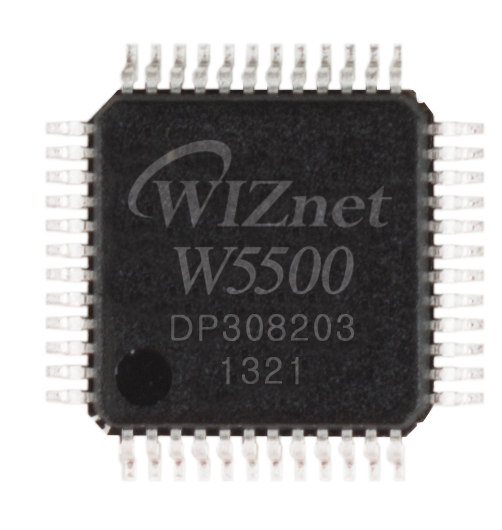
WIZnet - W5500
x 1

Espressif - ESP32
x 1
Project description
What the Project Does
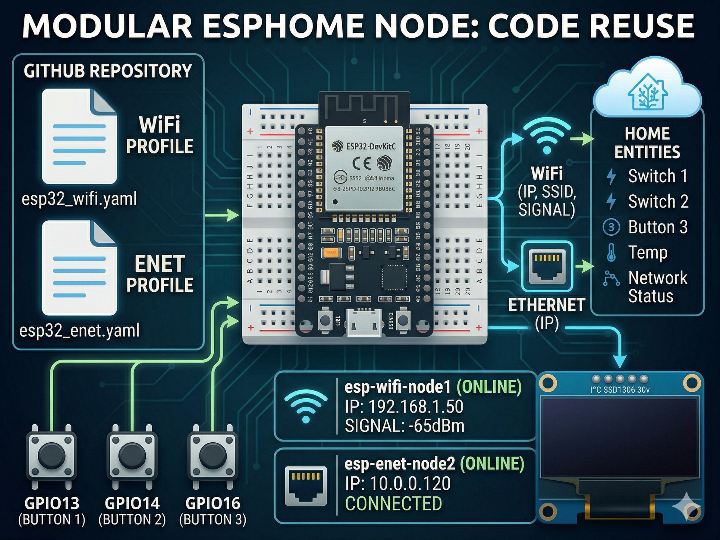
이 프로젝트는 GitHub에 있는 ESPHome 구성을 원격 패키지처럼 불러와 재사용하는 방식이다. packages를 이용해 장치 이름과 버튼, 디스플레이 구성을 바꿔 쓸 수 있고, 실제 파일은 Wi-Fi용 esp32_wifi_controller.yaml과 Ethernet용 esp32_ enet_ controller.yaml로 나뉘어 있다. 즉, 같은 하드웨어 구조를 유지하면서 네트워크 방식만 바꿔 재사용할 수 있는 홈오토메이션 노드다.
입력은 GPIO13, GPIO14, GPIO16의 버튼이고, 출력은 I²C SSD1306 OLED와 Home Assistant 엔티티다. 두 프로파일 모두 OLED, OTA, 웹 서버를 포함하고, Ethernet 프로파일은 ethernet_info.ip_address, Wi-Fi 프로파일은 wifi_info.ip_address, ssid, wifi_signal을 활용해 네트워크 상태를 표시한다.
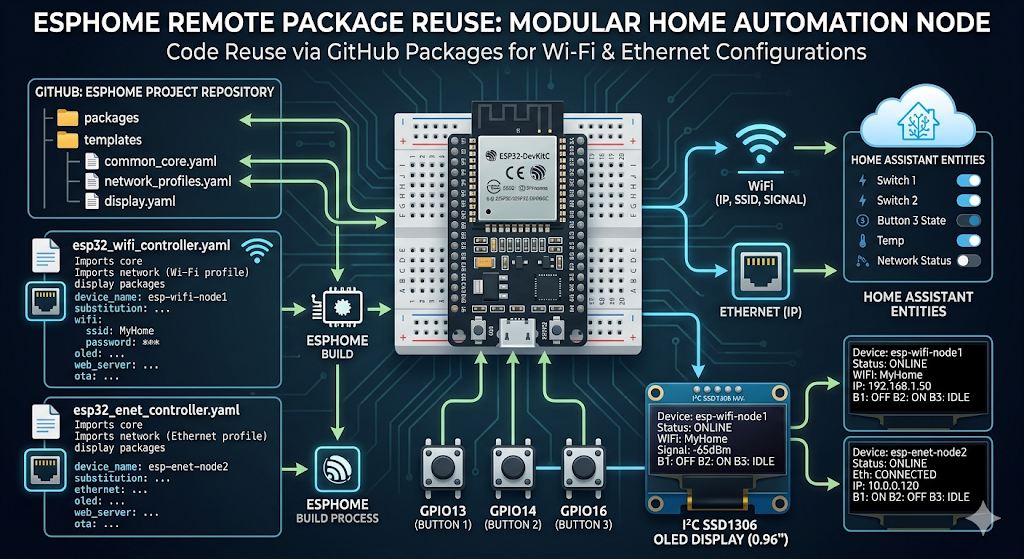
이미지 출처 : AI 생성
Code VS YAML
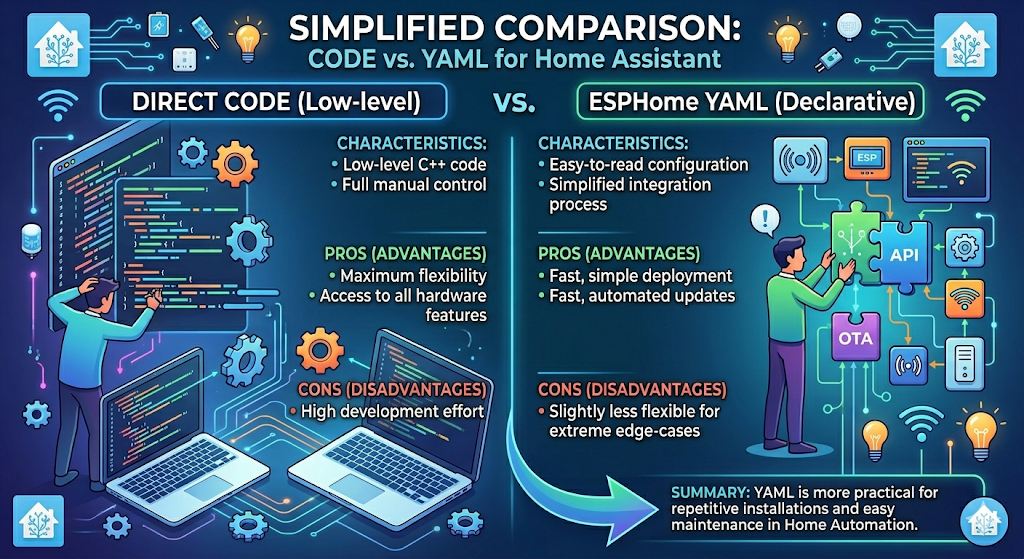
Home Assistant 환경에서 직접 코드를 제공하는 방식은 펌웨어 동작과 통신 흐름을 세밀하게 제어할 수 있어 복잡한 기능에 유리하지만, 개발과 유지보수 부담이 크다. 반면 YAML 방식은 ESPHome의 구성 체계를 활용해 센서, 디스플레이, API, OTA, 네트워크를 선언적으로 조합하므로 통합과 배포가 훨씬 단순하다. 따라서 홈오토메이션처럼 반복 설치와 유지보수가 중요한 환경에서는 YAML 방식이 더 실용적이다.
이미지 출처 : AI 생성
Where WIZnet Fits
이 프로젝트에서 WIZnet이 들어가는 부분은 W5500이다. Ethernet 프로파일은 ethernet: 아래에 type: w5500과 SPI 핀을 지정해 ESP32-C6가 W5500을 유선 네트워크 인터페이스로 사용하도록 구성한다. 즉, W5500은 단순 부가 모듈이 아니라 이 프로젝트에서 실제 Ethernet 링크를 만드는 핵심 칩이다.
W5500은 작은 MCU 시스템에 유선 네트워크를 붙이기 좋은 구조를 제공한다. 특히 벽면 스위치형이나 고정 설치형 홈오토메이션 장치처럼 무선 환경보다 연결 안정성이 더 중요한 경우에 적합하다. 이 프로젝트에서는 api:, OTA, 웹 서버, OLED IP 표시가 모두 W5500 경로 위에서 동작하므로, Home Assistant용 유선 ESPHome 노드를 구성하는 중심 역할을 맡는다.
Implementation Notes
가장 중요한 구성은 Ethernet 프로파일의 다음 부분이다.
ethernet:
type: w5500
cs_pin: GPIO4
mosi_pin: GPIO5
miso_pin: GPIO7
clk_pin: GPIO6
interrupt_pin: GPIO10
reset_pin: GPIO3
여기서 api:는 Home Assistant와의 직접 연동을 가능하게 하고, ethernet: 아래 핀 정의는 W5500을 ESP32-C6의 실제 네트워크 인터페이스로 고정한다. 이 조합이 있어야 장치가 단순 버튼 보드가 아니라 Home Assistant에 연결되는 네트워크 장치가 된다.
IP 처리도 실용적으로 구성되어 있다.
- platform: ethernet_info
ip_address:
name: "Ethernet IP Address"
id: ip_address
이 값은 Home Assistant 엔티티로 노출될 뿐 아니라, display 섹션에서 OLED에도 직접 출력된다. 그래서 현장에서 링크 상태와 IP 확인이 쉬워 유지보수에 유리하다.
다만 현재 저장소에는 확인할 점이 있다. README의 패키지 예시 파일명과 실제 저장소 파일명이 완전히 같지 않고, Wi-Fi YAML에는 api:가 보이지 않는다. 따라서 그대로 적용하기 전 파일명과 API 선언부터 점검하는 편이 좋다.
Practical Tips / Pitfalls
- README의 파일명과 실제 YAML 파일명이 다를 수 있으니 먼저 확인하는 것이 좋다.
- Home Assistant 연동용 프로파일에는
api:가 반드시 포함되어야 한다. - W5500 핀맵은
CS=GPIO4,MOSI=GPIO5,MISO=GPIO7,CLK=GPIO6,INT=GPIO10,RESET=GPIO3기준이다. - W5500은 배선 길이와 접지 상태에 민감할 수 있어 짧고 안정적인 배선이 유리하다.
web_server: port: 80은 편리하지만 메모리를 더 쓰므로 필요할 때만 유지하는 편이 낫다.- OLED에 IP가 안 보이면 먼저
ethernet_info또는wifi_info센서 갱신 상태를 확인하는 것이 빠르다.
FAQ
Q1. 왜 이 프로젝트에는 W5500이 맞는가?
Ethernet 프로파일이 처음부터 type: w5500 기준으로 작성되어 있고, 고정 설치형 홈오토메이션 장치에 필요한 유선 안정성을 제공하기 때문이다.
Q2. W5500은 이 플랫폼에 어떻게 연결되는가?
ESP32-C6와 SPI로 연결되며, CS GPIO4, MOSI GPIO5, MISO GPIO7, CLK GPIO6, INT GPIO10, RESET GPIO3를 사용한다.
Q3. 이 프로젝트에서 W5500의 역할은 무엇인가?
Home Assistant와의 ESPHome API 통신, OTA, 웹 서버, IP 표시를 포함한 전체 유선 네트워크 경로를 담당한다.
Q4. 초보자도 따라갈 수 있는가?
가능하지만 ESPHome YAML 구조, SPI/I²C 배선, api:의 역할 정도는 이해해야 한다. 처음에는 Ethernet 프로파일부터 보는 편이 더 쉽다.
Q5. W5500이 Home Assistant 연동에 주는 장점은 무엇인가?
구성이 단순하고 IP 확인이 쉬우며, 유선 네트워크 위에서 OTA와 웹 UI를 함께 운영할 수 있어 설치 후 점검과 유지보수가 편하다.
What the Project Does
This project is built around reusing ESPHome configurations hosted on GitHub as remote packages. By using packages, you can change the device name, button configuration, and display setup without rewriting the full configuration, and the actual files are split into esp32_wifi_controller.yaml for Wi-Fi and esp32_ enet_ controller.yaml for Ethernet. In other words, it is a home automation node designed to keep the same hardware structure while switching only the network method.
The inputs are buttons on GPIO13, GPIO14, and GPIO16, while the outputs are an I²C SSD1306 OLED display and entities exposed to Home Assistant. Both profiles include the OLED, OTA, and a web server. The Ethernet profile displays network status using ethernet_info.ip_address, while the Wi-Fi profile uses wifi_info.ip_address, ssid, and wifi_signal.
Image source: AI-generated
Code VS YAML
In a Home Assistant environment, providing direct code allows much finer control over firmware behavior and communication flow, which is useful for more complex features, but it also increases the burden of development and maintenance. By contrast, the YAML approach uses ESPHome’s configuration model to declaratively combine sensors, displays, APIs, OTA, and networking, making integration and deployment much simpler. For that reason, in environments such as home automation where repeated installation and long-term maintenance matter, the YAML approach is often the more practical option.
Image source: AI-generated
Where WIZnet Fits
The WIZnet component used in this project is the W5500. In the Ethernet profile, the ethernet: section defines type: w5500 along with the SPI pins so that the ESP32-C6 can use the W5500 as its wired network interface. That makes the W5500 more than just an add-on module; it is the key chip that establishes the actual Ethernet link in this project.
The W5500 is well suited to adding wired networking to small MCU-based systems. It is particularly useful in fixed-installation home automation devices, such as wall-mounted switch controllers, where connection stability matters more than wireless flexibility. In this project, api:, OTA, the web server, and OLED IP display all operate over the W5500 path, so it serves as the core element for building a wired ESPHome node for Home Assistant.
Implementation Notes
The most important part of the configuration is the following section from the Ethernet profile.
ethernet:
type: w5500
cs_pin: GPIO4
mosi_pin: GPIO5
miso_pin: GPIO7
clk_pin: GPIO6
interrupt_pin: GPIO10
reset_pin: GPIO3
Here, api: enables direct integration with Home Assistant, while the pin definitions under ethernet: bind the W5500 as the actual network interface for the ESP32-C6. This combination is what turns the device from a simple button board into a networked device connected to Home Assistant.
The IP handling is also designed in a practical way.
- platform: ethernet_info
ip_address:
name: "Ethernet IP Address"
id: ip_address
This value is not only exposed as a Home Assistant entity, but also displayed directly on the OLED through the display section. That makes it easier to check link status and IP assignment on site, which is useful for maintenance.
There are still a couple of points to verify in the current repository. The example package filenames in the README do not exactly match the actual filenames in the repository, and the Wi-Fi YAML does not appear to include api:. Because of that, it is better to check the filenames and API declaration before applying the configuration as-is.
Practical Tips / Pitfalls
Check the package filenames first, because the names shown in the README may differ from the actual YAML filenames.
The profile intended for Home Assistant integration must include api:.
The W5500 pin map is based on CS=GPIO4, MOSI=GPIO5, MISO=GPIO7, CLK=GPIO6, INT=GPIO10, and RESET=GPIO3.
The W5500 can be sensitive to wiring length and grounding quality, so shorter and more stable wiring is preferable.web_server: port: 80 is convenient, but it uses more memory, so it is better to keep it only when needed.
If the OLED does not show an IP address, first check whether the ethernet_info or wifi_info sensors are updating correctly.
FAQ
Q1. Why is the W5500 a good fit for this project?
Because the Ethernet profile is written around type: w5500 from the start, and it provides the wired stability needed for fixed-installation home automation devices.
Q2. How is the W5500 connected to this platform?
It is connected to the ESP32-C6 over SPI, using CS GPIO4, MOSI GPIO5, MISO GPIO7, CLK GPIO6, INT GPIO10, and RESET GPIO3.
Q3. What is the role of the W5500 in this project?
It handles the entire wired network path, including ESPHome API communication with Home Assistant, OTA, the web server, and IP display.
Q4. Can beginners follow this project?
Yes, but they should understand the basic ESPHome YAML structure, SPI/I²C wiring, and the role of api:. It is easier to start with the Ethernet profile first.
Q5. What practical benefit does the W5500 provide for Home Assistant integration?
It keeps the configuration straightforward, makes IP checking easy, and allows OTA and the web UI to run over a wired network, which simplifies setup verification and maintenance.


