Hit the API with Node.js Express using Arduino Due Ethernet shield2
Hit the API with Node.js Express using Arduino Due Ethernet shield2
0
Components
Hardware components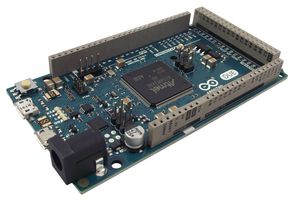
Arduino - Arduino Due
x 1

Ethernet shield 2
x 1
Arduino - Arduino IDE
x 1
Project description
Introduction
Recently, I've just made something by doing WiFi communication with ESP32. By the way, I haven't had many connections to the Internet by connecting to a wired LAN. So, I will connect a wired LAN and hit the API using Node.js and Express from Arduino Due.What you need, environment
- Arduino Due (Arduino Uno is fine as long as Ethernet shield 2 can be used)
- Ethernet shield2
- Node.js (v12.13.0)
- Express
program
Program on Node.js side
It is assumed that node.js is installed. Execute the following in an appropriate directory.?Then write the program in index.js.npm init
npm i express
touch index.js
var express = require('express');
const bodyParser = require('body-parser');
var http = require("http"),
    url  = require("url"),
    server;

var app = express();
app.use(express.json());
const port = process.env.PORT || 3200;
app.listen(port, () => console.log(`Listening on port ${port}...`));

app.use(bodyParser.urlencoded({ extended: false }));
app.use(bodyParser.json());

app.get('/', (req, res) => {
   res.setHeader('Content-Type', 'text/plain');
   res.json("Hello World !!");
   //res.sendStatus(200);
});

app.post('/api', (req, res) => {
  //Arduinoからの送られたデ?タvalをコンソ?ル?面に表示する
  console.log(req.query.val);
  res.setHeader('Content-Type', 'text/plain');
  res.json("Hello");
  //res.sendStatus(200);
});
Arduino side program
#include <SPI.h>
#include <Ethernet2.h>

// Arduino Due : SerialUSB
// Arduino Uno : Serial
// ?考
// https://www.arduino.cc/reference/en/language/functions/communication/serial/
#define SERIAL SerialUSB

// Ethernet shield2のMACアドレス
// シ?ルドの裏面に記載してある番?の前に0xをつける
byte mac[] = {
  0xDE, 0xAD, 0xBE, 0xEF, 0xFE, 0xED
};

// Arduinoの固定IP
 // ここを適?なIPアドレス(ル?タ??で空いているもの)に?更
IPAddress ip(192, 168, 1, 177);

// PCのIPアドレスを入力
char server[] = "192.168.11.66";
// クライアント
EthernetClient client;

int val  = 0;

// POSTする間隔
int INTERVAL = 500;

bool post(int val) {
  //デ?タを送るのでメソッドはPOST
  String header = "POST /api/?val=";

  header += String(val);
  header += " HTTP/1.1";

  SERIAL.println("connecting...");

  //今回は3200番のポ?ト番?を使った
  if (client.connect(server, 3200)) {
    SERIAL.println("connected");

    client.println(header);
    client.println("Host: 192.168.11.66");
    client.println("Content-Type: application/x-www-form-urlencoded");
    client.println("User-Agent: Arduino Post Client");
    client.println("Connection: close");
    client.println();
    client.print("");
    client.stop();
    SERIAL.println("disconnecting.");

    return true;
  } else {
    SERIAL.println("connection failed");

    return false;
  }
}

void setup() {
  SERIAL.begin(115200);

  while (!SERIAL) {
    ; // wait for serial port to connect. Needed for Leonardo only
  }

  if (Ethernet.begin(mac) == 0) {
    SERIAL.println("Failed to configure Ethernet using DHCP");
    Ethernet.begin(mac, ip);
  }

  delay(1000);
}

void loop() {
  val = random(255);

  SERIAL.println(val);

  //ランダムな?をPOST
  post(val);

  delay(INTERVAL);
}
Operation check
Node.js index.jsnode index.js

Impressions
It seems easy to implement GET and other methods as well as POST.reference
Send data from Arduino by POST and receive it with Node.js --Mikazuki Blog Part 3
https://kimizuka.hatenablog.com
