Object-Triggered Image Capture
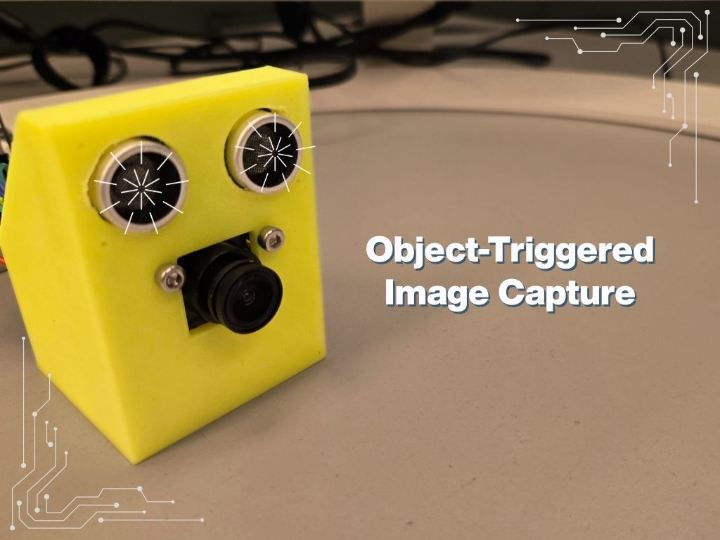
An object-triggered camera system that automatically captures and serves images over Ethernet when objects are detected within 20 centimeter
0
Components
Hardware components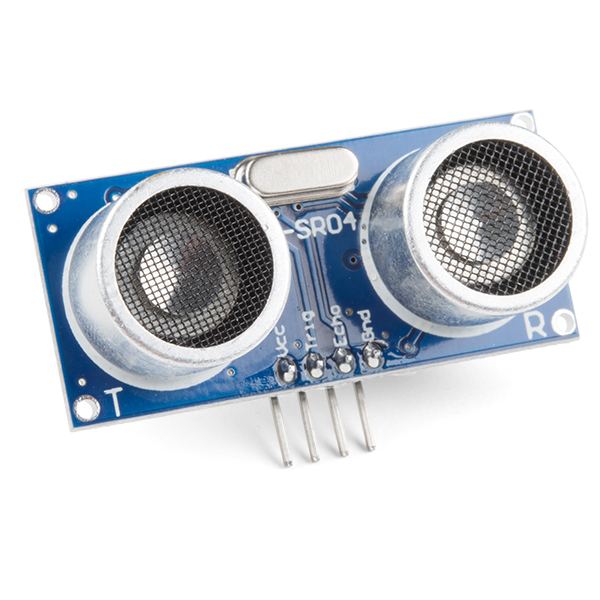
SparkFun - Ultrasonic Sensor - HC-SR04
x 1

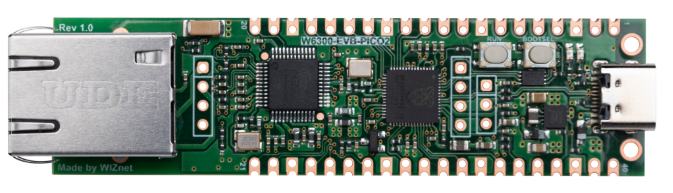
WIZnet - W6300-EVB-Pico2
x 1
Project description
Introduction
Modern IoT security and monitoring applications require intelligent systems that can autonomously detect objects and capture visual evidence. This project demonstrates how to build an object-triggered camera system using the W6300-EVB-PICO2 microcontroller with Ethernet capabilities. The system automatically detects objects using ultrasonic sensing and captures images when objects enter the detection zone, serving them through a real-time web interface.
Step 1: Gather Components
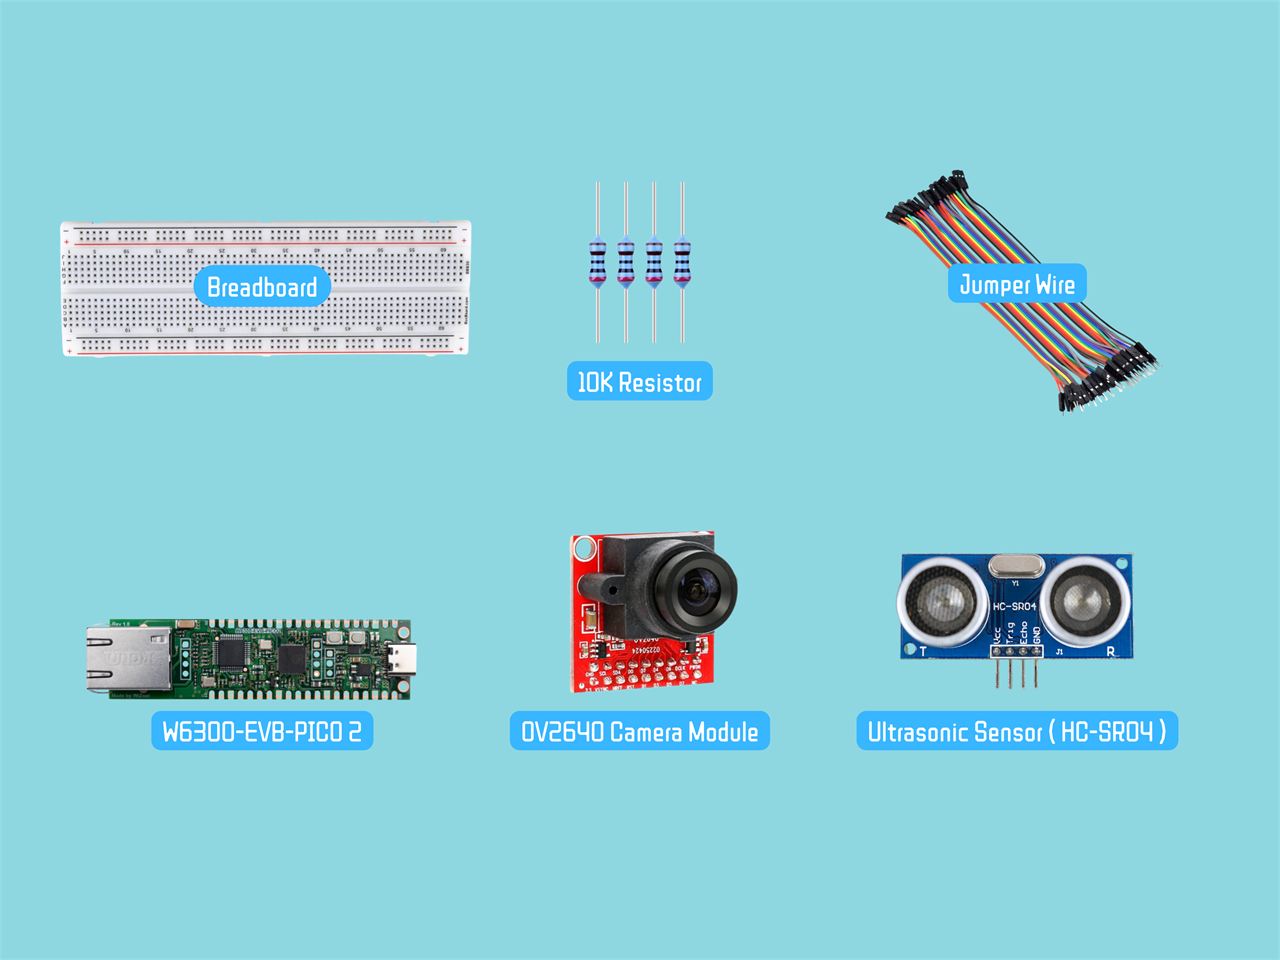
For this project, you will need:
- W6300-EVB-PICO2 Microcontroller
- HC-SR04 Ultrasonic Distance Sensor
- OV2640 Camera Module
- 10kΩ resistors (2 units for voltage divider, 2 units for I2C pull-up)
- Breadboard and jumper wires
Step 2: Hardware Setup
Connections
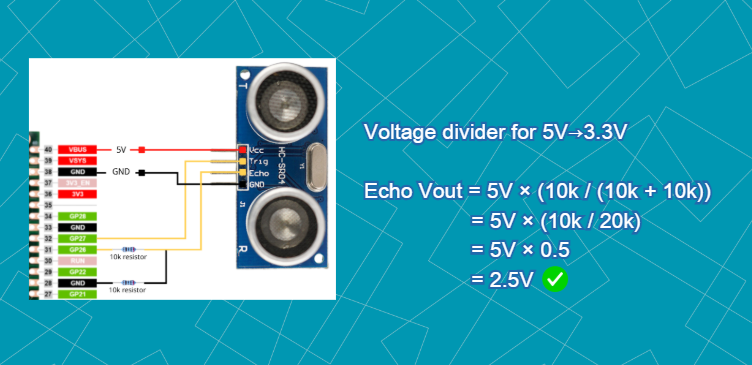
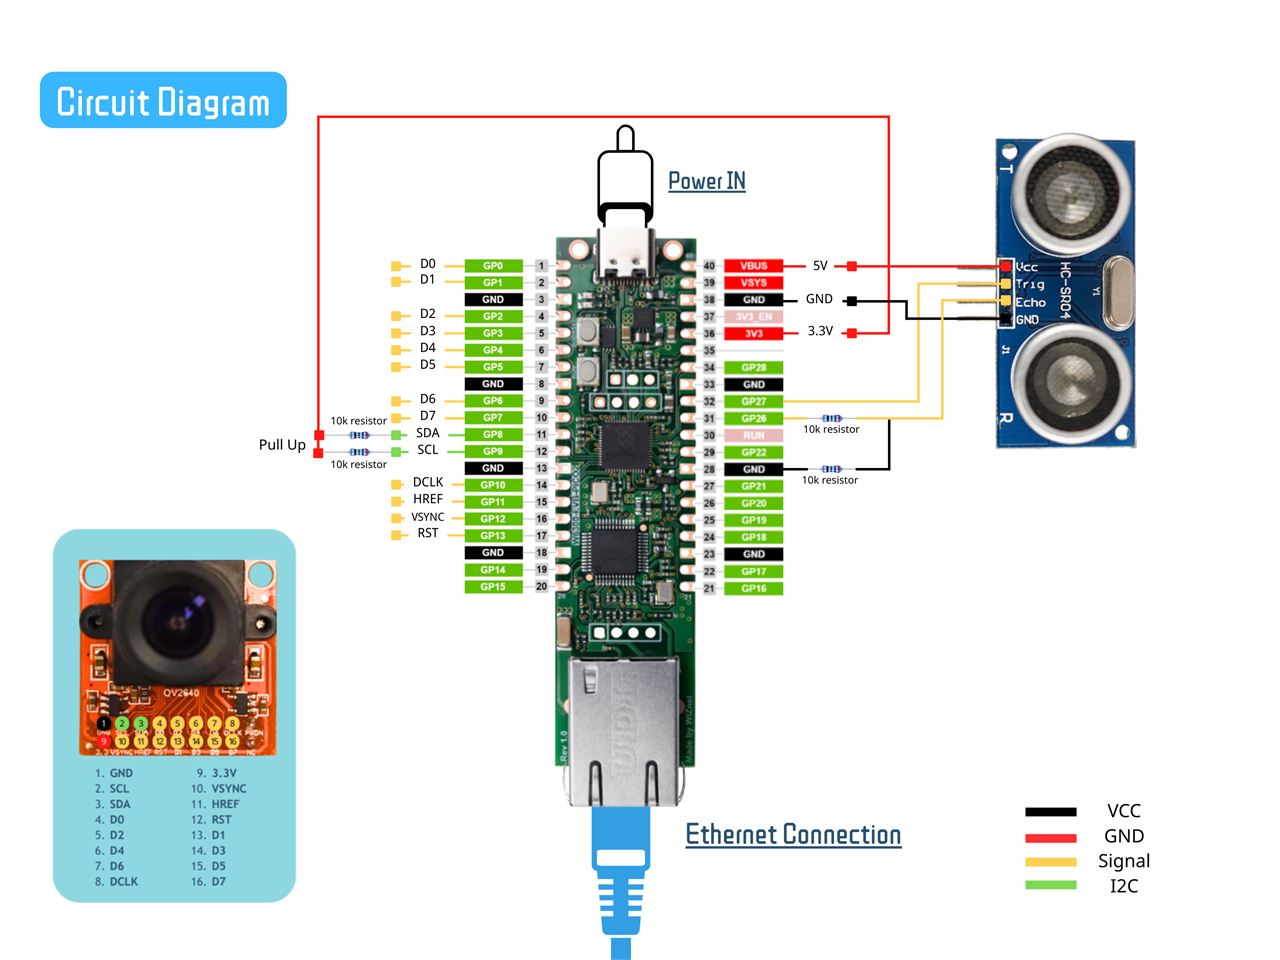
HC-SR04 Ultrasonic Sensor → W6300-EVB-PICO2:
- VCC → 5V
- Trig → GP27
- Echo → GP26 (via voltage divider)
- GND → GND
OV2640 Camera → W6300-EVB-PICO2:
- VSYNC → GP12
- HREF → GP11
- PCLK → GP10
- D0-D7 → GP0-GP7 (data bus)
- SCL → GP9 (I2C clock) WITH 2kΩ pull-up to 3.3V
- SDA → GP8 (I2C data) WITH 2kΩ pull-up to 3.3V
- RESET → GP13 (optional)
Important Notes:
- Voltage divider essential for HC-SR04 (5V output → 3.3V safe input)
- I2C pull-up resistors required for reliable camera communication
- Double-check all connections before powering on the board
1. Why Voltage Divider for HC-SR04?
Safety Requirement: HC-SR04 outputs 5V on Echo pin, but RP2040 GPIO maximum is 3.6V
Signal Protection: Prevents damage to microcontroller GPIO pins
Reliable Operation: Ensures proper logic level recognition (2.5V = HIGH, safe margin)
2. Why I2C Pull-up Resistors?
Protocol Requirement: I2C uses open-drain bus requiring pull-up resistors
Signal Integrity: Ensures proper HIGH/LOW logic levels
Camera Detection: Required for camera I2C address (0x30) detection
Step 3: Software Libraries Setup
Required Libraries
Create a `lib` folder on your board with these libraries:
Core Libraries:
- `adafruit_wiznet5k` - Ethernet connectivity
- `adafruit_wiznet5k_socketpool` - Socket management
- `adafruit_ov2640` - Camera control
- `adafruit_hcsr04` - Ultrasonic sensor
Import Required Libraries
import time
import gc
import board
import busio
import digitalio
import wiznet
from adafruit_wiznet5k.adafruit_wiznet5k import WIZNET5K
import adafruit_wiznet5k.adafruit_wiznet5k_socketpool as socketpool
import adafruit_ov2640
import adafruit_hcsr04
Network Configuration
MY_MAC = "00:08:DC:03:04:05"
# Using DHCP for automatic IP assignment
Hardware Initialization
Ethernet Setup:
# Reset W6300 chip
ethernetRst = digitalio.DigitalInOut(board.W5K_RST)
ethernetRst.direction = digitalio.Direction.OUTPUT
ethernetRst.value = False
time.sleep(1)
ethernetRst.value = True
time.sleep(1)

# SPI setup for Ethernet
spi_bus = wiznet.PIO_SPI(
    board.W5K_SCK,              # Clock pin
    quad_io0=board.W5K_MOSI,    # Master Out Slave In (MOSI)
    quad_io1=board.W5K_MISO,    # Master In Slave Out (MISO)
    quad_io2=board.W5K_IO2,     # Additional IO for quad-SPI
    quad_io3=board.W5K_IO3,     # Additional IO for quad-SPI
)

# Initialize Ethernet with DHCP
cs = digitalio.DigitalInOut(board.W5K_CS)
eth = WIZNET5K(spi_bus, cs, is_dhcp=True, mac=MY_MAC, debug=False)
ip_address = eth.pretty_ip(eth.ip_address)
print(f"IP Address: {ip_address}")
Camera Setup:
i2c = busio.I2C(board.GP9, board.GP8)
cam = adafruit_ov2640.OV2640(
    i2c,                      # I2C bus for camera control
    data_pins=[board.GP0, board.GP1, board.GP2, board.GP3,
              board.GP4, board.GP5, board.GP6, board.GP7],  # 8-bit parallel data
    clock=board.GP10,         # Pixel clock (20MHz)
    vsync=board.GP12,         # Vertical sync (new frame)
    href=board.GP11,          # Horizontal reference (new line)
    reset=board.GP13,         # Hardware reset control
    mclk_frequency=20_000_000,# Master clock frequency
)
cam.size = adafruit_ov2640.OV2640_SIZE_SVGA
cam.colorspace = adafruit_ov2640.OV2640_COLOR_JPEG
time.sleep(2)
Ultrasonic Sensor Setup:
sonar = adafruit_hcsr04.HCSR04(
    trigger_pin=board.GP27,     # Output: 10µs pulse to start measurement
    echo_pin=board.GP26,        # Input: Pulse width proportional to distance
    timeout=0.5                 # Maximum wait time for echo (0.5s = ~85m max)
)
System Configuration
# Frame buffer for image capture
frame_buffer = bytearray(40 * 1024)

# Detection threshold (20 cm)
DETECTION_THRESHOLD = 20.0

# Critical state variables
latest_detection_image = None     # Buffer: Stores JPEG data (up to 40KB)
current_distance = None          # Float: Last measured distance in cm
show_image = False              # Boolean: Control image display on webpage
last_detection_time = 0         # Float: Timestamp of last detection
detection_cooldown = 1.0        # Float: Minimum time between captures
Core Functions
Distance Measurement:
def measure_distance():
    try:
        distance = sonar.distance
        if 2 <= distance <= 400:
            return distance
    except RuntimeError:
        pass
    return None
*Measures distance with validation (2-400cm range)*
Image Capture:
def capture_image():
    try:
        jpeg_data = cam.capture(frame_buffer)
        if jpeg_data:
            return bytes(jpeg_data)
    except Exception as e:
        print(f"Capture error: {e}")
    return None
*Captures and validates JPEG images*
Web Server Functions:
send_html_response() - Detailed Explanation
HTTP Response Construction Process
def send_html_response(conn, client_ip):
    """Send HTML page"""
    global current_distance, latest_detection_image, show_image

    # Handle None distance
    distance_str = f"{current_distance:.1f} cm" if current_distance is not None else "-- cm"

    # Check if we should show the image
    show_image = current_distance is not None and current_distance < DETECTION_THRESHOLD

    # Border color based on detection
    border_color = "red" if show_image else "#ccc"
Step 1: Data Gathering
Memory State → HTML Variables
─────────────────────────────────────────
current_distance: 8.5 → "8.5 cm"
show_image: True → border_color: "red"
latest_detection_image: [JPEG data] → Image will be shown
Step 2: Conditional HTML Generation
if show_image:
    text = """
     <img src="/latest.jpg" alt="Camera Image">
    """
else:
    text = """
    <div id="placeholder">
        <div>
            <h3>No Object Detected</h3>
            <p>Image will appear when object is within 20cm</p>
            <p>Current distance: {distance_str}</p>
        </div>
    </div>
    """
Step 3: HTTP Protocol Assembly
response = (
    f"HTTP/1.1 200 OK\r\n"
    f"Content-Type: text/html; charset=utf-8\r\n"
    f"Connection: close\r\n"
    f"Content-Length: {len(html)}\r\n"
    f"\r\n{html}"
).encode()
Exact Bytes Sent to Browser:
Byte Stream (example):
48 54 54 50 2F 31 2E 31 20 32 30 30 20 4F 4B 0D 0A   HTTP/1.1 200 OK\r\n
43 6F 6E 74 65 6E 74 2D 54 79 70 65 3A 20 74 65 78   Content-Type: tex
74 2F 68 74 6D 6C 3B 20 63 68 61 72 73 65 74 3D 75   t/html; charset=u
74 66 2D 38 0D 0A 43 6F 6E 6E 65 63 74 69 6F 6E 3A   tf-8\r\nConnection:
20 63 6C 6F 73 65 0D 0A 43 6F 6E 74 65 6E 74 2D 4C    close\r\nContent-L
65 6E 67 74 68 3A 20 31 35 32 37 0D 0A 0D 0A 3C 21   ength: 1527\r\n\r\n<!
44 4F 43 54 59 50 45 20 68 74 6D 6C 3E 0A 3C 68 74   DOCTYPE html>\n<ht
6D 6C 3E...                                          ml>...
Why This Structure Matters:
Browser Expectation:            Our Delivery:
1. Status Line                  HTTP/1.1 200 OK
2. Headers                      Content-Type, Connection, Content-Length
3. Empty Line                   \r\n\r\n (CRLF CRLF)
4. Body                         <html>...</html>
Step 4: Network Transmission
try:
    conn.send(response)
    print(f"  Distance: {distance_str}")
    return True
except Exception as e:
    print(f"  Failed to send HTML: {e}")
    return False
send_image_response() - Detailed Explanation
Binary Image Transmission Process
def send_image_response(conn):
    """Send JPEG image with 2048 byte chunks"""
    global latest_detection_image

    if latest_detection_image:
        image_length = len(latest_detection_image)

        response = (
            f"HTTP/1.1 200 OK\r\n"
            f"Content-Type: image/jpeg\r\n"
            f"Content-Length: {image_length}\r\n"
            f"Cache-Control: no-cache\r\n"
            f"Connection: close\r\n"
            f"\r\n"
        ).encode()
Step 1: HTTP Headers for Binary Data
Critical Headers Explained:
Content-Type: image/jpeg
- Tells browser "this is a JPEG image, not HTML/text"
- Browser will render as image, not display raw bytes

Content-Length: 28765
- Exact byte count of JPEG data
- Browser knows when transmission is complete

Cache-Control: no-cache
- Prevents browser from storing old images
- Ensures fresh image on every request

Connection: close
- Close TCP after image sent
- Frees WIZNET socket for next request
Step 2: Chunked Transmission Algorith
# Send in 2048 byte chunks
chunk_size = 2048
for i in range(0, image_length, chunk_size):
    end = min(i + chunk_size, image_length)
    conn.send(latest_detection_image[i:end])
Send the image separately to prevents:
- Buffer overflow (if chunk > free space)
- Deadlock (waiting for ACK with full buffer)
- Fragmentation (inefficient small packets)
Step 3 : Error Handling and Cleanup
Network Failure Scenarios Handled:
except Exception as e:
    print(f"  Image send error: {e}")
Step 4: Browser Reception and Rendering
Browser Processing Pipeline:
1. Receives HTTP/1.1 200 OK
2. Sees Content-Type: image/jpeg
3. Allocates buffer for 28,765 bytes (Content-Length)
4. Receives chunks, fills buffer
5. Validates JPEG (checks for FF D8 ... FF D9)
6. Decodes JPEG to RGB pixels
7. Renders in <img> tag on page
8. Cache-control: no-cache → won't reuse on next request
Web Server Setup
pool = socketpool.SocketPool(eth)
server = pool.socket()
server.bind((ip_address, 80))
server.listen(1)
print(f"Server ready at http://{ip_address}")
Main Loop Logic
The system operates in a continuous loop with three primary functions:
1. DHCP Maintenance (every 30 seconds):
- Renews DHCP lease to maintain network connectivity
2. Object Detection (every 0.5 seconds):
Measures distance using ultrasonic sensor
If object < 20cm AND cooldown period passed:
- Captures JPEG image
- Validates image (checks for JPEG header)
- Stores image in memory
- Updates web display flag
If no detection:
- Clears stored images
- Runs garbage collection
3. HTTP Request Handling:
Listens for browser connections (0.1s timeout)
Processes requests:
- `GET /latest.jpg` → Serves captured image
- Any other request → Serves HTML page with auto-refresh
Closes connections immediately after serving
# Main loop - SINGLE SERVER SOCKET
try:
    while True:
        current_time = time.monotonic()

        # 1. DHCP Maintenance (every 30 seconds)
        if current_time - last_dhcp_check > 30:
            eth.maintain_dhcp_lease()
            last_dhcp_check = current_time

        # 2. Object Detection Logic
        if connection_active:
            if current_time - last_distance_check > 0.5:
                distance = measure_distance()
                current_distance = distance

                if distance and distance < DETECTION_THRESHOLD:
                    if current_time - last_detection_time > detection_cooldown:
                        # Detection confirmed - capture image
                        led.value = True
                        image_data = capture_image()

                        if image_data:
                            # Validate JPEG magic number
                            if image_data[0] == 0xFF and image_data[1] == 0xD8:
                                latest_detection_image = image_data
                                show_image = True
                                last_detection_time = current_time
                                print(f"🚨 Detected: {distance:.1f}cm")

                        time.sleep(0.1)
                        led.value = False
                elif distance is None or distance >= DETECTION_THRESHOLD:
                    show_image = False
                    latest_detection_image = None
                    gc.collect()  # Free memory

                last_distance_check = current_time

        # 3. Web Server Handling
        try:
            server.settimeout(0.1)
            conn, addr = server.accept()
            # ... handle HTTP requests ...

        except Exception as e:
            if "timeout" not in str(e):
                connection_active = False

        time.sleep(0.01)
HTML Interface Features
- Real-time distance display with color coding
- Automatic image display on detection
- 2-second auto-refresh for updates
- Responsive design for different devices
- Visual status indicators (red/green)
Step 5: System Features and Benefits
Key Features:
1. Automatic Object Detection - Ultrasonic sensor triggers image capture
2. Real-time Web Interface - Live updates without manual refresh
3. Efficient Memory Management - Adaptive buffer usage and garbage collection
4. Network Reliability - Ethernet connection with DHCP support
5. Fail-safe Operation - Comprehensive error handling and recovery
Technical Benefits:
- Low Latency: Image capture within 100ms of detection
- Resource Efficient: Optimized for microcontroller constraints
- Scalable Design: Can be extended with multiple sensors
- Professional Interface: Clean web UI with status indicators
Step 6: Demonstration
Conclusion
This object detection camera system successfully demonstrates:
1. Intelligent Automation - Autonomous detection and capture
2. Real-time Monitoring - Instant web interface updates
3. Hardware Integration - Seamless sensor-camera-Ethernet coordination
4. Resource Optimization - Efficient operation on constrained hardware
The system provides a practical foundation for various applications including:
- Security and surveillance systems
- Package delivery monitoring
- Industrial automation
- Smart home applications
By combining reliable Ethernet connectivity with responsive sensing and imaging capabilities, this project showcases how embedded systems can deliver sophisticated IoT functionality with minimal hardware requirements.


