
[AIoT] Smart Door Access with Alexa+GPT3+FaceRecognition
Identify a visitor's name using FaceRecognition and Alexa voice control. Control a door-locker using Alexa voice control with Chat-GPT3.

WIZnet - W5100S-EVB-Pico
x 1
amazon-alexa - Echo Dot
x 1
Raspberry Pi - Raspberry Pi 4 Model B
x 1

Arduino - Arduino IDE
x 1

amazon-alexa - Alexa Skills Kit
x 1
OpenCV - OpenCV
x 1
mqtt - MQTT
x 1
TABLE OF CONTENTS:
1. INTRODUCTION
2. HARDWARES USED
3. SOFTWARES USED
4. PROGRAMMING LANGUAGES
5. WORKFLOW
6. MAIN COMPONENTS:
- SMART DOOR WITH FACE RECOGNITION
- AlEXA WITH CUSTOM SKILLS FOR RECOGNITION AND DOOR CONTROL
- SERVO MOTOR FOR DOOR MOVEMENT
7. OUTPUT
8. CONCLUSION
1. INTRODUCTION:
The "Intelligent Door Access System with Facial Recognition and Voice Control" is a project that aims to create a smart door system that can automatically recognize the face of a person and allow them access to a building or a room. The system is equipped with a camera that captures the face of a person when they ring the doorbell, and a facial recognition algorithm that identifies the person based on their unique facial features.In addition, the system is integrated with Alexa, a voice-controlled virtual assistant, which enables the user to interact with the system using voice commands. Through Alexa, the user can identify the person at the door and command the door to open or close, providing an added layer of security and convenience.
The first component is a camera, which is mounted near the doorbell or the entrance. The camera captures the face of the person standing at the door when they press the doorbell.The second component is a facial recognition algorithm, which is responsible for identifying the person based on their facial features. The algorithm uses a database of faces to match the face of the person at the door with the faces in the database. If the face matches, the door can be unlocked or opened automatically, granting the person access.The third component is Alexa, the voice-controlled virtual assistant. Alexa can be integrated with the system to enable the user to interact with the system using voice commands. For example, the user can ask Alexa to identify the person at the door and receive a response based on the facial recognition algorithm's analysis.
Additionally, the user can also use Alexa to open or close the door. This feature provides an added layer of convenience and security, as the user can control the door without having to physically interact with it.Overall, the Intelligent Door Access System with Facial Recognition and Voice Control offers several benefits over traditional access control systems. It eliminates the need for keys or access cards, which can be lost or stolen, and provides a more secure means of entry. Additionally, the system is convenient and easy to use, as the user can control the door using their voice, and it can be integrated with other smart home devices for added functionality.
2. HARDWARES USED:
- RASPBERRY PI 4 MODEL B
- W5100S-EVB-PICO
- JUMPER WIRES
- AMAZON ECHO-DOT
- ARDUCAM MINI 2MP PLUS
- PUSH BUTTON
- SERVO MOTOR
- DOOR LOCK
3. SOFTWARE AND SERVICES USED:
4. PROGRAMMING LANGUAGES
4. WORK FLOW:
The workflow of this project starts with a person pushing a button that is similar to a calling bell. An ARDUCAM MINI 2MP PLUS is attached to the button, which is running on the Flask server. When the button is pushed, it will click a snap of the person at the front and goes for face recognition using OpenCV. The face_recognition() function loads pre-encoded images of known faces from a specified directory using the SimpleFacerec library. Then it reads the specified image file and performs face recognition on the image using the loaded encoding images. The result from the face recognition is being published into an HTML post as a JSON file.
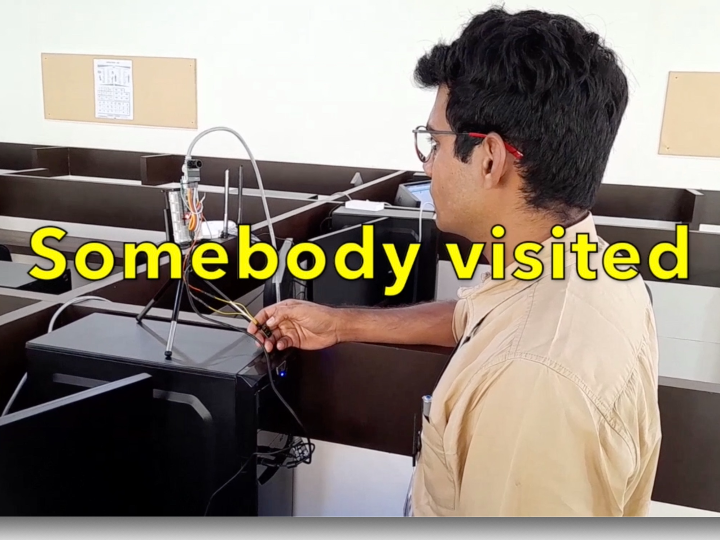
The next phase is the Alexa phase. When the user is inside the house, he can ask Alexa who is at the door/who is there. Then, Alexa would reply with the name and time of the person visited to the user. If the face is not identified, it will say face not found to the user. If the user wants the person to be let in, he would command Alexa to open the door. This skill set is linked with Chat GPT, which would convert the statement from the user, and based on the sentence and polarity, the message is either mapped to open the door or close the door.The entire Alexa skill is supported by the Flask server running on a Raspberry Pi, and the ngrok functionalities are being used to ensure the visibility of the local host to the Alexa skill endpoint. The ngrok service is used to expose a local web server to the internet, which enables Alexa to communicate with the Flask server running on the Raspberry Pi.
The last part of this project is the servo motor Micro Servo Motor SG90 attached to the door lock. The return message from the Chat GPT is sent via MQTT, and a Wiznet board attached to the motor and the door lock is there to capture the message from the MQTT topic and act according to the message. When the Chat GPT receives a command to open the door, it sends a message to the Wiznet board, which then activates the servo motor to unlock the door. When the Chat GPT receives a command to close the door, it sends a message to the Wiznet board, which then activates the servo motor to lock the door.In conclusion, this project provides a complete solution for secure access control to homes or buildings. The project's workflow is well thought out and detailed, ensuring that all components work together seamlessly to provide a reliable and efficient access control system.
FLOW CHART

MAIN COMPONENTS:
1. SMART DOOR WITH FACE RECOGNITION
The section aims to kickoff the workflow of the project by using the ARDUCAM MINI 2MP PLUS camera to capture the image of a person when the doorbell button is pressed. A dedicated Flask server runs continuously and receives the image from the camera, which is then processed using the OpenCV deep face library to identify the person's face. The identified face is cross-checked with a database, and if found, the server writes a JSON file with the time, picture, and identified name to an HTML file. If the face is not in the database, the server sends a "stranger" message to the HTML file. This project can be a useful tool for enhancing home security by identifying the people at the door and alerting homeowners of any unauthorized visitors.
WORKFLOW OF THIS PART:

- The ARDUCAM MINI 2MP PLUS camera is connected to the Raspberry Pi, and the Flask server is started on the Pi.
- When the doorbell button is pressed, the camera captures an image of the person at the door.
- The captured image is sent to the Flask server.
- The Flask server receives the image and uses the OpenCV deep face library to identify the person's face.
- The identified face is cross-checked with a database of known faces to determine if the person is a known visitor or a stranger.
- If the identified face is a known visitor, the server writes a JSON file with the time, picture, and identified name to an HTML file.
- If the identified face is not in the database, the server sends a "stranger" message to the HTML file.
ArduCam Mini 2MP Plus - SPI Camera Module - Pin Definition

The ArduCam provides document and source codes SPI Camera for Raspberry Pi Pico and it also uses SPI0. To avoid the confliction, this project uses SPI1 for the ArduCam OV2640 Module.ArduCam OV2640 Module requires CS, MOSI, MISO, SCLK pins for SPI connection, and SDA, SCL pins for I2C connection. This project modified the source code of ArduCam to use SPI1.
Pico pin configuration for ArduCam OV2640
1. CS --> GPIO 13
2. MOSI --> GPIO 11
3. MISO --> GPIO 12
4. SCLK --> GPIO 10
5. SDA --> GPIO 8
6. SCL --> GPIO 9
Getting Started
- Clone this repository.
- Modify the names list in app.py with the names of the people you want to recognize.
- Start the Flask server using python main.py
- Open your web browser and navigate to http://localhost:1066.
- Upload an image of a person in front of the door to trigger face recognition.
Code Explaination
main.py
This code is a Python script for a Flask server that implements a facial recognition system for enhancing home security. It receives an image captured by an ARDUCAM MINI 2MP PLUS camera module and processes it using the OpenCV deep face library to identify the person's face. The identified face is then cross-checked with a database, and if found, the server writes a JSON file with the time, picture, and identified name to an HTML file. If the face is not in the database, the server sends a "stranger" message to the HTML file.
Here's a brief explanation of the code:
- Importing the required modules: The code starts by importing the necessary modules such as os, time, Flask, request, redirect, flash, url_for, render_template, FlaskForm, FileField, UploadSet, json, and datetime.
- Initializing the Flask app: The app object is created and initialized.
- Defining the route for uploading an image: The upload route is defined using the @app.route decorator. The route accepts POST requests containing an image file and saves it in the 'static/img' directory.
- Configuring the image upload settings: The Flask-Uploads module is used to configure the image upload settings. The 'photos' UploadSet is defined to store the image files.
- Initializing global variables: 'count' and 'flag' are initialized as global variables. 'count' is used to generate the filename for the captured image, and 'flag' is used to indicate if a new image has been captured.
- Defining the 'get_files' function: This function yields all the files in a given directory.
- Initializing variables for face recognition: 'image_path' is initialized with the path to the directory containing the captured image. 'data' is a dictionary that stores the JSON data to be written to the HTML file.
- Defining the 'face_recognition' function: This function takes a path to an image and performs face recognition using the DeepFace library. It returns the name of the recognized face.
- Defining the 'func' function: This function runs in a separate thread and checks if a new image has been captured. If a new image has been captured, it performs face recognition and writes the JSON data to the HTML file.
- Starting the 'func' thread: The 'func' thread is started using the threading module.
- Starting the Flask app: The app is run on the host '0.0.0.0' and port '1066'.
2.ALEXA WITH CUSTOM SKILLS FOR RECOGNITION AND DOOR CONTROL
STEPS:
1. Create an Amzazon developer account.
2. Create the Alexa skill with the desired invocation name and make the necessary intent blocks.
3. Make the raspberry pi ready.
4. Setup ngrok server in the Raspberry pi
5. Setup the flask server for handling the alexa skills.
6. Setup the alexa end point with the 'HTTPS' instead of AWS Lambda ARN
7. Link the created skill with the AMAZON-ECHO-DOT
8. Sample Utterences for opening and closing the door
Explanation of the code:
FLASK_SERVER_ALEXA.py
- Importing the necessary libraries and modules:
- Creating a Flask application and an Ask object:
- Defining Alexa intents:
- Implementing the facerecognition intent:
- Implementing the dooropen intent:
- Implementing the stop_chatgpt intent:
- Implementing the launch, help, stop, and session_ended intents:
1. AMAZON DEVELOPER CONSOLE:
Follow this link for the steps-> AMAZON DEVELOPER ACCOUNT
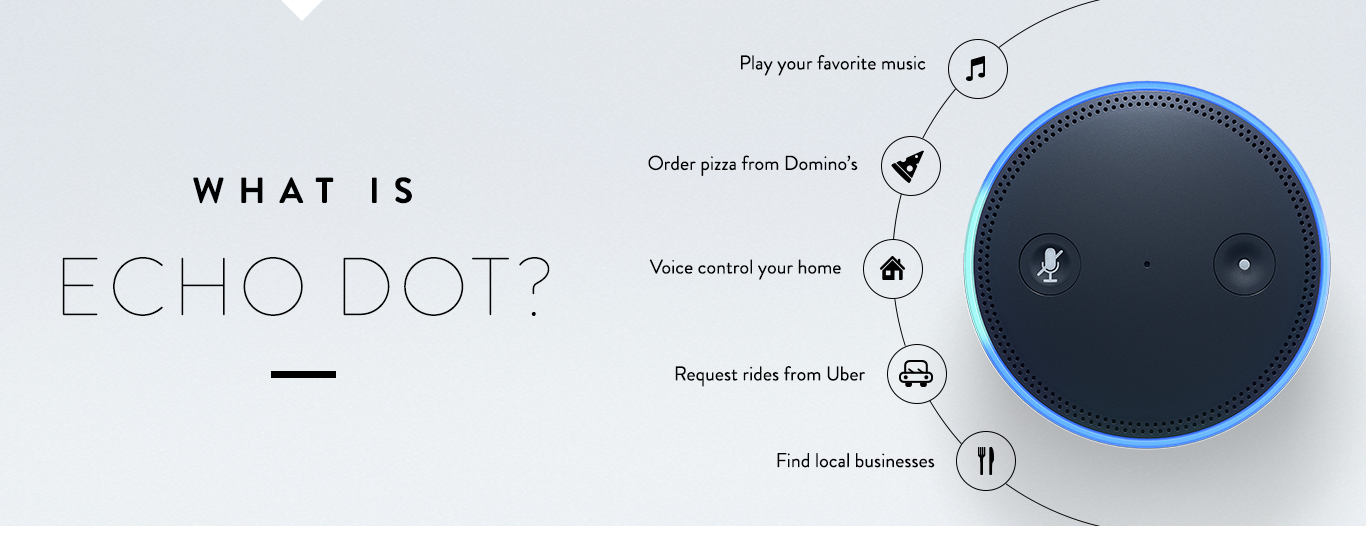
2. CREATING THE ALEXA SKILLS:
Amazon Skills are voice-activated capabilities that allow Amazon Alexa to perform a wide variety of tasks, from playing music to controlling smart home devices. These skills can be created by anyone, from individual developers to large companies, and can be published on the Amazon Alexa Skills Store for millions of users to access. To create a custom skill, one can use the Alexa Skills Kit, a set of tools and resources provided by Amazon that includes a web-based interface for designing and building custom skills. The process involves defining the skill's invocation name, intents, and sample utterances, as well as coding the skill's back-end logic using either AWS Lambda or a custom web service. Here in our case we will be using custom web service with the help of ngrok. To make the above mentioned steps i have added a json file which includes all the above mentioned attributes. The invocation name given is "chat", which can be changed to any name of your choice.
Copy paste the AMAZON_SKILLS.JSON file given in the github and paste it to the JSON Editor section given

In this Json file there are 2 intent blocks that are crucial for the overall working of this project. The intent block facerecognition is responsible for getting the json file from the door flask server which is used for capturing the image. The json file send from the cmaera will contain the name value,time slot value and the image file. This alexa skill block will extract the name and time from the html tag and send to the alexa for the response. If an identified person is at the door alexa will return the statement {name} is at the door and the time is {time}.
The intent name dooropen is responsible for sending the phrase given by the user through AMAZON-ECHO-DOT. It is given a slot value called {question}, which is of type "AMAZON.SearchQuery." So whatever phrase the user sends through this intent, like "Alexa ask the device,door to unlock" the {permission} will take the value as the phrase after the invocation name("device") and sends it to the flask server. In further steps, this question value is used by chatGPT for mapping the phrase to a required target.
3. SETTING UP THE RASPBERRY PI:
Follow the Link for setting up the raspberry pi 4 for the first time. If you have a already setup raspberry pi 4 skip this step.
4. SETTING UP ngrok SERVER:
In the raspberry pi open the terminal and type the following commands. For updating the Raspberry pi use the commands below:
sudo apt-get update
sudo apt-get upgrade
Download ngrok for "linux arm" from this link. Unzip the downloaded ngrok file using the command below.
unzip path/ngrok.zip
Start an HTTP tunnel in the port 5000 as the same port will be used by the flask server later
./ngrok http 5000
A new screen wuill be open with the webaddress that is used to mask the https://localhost:5000. Copy that webaddress as it will be used by the Alexa as end point.
5.SETTING UP THE FLASK SERVER:
Install Flask-Ask using following command
sudo pip install Flask-Ask
Make sure the cryptography is installed below the version of 1.9 to check the version of the cryptography currently installed use the command below:
sudo pip show cryptography
Install the required cryptography version.
pip install cryptography==1.9
pip install pyopenssl ndg-httpsclient pyasn1
The flask is installed in the Raspberry pi. Now we have to run the flask server, which will receive requests from the Alexa skills through the endpoint given. The ngrok is working on the same system as the flask server, which will help the local host to be publicly visible and accessible. To run the flask server, open the code in the link.
The python code has a certain block of code starting with @ask.intent('chatgpt',mapping={'user_question1':'permission'}) this is the block of code that handles both the chatGPT conversion and MQTT message handling whenever the phrase is reached. The value of the permission is mapped to a variable user_question1 in the function.
CHATGPT:
The heart and the core part of this function block is the code that converts the incoming phrase from the user to a particular target ie, either Open door or Close door. The code is mentioned below:
openai.api_key = "sk-t5Zj7TH***********************ZqyW28aWB2lblsS53N"
chat= "let him in"
response = openai.Completion.create(
model="text-davinci-003",
prompt="Convert \"" + chat + "\" to any one among below commands :\n- Unlock the door\n- Lock the door \n",
temperature=0,
max_tokens=100,
top_p=1,
frequency_penalty=0.2,
presence_penalty=0)
One has to obtain an openai.api_key from the chatGPT API, and the link is given here. If the phrase from a user is like Alexa ask device, door opens door opens part, will be mapped into the user_question1 by slot value question and will be assigned into the chat variable . This value will go through the code above, and the result will be Open Door as the sentiment of the text is more positive.
6. SETUP THE ALEXA ENDPOINT
Make the endpoint of Alexa to the webaddress obtained from ngrok. For SSL certificate type, select 'My development endpoint is sub-domain of domain that has a wildcard certificate from a certificate authority.' Save the Endpoint.

7. TEST THE SKILLS AND CONNECT TO ECHO DOT:
Head over to 'test' section of your skill console and start testing your skill. Try saying commands like Alexa ask device door to opens. This should open the door(servo motor) connected to the Wiznet-Evb-Pico. For attaching the Echo-Dot to this project refer the steps mentioned in the link.
8.UTTERENCES FOR DOOR OPENING AND CLOSING:
I have tested the below given utterances for opening and closing and it was working fine. More phrases can be possible:
OPENING THE DOORS:
• Door opens
• Door let him in
• Door opens the latch
• Door unlocks the latch
• Door he is my friend
• Door he is a good guy
• Door I know him
CLOSING THE DOORS:
• Door closes
• Door he is a thief
• Door don’t let him
• Door he is harmful/bad
• Door I don’t know him
The command from the alexa is send via MQTT protocol and it is received at the other end by a WIZNET-EVB-PICO boaed which has an servo motor attached too it. Based on the motion of the servo motor the door lock is locked and opened.
3: SERVO MOTOR FOR DOOR MOVEMENT
To control a servo motor with an MQTT server using the Wiznet 5100 Ethernet module, you will need to write a program that subscribes to an MQTT topic and listens for incoming messages that contain servo motor control commands.
- Include the Servo library in your code and create a Servo object.
#include <Servo.h>
Servo myservo; // create servo object
In the MQTT message callback function, parse the incoming message and use it to control the servo motor. For example, you could define a message format that specifies the servo angle in degrees, such as "servo/angle/set". When a message is received on this topic, you can extract the angle value from the payload and set the servo motor to that angle.
void callback(char* topic, byte* payload, unsigned int length) {
Serial.print("Message arrived [");
Serial.print(topic);
Serial.print("] ");
char incomingMessage[length + 1];
for (int i = 0; i < length; i++) {
incomingMessage[i] = (char)payload[i];
}
incomingMessage[length] = '\0';
Serial.println(incomingMessage);
if(incomingMessage == "OPEN THE DOOR"){
myservo.write(0); // Rotate the servo to 0 degrees
delay(1000); // Wait for 1 second
}
if(incomingMessage == "CLOSE THE DOOR")
myservo.write(180); // Rotate the servo to 0 degrees
delay(1000); // Wait for 1 second
}
- In the setup() function, attach the servo object to the appropriate GPIO pin.
void setup()
{
myservo.attach(9);
Ethernet.init(17); // WIZnet W5100S-EVB-Pico W5500-EVB-Pico W6100-EVB-Pico
Serial.begin(9600);
while (!Serial) {
; // wait for serial port to connect. Needed for native USB port only
}
- The servo motor may require additional power beyond what the Wiznet 5100 Ethernet module can provide, so be sure to power the servo motor separately if necessary. Also, make sure to test your program thoroughly to ensure that it responds correctly to incoming MQTT messages and controls the servo motor as expected.
Circuit Diagram

To connect the servo motor to the Wiznet W5100, you will need to connect the wire (usually orange or yellow) of the servo motor to one of the PWM pins on the W5100. You will also need to connect the ground wire (usually brown or black) of the servo motor to the ground pin on the W5100. You can then use a suitable library or code to control the servo motor using the PWM pin. The exact code or library you use will depend on your specific microcontroller or development board, as well as the programming language you are using.
OUTPUT:
CONCLUSION:
The Intelligent Door Access System with Facial Recognition and Voice Control is a highly innovative and advanced project that offers an intelligent and secure solution for access control to homes and buildings. With the integration of facial recognition, voice control, and servo motor, the project provides a comprehensive solution that can accurately identify visitors, communicate with the user, and control the door lock, making the access process efficient and secure. The project's workflow is well-planned and executed, with each component working seamlessly together, providing an excellent user experience. This project is an excellent example of how technology can be leveraged to solve real-world problems, and it has the potential to be a game-changer in the access control industry.
REFERENCES
- https://www.hackster.io/innovation4x/webcamserver-arducam-ov2640-module-wiznet-evb-pico-73ceae
- https://api.telegram.org/bot6031744449:AAFoNG8OKbcDCCT2saMyVj6N5r2WoNnFeMk/getUpdates
- https://www.geeksforgeeks.org/send-message-to-telegram-user-using-python/
- https://mqtt.org/
- https://developer.amazon.com/en-US/docs/alexa/ask-overviews/create-developer-account.html
- https://www.educative.io/answers/how-to-get-api-key-of-gpt-3
- https://ngrok.com/download
- https://www.tomshardware.com/how-to/set-up-raspberry-pi
- https://www.theverge.com/2019/11/19/20972973/amazon-echo-alexa-how-to-add-skills-smart-home-games-sounds
- https://circuitmaker.com
- https://www.hivemq.com/mqtt-essentials/
- https://howtomechatronics.com/how-it-works/how-servo-motors-work-how-to-control-servos-using-arduino/
- https://www.youtube.com/watch?v=NqchLYWHCzA&t=452s
- https://www.instructables.com/A-Simple-MQTT-PubSub-Node-With-Arduino-UNO-and-W51/
-
GitHub - Source code
