Practical Guide about how to use Ubidots with Arduino to build IoT projects
Practical Guide about how to use Ubidots with Arduino to build IoT projects
0
Components
Hardware components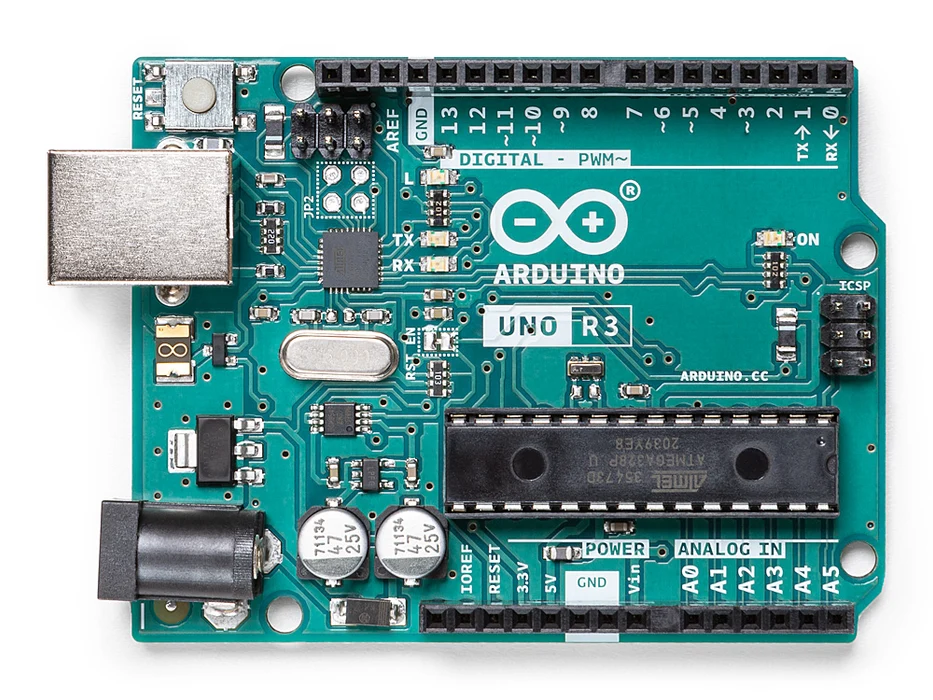
Arduino - Arduino UNO
x 1

Ethernet shield
x 1
dht11
x 1
Ubidots - Ubidots
x 1
Project description
This article covers how to connect?Ubidots to Arduino to build an IoT project. Moreover, this practical guide explores how Arduino can connect to Ubidots to send sensor readings. Moreover, in the second part of this tutorial, we will cover how to build an Android app that reads data stored by? Arduino into Ubidots cloud platform. This aspect is important because it is possible to store data in the cloud and analyze it later using different means. Once the data, like sensor values, is in the cloud is possible to access it using smartphones. This Arduino and Android integration project demonstrates how easy is connecting Arduino and Android together implementing an IoT system using a cloud IoT platform such as Ubidots. This IoT project can have several implementations and it can be really useful in real life IoT project. Usually, the integration between the mobile and the IoT ecosystem is a quite common scenario.
This project is built by two different parts:
 As soon as the temperature and humidity sensor starts reading values,?it sends them through Arduino board to the cloud platform. The project uses?Ubidots to store data in the cloud. This platform is easy to use and can be easily integrated with Arduino. Moreover, it has a built-in dashboard features, so that it is possible to create interesting dashboard to show, using charts, the values sent from the board.
 In this sketch, ?DHT11 sensor is connected to Arduino board, that, in turn, uses the Arduino Ethernet shield to connect to the network to send data. As a?first step, we check if everything is connected correctly trying to read the value of the temperature and the humidity. The snippet below shows the Arduino sketch to test the sensor:
[c]#include "DHT.h"
#include <spi.h>
#define DHTPIN 2
#define DHTTYPE DHT11
DHT dht(DHTPIN, DHTTYPE);
void setup() {
Serial.begin(9600);
dht.begin();
}
void loop() {
delay(50000);
float h = dht.readHumidity();
// Read temperature as Celsius (the default)
float t = dht.readTemperature();
Serial.print("Humidity: ");
Serial.print(h);
Serial.print(" %t");
Serial.print("Temperature: ");
Serial.print(t);
Serial.println(" *C ");
}
[/c]
One thing to remember is importing DHT11 library in your Arduino IDE. Running the example you should get the temperature and the humidity.
If everything works correctly, it is time to make things a little more complex explaining how to use Ubidots with Arduino.
As stated before, the purpose of this first part of this IoT project is describing how to use Ubidots to Arduino so that values read by sensors connected to Arduino are sent the the cloud. In a second step, this IoT practical guide covers how to develop an Android app that reads data stored in Ubidots.
Ubidots provides an example that can be useful. In Arduino,?we have to develop an Arduino HTTP client that calls a JSON service passing the data we want to store in the cloud.
Referring to the?Ubidots documentation, it is necessary to create an authentication token that the client has to send. Please read below to know more how to create the token.
In this IoT project, the Arduino HTTP client sends two variable at the same time:
In this sketch, ?DHT11 sensor is connected to Arduino board, that, in turn, uses the Arduino Ethernet shield to connect to the network to send data. As a?first step, we check if everything is connected correctly trying to read the value of the temperature and the humidity. The snippet below shows the Arduino sketch to test the sensor:
[c]#include "DHT.h"
#include <spi.h>
#define DHTPIN 2
#define DHTTYPE DHT11
DHT dht(DHTPIN, DHTTYPE);
void setup() {
Serial.begin(9600);
dht.begin();
}
void loop() {
delay(50000);
float h = dht.readHumidity();
// Read temperature as Celsius (the default)
float t = dht.readTemperature();
Serial.print("Humidity: ");
Serial.print(h);
Serial.print(" %t");
Serial.print("Temperature: ");
Serial.print(t);
Serial.println(" *C ");
}
[/c]
One thing to remember is importing DHT11 library in your Arduino IDE. Running the example you should get the temperature and the humidity.
If everything works correctly, it is time to make things a little more complex explaining how to use Ubidots with Arduino.
As stated before, the purpose of this first part of this IoT project is describing how to use Ubidots to Arduino so that values read by sensors connected to Arduino are sent the the cloud. In a second step, this IoT practical guide covers how to develop an Android app that reads data stored in Ubidots.
Ubidots provides an example that can be useful. In Arduino,?we have to develop an Arduino HTTP client that calls a JSON service passing the data we want to store in the cloud.
Referring to the?Ubidots documentation, it is necessary to create an authentication token that the client has to send. Please read below to know more how to create the token.
In this IoT project, the Arduino HTTP client sends two variable at the same time:
 Once the project is configured, we can define our variables
 We do the same steps for humidity variable and finally, we have our dashboard:
 As you can see, these two variable have two ids that we used previously when we created the JSON request.
The IDs of these variables are used in the Arduino sketch:
[java]…
// Ubidots Data
String tempVarId = "5656116076254219f78cad12";
String humVarId = "565611777625421b5e91a1ef";
…
[/java]
The last step is creating the token:
As you can see, these two variable have two ids that we used previously when we created the JSON request.
The IDs of these variables are used in the Arduino sketch:
[java]…
// Ubidots Data
String tempVarId = "5656116076254219f78cad12";
String humVarId = "565611777625421b5e91a1ef";
…
[/java]
The last step is creating the token:
 Once the variables are configured we can use them to send data.
Running the sketch,?Arduino starts sending data to Ubidots. One feature provided by Ubidots is the capability to create a dashboard in an easy way.
For example, for the temperature we can create a simple dashboard to show data sent by Arduino and DHT11:
Once the variables are configured we can use them to send data.
Running the sketch,?Arduino starts sending data to Ubidots. One feature provided by Ubidots is the capability to create a dashboard in an easy way.
For example, for the temperature we can create a simple dashboard to show data sent by Arduino and DHT11:

 Below the real Arduino board connected to DHT11 with Ethernet shield.


-
- the first part describes how to use Ubidots to Arduino to? collect data from sensors connected to Arduino board and send this information to a cloud platform that stores it
- the second part describes how to access this information using an Android smartphone.
Project Overview: how to use Ubidots with Arduino
The picture below shows the project overview :Building an IoT project with Arduino and Ubidots
The first step is setting up the Arduino sketch and the wire connections. The DHT11 sensor is very easy to use and can be integrated easily and fast with Arduino.?Moreover, there is a library that helps to develop the system. The picture below shows the schematic of this project:- temperature
- and humidity
[json][
 {"variable": "varId", "value":val, "timestamp":timestamp},
 {"variable": "vardId1", "value":val1, "timestamp":timestamp1}
][/json]
Here the Arduino sketch for HTTP client:
[sociallocker] [c]#include "DHT.h"
#include <spi.h>
#include <ethernet.h>
#define DHTPIN 2
#define DHTTYPE DHT11
// Ubidots Data
String tempVarId = "5656116076254219f78cad12";
String humVarId = "565611777625421b5e91a1ef";
String token = "aIk7lh3ipJGRdgAWOwJwDlPFwCdQu6uoLWZcGsMelXVAF62ycFsanB9Yywdk";
DHT dht(DHTPIN, DHTTYPE);
byte mac[] = { 0xDE, 0xAD, 0xBE, 0xEF, 0xFE, 0xED };
char server[]="things.ubidots.com";
EthernetClient client;
IPAddress ip(192, 168, 1, 40); // Arduino IP Add
IPAddress myDns(8,8,8,8);
IPAddress myGateway(192,168,1,1);
void setup() {
Serial.begin(9600);
Serial.print("Here");
dht.begin();
// start the Ethernet connection:
if (Ethernet.begin(mac) == 0) {
Serial.println("Failed to configure Ethernet using DHCP");
// try to congifure using IP address instead of DHCP:
Ethernet.begin(mac,ip,myDns,myGateway);
}
}
void loop() {
// Reading temperature or humidity takes about 250 milliseconds!
// Sensor readings may also be up to 2 seconds ‘old’ (its a very slow sensor)
float h = dht.readHumidity();
// Read temperature as Celsius (the default)
float t = dht.readTemperature();
Serial.print("Humidity: ");
Serial.print(h);
Serial.print(" %t");
Serial.print("Temperature: ");
Serial.print(t);
Serial.println(" *C ");
save_value(t, h);
delay(5000);
}
void save_value(float tempValue, float humValue)
{
Serial.println("Sending data…");
// if you get a connection, report back via serial:
int num = 0;
delay(2000);
// Post single value to single var
// String varString = "{"value":"+ String(tempValue) + "}";
String varString = "[{"variable": "" + tempVarId + "", "value":" + String(tempValue) + "}";
varString += ",{"variable": "" + humVarId + "", "value":" + String(humValue) + "}]";
num = varString.length();
Serial.println("Connecting…");
if (client.connect(server,80)) {
//client.println("POST /api/v1.6/variables/"+tempVarId+"/values HTTP/1.1");
//Serial.println("POST /api/v1.6/variables/"+tempVarId+"/values HTTP/1.1");
client.println("POST /api/v1.6/collections/values HTTP/1.1");
Serial.println("POST /api/v1.6/collections/values HTTP/1.1");
client.println("Content-Type: application/json");
Serial.println("Content-Type: application/json");
client.println("Content-Length: "+String(num));
Serial.println("Content-Length: "+String(num));
client.println("X-Auth-Token: "+token);
Serial.println("X-Auth-Token: "+token);
client.println("Host: things.ubidots.comn");
Serial.println("Host: things.ubidots.comn");
client.print(varString);
Serial.print(varString+"n");
}
else
{
// if you didn’t get a connection to the server:
Serial.println("connection failed");
}
boolean sta = client.connected();
Serial.println("Connection ["+String(sta)+"]");
if (!client.connected()) {
Serial.println();
Serial.println("disconnecting.");
client.stop();
}
Serial.println("Reading..");
while (client.available()) {
char c = client.read();
Serial.print(c);
}
client.flush();
client.stop();
}
[/c] [/sociallocker]
Notice at line 65 and 66 we build the JSON data to pass to the service using the variable ids (please refer below to know how to get the id) and at line 83 we send in the header the authentication token.
The Arduino HTTP client for Ubidots is almost ready, it is time to configure the project in Ubidots.
Configuring Ubidots to receive data from Arduino
Now, it is necessary to configure the project on Ubidots so that the Arduino client can send data.? It is possible to configure the project using Ubidots web interface. Before configuring the variable, we have to create a Ubidots project:
Once the project is configured, we can define our variables
- one that holds temperature values
- one that holds humidity values.
We do the same steps for humidity variable and finally, we have our dashboard:
As you can see, these two variable have two ids that we used previously when we created the JSON request.
You may like also
How to use Arduino and the TheThings.io Internet of Things with Android and Arduino: Step by step guide Once the variables are configured we can use them to send data.
Running the sketch,?Arduino starts sending data to Ubidots. One feature provided by Ubidots is the capability to create a dashboard in an easy way.
For example, for the temperature we can create a simple dashboard to show data sent by Arduino and DHT11:
Once the variables are configured we can use them to send data.
Running the sketch,?Arduino starts sending data to Ubidots. One feature provided by Ubidots is the capability to create a dashboard in an easy way.
For example, for the temperature we can create a simple dashboard to show data sent by Arduino and DHT11:


Connect Android and Arduino using Ubidots: Develop Android app
The next step in this Arduino and Android integration project is explaining?how to create an Android app that connects to Arduino.
To develop the android app, it is necessary:
- Handle HTTP connection to make REST requests toward Ubidots server
- Handle JSON format to read data
- Use?MPAndroidChart?to create charts based on the data retrieved
Moreover, the?android app will use Material design.The final result is shown below:
If you want to download the source code go here:
Even if Ubidots provides a?client to handle REST requests, it didn’t satisfy me so i prefer?to develop a custom client based on OkHttp library. The class that handles the HTTP request is named UbidotsClient.
The client uses an authentication token to authenticate the app to exchange data and variable ids to select the variable to read. If you remember, we talked about these two items in the previous post.
The HTTP client is very easy:
[java]OkHttpClient client = new OkHttpClient();
Request req = new Request.Builder().addHeader("X-Auth-Token", apiKey)
.url("http://things.ubidots.com/api/v1.6/variables/" + varId + "/values")
.build();
client.newCall(req).enqueue(new Callback() {
@Override
public void onFailure(Request request, IOException e) {
Log.d("Chart", "Network error");
e.printStackTrace();
}
@Override
public void onResponse(Response response) throws IOException {
// Here we handle the response
}
}
[/java]
At line 2, the?Android app adds the authentication token to the HTTP request header.
At line 3, the app calls the service provided by Ubidots passing the variable id we want to read values.
Finally, at line 5, the app makes the HTTP request and wait for the response. One interesting aspect of OkHTTP client is that it handles requests in a separate thread so we don’t have to worry about ANR problems.
Parsing Ubidots response in JSON
When the?android app invokes a remote services using REST, as Ubidots services, it gets a JSON response that has to be parsed so that it is possible to extract information. The Ubidots response is very easy and it is made by a JSON array and each item contains two values: the variable value itself and the timestamp. Having in mind this information, the JSON parsing is very simple: in onResponse, or in other words when the response is available, the app parses the JSON: [java]@Override public void onResponse(Response response) throws IOException { String body = response.body().string(); Log.d("Chart", body); try { JSONObject jObj = new JSONObject(body); JSONArray jRes = jObj.getJSONArray("results"); for (int i=0; i < jRes.length(); i++) { JSONObject obj = jRes.getJSONObject(i); Value val = new Value(); val.timestamp = obj.getLong("timestamp"); val.value = (float) obj.getDouble("value"); results.add(val); } listener.onDataReady(results); } catch(JSONException jse) { jse.printStackTrace(); } } [/java] The body contains the JSON response as string. At line 7 to 14, the app parses the JSON array and create a simple class that holds the value and the timestamp of each element parsed:protected static class Value {
float value;
long timestamp;
}
Finally, at line 17 the parser notifies the result to the main class so that it draws the chart.

