How to program WizFi360-EVB-Pico using CircuitPython
How to Program WizFi360-EVB-Pico using CircuitPython for more information
11
Components
Hardware components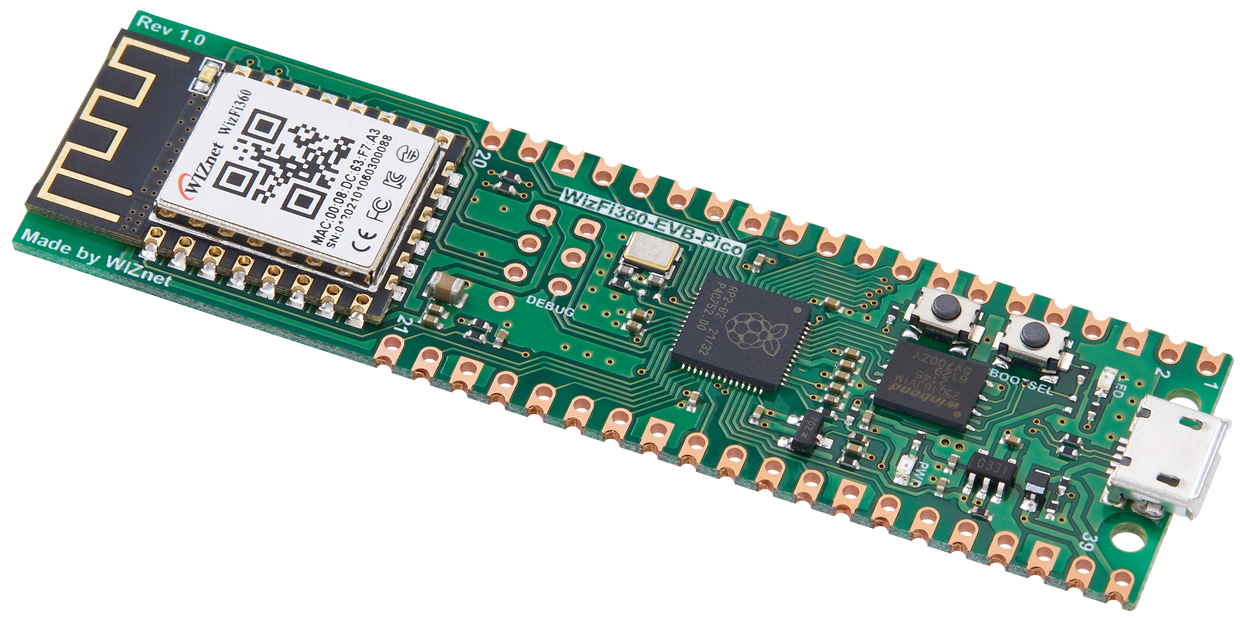
WIZnet - WizFi360-EVB-Pico
x 1
Project description
This document will guide through a series of steps from configuring development environment to use CircuiyPyhon to running simple examples using the WIZnet's Wi-Fi product - WizFi360-EVB-Pico.
I will use 'WizFi360-EVB-Pico-CircuitPython' provided by WIZnet.
1. H/W Preparation
WizFi360-EVB-Pico is a development board that is built on high-performance, low-price MCU RP2040 and adds Wi-Fi connectivity using WizFi360.
More details can be found at below link:
WizFi360-EVB-Pico is pin compatible to Raspberry Pi Pico. But keep in mind that pins GPIO4 ~ GPIO7 / GPIO20 are used for UART communication / reset between RP2040 and WizFi360.
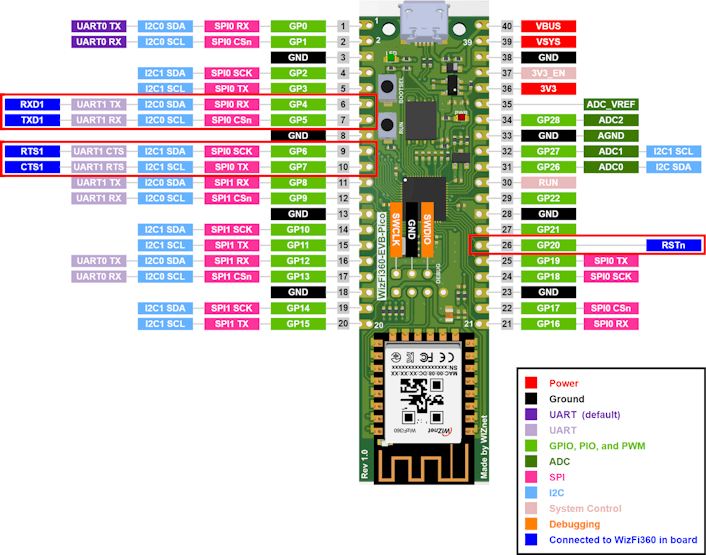
Follow the steps below to firmware upload and run.
① Connect WizFi360-EVB-Pico to desktop or laptop using 5 pin micro USB cable
2. S/W Preparation
The following serial terminal program is required for example test, download and install from below link.
3. Development environment Preparation
To develop and test examples using CircuitPython, you need to configure your development environment.
The examples were tested by configuring the development environment for Windows. Please refer to the below and configure accordingly.
① Install CircuitPython
Install CircuitPython on WizFi360-EVB-Pico by referring to the link below.
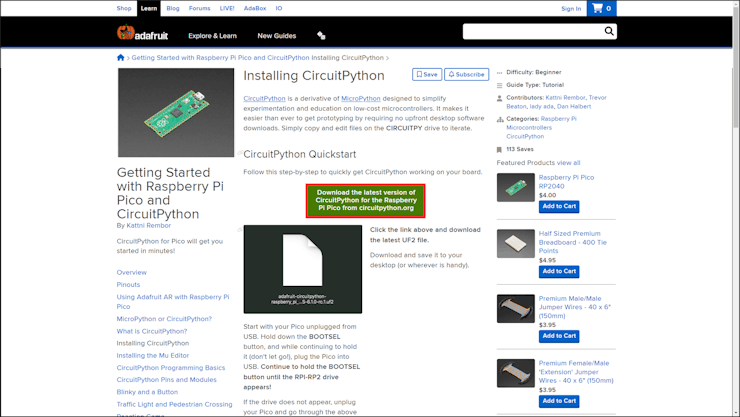
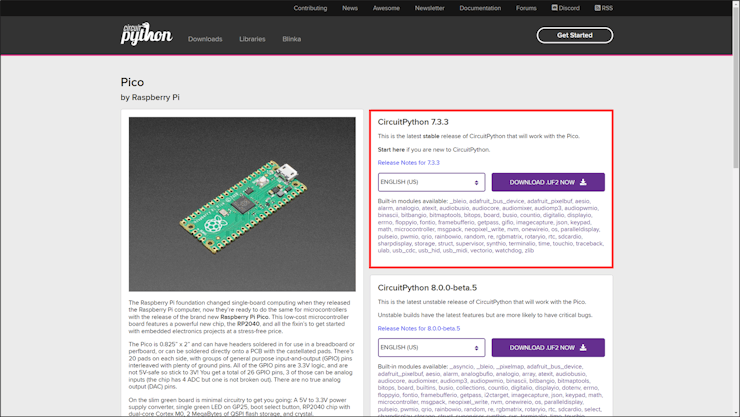
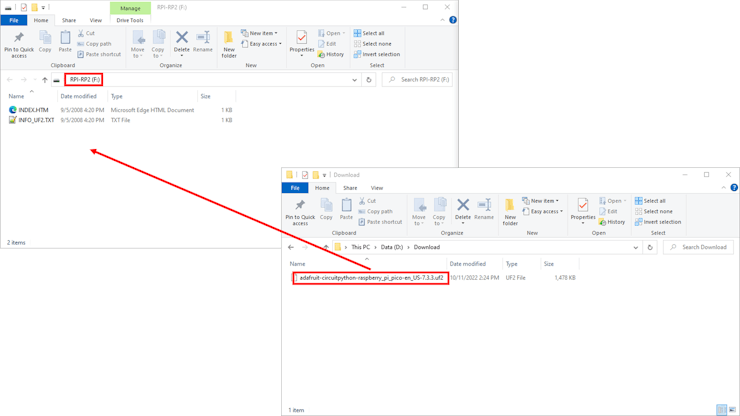
After entering WizFi360 into bootloader mode, install F/W to use downloaded CircuitPython by copy & paste.
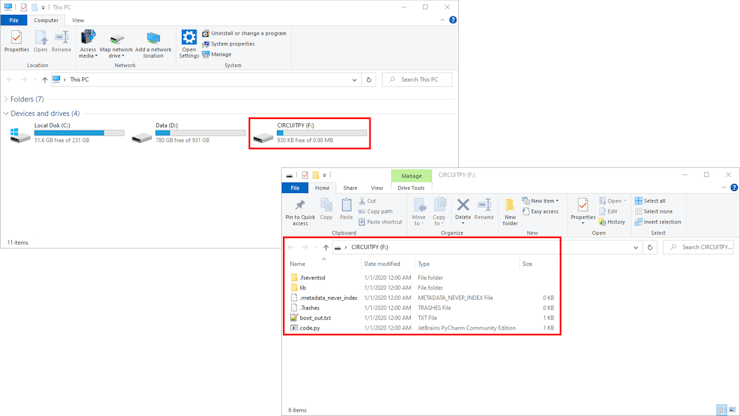
If the F/W for using CircuitPython is normally installed and worked on WizFi360-EVB-Pico, you can see that WizFi360-EVB-Pico is recognized as 'CIRCUITPY' drive.
② Setup Libraries
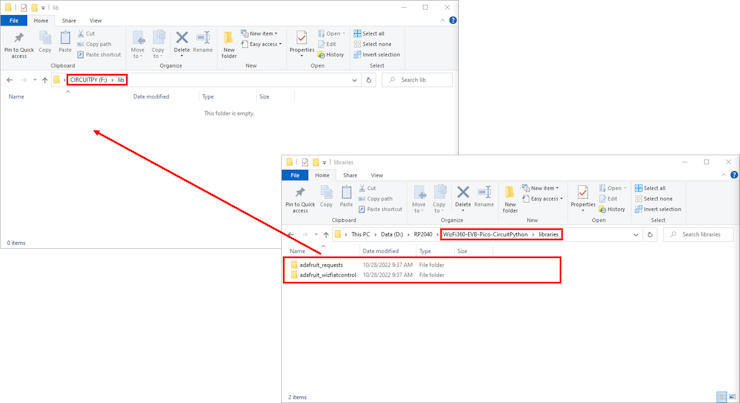
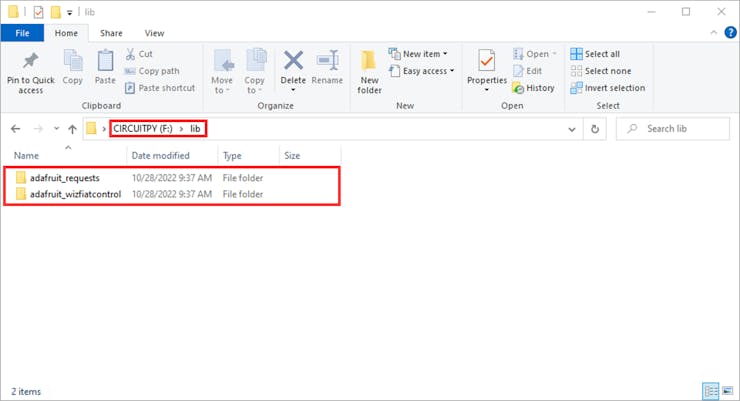
To use Wi-Fi and additional functions of WizFi360-EVB-Pico, copy and paste the libraries included in the 'WizFi360-EVB-Pico-CircuitPython/libraries' directory into the 'CIRCUITPY/lib' directory.
4. Example Settings
I tested it using a simple example, the blink example, so please refer to it.
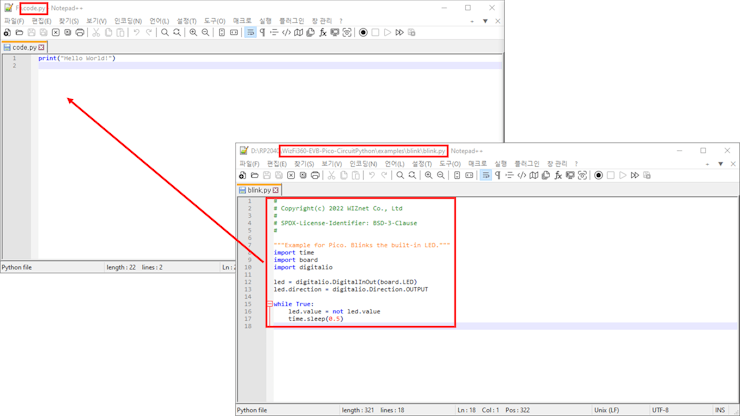
The blink example is in the 'WizFi360-EVB-Pico-CircuitPython/examples/blink' directory.
To test the blink example, minor settings shall be done in code.
① Setup LED blink interval
Setup the LED blink interval you want to check.
The default value is set to 0.5 seconds(500 milliseconds).
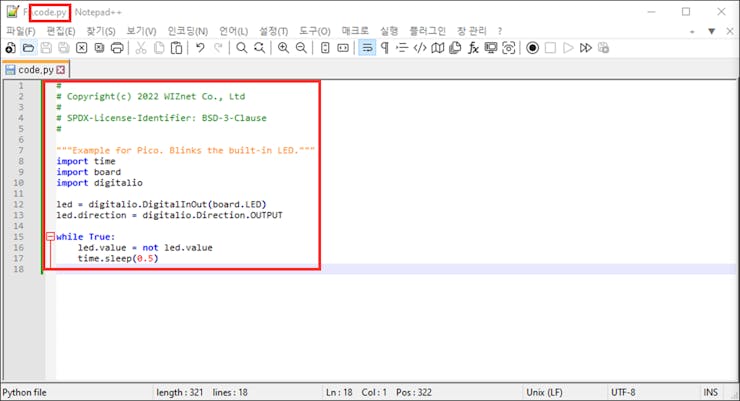
time.sleep(0.5)② Save the modified example in 'code.py' in 'CIRCUITPY' drive
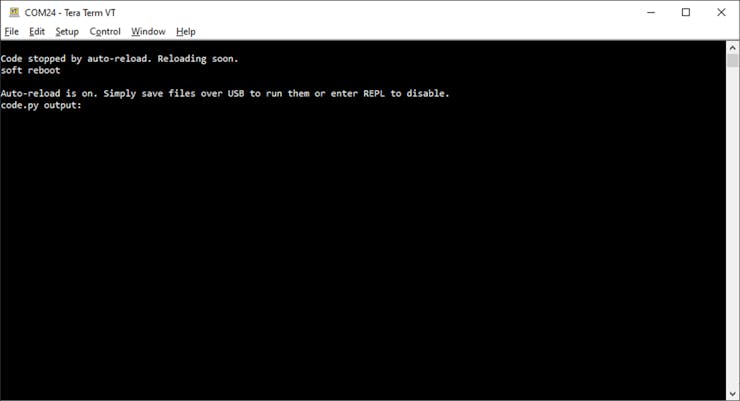
If the example is normally reflected on WizFi360-EVB-Pico, you can see that the log is output as shown in the picture below.
5. Running Example
If the example works normally on WizFi360-EVB-Pico, you can see that it blinks at every set blink interval.