Surf 5 - Web server example in VS Code
Surf 5 - Web server exampleS
6
Components
Hardware components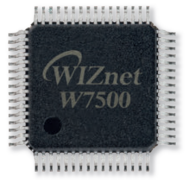
WIZnet - W7500
x 1


microsoft - VS Code
x 1
Project description
This project builds the Web example of Surf 5 in VS Code. It shows the process of flashing the extracted binary file to Surf 5 in boot mode using the ISP Tool and conducting a Web server test with Hercules.
If you are experiencing difficulties with the process mentioned above, please refer to the link below.
Hardware requirements
Before starting this project, prepare Surf 5 and a micro 5-pin cable, as well as an Ethernet connected to the internet.
The following serial terminal program is required for making web server , download and install from below links.
Step 2: Prepare hardware
- Connect ethernet cable to Surf 5 ethernet port.
- Connect Surf 5 to desktop or laptop using 5 pin micro USB cable.
Step 3: Setup Web Server Example
To test the Web Server example, Open VS Code and open the Surf 5 library project. If you created a workspace in 'How to make Projects in VS Code', it is recommended to open the workspace.
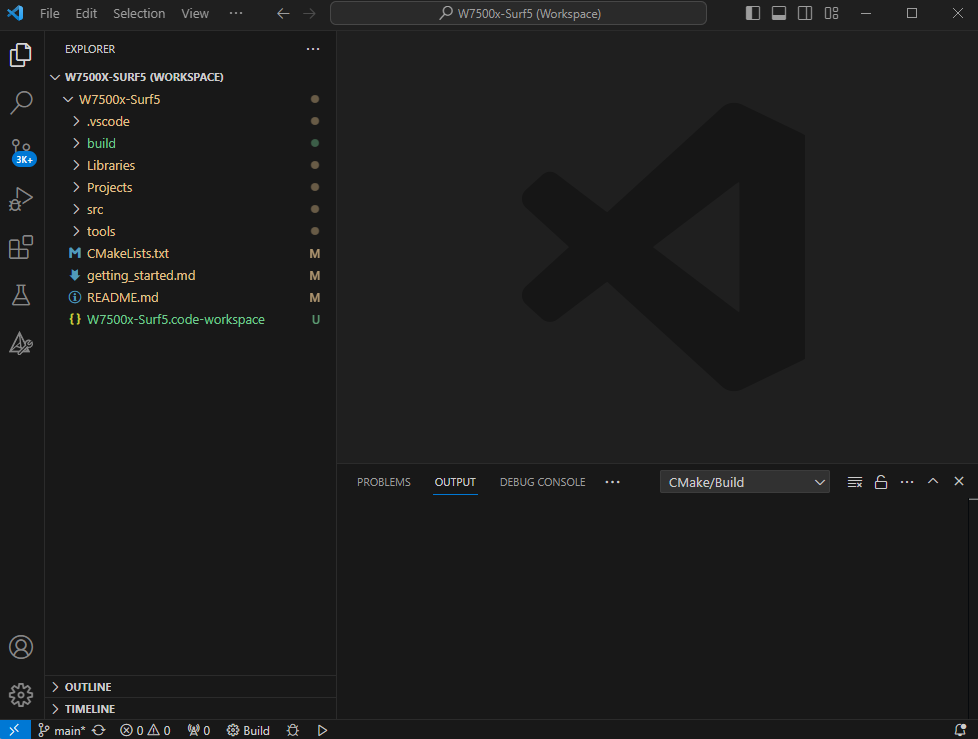
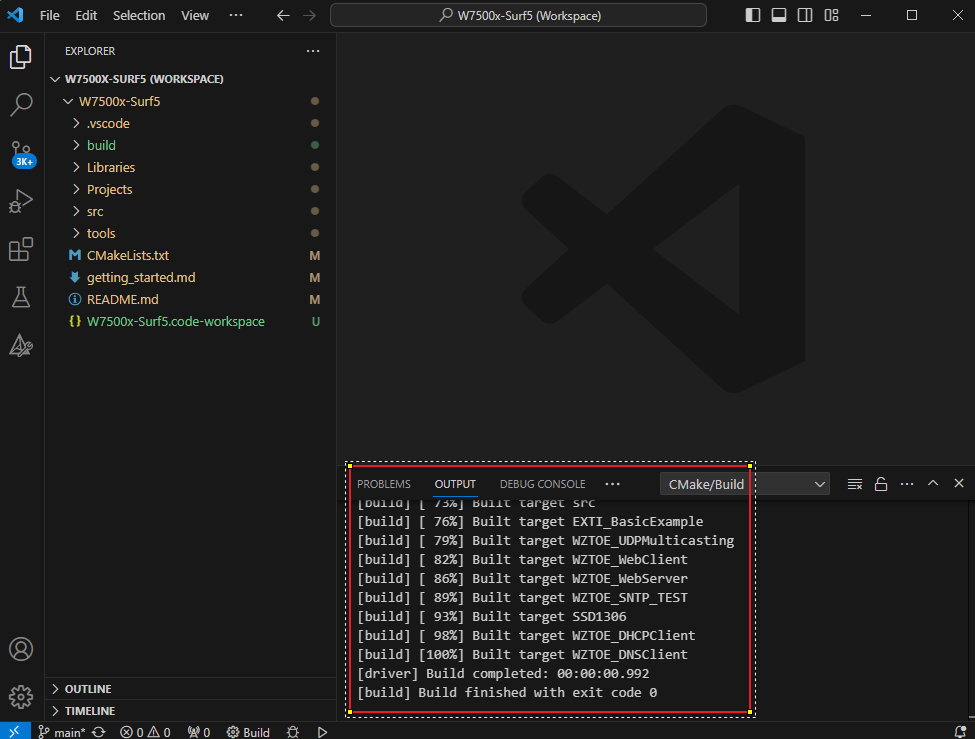
- After pressing the 'F7' button, check if the build is successful as indicated by the red square box below. If the build fails, return to 'How to make Projects in VS Code' and reconfigure the environment to ensure the build is successful.
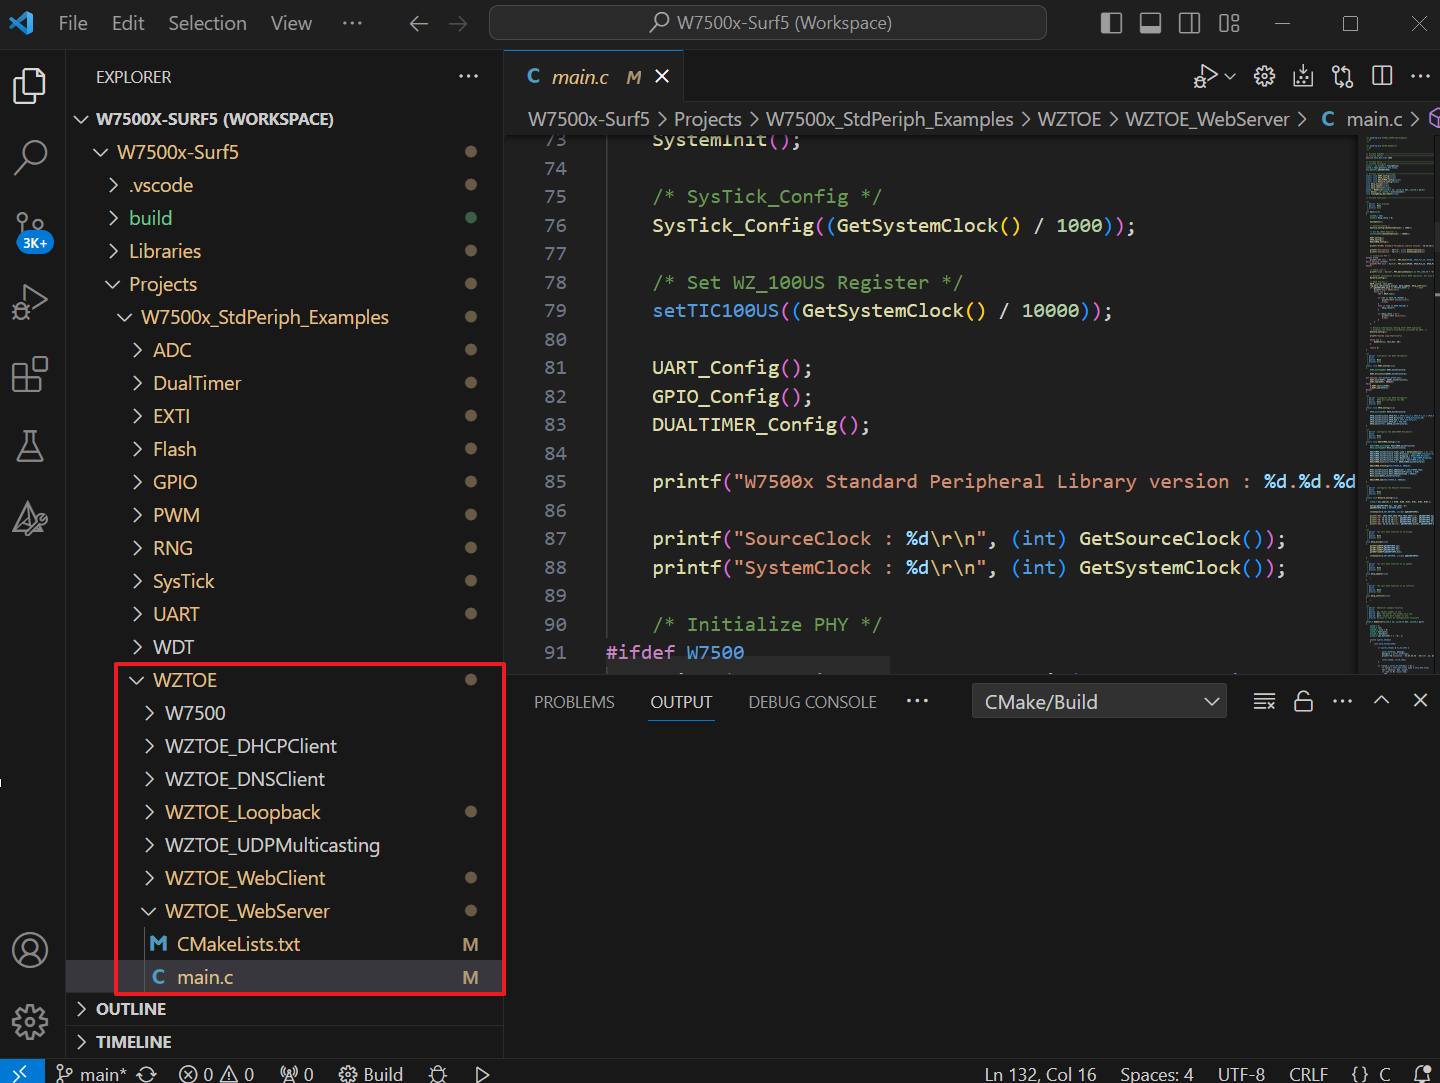
- Navigate to 'Projects\W7500x_StdPeriph_Examples\WZTOE\WZTOE_WebServer\main.c' as shown below.
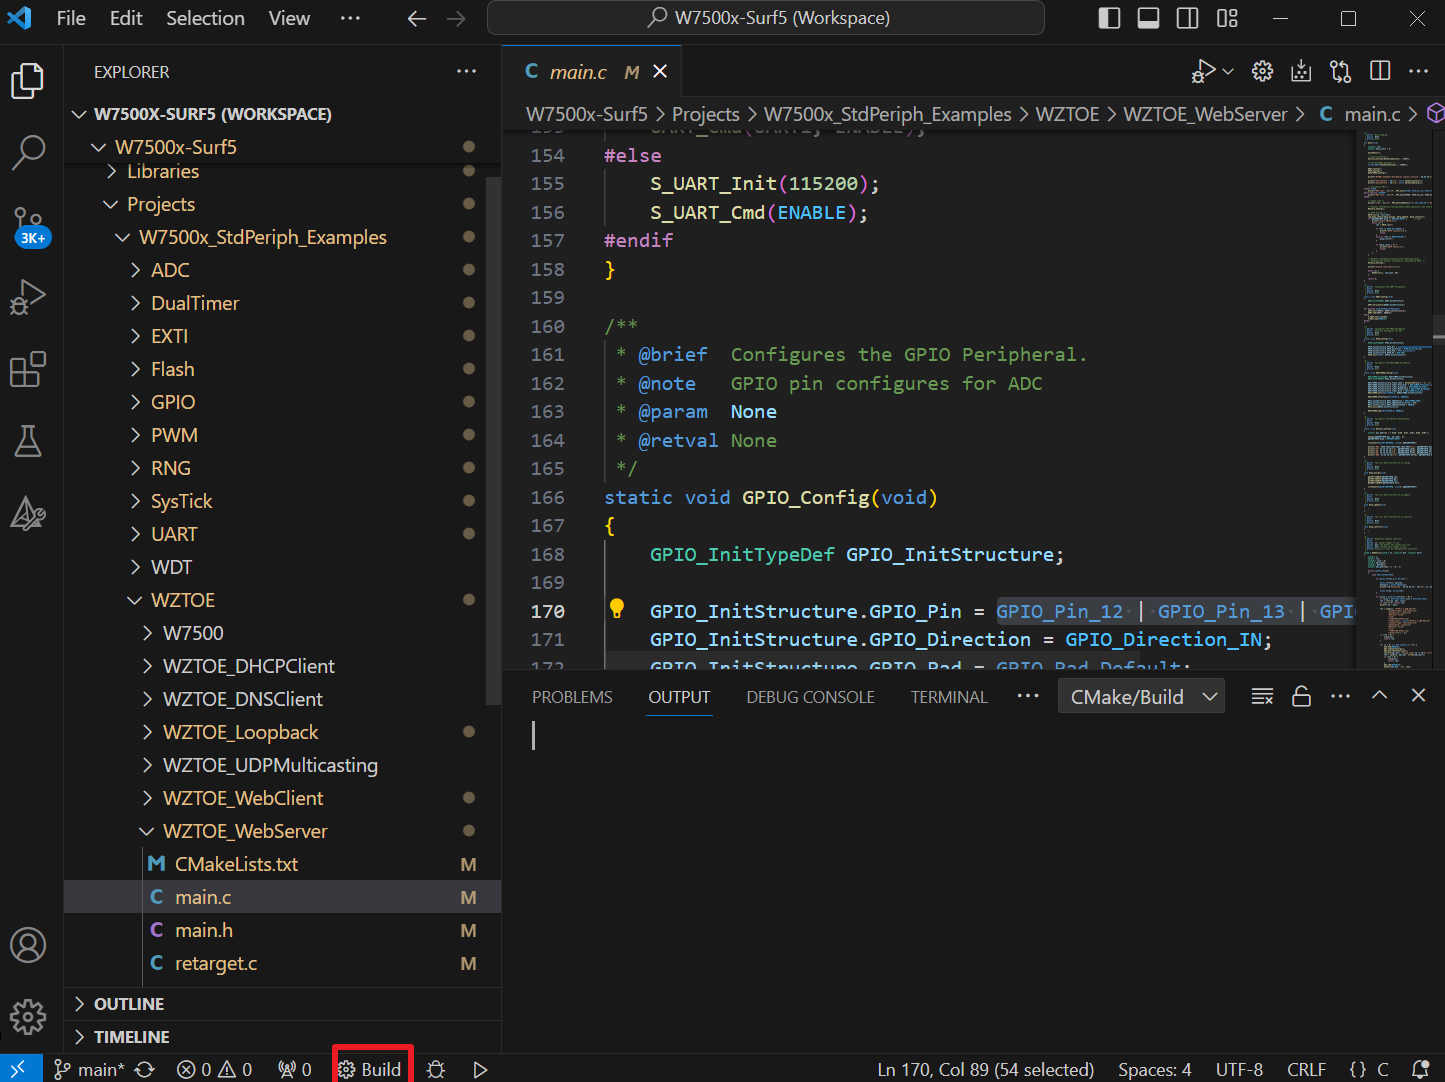
- If you have configured the network code to match your environment, press the build button below to rebuild.
Step 4: Upload and Run
Web Server Mode
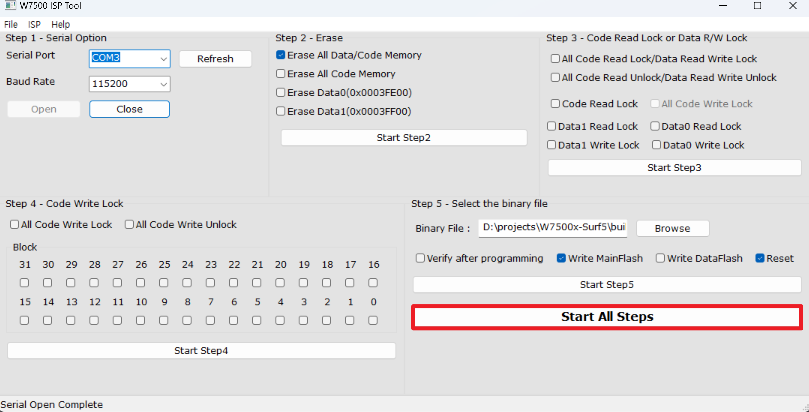
- Please turn on the 'W7500 ISP Tool' for flashing.
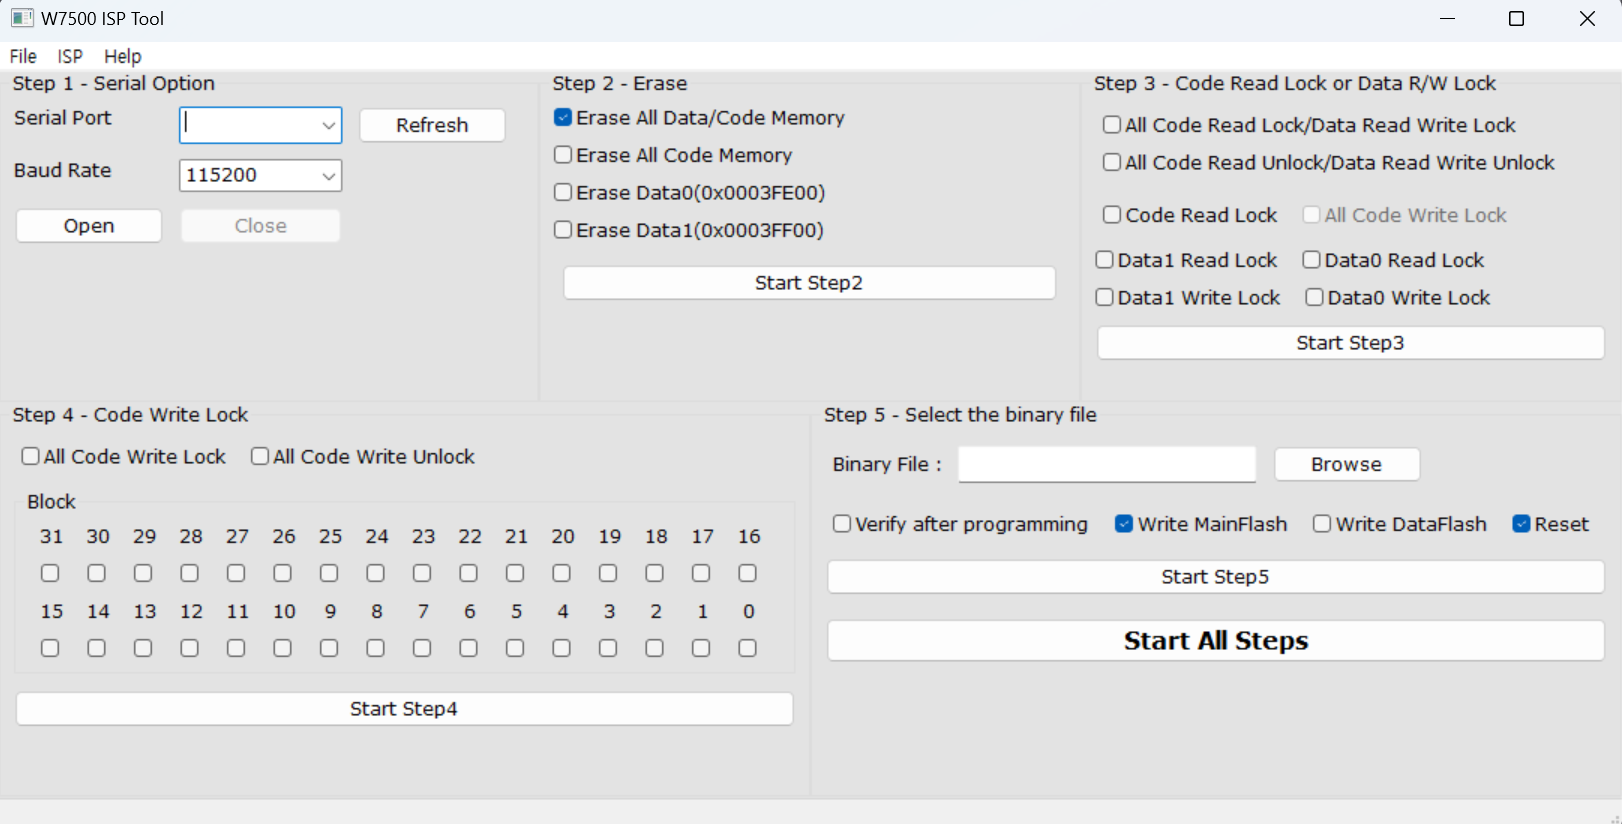
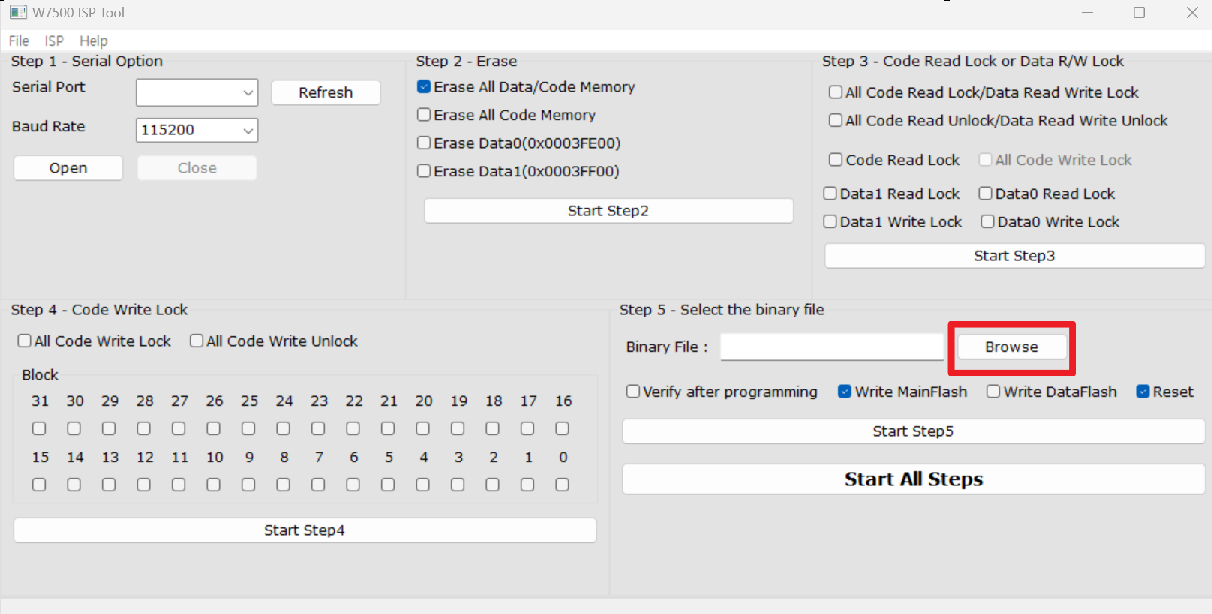
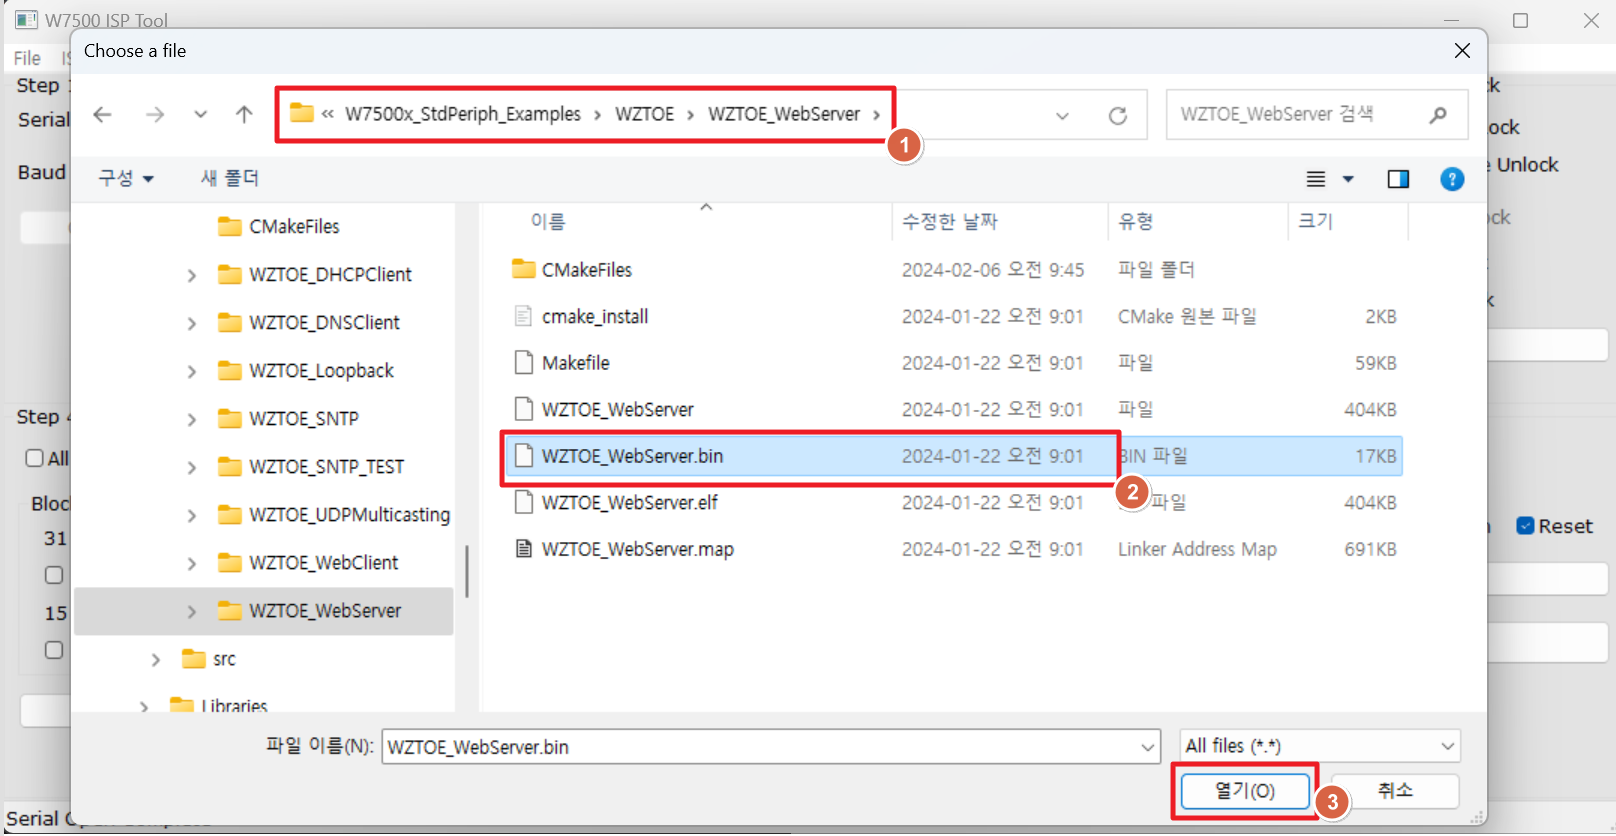
- Click the 'Browse' button in Step 5 of the tool. Then, select WZTOE_WebServer.bin located in the '...\W7500x-Surf5\build\Projects\W7500x_StdPeriph_Examples\WZTOE\WZTOE_WebServer' path.
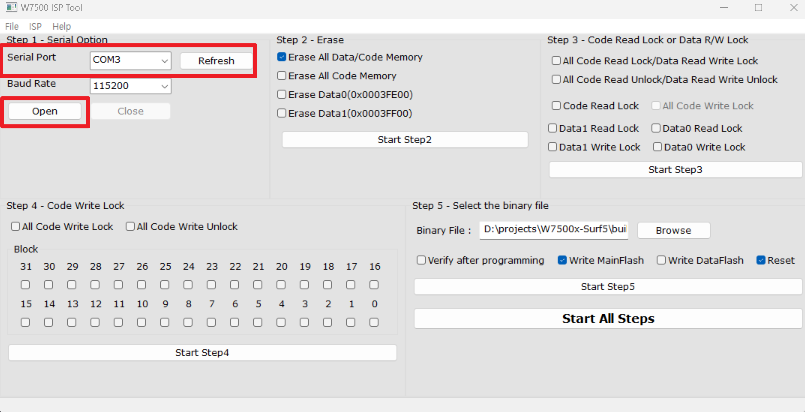
- Enter Surf 5 into boot mode and search for Surf 5's serial port, then press 'Open'.
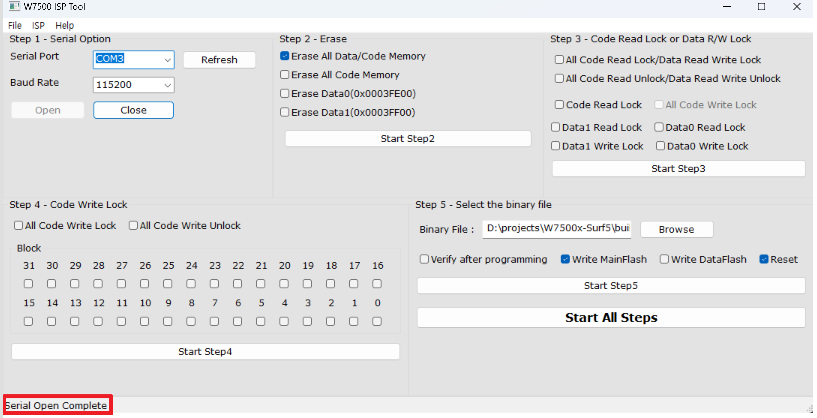
- If the connection to the tool is successful, a successful connection message will appear as below.
- Press the 'Start All Steps' button to start flashing.
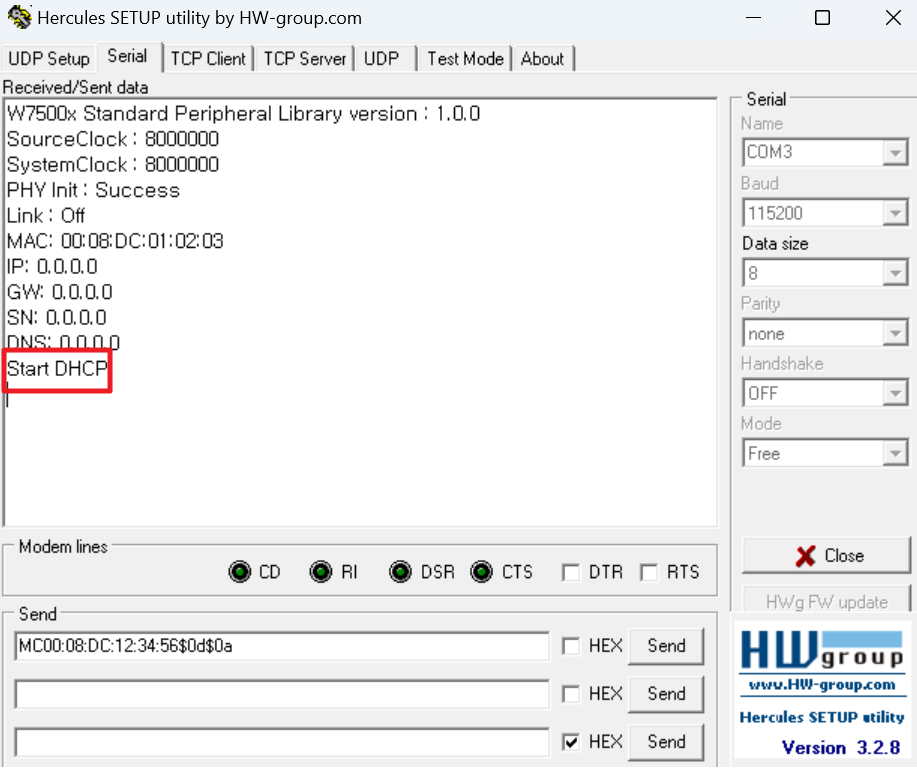
- Use Hercules to connect to Surf 5 and verify that the message indicating DHCP has started appears.
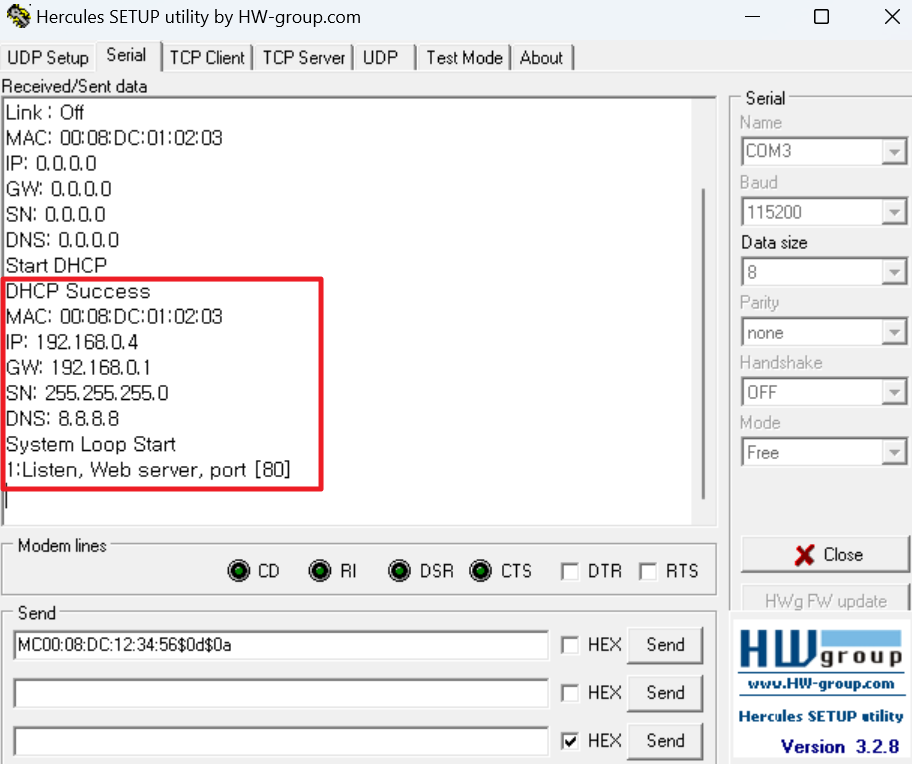
- After a slight delay once DHCP assignment is made, the message 'DHCP Success' will appear along with the creation of the web server's address (IP: 192.168.xxx.xxx).
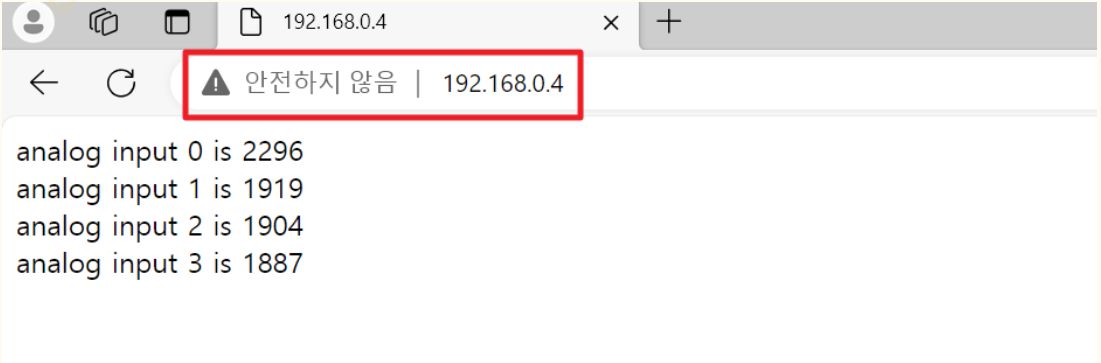
- By entering the IP address assigned by DHCP into a web browser window, the ADC values will be displayed as follows. (The ADC port is GPIO port C, pins 12 to 15.)
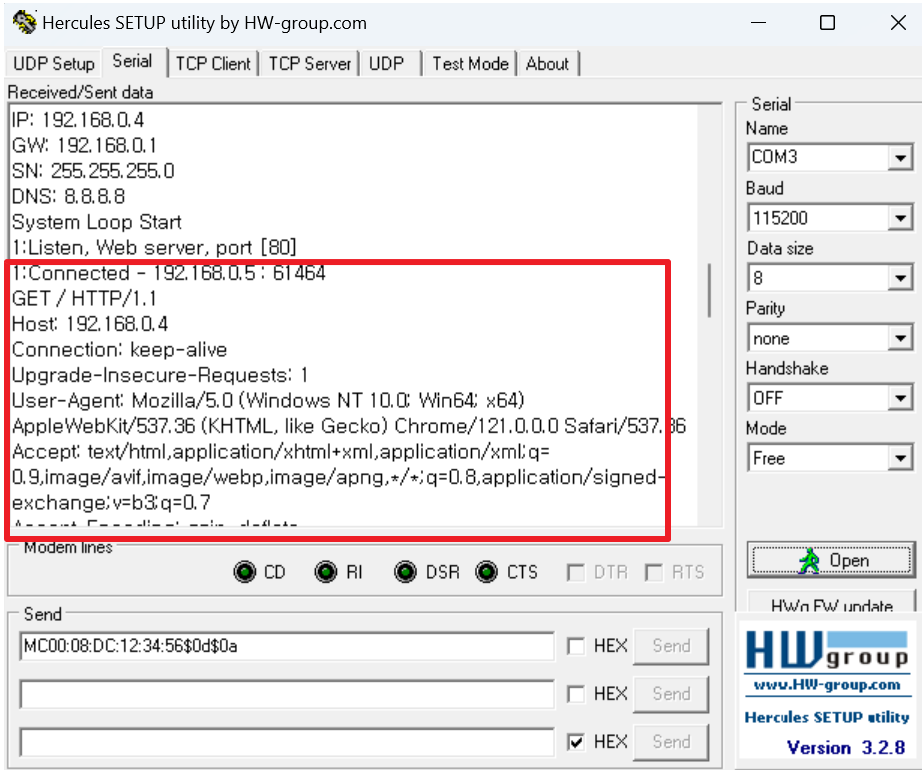
- The information of the client that accessed the web server from Hercules can be verified as follows.