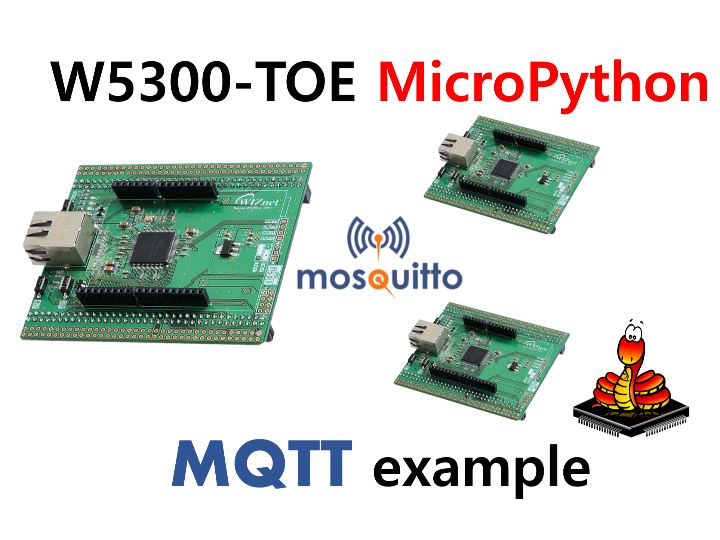
WIZnet W5300-TOE MQTT publish and Subscribe (micropython)
WIZnet W5300-TOE MQTT publish and Subscribe with Nucleo-f429zi
7
Components
Hardware components
WIZnet - W5300
x 1


micropython - MicroPython
x 1
Project description
These sections will guide you through a series of steps from configuring development environment to running ethernet examples using the STM32f429zi (nuleo-f429zi) with W5300-TOE
Please refer to the 'Getting Started' guide for the basic settings
https://github.com/Wiznet/W5300-TOE-MicroPython/blob/main/static/GettingStart.md
Hardware requirements
The ethernet examples use NUCLEO-F429ZI build on STM32 MCU with WIZnet's W5300ethernet chip. If you use other STM board, supported board of STMicroelectronics micropython in LISTand check that the board supports FMC 16bit data
W5300-TOE
* W5300-TOE shield's product page is not surported yet, I will add it when it is provided.
W5300 product page is Here
NUCLEO-F429ZI
STM32F429ZI This document is based on STM32F429ZI. If you use other STM board, Please edit it to your HW configuration.

- FMC Data pin (0-8 or 0-16)
- FMC Address pin (0-10)
- FMC Control GPIO pin (NE, NWE, NOE)
- WIZChip Control GPIO pin (INT, RST)
- UART3 pin(connect to ST-LINK) -- Be changed for use the FMC on the Nucleoboard. Pin D8, D9 -> Pin C10, C11
===================================================================
Wiznet5K (micropython Library for wiznet product)
W5300 is not included in the FW provided by microthon. So you have to use the FW provided by WIZnet.
Please refer to the getting start on the official site for downloading and editing of W5300 WIZNET5K FW (Click Here)
===================================================================

The following serial terminal program is required for MQTT Publish test, download and install from below links.
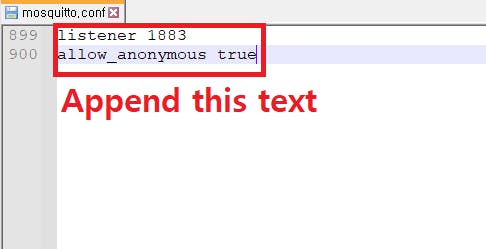
In Mosquitto versions earlier than 2.0 the default is to allow clients to connect without authentication. In 2.0 and up, you must choose your authentication options explicitly before clients can connect. Therefore, if you are using version 2.0 or later, refer to following link to setup 'mosquitto.conf' in the directory where Mosquitto is installed.
Step 2: Prepare hardware
- Combine WIZnet W5300-TOE Ethernet Shield and NUCLEO-F429ZI STM Board
- Connect ethernet cable to W5300-TOE ethernet port.
- Connect NUCLEO-F429ZI to desktop or laptop using 5 pin micro USB cable.
Step 3: Setup MQTT Publish Example
To test the MQTT Publish example, minor settings shall be done in code.
get basic code Here: https://github.com/Wiznet/W5300-TOE-MicroPython/tree/main/example/MQTT
Check COMport in [‘Configure interpreter …] and then open Thonny Python IDE.

- Copy the umqttsimple library code into it. You can access the umqttsimple library code in the following link (Click Here)
- If [umqttsimple.py], which is officially open on MicroPython, does not work, use the code in the link (Click Here)
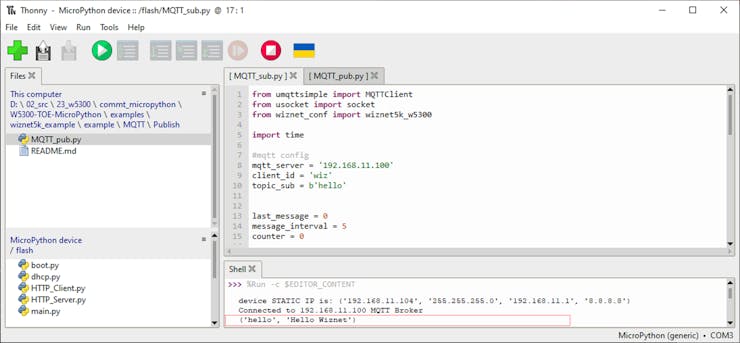
Initialize ethernet interface and configuration. Open the example code to set [Network Information] in main()
nic.ifconfig(('IP Address', 'Netmask', 'Gateway', 'DNS'))
from wiznet_conf import wiznet5k_w5300
		...

def main():
    w5300=wiznet5k_w5300()
    w5300.w5300_set_ip('192.168.11.104','255.255.255.0','192.168.11.1','8.8.8.8')
...- In the MQTT configuration, the [broker IP] address is the [IP of your desktop.]
#mqtt config
mqtt_server = '192.168.1.11'
client_id = 'wiz'
topic_pub = b'hello'
topic_msg = b'Hello Wiznet'

last_message = 0
message_interval = 5
counter = 0

def mqtt_connect():
    client = MQTTClient(client_id, mqtt_server, keepalive=60)
    client.connect()
    print('Connected to %s MQTT Broker'%(mqtt_server))
return client- going to use MQTT Publish.
#MQTT Publish
def main():

    try:
        client = mqtt_connect()
    except OSError as e:
        reconnect()

    while True:
        client.publish(topic_pub, topic_msg)
        time.sleep(3)

    client.disconnect()
Step 4: Upload and Run MQTT Publish
Create broker using mosquitto by executing the following command. If the broker is created normally, the broker's IP address is the current IP of your desktop or laptop, and the port is 1883 by default.
mosquitto -c mosquitto.conf -p 1883 -v

mosquitto_sub -h 192.168.1.11 -t hello
Step 5: Setup MQTT Subscribe Example
To test the MQTT Subscribe example, minor settings shall be done in code.
***The thonny setup and main() are the same as for publish
going to use MQTT Subscribe.
#subscribe
def main():

    try:
        client = mqtt_connect()
    except OSError as e:
        reconnect()

    while True:
        client.subscribe(topic_sub)
        time.sleep(1)

    client.disconnect()
Step 4: Upload and Run MQTT Subscribe
Create broker using mosquitto by executing the following command. If the broker is created normally, the broker's IP address is the current IP of your desktop or laptop, and the port is 1883 by default.
mosquitto -c mosquitto.conf -p 1883 -v
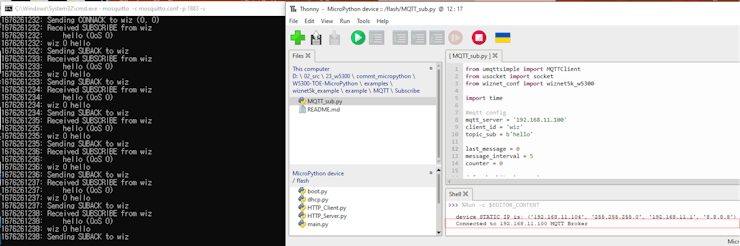
mosquitto_pub -h 192.168.1.20 -t hello -m "Hello Pico"