
TinyML based room occupation watcher
A watcher device to monitor the room occupation
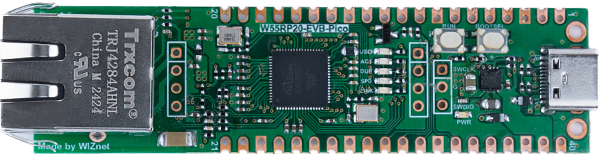
WIZnet - W55RP20-EVB-Pico
x 1
micropython - MicroPython
x 1
thonny.org - Thonny
x 1
At the campus where I work, there are many meeting rooms that is use by the staff. Sometime so many meeting could happen in one single day and it could take quite a distance to go to the meeting room and disappointed because there are no one told us that the room is occupied already.
In this project I will make a smart room watcher that has the ability to sense if there are people in the room.
HARDWARE
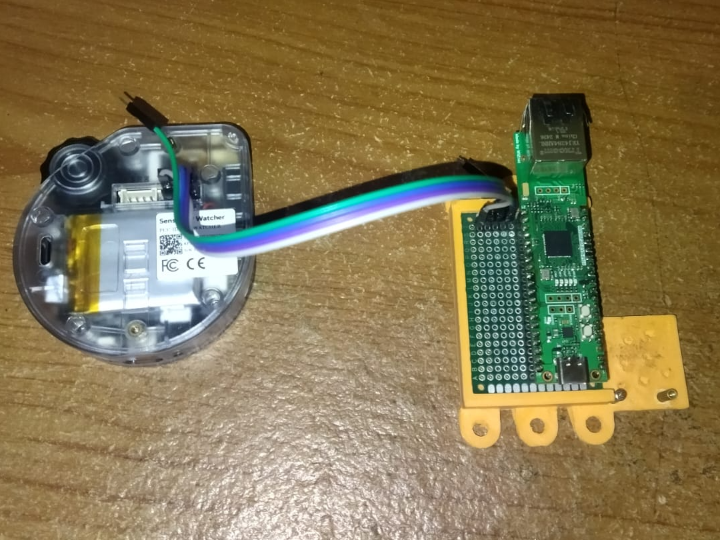
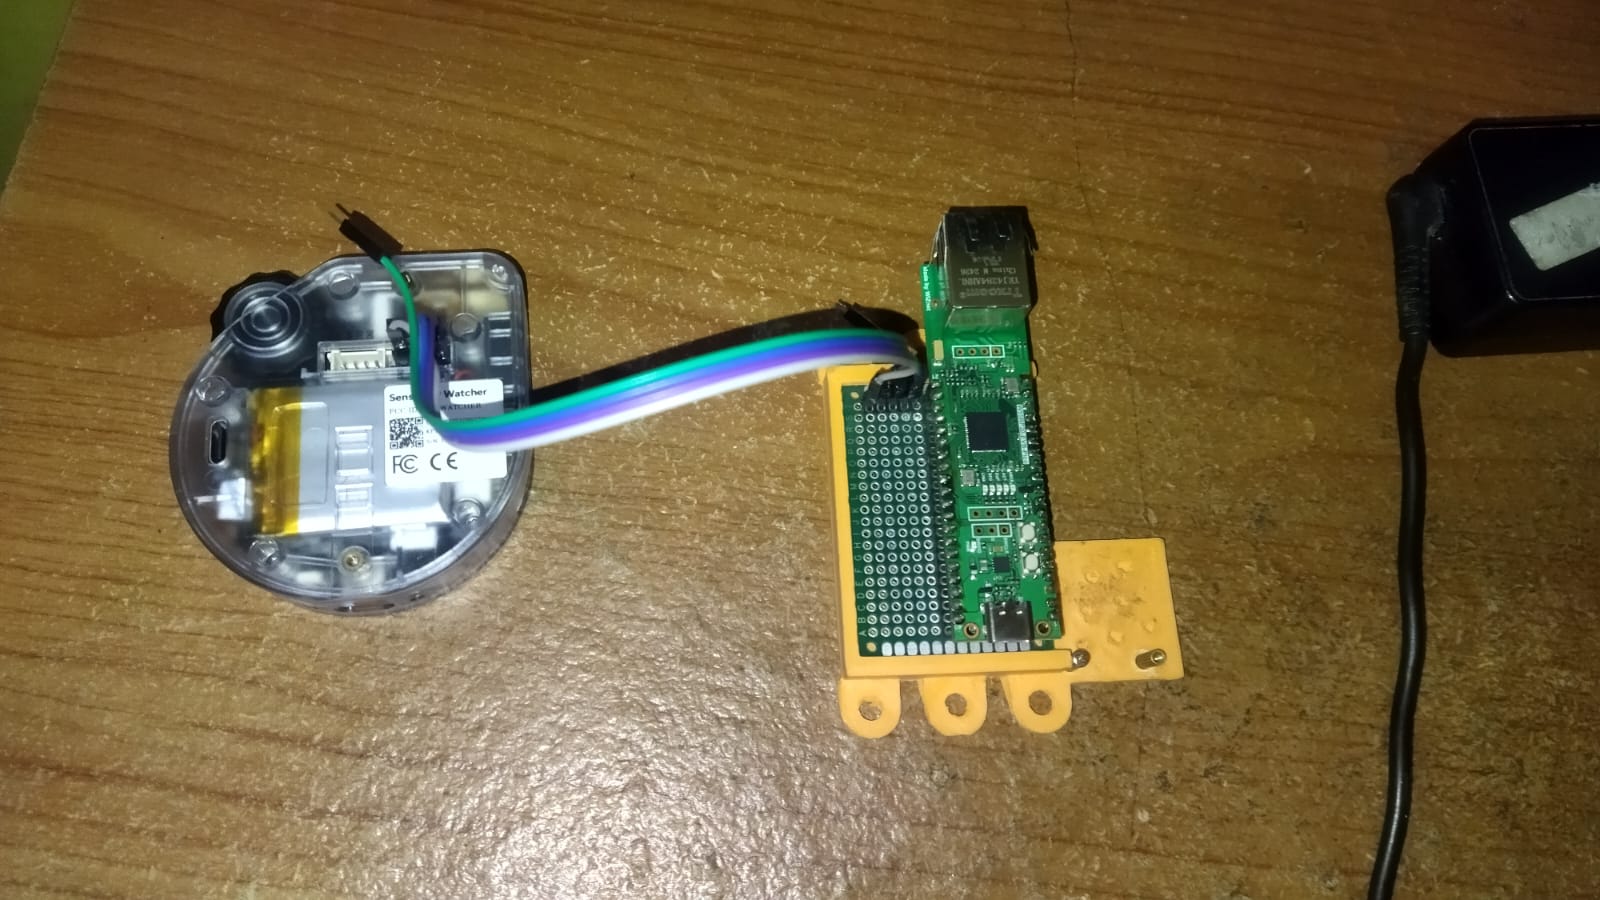
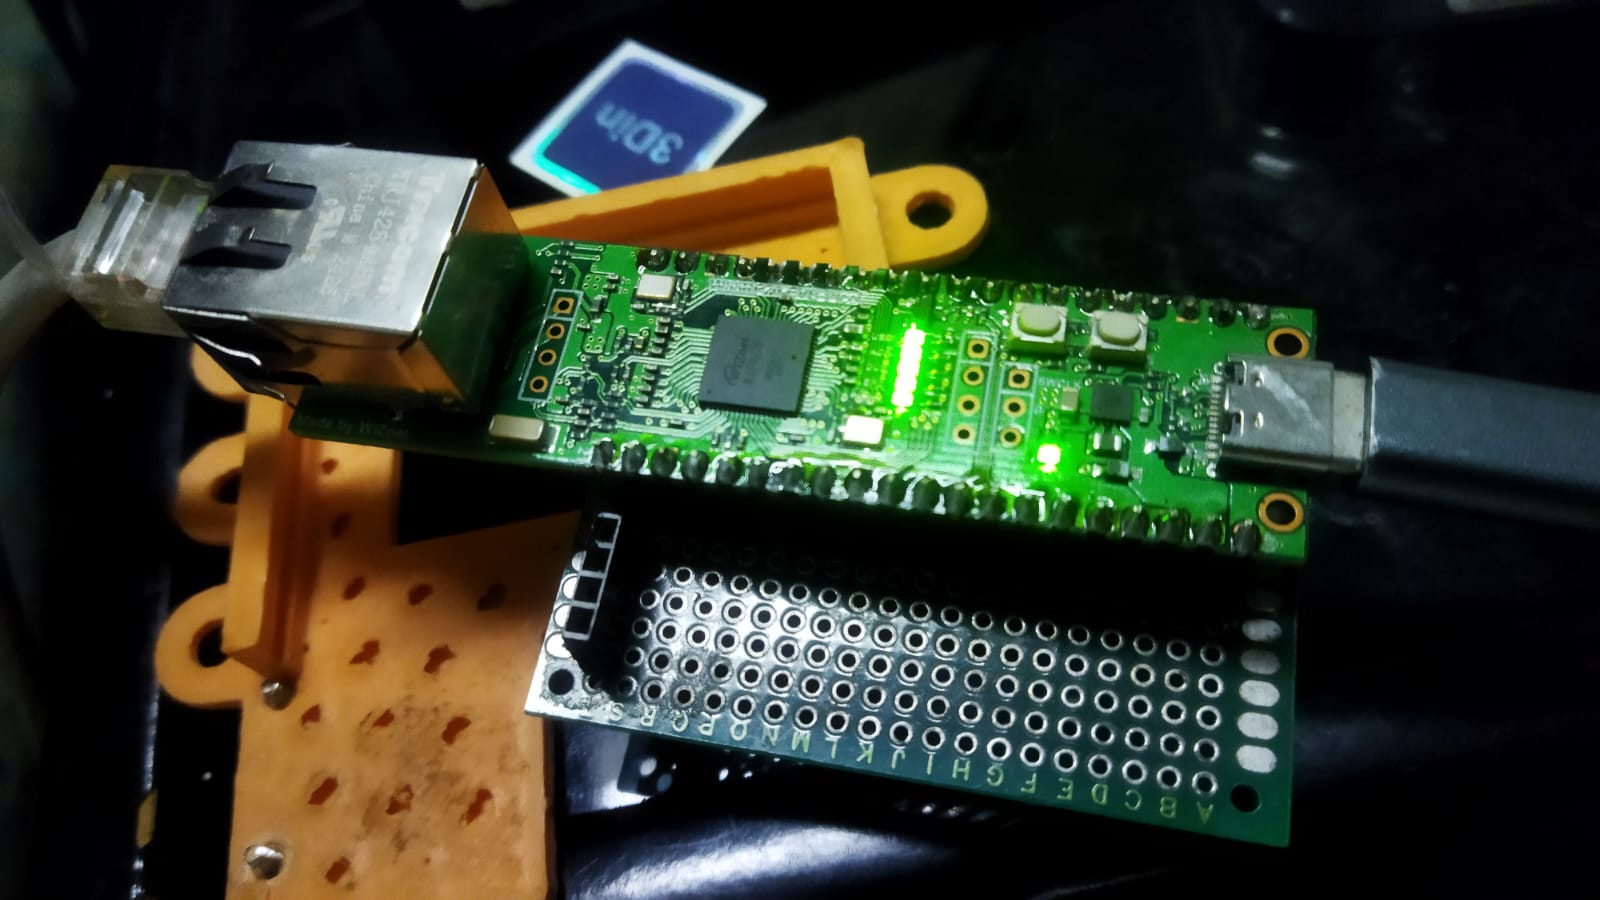
To make this project, Besides the W55RP20-evb-pico ionic I'll be using the newly released Sensecap Watcher for its easy AI or TinyML configuration. and connect it to Ionic board like the picture below
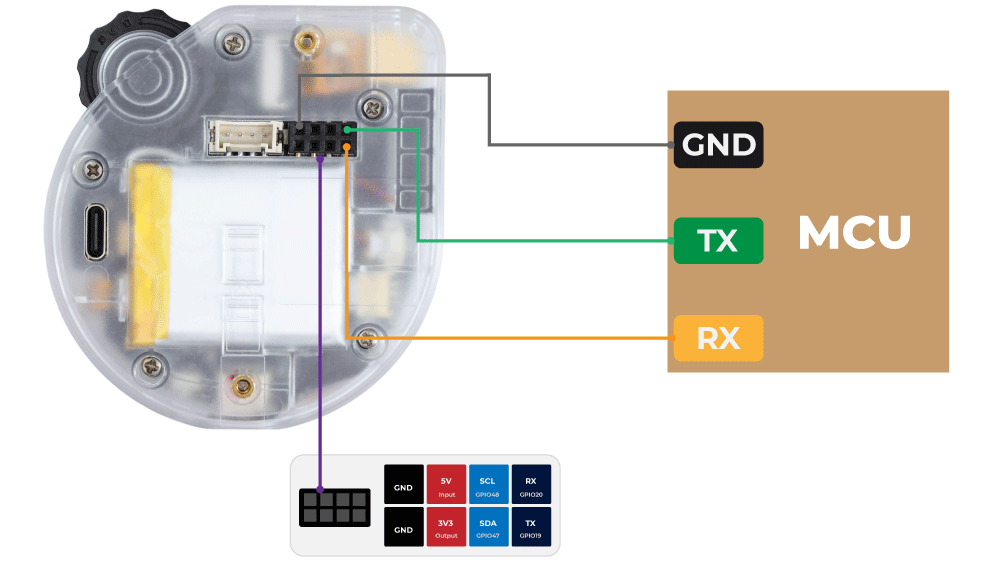
For TX Pin I Use Pin 0 or GP0 and for the RX Pin I use Pin 1 or GP1 on the Ionic board.
SOFTWARE
The project will use the micropython firmware that I already familiar with and you can grab the Micropython firmware for the ionic board here. And to install to the board just use the same way like the micropython firmware for the Raspberry pi Pico (there are a bunch of tutorial for this).
Before I use it with the sensecap watcher I want to try its ethernet capability. So I test the example from the wiznet github to get some http data. And it worked flawlessly. The ethernet indicator LED's all turned on. it means that the module is succesfully connected to the network.
After making sure the ethernet connection is running well, I want to make a simple web server that functioned to display the occupation status. After doing a quick google search I found Microdot library that seems easy to use and familiar because it has almost the same structure with Flask framework.
As a first test, I want to try to turned the onboard LED on the Ionic board using a simple web page. Since the original source code is meant for esp32 board, I have to make a few adjustment on the "network".
import machine
from microdot import Microdot, redirect, send_file
from machine import Pin,WIZNET_PIO_SPI
import network
import time#W5x00 chip init
def w5x00_init():
spi = WIZNET_PIO_SPI(baudrate=31_250_000, mosi=Pin(23),miso=Pin(22),sck=Pin(21)) #W55RP20 PIO_SPI
nic = network.WIZNET5K(spi,Pin(20),Pin(25)) #spi,cs,reset pin
nic.active(True)
#None DHCP
nic.ifconfig(('192.168.0.180','255.255.255.0','192.168.0.1','8.8.8.8'))
#DHCP
#nic.ifconfig('dhcp')
print('IP address :', nic.ifconfig())
while not nic.isconnected():
time.sleep(1)
print(nic.regs())w5x00_init()
app = Microdot()
@app.route('/', methods=['GET', 'POST'])
def index(request):
form_cookie = None
message_cookie = None
if request.method == 'POST':
form_cookie = '{pin},{pull}'.format(pin=request.form['pin'],
pull=request.form['pull'])
if 'read' in request.form:
pull = None
if request.form['pull'] == 'pullup':
pull = machine.Pin.PULL_UP
elif request.form['pull'] == 'pulldown':
pull = machine.Pin.PULL_DOWN
pin = machine.Pin(int(request.form['pin']), machine.Pin.IN, pull)
message_cookie = 'Input pin {pin} is {state}.'.format(
pin=request.form['pin'],
state='high' if pin.value() else 'low')
else:
pin = machine.Pin(int(request.form['pin']), machine.Pin.OUT)
value = 0 if 'set-low' in request.form else 1
pin.value(value)
message_cookie = 'Output pin {pin} is now {state}.'.format(
pin=request.form['pin'],
state='high' if value else 'low')
response = redirect('/')
else:
if 'message' not in request.cookies:
message_cookie = 'Select a pin and an operation below.'
response = send_file('gpio.html')
if form_cookie:
response.set_cookie('form', form_cookie)
if message_cookie:
response.set_cookie('message', message_cookie)
return response
app.run(debug=True)
I thought that the adjustment will not work instantly and I have to make few other configuration to make this work. But to my surprise my 1st adjustment for the code worked directly. This is the result.
For the Sensecap Watcher you just need to configure it through the sensecraft app on your mobile phone using this tutorial.
CONFIGURATION
If you want to run this system, First you need to download the code from my github repository
https://github.com/chalei/ionic-room-occupation
The code is based on donskytech tutorial . I made a few changes on the uart and networking part in order to run this project.
ionic-room-occupation/
│
├── lib/ # Contains libraries
├── static/ # Contains static resources (stylesheets, etc.)
├── templates/ # HTML templates for the web interface
│
├── gpio.py # Manages GPIO interactions
├── occupy.py # Controls LEDs via the web interface
└── watcher_read.py # Handles data from the SenseCap Watcher
Open the "occupy.py" file and configure the IP address based on your network configuration.
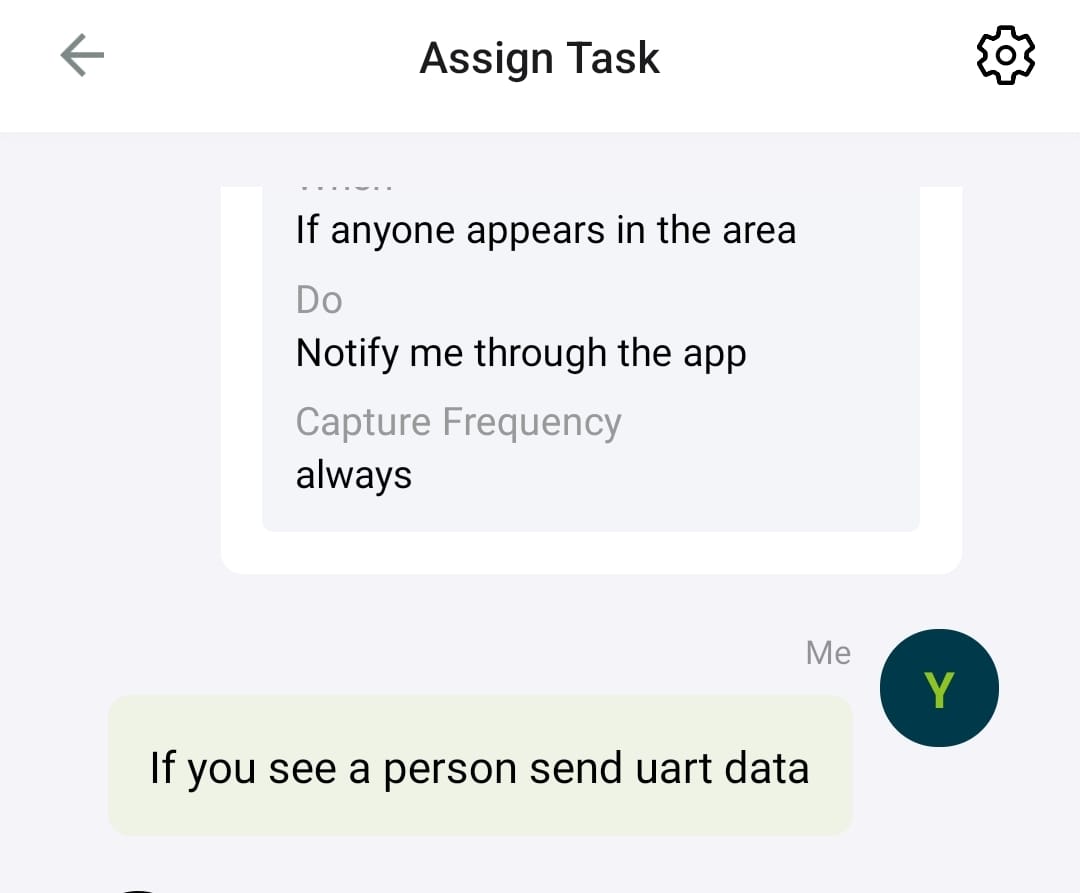
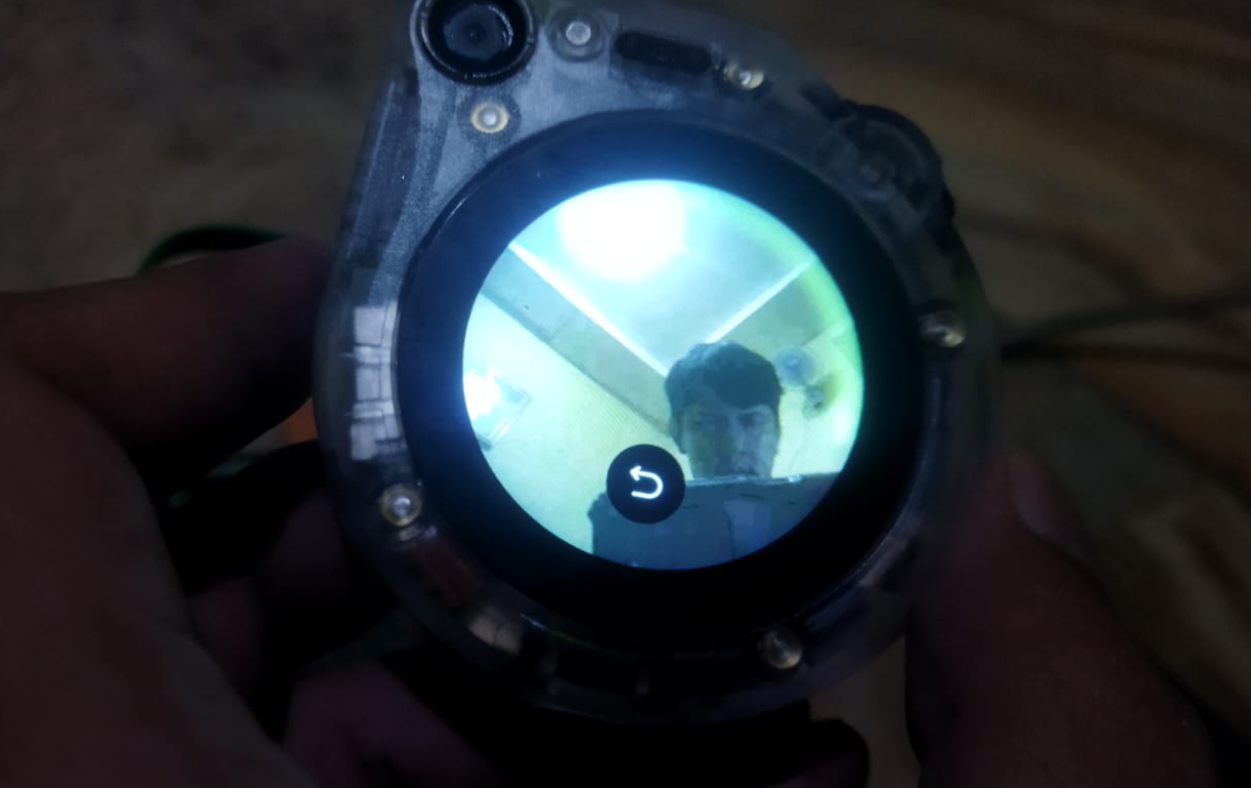
Before running the file we need to ask the sensecap watcher to send a uart data when it see a person.
type "If you see a person send uart data" on the chat box of the sensecraft app.
then on the configuration page make sure you tick the UART Output option and turned off the "include base 64" toggle button.
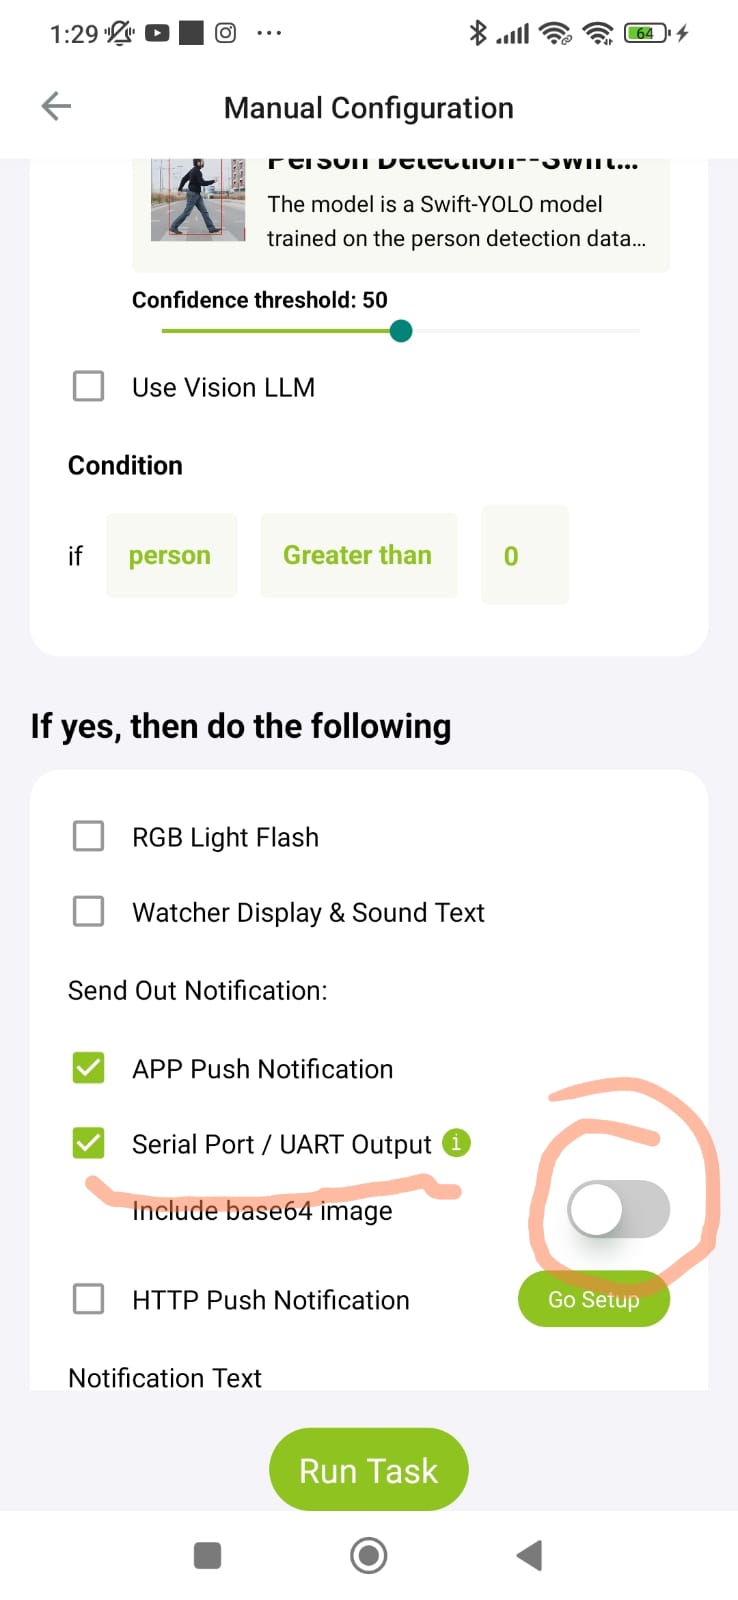
now you can check the sensecap watcher to check your configuration is working properly or not.
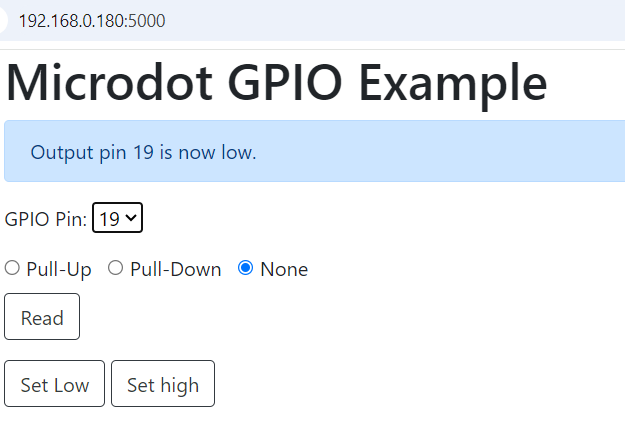
Now back to the Ionic board, Open the "occupy.py" file on Thonny IDE, make sure you already configure the IP address that work in your network.

Run the file and open the IP address with the port 5000 (ipaddress:5000) on your browser then you will see web page like this
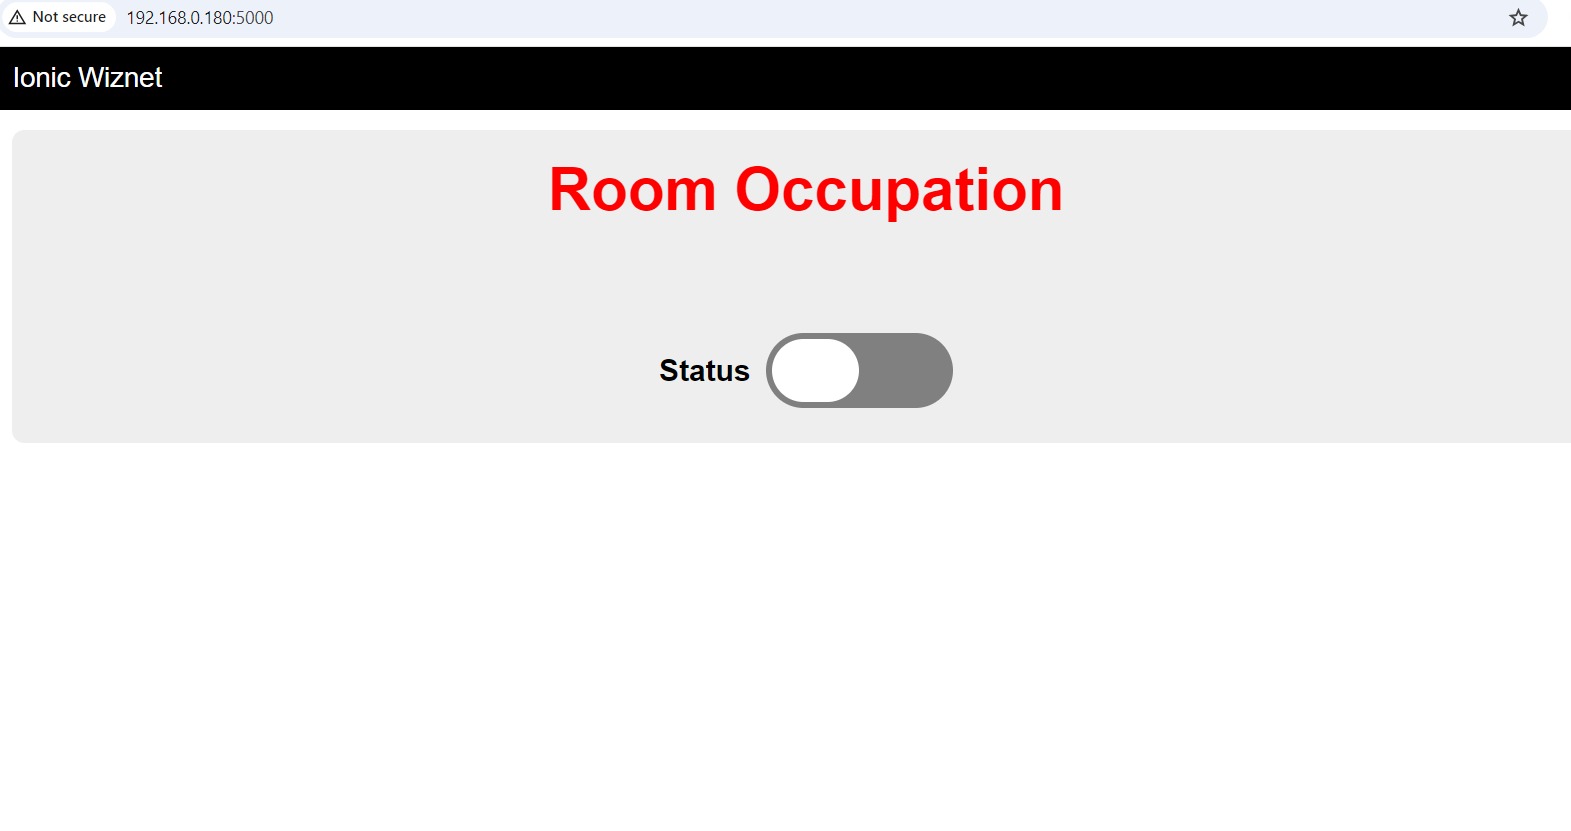
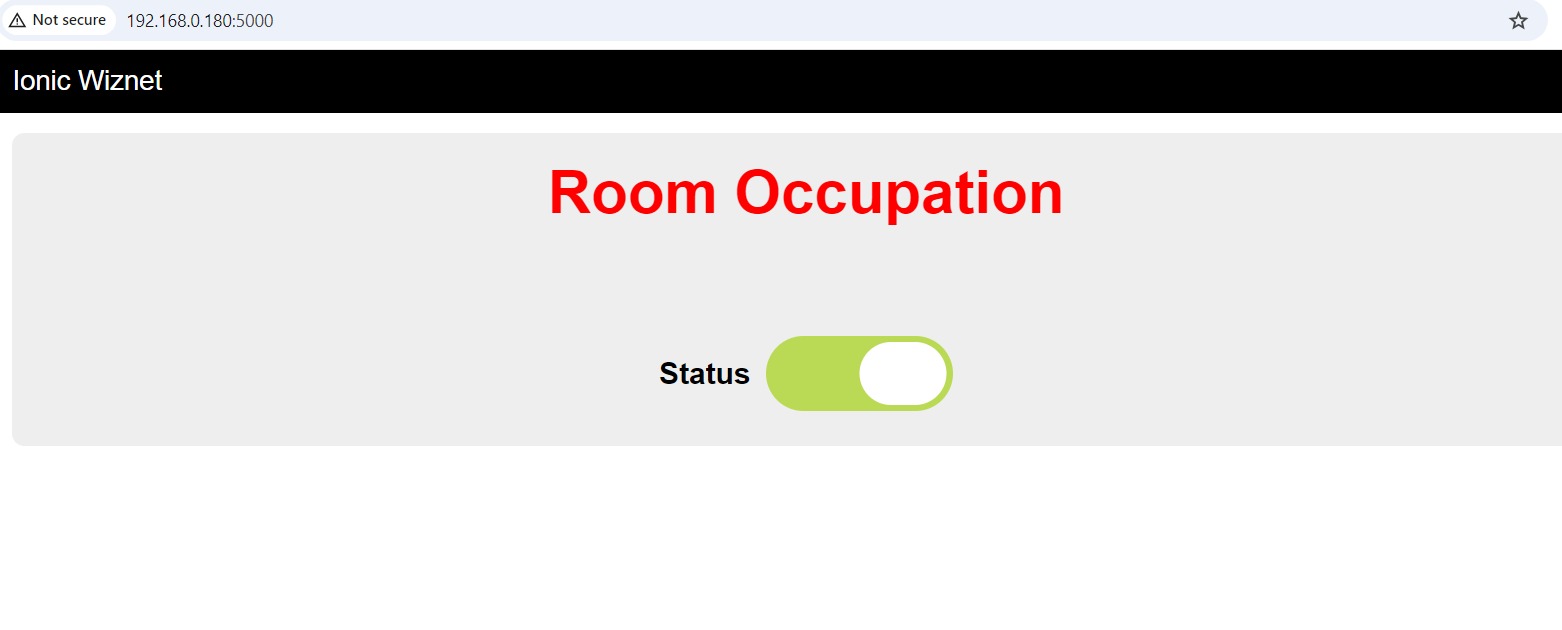
When a person or more is detected the toggle status will change to the right.
More clearer demo of the system you can check the video below
Huge Thanks To Donsky for the microdot tutorial
-
Ionic Room Occpupation
