How to use OpenAI API with WizFi360-EVB-Pico in Arduino
How to use DALL-E service using OpenAI API with WizFi360-EVB-Pico in Arduino.
1
Project description
This document will guide through a series of steps from configuring development environment to running WizFi360 Arduino library & DALL-Ebasic example using OpenAI API with the WIZnet's Wi-Fi product - WizFi360-EVB-Pico.
I will use 'WizFi360_arduino_library' provided by WIZnet.
And for the DALL-E basic example using OpenAI API, the example below was used.
1. Development environment Preparation
To test the WizFi360 Arduino library & DALL-E basic example using OpenAI API, the development environment must be configured to use Arduino platform.
Please note that in this guide DALL-E basic example using OpenAI API was configured and tested using Arduino IDE in Windows environment.
Before starting, download and install the Arduino IDE from the link below.
Additionally, if you are using WizFi360-EVB-Pico, minor settings are required in the Arduino IDE.
WizFi360-EVB-Pico is an development board based on RP2040, and you need to add a package to use the development board based on RP2040.
① Run the Arduino IDE
② Open Preferences
You can open it through 'File → Preferences' in the menu bar of Arduino IDE.
③ Add next link to Additional Boards Manager URLs
https://github.com/earlephilhower/arduino-pico/releases/download/global/package_rp2040_index.json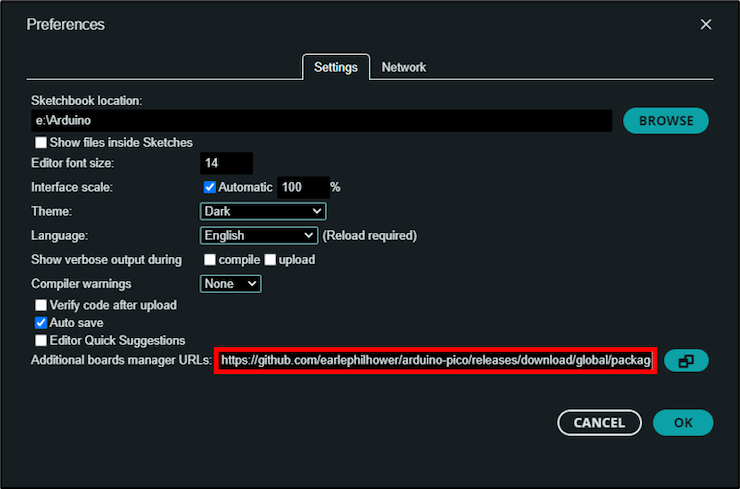
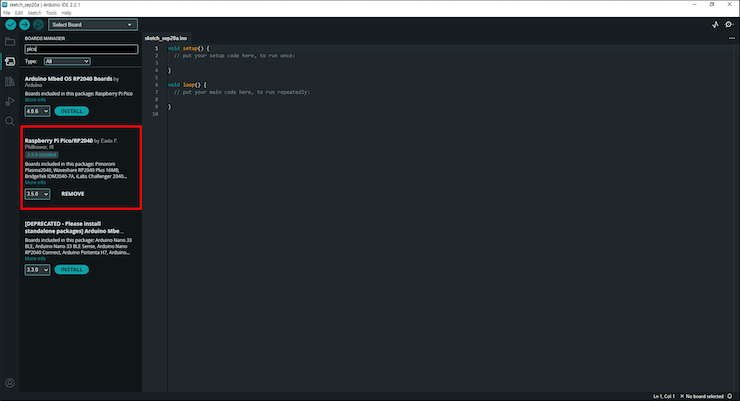
Open it via 'Tool → Board: "" → Boards Manager...'
⑤ Install board support package
Search and install Earle F. Philhower's Raspberry Pico/RP2040 board support package.
WizFi360-EVB-Pico is a development board that is built on high-performance, low-price MCU RP2040 and adds Wi-Fi connectivity using WizFi360.
More details can be found at below link:
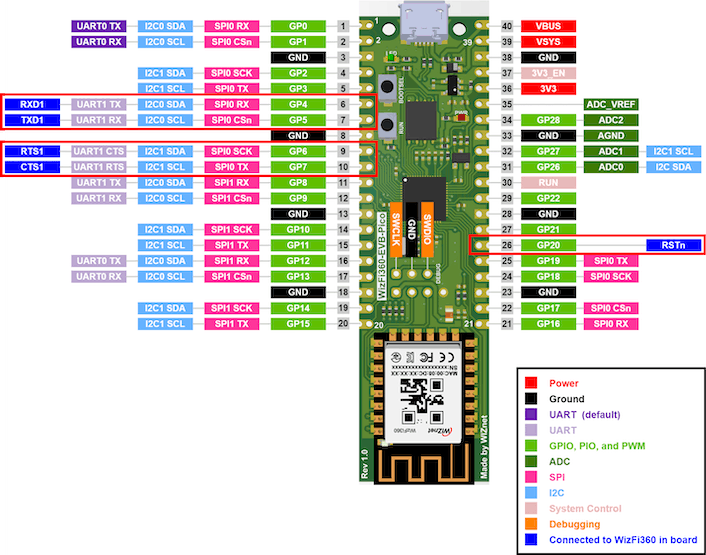
WizFi360-EVB-Pico is pin compatible to Raspberry Pi Pico. But keep in mind that pins GPIO4 ~ GPIO7 / GPIO20 are used for UART communication / reset between RP2040 and WizFi360.
Follow the steps below to firmware upload and run.
① Connect WizFi360-EVB-Pico to desktop or laptop using 5 pin micro USB cable.
3. S/W Preparation
The following serial terminal program is required for example test, download and install from below link.
4. Example Settings
This section will guide through testing the DALL-E basic example using OpenAI API with WizFi360-EVB-Pico.
① Setup Sketchbook location
Setup the Sketchbook location according to the location of the downloaded 'WizFi360_arduino_library'.
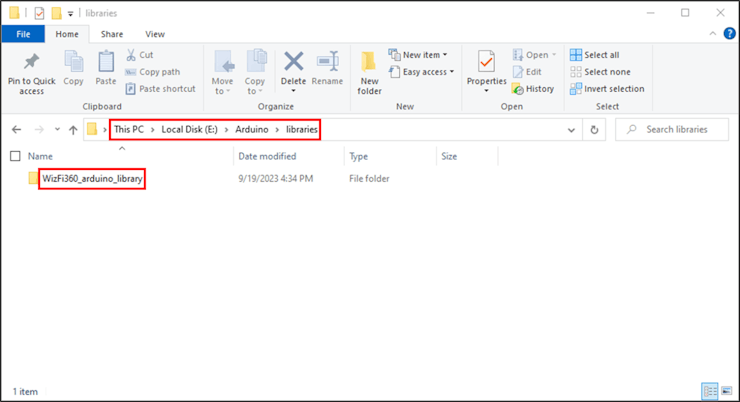
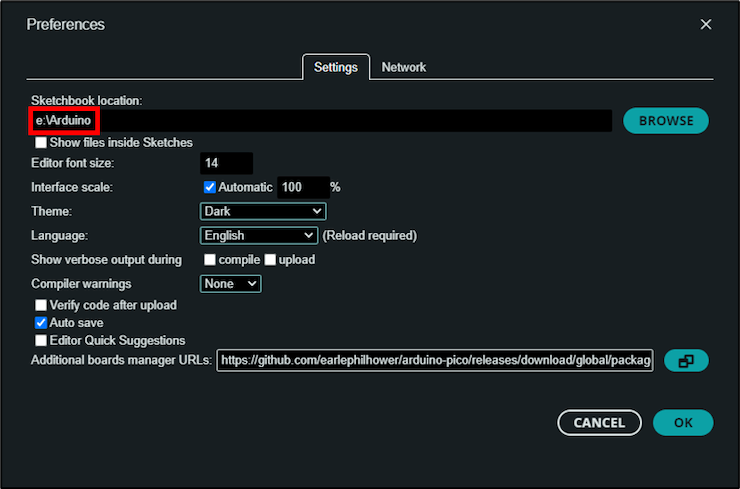
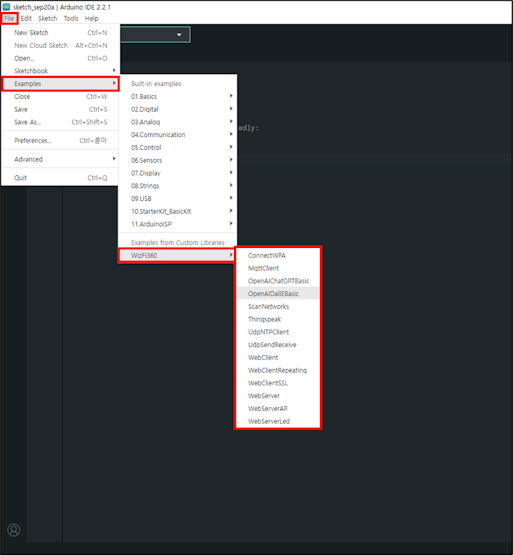
You can open examples through 'File → Examples → WizFi360'.
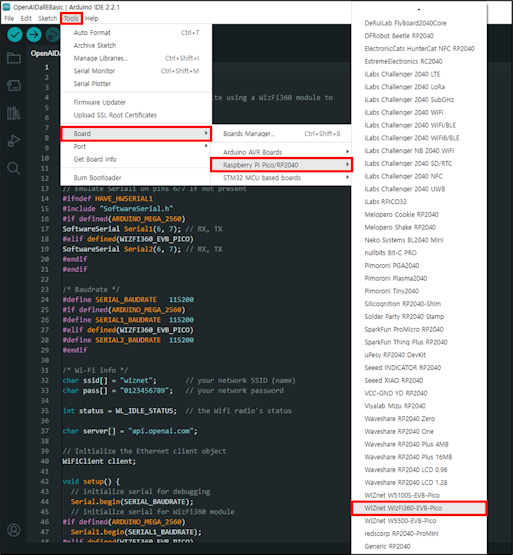
Select WizFi360-EVB-Pico.
Select the COM port of WizFi360-EVB-Pico.
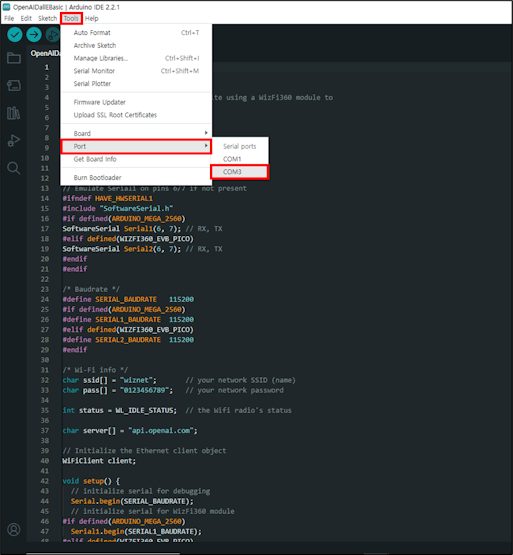
Serial port configuration is different depending on the device used.
- Arduino Mega 2560 : ARDUINO_MEGA_2560
- WizFi360-EVB-Pico : WIZFI360_EVB_PICO
// setup according to the device you use
#define WIZFI360_EVB_PICO
⑥ Setup Wi-Fi configuration
/* Wi-Fi info */
char ssid[] = "wiznet";       // your network SSID (name)
char pass[] = "0123456789";   // your network password
⑦ Setup OpenAI API key
client.println("Authorization: Bearer sk-xxxxxxxxxxxxxxxxxxxxxxxxxxxxxxxxxxxxxxxxxxxxxxxx"); // your OpenAI API key5. Example Build & Upload
① After completing the configuration, click Verify button.
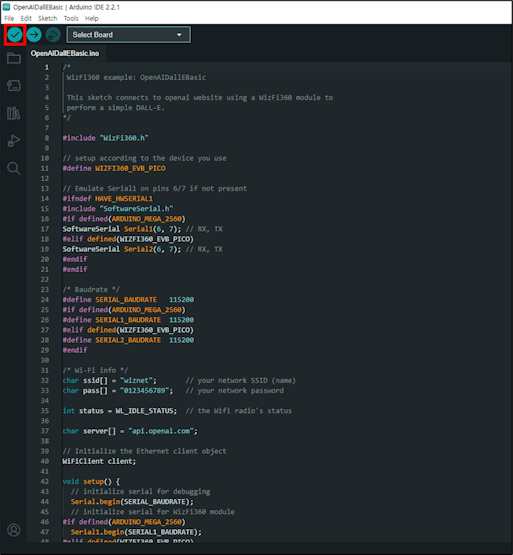
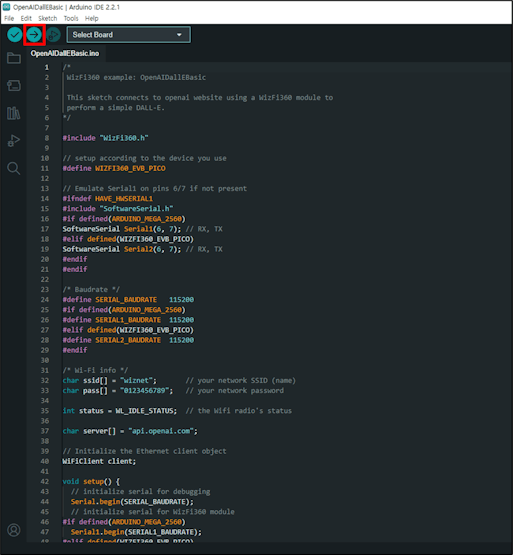
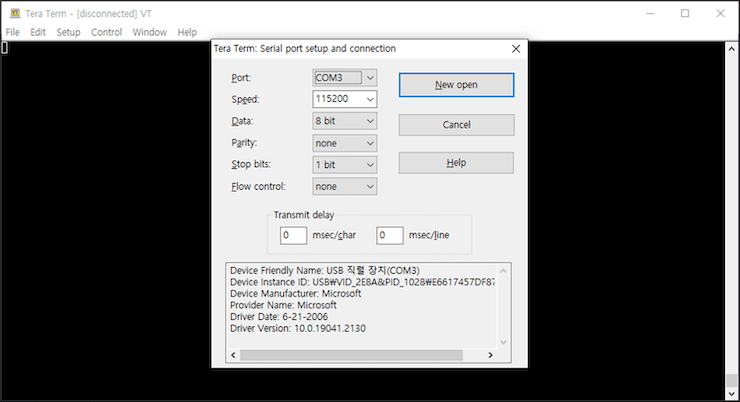
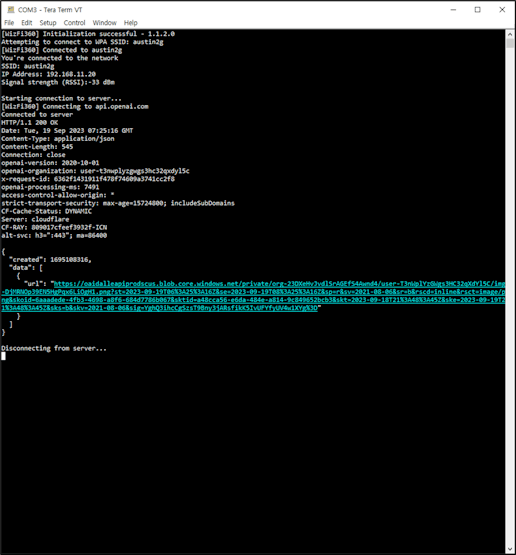
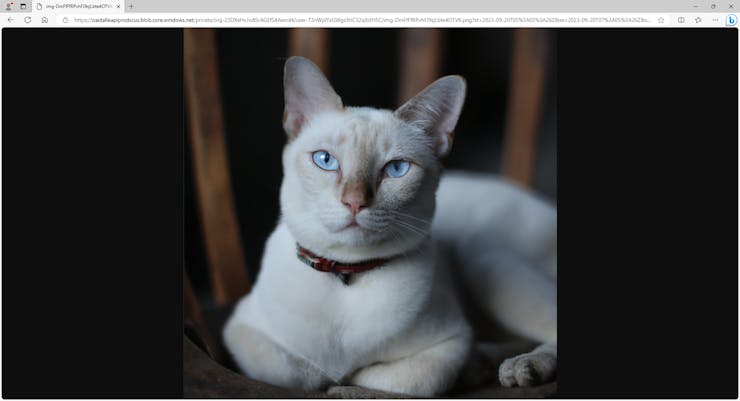
① Connect to the serial COM port of WizFi360-EVB-Pico with Tera Term.
Documents
-
WizFi360_arduino_library
Arduino library and examples for WizFi360
-
WizFi360-EVB-Pico Schematic


