Skip to content

Arduino Control Center

Arduino Control Center

teju

Published July 28, 2021

57 UCC

16 VAR

Components

Hardware components

x 1

Software Apps and online services

x 1

Arduino Control Center


Project description

Required hardware:

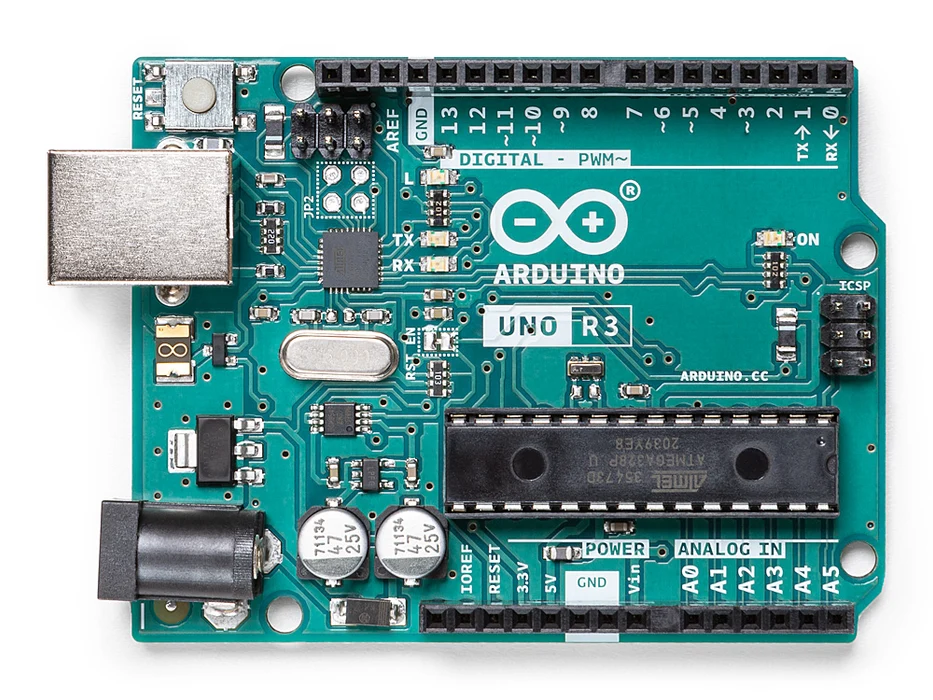
- Arduino UNO - w5100 Ethernet shield - 2 x?DS18B20?temperature sensor -?Screw shield - 4 channel relay board - Dupont wire jumpers male-female, female-female - and(or)?Sensor shield?(for easier connecting and following instructions)
Thermostat required hardwareRequired hardware without connected DS18B20 temperature sensors
DOWNLOAD?Arduino Control Center zipped file, unpack and run the application, portable no installation.

Configure Arduino Uno with Ethernet shield for use:

1.?Select Arduino board type 2.?Select firmware?for Arduino board type 3.?Select communication serial port 4.?Upload Arduino compiled sketches(firmwares)?with built in uploader, no arduino IDE required 5.?Test uploaded firmware, read messages 6.?Generate Arduino ID number, required 7.?Find your PC ip address, required for network shield setup 8.?Set Arduino PC ip address, has to be within your LAN(local network) range. DHCP for Arduino UNO is disabled!
9.?Generate Arduino MAC address, required! Must be unique in LAN!
10.?Set UDP(arduino server) ip address?- this is YOUR PC ip address in this example! 11.?Upload id and network configuration 12.?View Arduino board configuration 13.?Finish Arduino configuration?and add device to the ACC system 14.?Click on checkbox in the list?in order to open serial communication 15.?VOILA! You are ready?to configure Inputs and Outputs!
  • ACC arduino device configuration complete

    VOILA! You are ready to configure Inputs and Outputs!

  • Select Arduino board type

    Select Arduino board type

  • Select firmware for Arduino board

    Select firmware for Arduino board type

  • Select serial port

    Select communication serial port

  • Upload Arduino firmware

    Upload Arduino compiled sketches(firmwares) with built in uploader, no arduino IDE required

  • Test uploaded firmware

    Test uploaded firmware, read messages

  • Generate Arduino ID number

    Generate Arduino ID number, required

  • Find your PC ip address

    Find your PC ip address, required for network shield setup

  • Set Arduino PC ip address

    Set Arduino PC ip address, has to be within your LAN(local network) range. DHCP for Arduino UNO is disabled!

  • Generate Arduino MAC address

    Generate Arduino MAC address, required! Must be unique in LAN!

  • Set UDP(arduino server) ip address

    Set UDP(arduino server) ip address - this is YOUR PC ip address in this example!

  • Upload configuration

    Upload id and network configuration

  • View configuration

    View Arduino board configuration

  • Finish setup

    Finish Arduino configuration and add device to the ACC system

  • Open serial connection

    Click on checkbox in the list in order to open serial communication

  • ACC arduino device configuration complete

    VOILA! You are ready to configure Inputs and Outputs!

  • Select Arduino board type

    Select Arduino board type

  1. 1
  2. 2
  3. 3
  4. 4
  5. 5
  6. 6
  7. 7
  8. 8
  9. 9
  10. 10
  11. 11
  12. 12
  13. 13
  14. 14
  15. 15
 

Configure Inputs and Outputs:

1.?Double click on pin list?(or right click-Configure pin) and add DS18B20 sensor (2 times, pin D6 and D7 2.?Double click on pin list?(or right click-Configure pin) and add relays (4 times, pins A0-A3, see image)
3.?Right click on relay?and set the triggering rule for thermostat 4.?Triggering rule?preview 5.?If you relay board (like in this example)?trigger relay with LOW, you can INVERT output in order to show real relay status
 
Thermostat required hardwareRequired hardware with connected DS18B20 temperature sensors and relay board 1. Relay board: A0-A3, analog pins will be set as digital outputs when you set pin as DIGITAL 2. DS18B20: D6 and D7 VCC and GND for sensors connect to sensor shield V and G contacts(if you use sensor shield, or depends of what kind of hardware you use)
 

Setup and start HTTP and UDP servers:

1.?Open servers page 2.?Set UDP and HTTP port( default 8082 and 80) 3.?Start servers 4.?If setup is ok?you should see your Arduino ip address 5.?If you relay board (like in this example)?trigger relay with LOW, you can INVERT output in order to show real relay status
 

Create rules for relays:

1.?Right click?on output(relay) and click on "Rule editor" menu item 2.?Create rule?with available DS18b20 sensors 3.?Rule mark?on output(relay) image 4.?Login to web page 5.?Web preview?for created configuration 6.?Toogle relays?over network. If Arduino device has serial and network connection, serial connection has higher priority

Comments

Comments