Arduino W5100 Get
Let's see how to send GET data via a GET request to a web server using the Ethernet W5100 Shield.
0

Components
Hardware components
WIZnet - W5100 ethernet shield
x 1

Arduino - Arduino IDE
x 1
Project description
Author : dimon
Published On : 2013-05-02
This content was created with the assistance of ChatGPT, an artificial intelligence language model developed by OpenAI.
Discover the art of transmitting data using the Ethernet W5100 Shield Network Expansion Board, complete with a Micro SD Card Slot. Dive into this guide, where we'll craft a sketch that effortlessly captures a line from the com port, showcases it on the 1602 screen, and keeps a tally of the lines received. Not just that, it mirrors this line back to the com port and forwards it to a web server via a GET request.
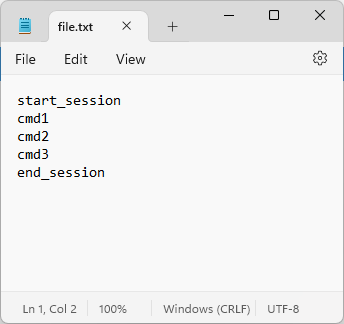
Think of the code variable as a secret handshake. This code acts as a verification tool for the server script. If there's a mismatch, the server disregards the data. But when they align, the magic happens: the string finds its way into a text file.
While this serves as a basic illustration, the potential is vast. Take the rwg.php file, for instance. Modify it, and you can have the server-side script channel the GET request data straight into a MySQL database. The horizon is limitless when it comes to data processing. Imagine transmitting temperature readings every 60 seconds and then weaving them into intricate, time-lapse graphs.
A note on compatibility: The shield employs digital pins like 4, 10, 11, 12, and 13. If you recall, our previous examples had these pins dedicated to the display. So, a little rejigging is in order; you'll need to link the display to alternate digital outputs.
I've reconfigured the setup using the W5500-EVB-Pico board.
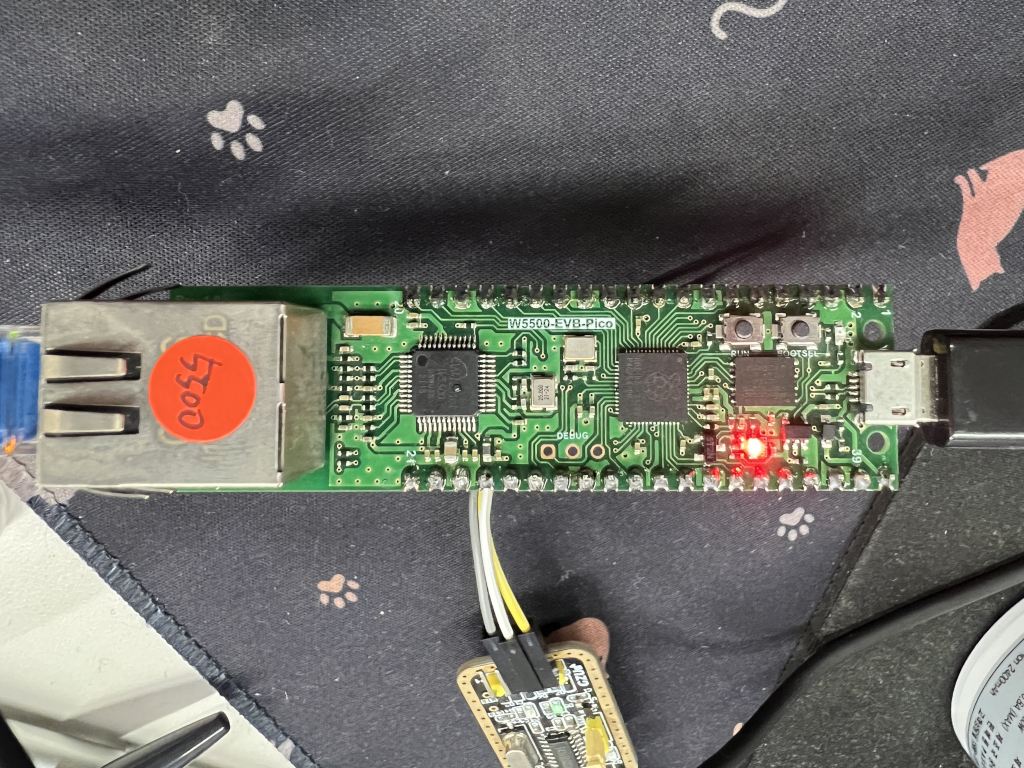
As for the sketch, it's peppered with comments, making it a self-explanatory masterpiece. Dive in and explore!
/*
  Web client

 This sketch connects to a website (http://www.google.com)
 using an Arduino Wiznet Ethernet shield.

 Circuit:
 * Ethernet shield attached to pins 10, 11, 12, 13

 created 18 Dec 2009
 by David A. Mellis
 modified 9 Apr 2012
 by Tom Igoe, based on work by Adrian McEwen

 */

#include <SPI.h>
#include <Ethernet.h>

// Enter a MAC address for your controller below.
// Newer Ethernet shields have a MAC address printed on a sticker on the shield
byte mac[] = { 0xDE, 0xAD, 0xBE, 0xEF, 0xFE, 0xED };

// if you don't want to use DNS (and reduce your sketch size)
// use the numeric IP instead of the name for the server:
//IPAddress server(74,125,232,128);  // numeric IP for Google (no DNS)
char server[] = "www.google.com";    // name address for Google (using DNS)

// Set the static IP address to use if the DHCP fails to assign
IPAddress ip(192, 168, 0, 177);
IPAddress myDns(192, 168, 0, 1);

// Initialize the Ethernet client library
// with the IP address and port of the server
// that you want to connect to (port 80 is default for HTTP):
EthernetClient client;

// Variables to measure the speed
unsigned long beginMicros, endMicros;
unsigned long byteCount = 0;
bool printWebData = true;  // set to false for better speed measurement

// Define variables
bool receiveFlag = false;      // Flag indicating something was received via com-port
String myString;               // String variable
int Count = 1;                 // Counter
int selectEthernet = 10;       // Slave selection on shield - Ethernet
int selectSd = 4;              // Slave selection on shield - SD

byte remote_ip[] = {192, 168, 50, 152};

void setup() {
  // You can use Ethernet.init(pin) to configure the CS pin
  //Ethernet.init(10);  // Most Arduino shields
  //Ethernet.init(5);   // MKR ETH shield
  //Ethernet.init(0);   // Teensy 2.0
  //Ethernet.init(20);  // Teensy++ 2.0
  //Ethernet.init(15);  // ESP8266 with Adafruit Featherwing Ethernet
  //Ethernet.init(33);  // ESP32 with Adafruit Featherwing Ethernet
  Ethernet.init(17);  // WIZnet W5100S-EVB-Pico W5500-EVB-Pico W6100-EVB-Pico

  // Open serial communications and wait for port to open:
  Serial.begin(9600);
  while (!Serial) {
    ; // wait for serial port to connect. Needed for native USB port only
  }

  // start the Ethernet connection:
  Serial.println("Initialize Ethernet with DHCP:");
  if (Ethernet.begin(mac) == 0) {
    Serial.println("Failed to configure Ethernet using DHCP");
    // Check for Ethernet hardware present
    if (Ethernet.hardwareStatus() == EthernetNoHardware) {
      Serial.println("Ethernet shield was not found.  Sorry, can't run without hardware. :(");
      while (true) {
        delay(1); // do nothing, no point running without Ethernet hardware
      }
    }
    if (Ethernet.linkStatus() == LinkOFF) {
      Serial.println("Ethernet cable is not connected.");
    }
    // try to congifure using IP address instead of DHCP:
    Ethernet.begin(mac, ip, myDns);
  } else {
    Serial.print("  DHCP assigned IP ");
    Serial.println(Ethernet.localIP());
  }
  // give the Ethernet shield a second to initialize:
  delay(1000);

  beginMicros = micros();
}

void loop() {
  // Check the com-port buffer - was something received
   if (Serial.available() > 0) {
      while (Serial.available() > 0) {
         int inChar = Serial.read();
         myString += (char)inChar;
      }
      receiveFlag = true;
   }

   // If the receiveFlag is set - something was received. Process it
   if (receiveFlag == true) {

      Serial.print("String: ");
      Serial.println(myString);

      // Send a GET request to the server remote_ip

      if (client.connect(remote_ip, 80)) {
         Serial.println("connected. Send GET");
         client.print("GET /myproject/rwg.php?q=");
         client.print(myString);
         client.print("&code=Std3fOry1GfizfT309Hytcklt31"); // Security code
         client.println(" HTTP/1.1");
         client.println("Host: tudimon.com");
         client.println("Connection: close");
         client.println();
         client.stop();
      } else {
         Serial.println("connection failed");
      }

      receiveFlag = false;
      myString = "";
      Count++;
   }
   delay(1000);
}
index.php
<?php

/************************************************************************
Copyright (c) 2013 by dimon
http://tudimon.com/
File: index.php

Purpose: Displays a form that sends a GET request with a single string variable.

************************************************************************/

print "
<html>
<head>
<title>Arduino GET Use</title>
<meta http-equiv=\"Content-Type\" content=\"text/html; charset=UTF-8\">
</head>
<body>
<p>Form simulating a GET request from Arduino</p>

<form method=\"GET\" action=\"rwg.php\">

   Enter a string: <input type=\"text\" name=\"q\">
   <br>
   <input type=\"submit\" name=\"okbutton\" value=\"Send\">
   <input type=\"hidden\" name=\"code\" value=\"Std3fOry1GfizfT309Hytcklt31\">
 </form>

</body>
</html>
";

?>
rwg.php
<?

/************************************************************************
Copyright (c) 2013 by dimon
http://tudimon.com/
File: rwg.php

Purpose: Writes a string received by a GET request to a text file named file.txt.

The 'code' variable should match the one passed by Arduino. If not, the received data is discarded.

************************************************************************/

$str = $_GET['q'];
$code = $_GET['code'];

if ($code == "Std3fOry1GfizfT309Hytcklt31") {

  $file = fopen ("file.txt","a+");
  if ( !$file )
  {
    echo("Error opening file");
  }
  else
  {
    fputs ( $file, "$str\r\n");
  }
  fclose ($file);

}
?>
Com port, transmitted strings:
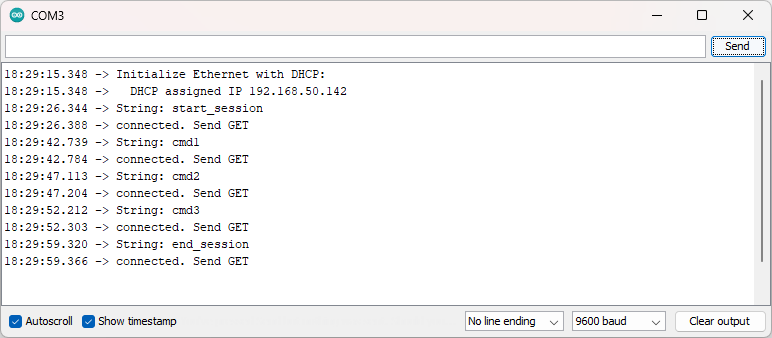
Test file on the server - the same lines:
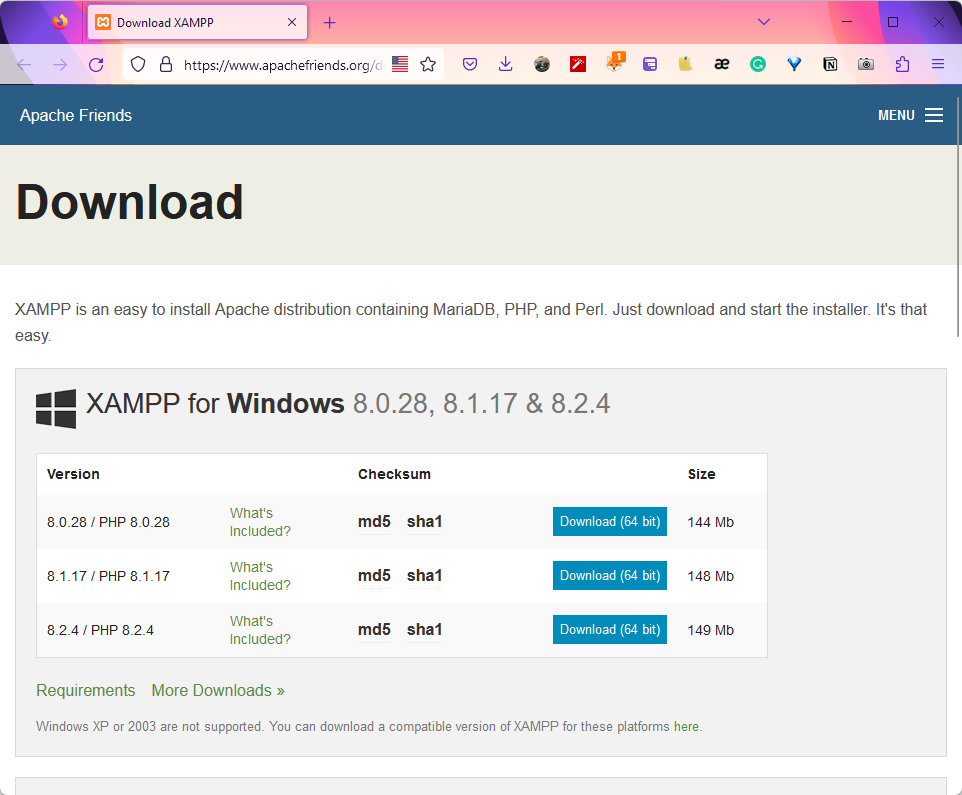
You can run the PHP files on a Windows machine and access them using the Firefox browser. Here's how you can set it up using XAMPP, which is a popular PHP development environment for Windows:
1. Install XAMPP:
- Download XAMPP from the official website: https://www.apachefriends.org/download.html
- Run the installer and follow the on-screen instructions. During installation, you can choose which components to install. At a minimum, you'll need Apache and PHP.
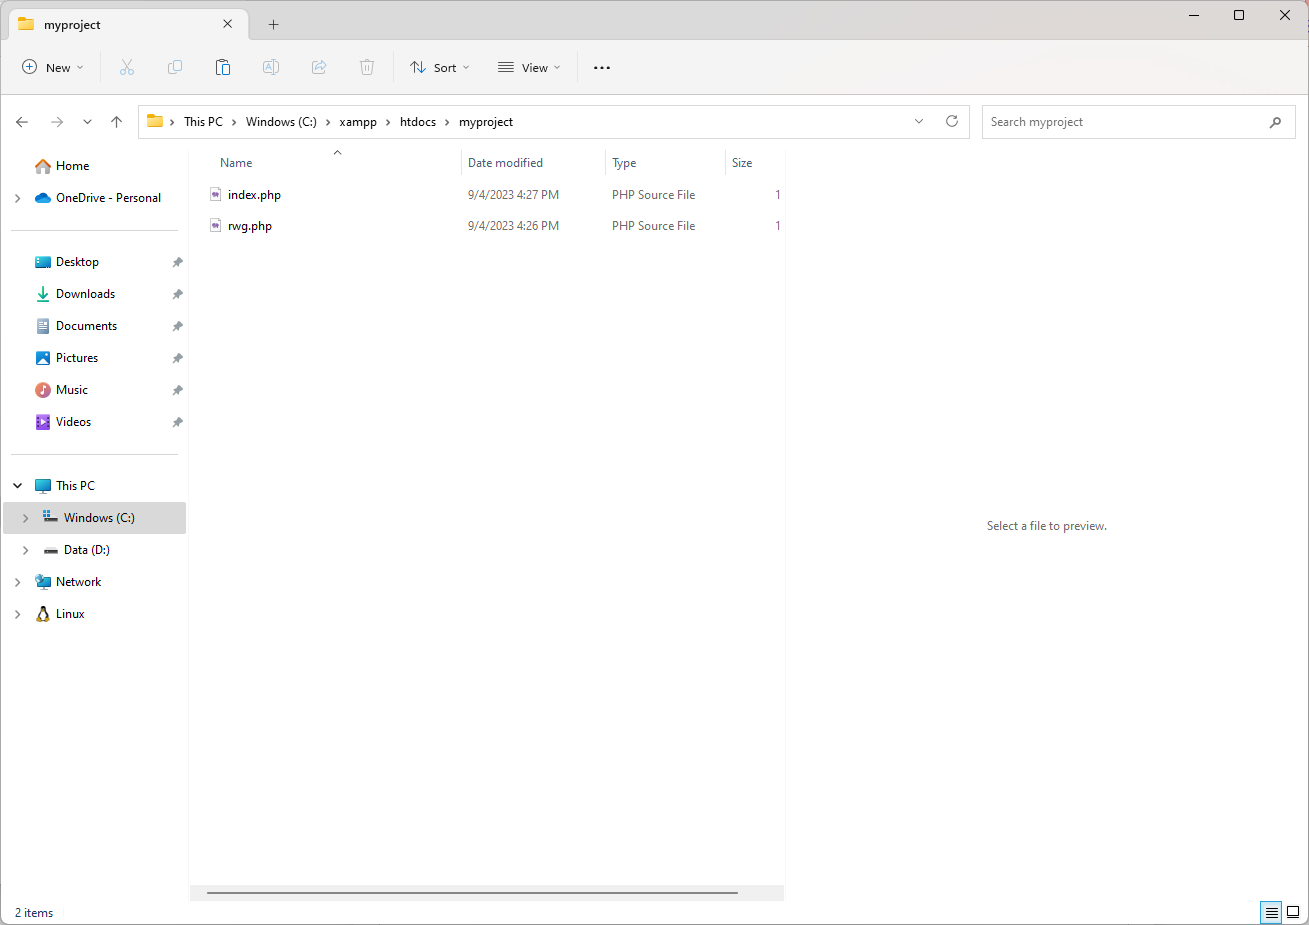
2. Place your PHP files:
- Navigate to the
htdocsdirectory in your XAMPP installation (typicallyC:\xampp\htdocs). - Create a new folder, for example,
myproject. - Move
index.phpandrwg.phpinto this folder.
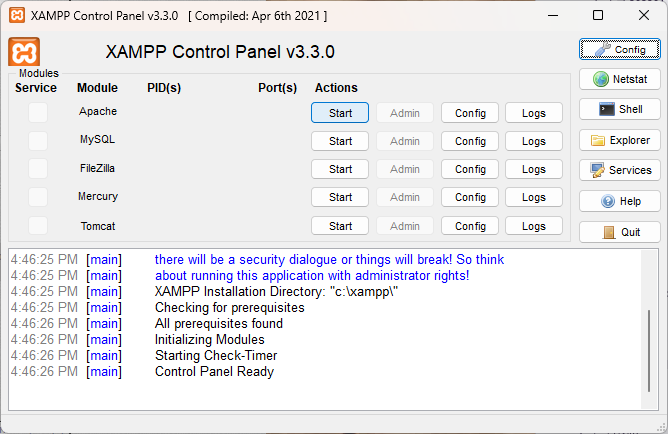
3. Start Apache:
- Launch the XAMPP Control Panel (you can find it in the Start Menu).
- Click the 'Start' button next to 'Apache'.
4. Access the service:
- Open Firefox (or any other browser).
- Navigate to
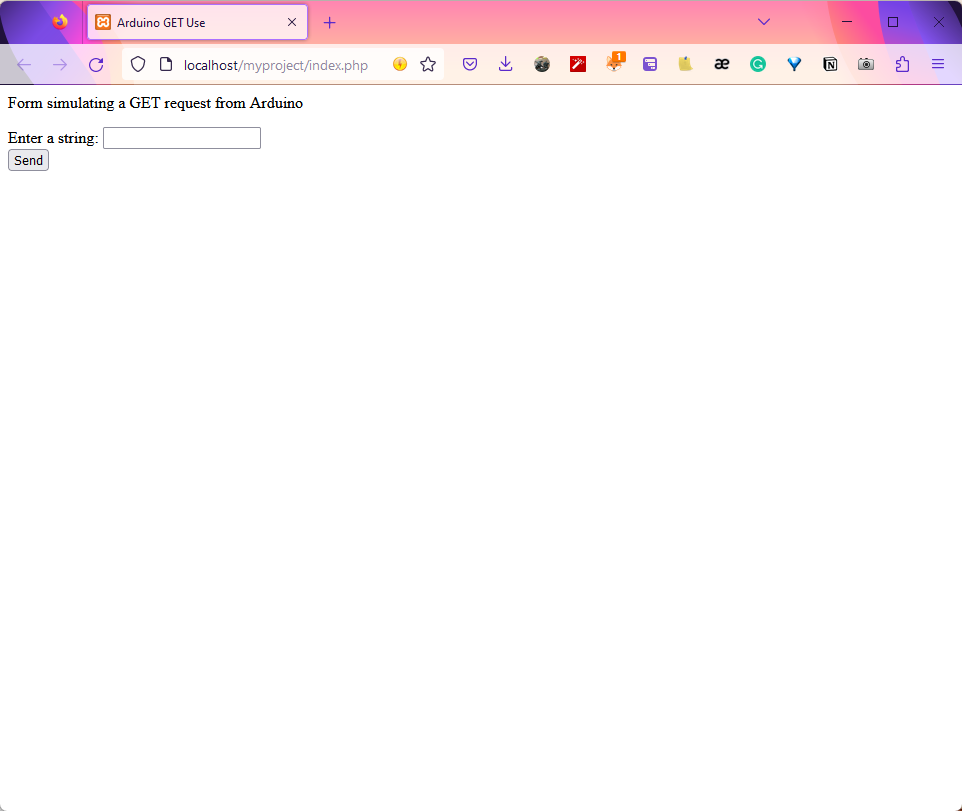
http://localhost/myproject/index.php.
You should see the form you created in index.php.
Notes:
- If you encounter any issues, ensure that no other services are using port 80 or 443 (the default ports for HTTP and HTTPS, respectively). If necessary, you can configure Apache in XAMPP to use different ports.
- As with any web server setup, if you plan to expose this to the internet, ensure you have proper security measures in place.
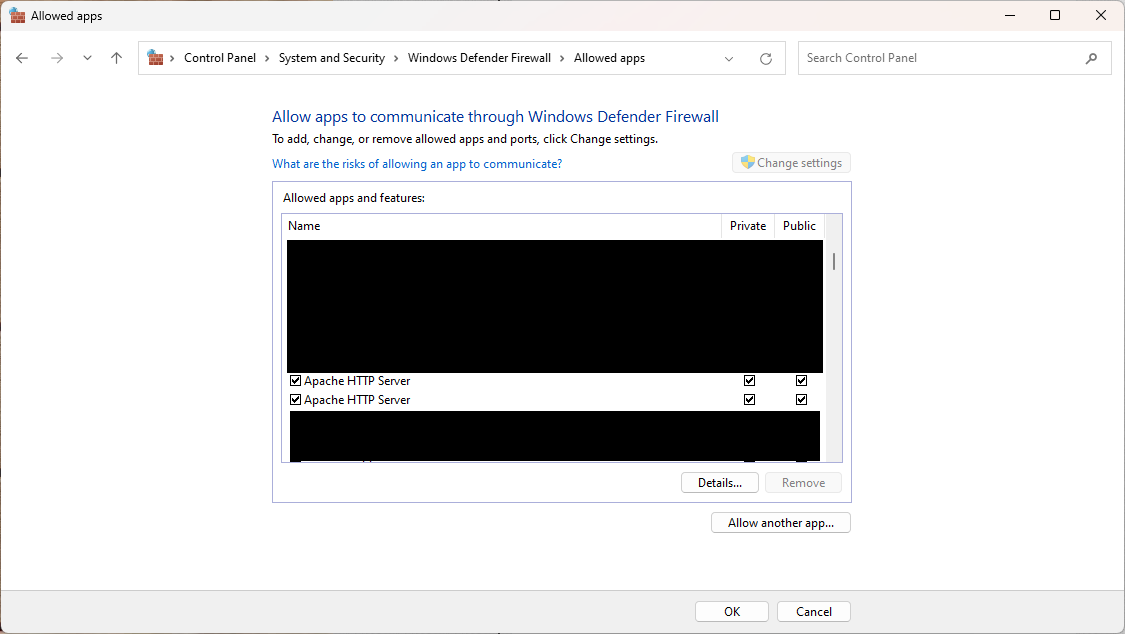
The following firewall settings are required.
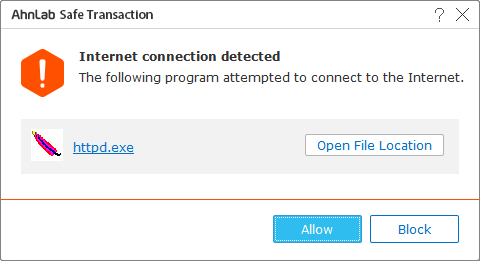
If the antivirus is running, you need to grant access.
Thank you for reading.


