teplomer-nejen-do-serverovny
Build a thermometer and hygrometer that costs a few crowns, displays both current and historical information, and sends a warning if the spe
7
Project description
When the network thermometer that monitored the temperature went to silicon heaven in our air-conditioned server room, I thought of trying to build something of my own. The Arduino platform is becoming more and more popular not only in schools with technical education, and this project can be implemented relatively easily, for example, by pupils as part of the lessons. Both motherboards with ATMega microcontrollers and expansion boards (shields) cost literally a few crowns and have the option of connecting various sensors, motors, displays and other electronic devices. In the end, my choice also fell on Arduino. All electronic components can be easily found, for example, in the GM electronic store in Pilsen, or purchased online in various Czech and foreign e-shops.
Motherboard and electronic accessories
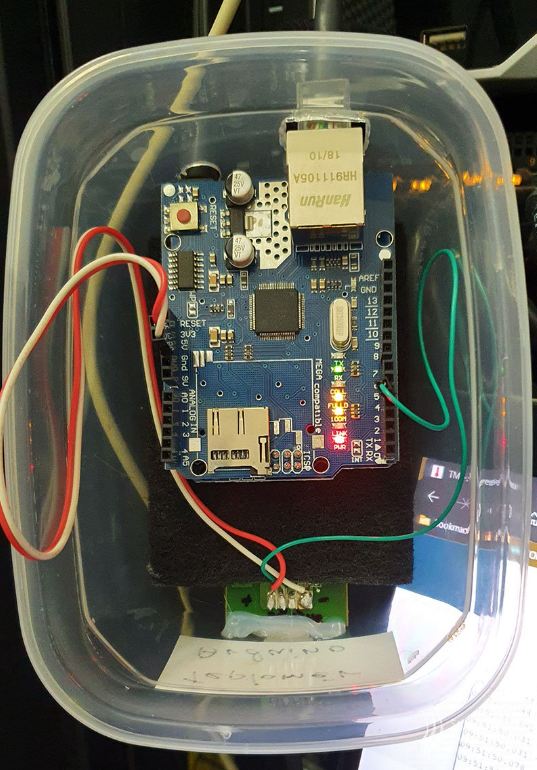
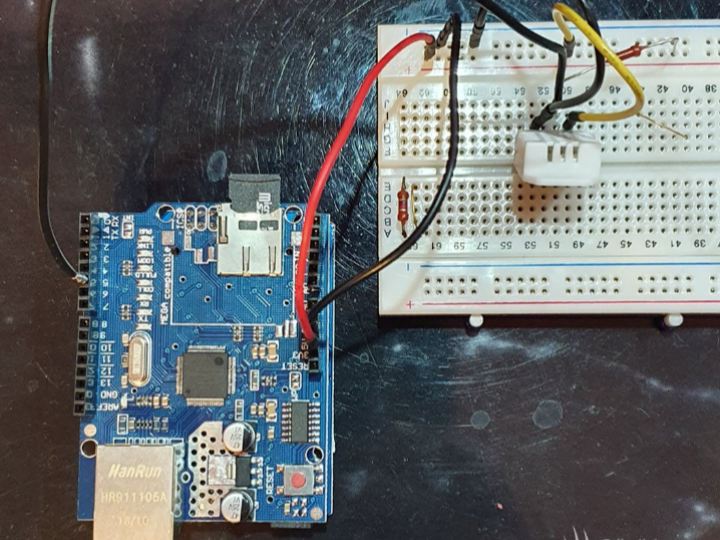
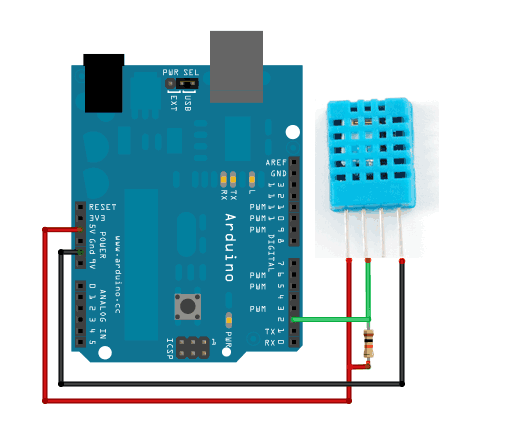
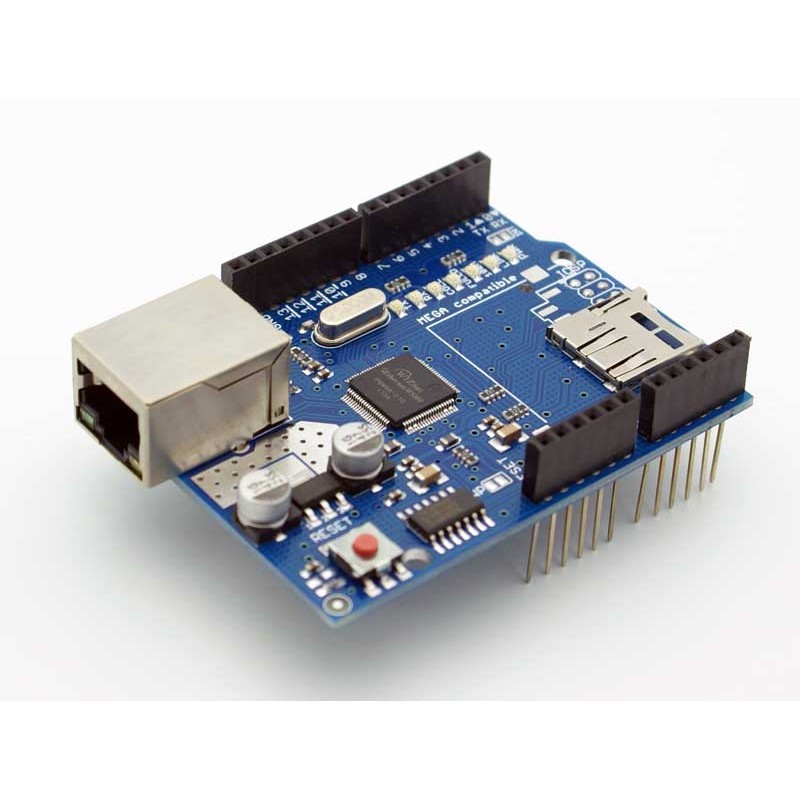 I chose the Arduino UNO motherboard, which is quite large, but it is good for prototyping, and since this is my first project, I will stick to as many standards and instructions as possible, available on the Internet. I need to connect a temperature sensor to the board. It is really an item of several crowns, so I choose the DHT 22 sensor (AM2302), which can measure not only temperature, but also humidity. I will want to display information about temperature and humidity both in real time and save a history of values, and for this I need to connect the Arduino to a computer network. The option is either wirelessly using WiFi, or connect the board to the network wired via an RJ-45 connector. In the server room, it is not a problem to connect the Arduino directly to the switch with a network cable, so I am buying an Ethernet shield expansion board with a W5100 chip. All that remains is to connect everything, which is quite simple. I will connect the boards together,
Web server for displaying data
Since the project is supposed to be relatively fast and my programming skills are not at a very high level, I was looking for some ready-made solution that will suit me, or I can simply modify it for my needs. The web server is not a problem, I have it on the internal network. It also runs a database server where I can store measured values. So I found a web application that is perfect for Arduino - TMEP by Michal Ševčík. It is written in PHP, so I understand the code quite well and can modify it if necessary, it uses a classic MySQL database and can even draw nice graphs. The link to the TMEP application on Github is here: https://github.com/MultiTricker/TMEP. Now all you have to do is create a database for the application and import the necessary tables into it. Then copy the directory structure of the application to the web server and edit the configuration file. Here is a sample web application:
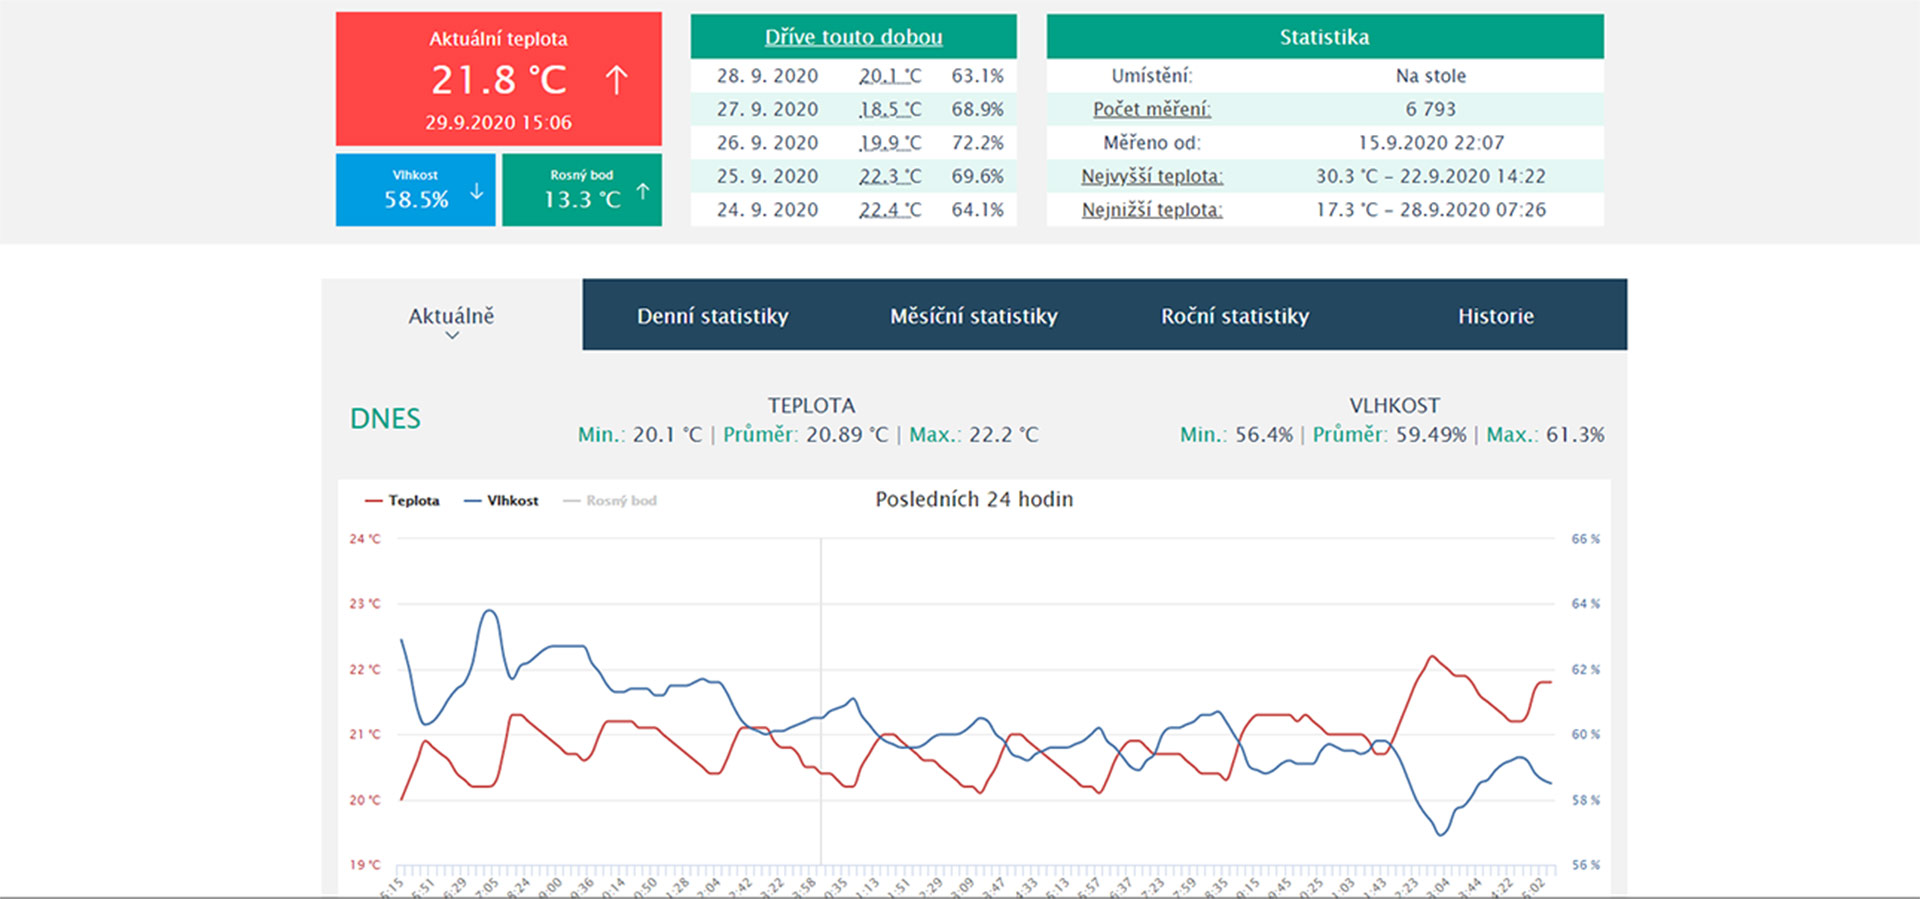
So I have the necessary hardware, the data display software is running on a web server. Now just plug in and program the Arduino and a few little things.
Arduino programming
The code for the Arduino is not complicated at all and is based on the C programming language. I am taking over the program from the website tmep.cz, which sends values from the Arduino to the web application, and I am partially modifying it for my needs, so that I can set the maximum threshold temperature and when it is exceeded, I want to receive an email with notice. This is also the main reason for the thermometer in the server room. Air conditioners maintain a constant temperature in it, but if the air conditioner stops working, the temperature will rise very quickly, which can lead to restarts of servers and other equipment, or even damage to them.
Sending an HTTP request to the IFTTT web platform seems to be the easiest, where you can very easily create your own application that receives an HTTP request using a so-called Webhook and then sends an information email. I use the instructions on the official Arduino website and slightly modify the code again for my needs. So here is my complete Arduino program with a description of each part of the code and comments inside the program. The entire program can be downloaded at the end of the article.
The first part contains the connection of libraries for handling the Ethernet shield and the DHT sensor. Setting a static IP address and other variables for the rest of the program.
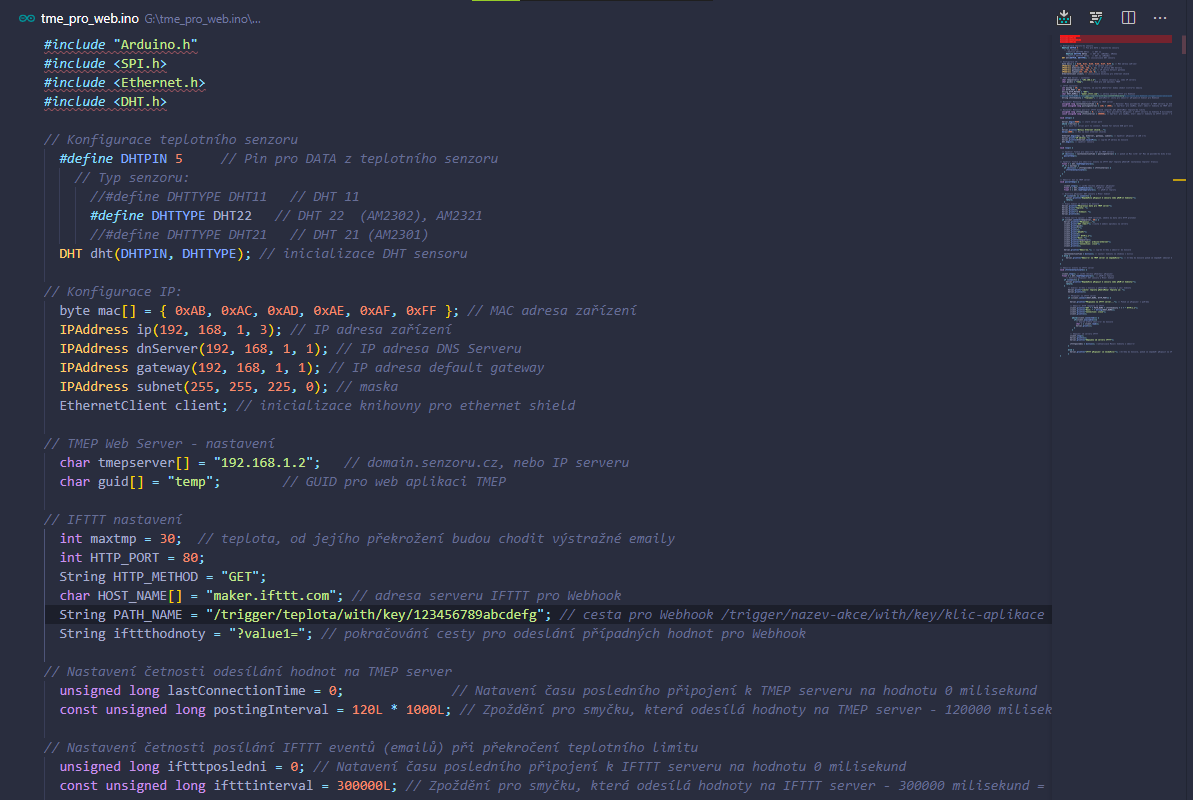
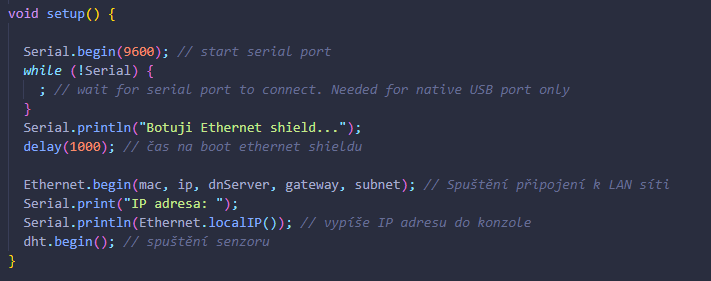
The setup part sets the serial port, introduces the IP address for the device and starts the sensor itself. It still prints the IP address to the console for checking.
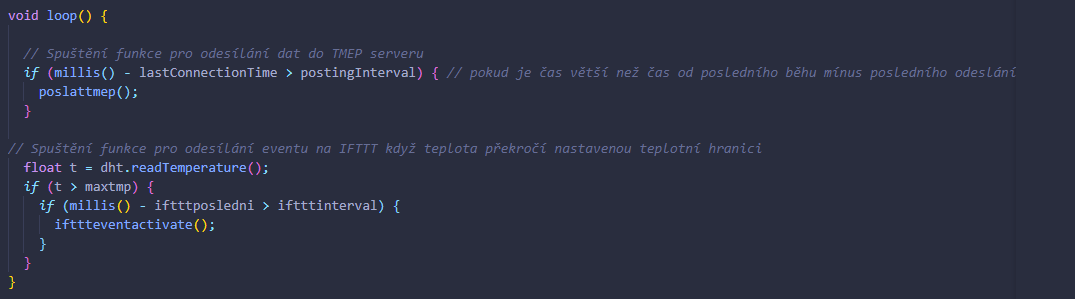
This is followed by a loop , which verifies the conditions and, when they are met, triggers functions. The first condition is triggered in the set time interval from the last sending of values from the sensor to the web server. The second then verifies whether the temperature has not exceeded the permitted limit and, if so, again triggers the sending of emails via the IFTTT service in a time interval.
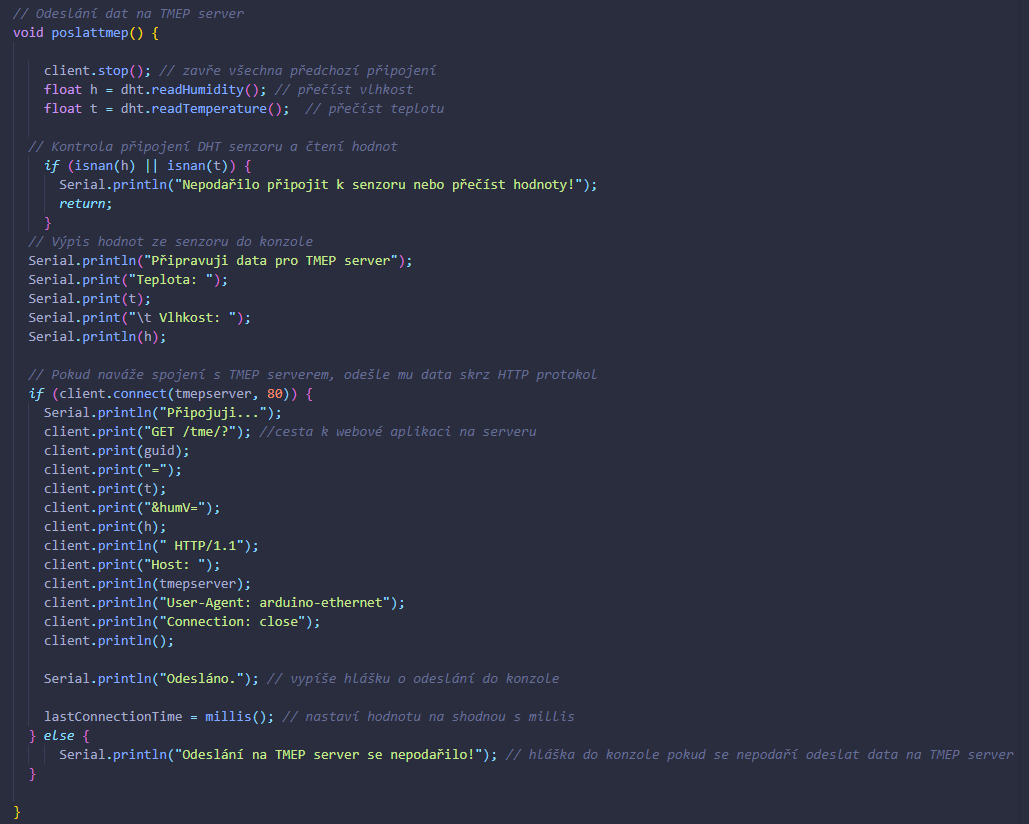
The sendtmep function reads the values from the sensor, writes them to the console and then sends them via HTTP request to the TMEP web server. At the end, it also resets the variable from which the time to run this function is calculated.
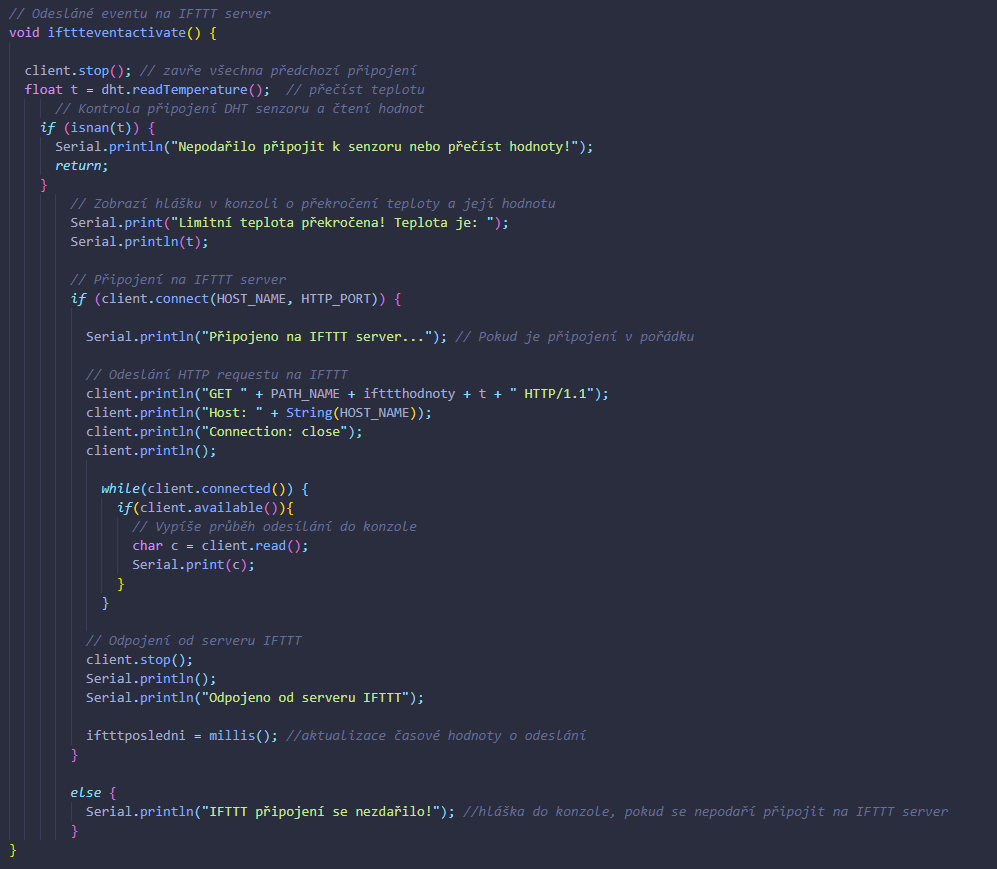
The last part of the code is the ifttteventactivate function , which reads the temperature after its execution, writes information about exceeding the limit and the current temperature to the console, and then sends the data to the IFTTT server, again via HTTP request. The following is a mandatory run time update for this feature.
Sending an email notification
All that remains is to send an email notification when the limit temperature is exceeded, which usually equates to a malfunctioning air conditioner. So I set up an account with IFTTT.com . In short, IFTTT is a platform that arose mainly with the advent of IoT electronics and provides the possibility of creating web-based automated applications and connecting them to network devices using the Internet.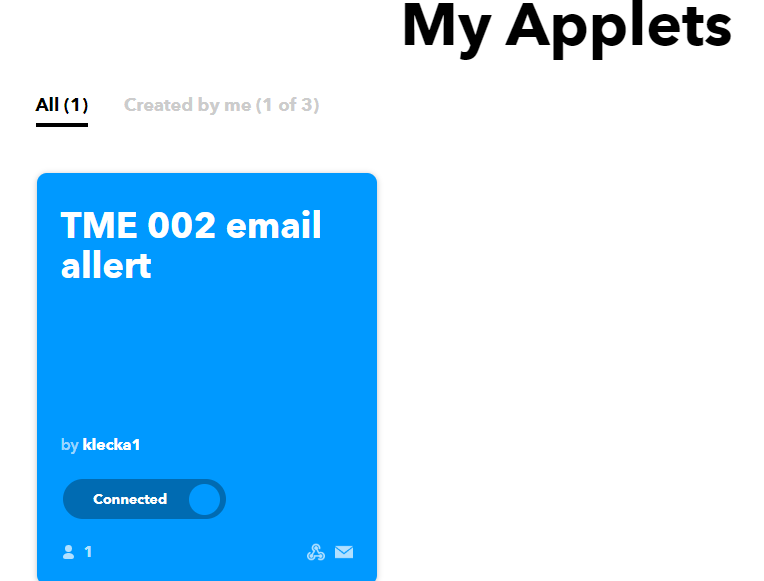
The service is completely free with a limit of 3 applets (applications). I created an Applet that has a so-called Webhook attached. It can receive an HTTP request via a specific address and, based on this request, it will trigger another action within the applet, which is to send the email specified in my IFTTT account. In the body of the email, you can set the text or several other options, so the http request also contains the current temperature, which I also send in the body of the email message. Here is a sample notification email:

Box and installation
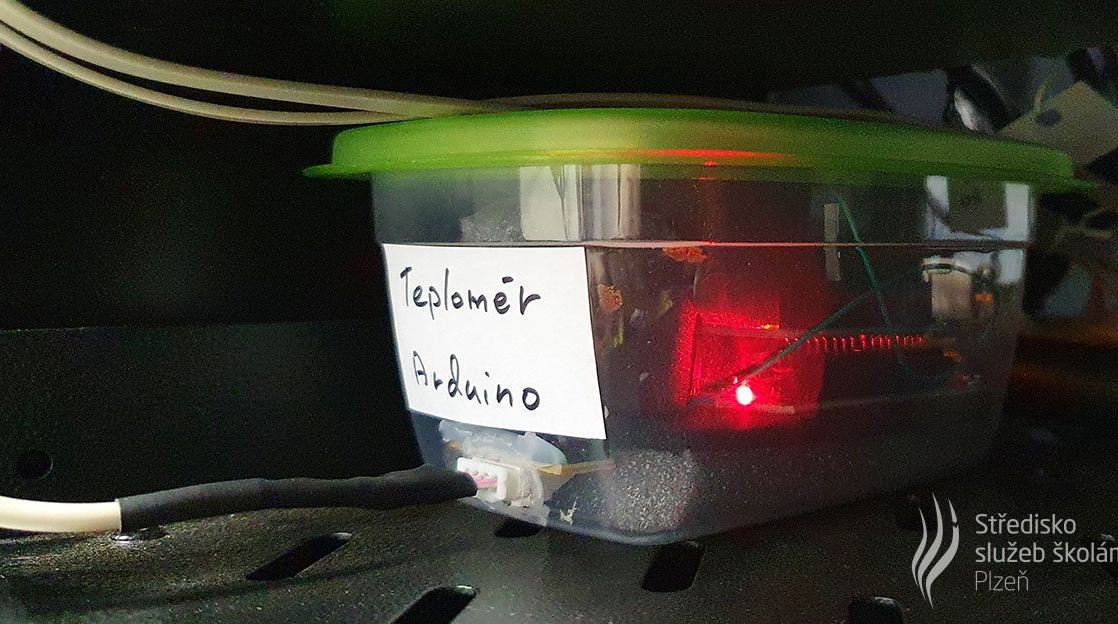
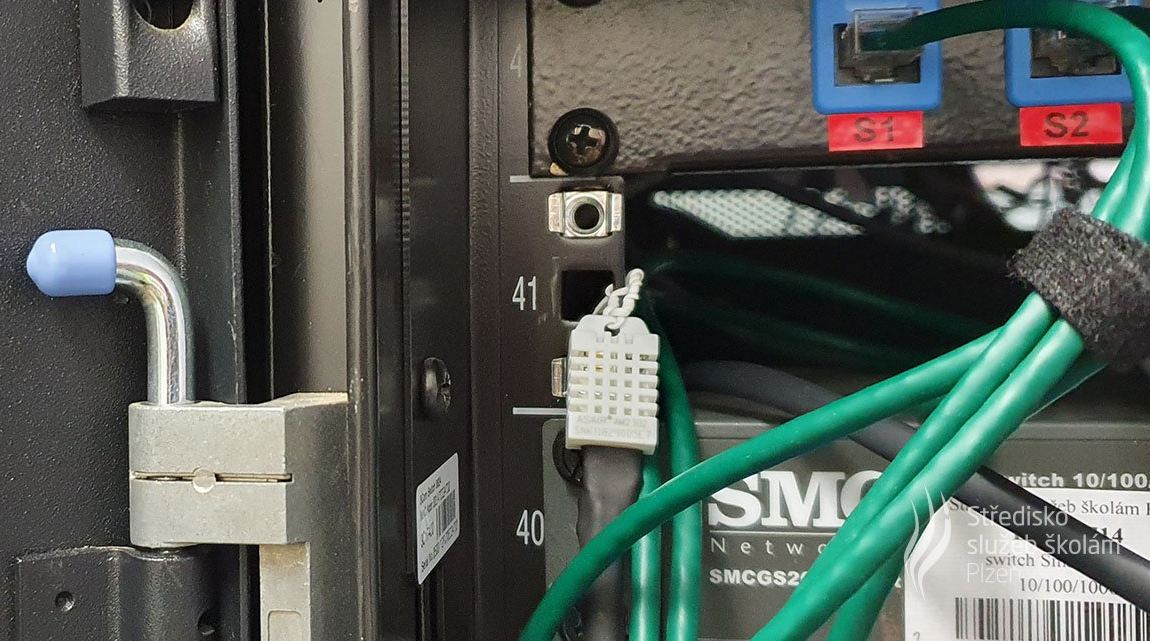
Everything is almost done. The thermometer works, the web server displays the temperature and humidity and writes the values to the database. Sending notifications is also tested. All that remains is to cultivate everything and install a thermometer in the server room. The box doesn't have to be pretty, so I found a plastic box of the right size, made holes for the connectors in it, and placed the electronics in it. Finally, I took everything to the server room and plugged it in. I placed the sensor inside the rack on the front side. Air is always drawn in from this side. At the back of the rack, the thermometer could report that the temperature limit has been exceeded, as the devices blow hot air out the back.
This article is not a literal guide, but rather an inspiration for what can be done with a little time, money and imagination. I spent up to 10 hours on the whole project, and the budget was 500 CZK.