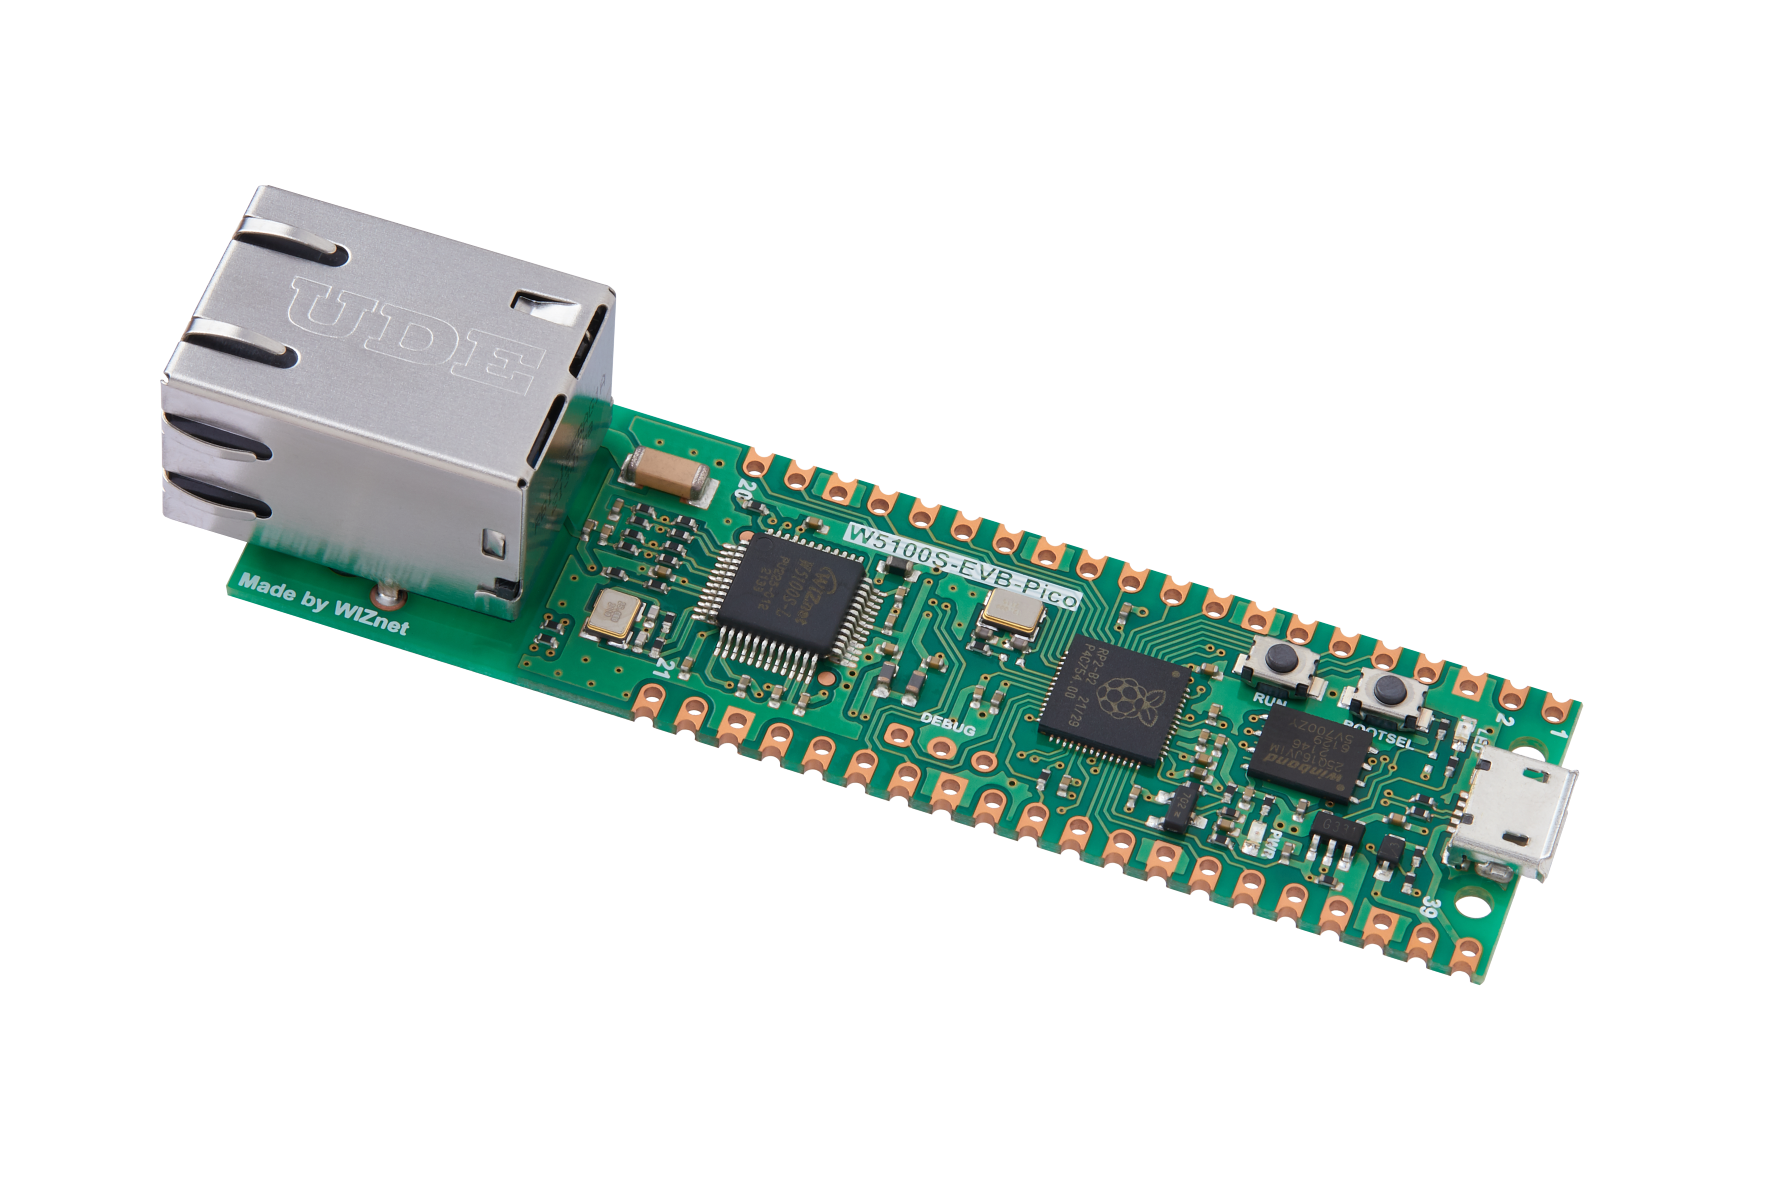
Simple MQTT project with Pico and Ethernet-Hat using Prompt (feat W5100S-EVB-PICO)
We developed an MQTT RGB lamp using Pico, WIZnet W5100S, & Pico Bricks. Learn about the prompt & process for Chat GPT's 'code interpreter'.

Software Apps and online services
There are many introductions on how to be coding with ChatGPT. I've also tried using it to create simple examples or generate some logic. But is it possible to develop a project with only ChatGPT?
ChatGPT4 has recently opened the Code interpreter feature. Let's try using this new feature.
I proceeded only with prompt writing, without any commands or extension applications.
result? It's a great success.
Except for some very simple code modifications, most of the code was done using chatGPT
Pico Remote control Lamp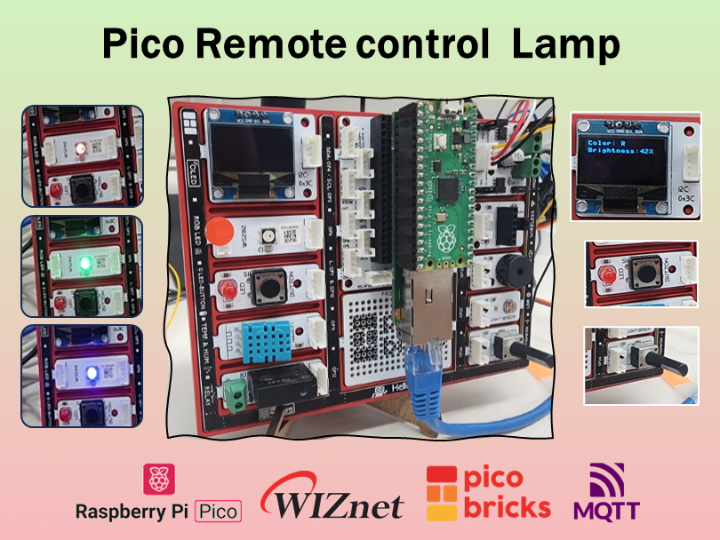
It’s a summary. Please keep that in mind and check the following text to see how it was applied.
The work was done by writing and verifying basic libraries and example codes, and then merging the necessary parts.
1. If you are using a specific module/library, please specify it. 2. After execution, if an error occurs, notify GPT of the error message and the code where the error is suspected, and request a correction. Even if you apply the modified code and errors continue to occur, persistently ask for an answer. Then, a new direction will be suggested. 3. You must clearly write what functionality you want, triggers for operation, timing, etc., to get closer to the desired action. 4. When creating a new class, if you provide a class with a similar function and structure as an example, a similar class will be created for you. 5. When using various classes in combination, it can often yield better results to request examples for each individual function and combine them, rather than inputting class information and directly asking for a finished feature. 6. If you want to apply a different logic for the same result, provide a logic example and request its application. |
Rather than overthinking it, just read it as 'Ah, they used the prompt this way for such a problem?'
If you think, 'This part is good!' then remember it and try using it in your project.
Setting up Code Interpreter
Feature Definition
To create an appropriate prompt, clearly outline the feature.
This part is important for development as well as for writing prompts. When you clearly understand the feature, the questions become more precise, and it becomes clear which parts to divide and work on.
Since there are many cases where you work in parts and then merge, understanding the overall structure is even more crucial.
**- Controller Device**
1. The controller device will use MQTT to transmit JSON data to the RGB lamp. This data will include information to adjust the **RGB color** and **brightness** of the lamp.
2. The controller device will have a push button that controls the RGB color of the lamp.
Pressed for less than 0.5 seconds, it will select the RGB color.
3. The controller device will adjust the brightness of the lamp using a variable resistor.
Values will be mapped to brightness levels 1 ~100.
4. Show the RGB color and brightness information of the lamp on the OLED display.
**- RGB Lamp Device**
1. The RGB lamp device will receive JSON data via MQTT from the controller device.
This data will include information to adjust the **RGB color** and **brightness** of the lamp.
2. The RGB lamp device will adjust its RGB values and brightness based on the received JSON data.
3. Show the RGB color and brightness information of the lamp on the OLED display.
- Network: MQTT
1. Init
If you are using a specific module/library, please specify it.
Request Network and MQTT basic examples. Network and MQTT information are declared with define.
MQTT default |
Prompt 1: Certainly, here's a basic function for using MQTT with MicroPython and the WIZNET5K driver. In this function, the device is set to a static IP address of 192.168.11.101, with a gateway of 192.168.11.1, a subnet mask of 255.255.255.0, and a DNS server at 8.8.8.8. The MQTT broker is at IP address 192.168.11.100 and the topic is ctrl_state. user name and password is not used. Keep alive=60. spi configuration:baudrate: 2_000_000, mosi:19 miso:16 sck:18 cs:17 reset:20, add default subcript and publish. Prompt 2: Please define the contents related to user name, IP,gate way, netmask, dns and topic in the code you wrote . |
ChatGPT completed it in one go. I tested the subscribe and publish functions using Mosquitto.
Since MQTT is often used in other projects, we create it as a library.
Prompt1: I'm going to create the below code as a library by making it into WIZnetMQTT.py. Please modify it into a class format to make it easy to use as an API. Prompt2: In the class you've written, we're going to use the network init part of the init function in a different function. Please divide it excluding that part, and only include the MQTT init. |
After receiving the code to update in the library and the test example for the main, I checked its operation again and it works well.
2. Subscript callback
To use the MQTT lib more diversely, we allow for the registration of callback functions to handle sub messages.
If there is no callback, it is designed to directly return the topic and message.
Please modify the def sub_cb(self, topic, msg) function to make it more general-purpose. If there's a callback provided, utilize the callback function. if not, return the topic and message. |
class WIZnetMQTT: def __init__(self, username, broker_ip, topic, keep_alive, callback=None): … self.callback = callback … def sub_cb(self, topic, msg): if self.callback: return self.callback(topic, msg) else: return topic, msg |
For testing purposes, I'll create a subscription callback function.
Since we plan to receive data in JSON format, I'll add a parsing function.
Prompt2: Also, could you provide an example of using the callback? The received message is in JSON format, like {color:"R", brightness: 0}. The color value can be 'R', 'G', or 'B', and the brightness value ranges from 0.01 to 1. In the WIZnetMQTT class, please include a callback function that can parse this JSON message. |
def example_callback(topic, msg): try: data = json.loads(msg) color = data.get("color", None) brightness = data.get("brightness", None) … print(f"Received color: {color}, brightness: {brightness}") except json.JSONDecodeError: print("Error decoding JSON!") |
If you run it as it is, an error will occur.
After execution, if an error occurs, notify GPT of the error message and the code where the error is suspected, and request a correction.
Even if you apply the modified code and errors continue to occur, persistently ask for an answer. Then, a new direction will be suggested
Prompt: I encountered an 'AttributeError: 'module' object has no attribute 'JSONDecodeError' error in the function below. What could be the issue in example_callback |
…To handle this, you can catch a more general exception, like Exception, to capture any kind of error that arises during the JSON decoding process: … except Exception: # Catch any exception, not just JSONDecodeError … |
You check for normal operation.
Module
For modules, I have a library that I've previously created.
Existing classes, I either use them as they are or add to them, and for non-existing classes, I create them to match a similar format.
(Most of this library was also created using ChatGPT)
1. Potentiometer
The Potentiometer has a simple logic. I will add the Potentiometer example provided by Pico bricks and the structure to refer to from picobricks_utils.py's class(picobricks_hum_temp) to the prompt.
You must clearly write what functionality you want, triggers for operation, timing, etc., to get closer to the desired action.
When creating a new class, if you provide a class with a similar function and structure as an example, a similar class will be created for you.
Prompt: This is the basic function for the Potentiometer. "pot=ADC(Pin(26)) pot_val=((pot.read_u16()/65535.0)*20) +1 " Please write it in a format like the class below. class picobricks_hum_temp: ~Omitted~ |
import machine from machine import ADC, Pin
class Potentiometer: ~Omitted~ |
The modification was successful, but the output value is a decimal ranging from 1 to 21.
Change this to a function that maps it to integers from 0 to 100. (The default range is 0~100).
If you want to modify a part of the output, instead of creating a new prompt, only request the section you want to correct from the written output1.
Prompt: The result of this function has min and max values as decimals between 1.0 and 21.0. Please add a function that maps based on the input min and max values. The default values should be 1 and 100, and they should be configurable through parameters in the init method |
def __init__(self, pot_pin=26, read_timer=2, min_val=0, max_val=100): self.min_val = min_val self.max_val = max_val def _map_value(self, value): # Map the value from [1, 21] range to [self.min_val, self.max_val] range return ((value - 1) / (21 - 1)) * (self.max_val - self.min_val) + self.min_val |
2. Button
There's already a class created for the button.
However, since there is only a toggle button, I will add a push button mode and a push callback.
Also, I will add mode selection, so it operates according to the selected mode.
(Since the default mode is "on/off", it won't be a problem with the example previously written).
Prompt1: class picobricks_button: ~Omitted~ Prompt2: Please divide the set_toggle_button_state function into two modes: "on/off" and "push." When it's in "push" mode, execute the push callback. |
class picobricks_button: def __init__(self, btn_pin=10, detect_time_ms=500, mode="on/off"): self.push_callback = None self.mode = mode |
It works well. Let's create a callback function for this.
Based on the push action, let's change the State from R->G->B... and create a function to read the set RGB values
Prompt1: Create a function to register in the push callback. Implement a logic where, upon pressing the push button, the RGB state cycles and changes in the order of "R," "G," "B" repeatedly. Prompt2: With this function, the initial value is set to "B," so please modify it to start with "R." Additionally, add a "get" function that allows reading the currently set RGB value. |
class RGBController: def __init__(self): def cycle_rgb_state(self):
def main(): btn = picobricks_button(mode="push") btn.set_button_callback(push_callback=rgb_controller.cycle_rgb_state) while True: btn.set_toggle_button_state() time.sleep_ms(50) |
I requested a function, but I received a class. Since the RGB circle seems to be used in various forms, I will add it as it is in the class format to picobricks_utils.py.
3. Ramp Control
When using various classes in combination, it can often yield better results to request examples for each individual function and combine them, rather than inputting class information and directly asking for a finished feature.
From above, we combine the two functions to create a button and Ramp control function.
And I proceed while modifying the error message.
I need examples for button push and Potentiometer. I need functions to put in the main. Create a function that prints the current RGB value and Potentiometer/100 value whenever the button is pushed or the Potentiometer value changes. ~exmaple button/ potentiometer~ Prompt2: When I made these modifications, the changes aren't updating in real-time. What could be the issue? Prompt3: Read values every 1 second and print the changed values whenever the button and Potentiometer values are different from the previous ones. Prompt4: There is a bug where the RGB value changes automatically when the Potentiometer changes without any button action. Please fix this issue. |
And using [time.sleep(1)] for a time delay. But it isn't the best method.
If you want to apply a different logic for the same result, provide a logic example and request its application.
Prompt5: Set the timer to read every 1 second. Use the format 'get_time' instead of using 'sleep' current_pot_value = pot_value_scaled() if current_pot_value != prev_pot_value: print(f"Brightness Value changed to: {current_pot_value:.2f}") prev_pot_value = current_pot_value Prompt6: Reduce the timer to 500ms. |
4. OLED
I've already created a class for OLED, and I will add a new function that displays different content on each line.
As there are multiple print functions, the function names become less readable. I request a modification.
Prompt1: Please add an 'oled' function to the class below that allows inputting different content in each of the 5 lines. Prompt2: Ensure that the call to self.oled.text(line5, 5, 48) is not made if there is no input on a specific line. Prompt3: Please rename the function |
Using the variables created in Button and Potentiometer, display the current color and brightness values on the OLED.
Since there is a previous prompt writing history, there's no need to input additional variable information.
Prompt1: Referencing the function below, please create a function that prints 'Color: {rgb}' on the first line of the OLED and 'Brightness: {current_pot_value}%' on the second line, using the provided cur_rgb and current_pot_value values Prompt2: When values change, I want to update both 'Brightness' when changing 'Color' and 'Color' when changing 'Brightness.' I'd like both to be displayed simultaneously and only update the value that has changed |
We also create a JSON encoding function using the generated values.
5. Lamp control
Create a Lamp control device.
First, we'll use dummy data for the JSON message.
Using the previously created classes and functions, display data on the OLED according to the JSON message and control the RGB LED.
Prompt1: This is a function for parsing JSON messages. When 'color' and 'brightness' are different from their previous values, create a function to control the Neopixel. Please refer to the Neopixel class. |
I've conducted tests, and it works well.
Now that the individual functions of each device are completed, let's finalize the MQTT control part.
I will input both completed codes and request them to be combined.
As emphasized before, rather than requesting a complete code from the beginning, it's more efficient to have codes written for each function and then request a merge. This approach ensures detailed functionality is well-implemented and reduces the number of attempts.
We also change the function names to match their functionality.
After running the code, if an error occurs, you just need to request a modification.
Prompt1: Combine the two codes. Prompt2: When calling 'update_oled_display', also call the 'generate_json_message' function with the same parameters as 'update_oled_display'. Additionally, use the return message from 'generate_json_message' to execute the 'publish()' function. Prompt3: Modify the function name of 'update_oled_display' to reflect its updated functionality. Prompt4: NameError: name 'mqtt' isn't defined |
For the Control device, we classify the features as MQTT Publish, button, potentiometer, and OLED. For the Lamp device, we classify them as MQTT subscribe, OLED, and controlled RGB LED.
Since it's a simple task, I coded it directly.
I'll share with you the process of writing prompts that I used while working on the project.
For the history of all my work, please refer to the chatgpt log here. Many trials and many failures are documented.
https://chat.openai.com/share/5039b460-f0fb-4347-854a-ba2503c17311
And here is a utility to help you write your prompts. I wrote all the prompts myself, but using this utility can be very effective.
No coding! iot developers you can do it (with GPT)
The project is now complete. It was a simple project, wasn't it?
Even though it was a small project, we proceeded with development solely using chatGPT.
As with coding, where the more you practice, the better you become, it seems the same goes for using prompts.
While it's crucial to experience parts of big projects in development, it's also important to go through the beginning and end of smaller projects.
I've used it frequently, but it was my first time developing from start to finish only with prompts, and I feel like I'm getting the hang of it more than before.
While it was a bit rough around the edges being my first time, I'll continue to use it more. If there's a better project in the future, I'll be back with another project.

