
[AIoT] Smart Glasses for Blind Person using AI
The glasses detects obstacles in front of it with voice notification. It can recognize Indian Rupees with a voice message.
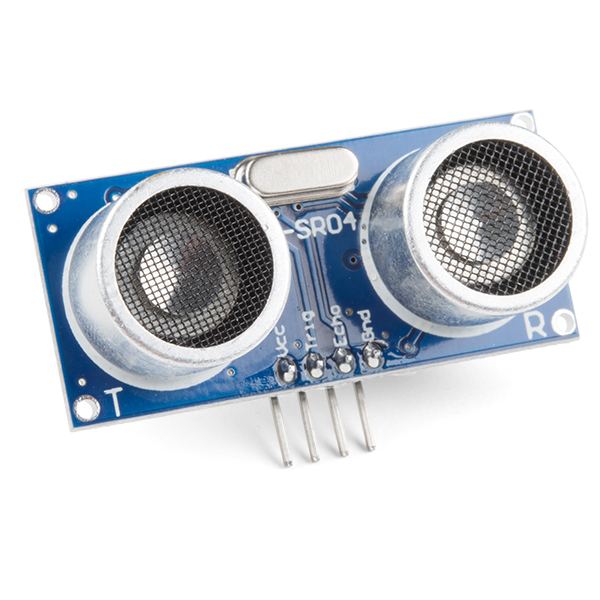
sparkfun - Ultrasonic Sensor - HC-SR04
x 1
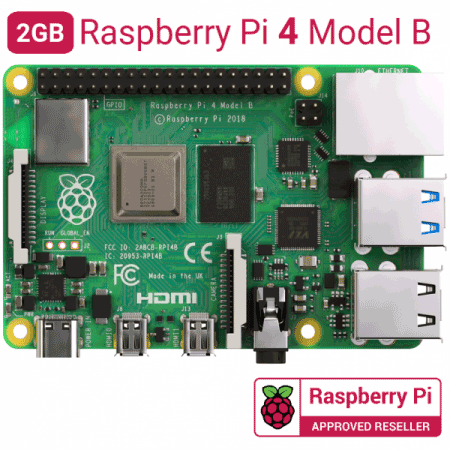
Raspberry Pi - Raspberry Pi 4 Model B
x 1
Story
Introduction
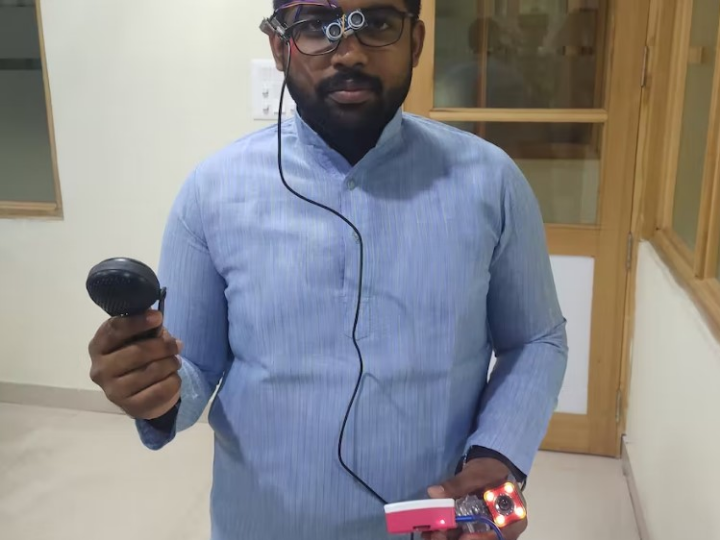
The glasses with an obstacle detecting module in the center, a processing unit and a power supply make up this device. The processing unit is coupled to the obstacle detecting module and the output device. The central processing unit receives power from the power supply. A ultrasonic sensor serves as the obstacle detection module, while a control module serves as the processing unit, and a buzzer serves as the output unit. The control unit activates the ultrasonic sensors, which gather information about the barrier or object in front of the person, analyses it, and then sends obtained data through serial connection. After sending data, in the form of voice letting the user know if obstacle is near or far away and currency detection is enabled with AI integration.
Components
Hardware
- Glasses
- Ultrasonic sensor
- Jumper wires
- Wiznet Pico board
- Raspberry Pi 4 (Model B)
- Bluetooth Speaker
- Power Bank
Software
- Yolo v5 Object detection
- Arduino IDE
- Google Colab
- PyCharm - Python IDE
- Raspberry Pi IDE
Pin Configuration
Ultrasonic sensor (HC-SR04) consists of 4 pins.
- GND - It is connected to GND of Pico Board.
- Trig - This pin is connected to GP12.
- Echo - Its connected to pin is connected to GP11.
- VCC - Its connected to 3V3(OUT).
AI implementation
Voice Module:
We have used Python eSpeak Module. eSpeak is a small open source software speech synthesizer for Linux and Windows that supports English and other languages. eSpeak employs a technique known as "format synthesis." This enables a large number of languages to be supplied in a little space. It basically converts text to speech format. There are several Voices to choose from, each with its own set of attributes that can be changed. In this Project we are using eSpeak for two purpose convert the distance calculated using ultrasonic sensor to speech. It will let user know how safer are they to move forward. The other purpose is currency detection. When any 100, 200, 500 etc notes is bought in front of camera. Detected note will be speak out loud using eSpeak module.
Camera Module:
The image is trained with yolov5 library using the mechanism of annotation. The Indian currencies are annotated using Roboflow software for the image training. Training is done by collecting Indian currencies. We then annotate these pictures differentiating between new Indian notes. Then feed it to the training algorithm. Ensure that the present working directory is the YOLOV5 directory and all dependencies are installed. The coco128.yaml file has to be updated with the dataset directory and also the classes used are classification of Indian currencies.Train using the command:
python train.py --img 416 --batch 16 --epochs 100 --data coco128.yaml --weights yolov5s.pt --cache
A pertained weight has been assigned to the training [yolov5s.pt] and is running at 100 epochs. Once the training is done check in the “runs” folder to check the accuracy of predictions in the.jpg files. The real time detection can be used with the command :python detect.py --weights best.pt --img 416 --conf 0.5 --source 1
While running this command the present working directory should be the root of the yolov5 folder. The weight file ending in “.pt” file has to be given in the - -weight argument. The source can be set to 1 or 0 depending on the webcam used internal or external. On running this command a frame opens up with bounding box detection. In the detect.py we have made some edits so that the frames will only only be sent at a slower rate. The classification of Indian currency will be shown in the screen. In this project we are sending this note classification to eSpeak.. These status messages include “100, 200, 10, 20, 50, 500, 2000” On receiving the status from camera. Once detected it gives the note detected as voice command.
Arduino Code Explanation:
The code explains distance calculation using ultrasonic sensor. Line [1 - 2] defines the pin number for trig and echo pin of ultrasonic sensor. Line [3 - 4] initializing the the variables. Line [6 - 11] Void setup configures the specified pin to behave as output/input. Line [14 - 25] function to calculate distance. Formula used is dist= time_taken*0.034/2. Line [27 - 33] Void loop here getting the distance calculated by ultrasonic sensor from the function defined.
Python Code Explanation:
The code explains text to speech voice module. Python language is used. eSpeak module is used to convert the text to speech. The distance data sensed by ultrasonic sensor is passed to python code used serial communication. Line [1-3] importing libraries. Line [ 6 ] is where we give the COM port as per your device. Make sure it is correct. Here our device COM is /dev/ttyACM0 as per raspberry pi. Therefore, its used for transfer of data from pico board to python. Line [ 9 ] where it starts the for loop condition. Line [ 11 - 13 ] where we convert the byte string to a unicode string, then convert the unicode string to an int. Line [ 16 - 31 ] if condition where if the distance is less then 20 the it will let user know to “stop there is a near by obstacle, if condition is greater than 20 and less than 60 then it says “ object is quite a distance away. ”, if condition is greater than 40 and less than 100 then it says “ object is 1m distance away. ”, else it says “ object is far away”.
Why and How to connect Raspberry Pi and PICO?
Raspberry Pi 4 is a quad- core 64-bit processor, 4GB of RAM, wireless networking, dual-display output, and 4K video playback, as well as a 40-pin GPIO header. It's the most powerful and easy-to-use Raspberry Pi computer yet. Raspberry pi is used so that it is portable. Our own system is not portable friendly. Therefore we transferred all data to raspberry pi. BalenaEtcher is used to flash OS images to SD cards USB drivers. After flashing, the SD card is used in raspberry pi. We have to install all the required libraries. Then connect the power connection to power bank. Even connect camera and Bluetooth speaker. Before removing the display connection, keyboard, mouse check the code is running properly. Once code is running properly then remove the display etc. So that it can be portable.
-
Smart Glasses for blind person using AI

-
Circuit Diagram

-
AI Integration