NetPower
This Project : is a remote control system by network using telnet, based on Arduino UNO R3 with Ethernet Shield, which allows to control.
3
Components
Hardware components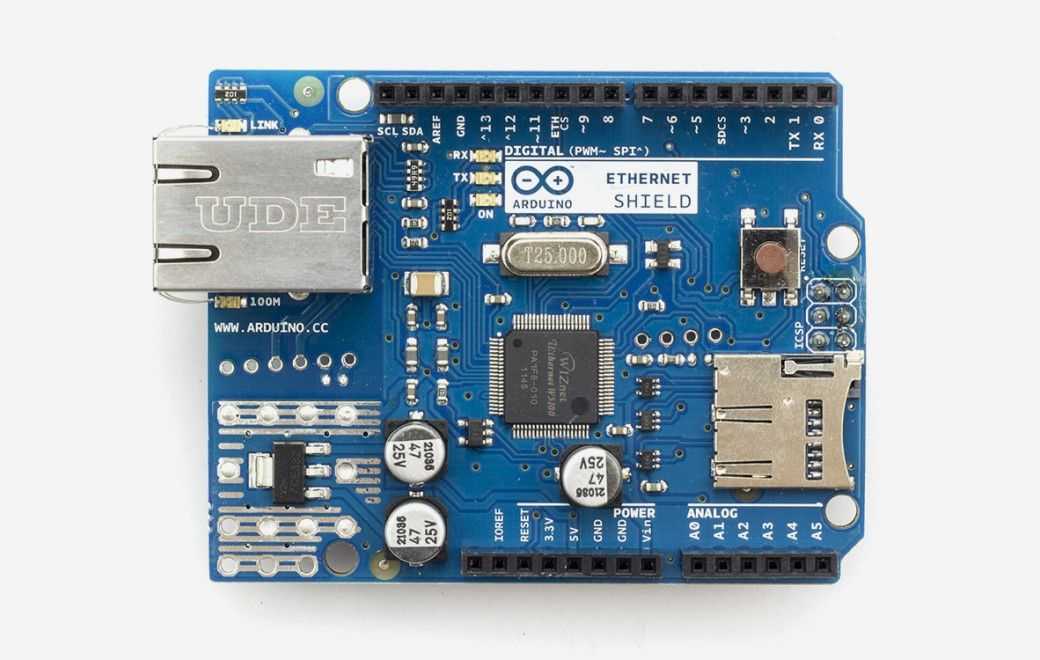
Arduino - Arduino Ethernet Shield
x 1

Project description

This Project : is a remote control system by network using telnet, based on Arduino UNO R3 with Ethernet Shield, which allows to control the status of 8 relays.
This Project: is a network remote control system using telnet, based on Arduino UNO R3 with Ethernet Shield, which allows to control the status of 8 relays.
Step 1: Stuff for the Project

With very few elements we can assemble the system, in this list are detailed.
With very few elements we can assemble the system, in this list they are detailed.
materials
- 1- Arduino UNO R3
- 1- Ethernet Shield W5100
- 1-8 Relay Board
- 10- Dupont Male-Female Cables
Step 2: Hardware Assembly


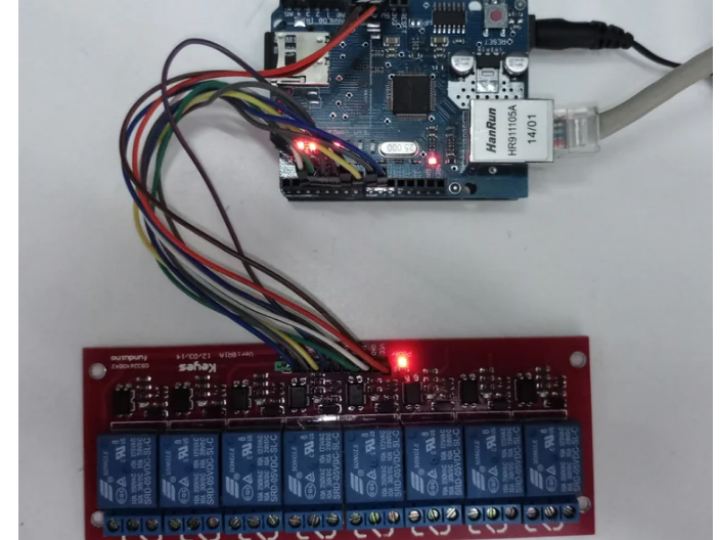
It is the simplest stage, since you only have to connect the Arduino UNO with the Ethernet Shield and then connect the cables starting from the digital pins of the Arduino UNO (actually they come out from the Ethernet Shield since it is on this one) to each contact of the relay board.
It is the simplest stage, since you only have to join the Arduino UNO with the Ethernet Shield and then connect the cables starting from the digital pins of the Arduino UNO (actually they come out from the Ethernet Shield since it is on it) to each contact of the relay board.
Step 3: The Code and Programming
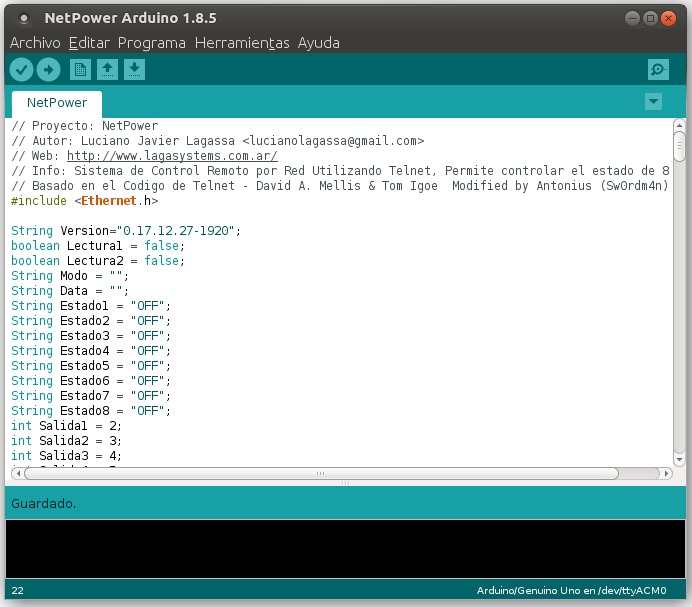
Let's say it's the part that took me longer since I was debugging and also had problems with the size of the memory in Arduino UNO, so I deleted part of the code, specifically it doesn't have login or other functions that if I had in mind to use but being very close to filling the tiny memory of the device I had to remove a lot of code, maybe in some future version I will use a more powerful hardware.
We're going to schedule, just download the compressed file and extract it, this creates a "NetPower" folder with a "NetPower. ino" file inside it, you have to move this folder (with the file) to the location where you save Arduino IDE projects. then start Arduino IDE, configure board, port and open the NetPower project, you have to configure the network parameters in the code, just program the Arduino and you will be able to use the NetPower system.
Let's say that it is the part that took me the longest since I was debugging and I also had problems with the memory size in Arduino UNO, so I eliminated part of the code, specifically it does not have a login or other functions that I had in mind to use but being very close to filling the tiny memory of the atmega I had to remove a lot of code, maybe in some future version I will use more powerful hardware.
Let's Program, you just have to download the compressed file and extract it, this creates a "NetPower" folder with a "NetPower.ino" file inside, you have to move this folder (with the file) to the location where you save the Arduino IDE projects. then start Arduino IDE, configure board, port and open the NetPower project, you have to configure the network parameters in the code, all that remains is to program the Arduino and you will be able to use the NetPower system.
Step 4: How Is It Used?
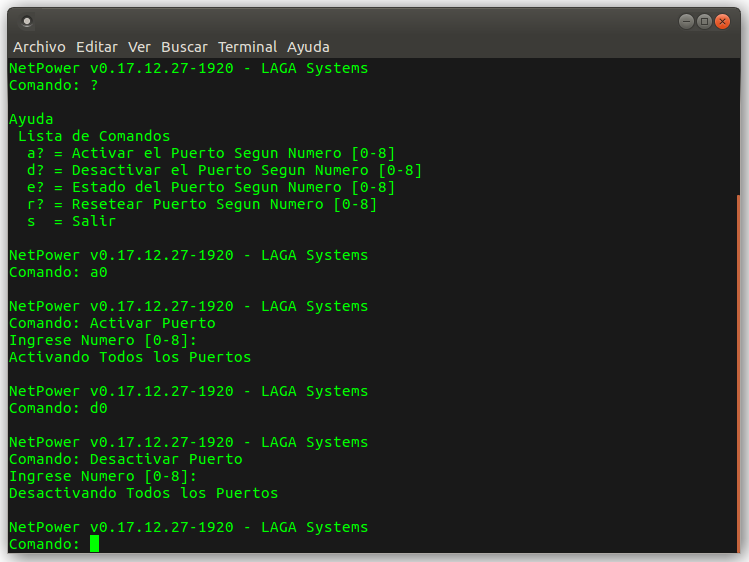
To be able to connect to the system previously had to configure the network parameters in the code, already having the system configured and programmed, we only have to execute the command: telnet SYSTEM-IP-ADDRESS
List of Commands
- a? Activate Port According to Number[0-8]
- d? Deactivate Port According to Number[0-8]
- and? Port Status According to Number[0-8]
- r? Reset Port According to Number[0-8]
- s = exit
In order to connect to the system, you previously had to configure the network parameters in the code, already having the system configured and programmed, we just have to execute the command: telnet IP-DEL-SISTEMA
Command List
- a? = Activate Port According to Number [0-8]
- d? = Disable Port According to Number [0-8]
- and? = Port Status According to Number [0-8]
- r? = Reset Port According to Number [0-8]
- s = Exit
Step 5: Final Greetings

As I have already mentioned on other occasions, many of my projects are using recycling materials, so I would like to thank all those who contribute materials for my workshop.
As I have already commented on other occasions, many of my projects are using recycled materials, for this reason I want to thank all those who contribute materials for my workshop.
