Arduino & Ethernet Shield
Arduino & Ethernet Shield
8
Project description
Arduino Example Circuit
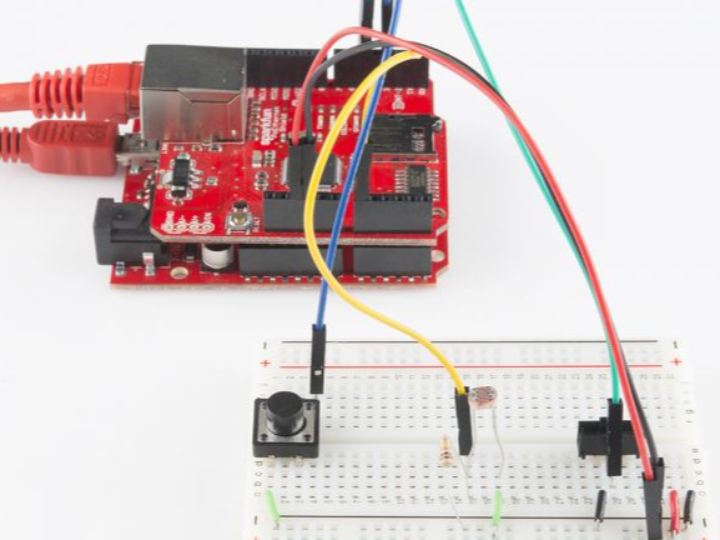
We'll use this circuit for all four of the Arduino examples. A simple selection of digital and analog sensors are used to demonstrate the abilities of the Data.SparkFun.com service.
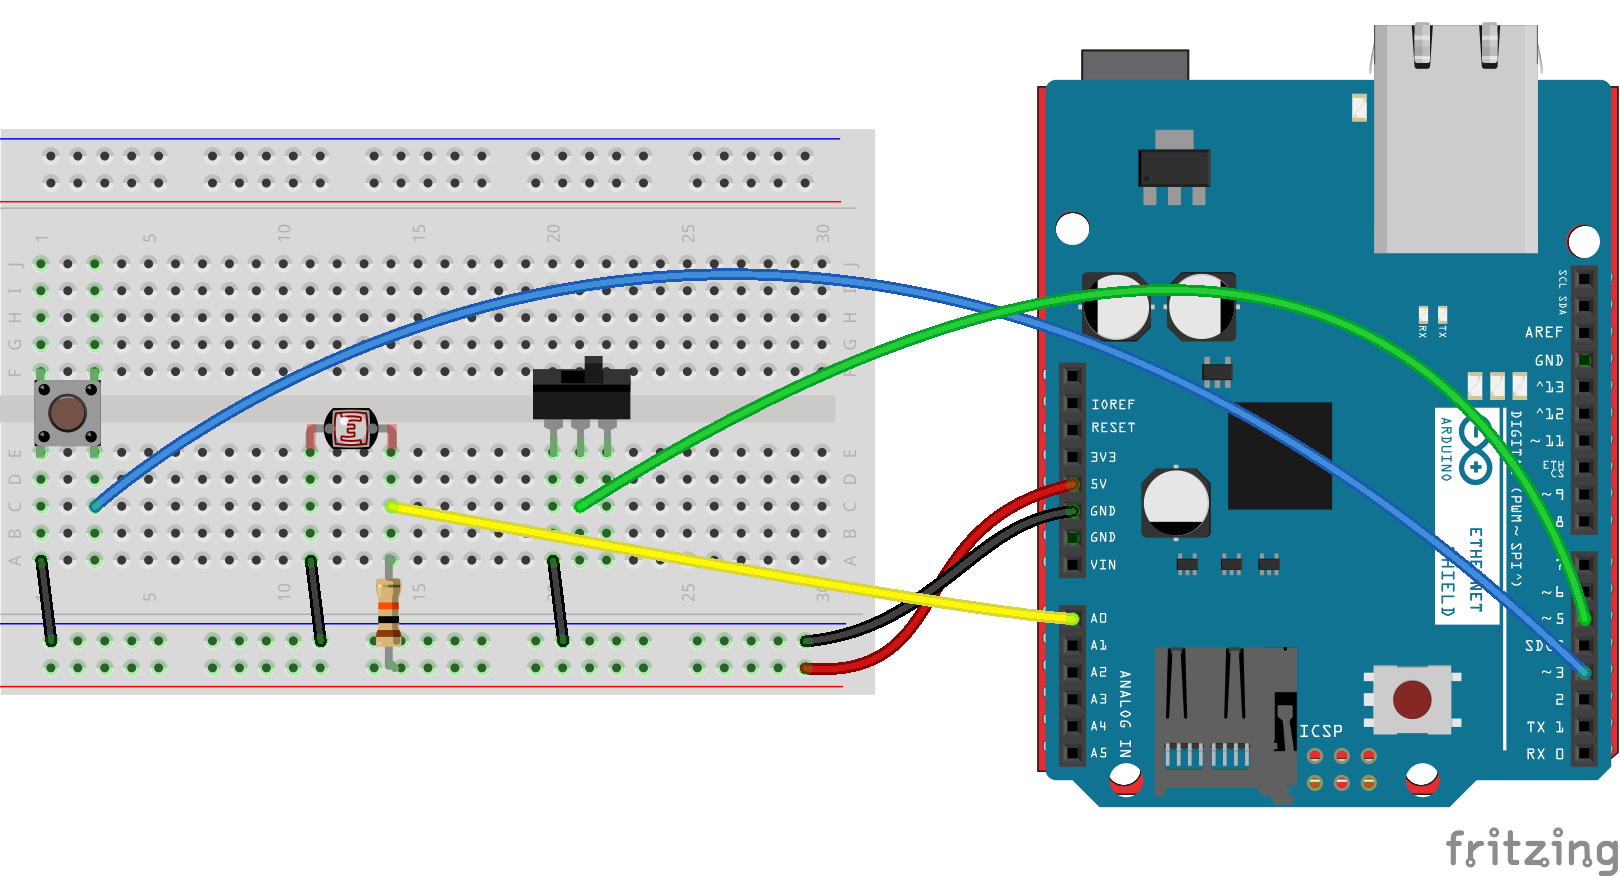
The output of a photocell (voltage divided with a 10kΩ resistor) connects to A0. A momentary push-button is connected to D3 on one end and ground on the other. And a SPDT switch can connect D5 to ground or let it float.
Running the Sketch
After you've fixed the WiFi and datastream settings, upload the sketch. Then open the Serial Monitor and set the baud rate to 115200 bps. Some debug messages will flow by at the start. Once you see your IP address printed, your Arduino is connected and you're ready to post some data.

One of the fields in this example pushes a name to the server. If you want to update the name value, type in your name into the Serial Monitor and terminate it with a '!'.
To push your data to the server, simply press the button tied to D3 (or just short that pin to ground). A few serial lines will quickly be printed. Check to make sure HTTP/1.1 200 OK is somewhere among those lines -- that means the server accepted your request.
