
TinyML Package Monitor
TinyML based Package detection for home usage
COMPONENTS
Hardware components


 Software Apps and online services


WIZnet - WizFi360-EVB-Pico
x 1
Seeedstudio - Grove Vision AI module
x 1
Arduino - Arduino IDE
x 1
Ubidots - Ubidots
x 1
WIZnet - WIZnet WizFi Library
x 1
PROJECT DESCRIPTION
With the emerging growth of online store popping out in a lot of countries, there are a lot of online customer ordering product via mail packages. Sometimes the customers are worried if the package have arrived safely or not at the front their house due too few problems such as package thief, lost package, confirmation status not corresponding with the real event, etc.
Because of that problem I want to create an easy to make project and affordable solution.
Preparation
To detect the package I will be using the Grove Vision AI module due to its easiness to build and deploy the data model needed.
As the main dev board, I will be using the wizfi360 evb pico. The Wizfi360 evb Pico are based on the RP2040 microcontroller combine the wizfi360 module as the wifi connectivity
Arduino Setup
I want this project easy to replicate by using the most common and easy way to program, using the Arduino IDE.
Before we start to the code part we need to add the board definition to the Arduino IDE by using the RP2040 Arduino core from Earle F. Philhower, III's github page or simply add this line below to the Arduino preferences

Then go to the board manager and install the RP2040 board definition
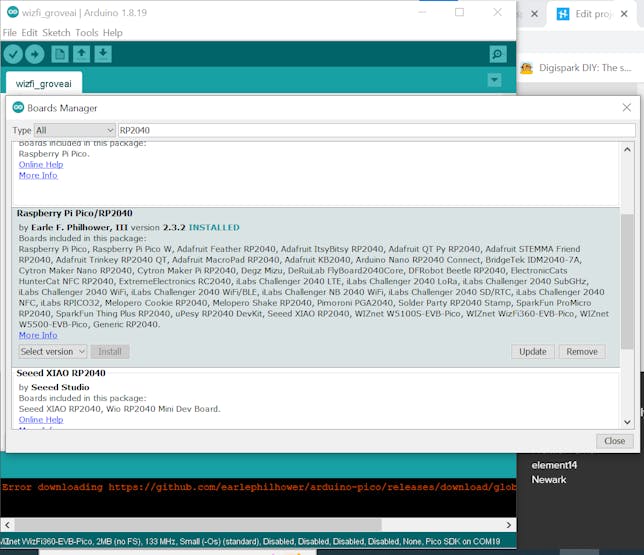
After done installing check out the Board manager menu and see the Raspberry Pi Pico RP2040 section, thankfully Phil already add the Wizfi360 EVB Pico to the board manager that we can use
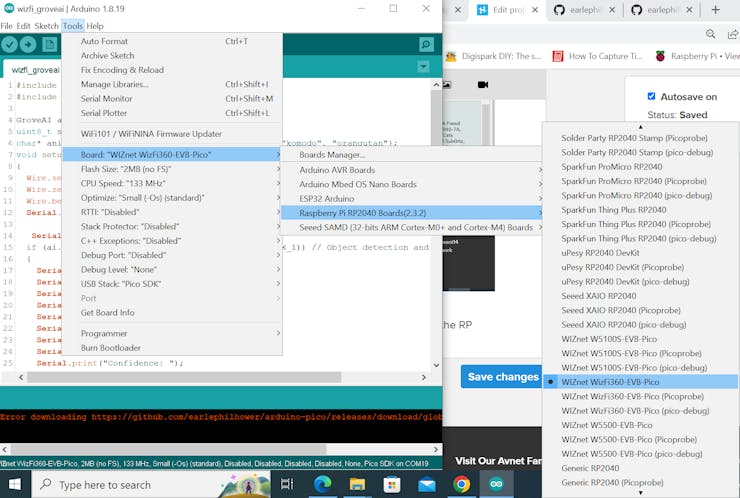
Choose the WizFi360 EVB Pico and select the COM Port assigned to the board.
Building The Package Detection Data Model
To build a custom data model for the grove vision ai module I'll be following the guide provided on wiki page from seeedstudio
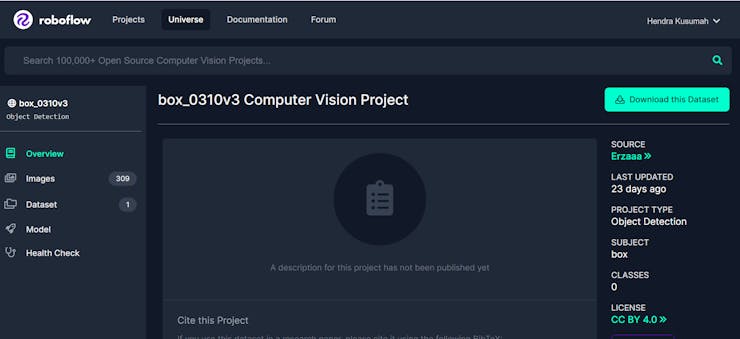
Search for the dataset on roboflow universe by visiting https://universe.roboflow.com/ and type package on the search box. For this tutorial I am gonna be using this dataset that consist of 307 images of packages
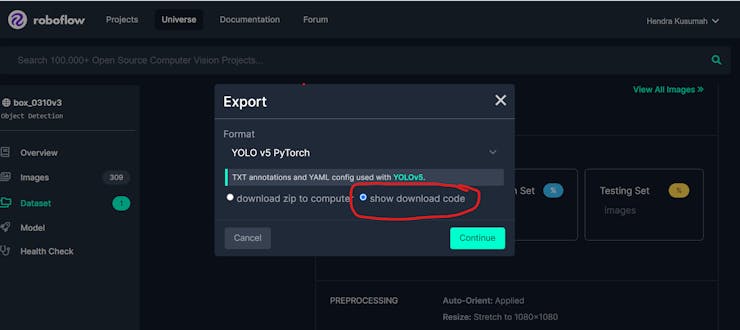
click download this dataset on the project page. choose Yolo v5 Pytorch format and click on the show download code option
Copy the text provided with your API key which should look this:
!pip install roboflow

from roboflow import Roboflow
rf = Roboflow(api_key="xxxxxxxxxxxxxx")
project = rf.workspace("erzaaa").project("box_0310v3")
dataset = project.version(1).download("yolov5")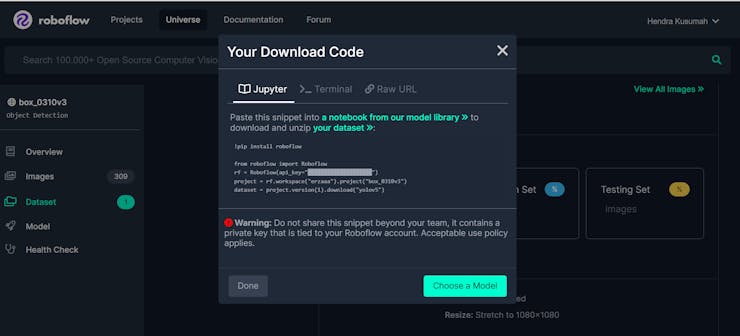
Copy the snippet text to a notepad and save it. We will be using this code part for the next part.
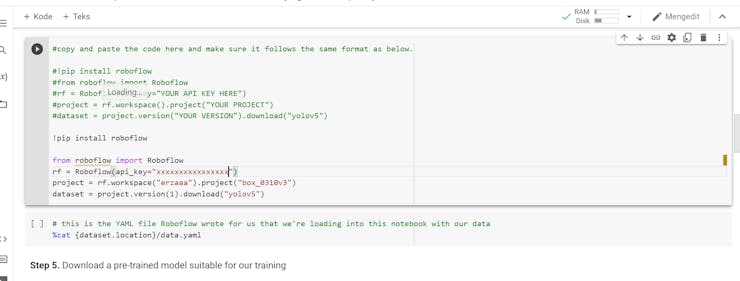
Next part we will train a new model on google colab based on the dataset that we save before.
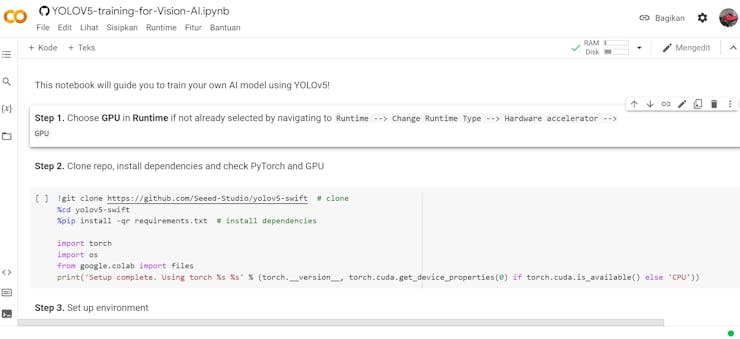
Follow along the instruction provided on the colab page until you get to the part where you need to input the download code you been saved before on a notepad for the dataset
follow along the rest of the instruction until you download the uf2 that has been made with your new data model
next we want to copy the uf2 file to grove vision by following these steps:
Step 2. Connect Grove - Vision AI Module into your PC via a USB Type-C cable

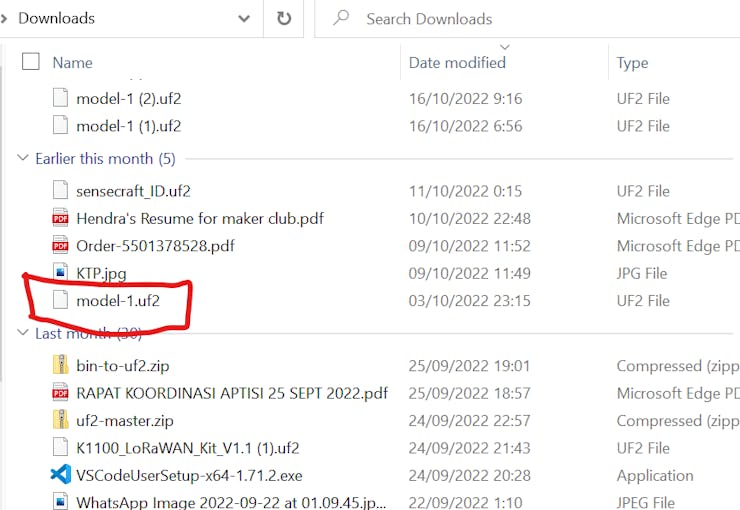
Step 3. Double-click the boot button on Grove - Vision AI Module to enter mass storage mode

After this you will see a new storage drive shown on your file explorer as GROVEAI

Step 4. Drag and drop the model-1.uf2 file to GROVEAI drive and wait for 1-2 minutes
Now the grove vision AI module have the ability to detect the package
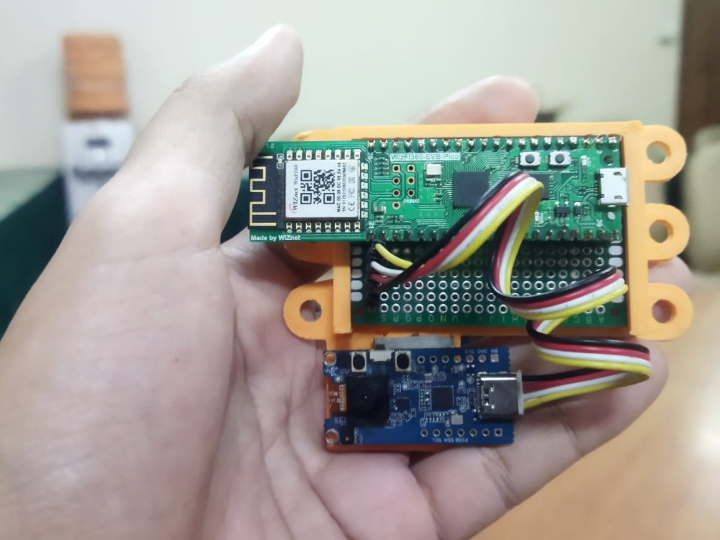
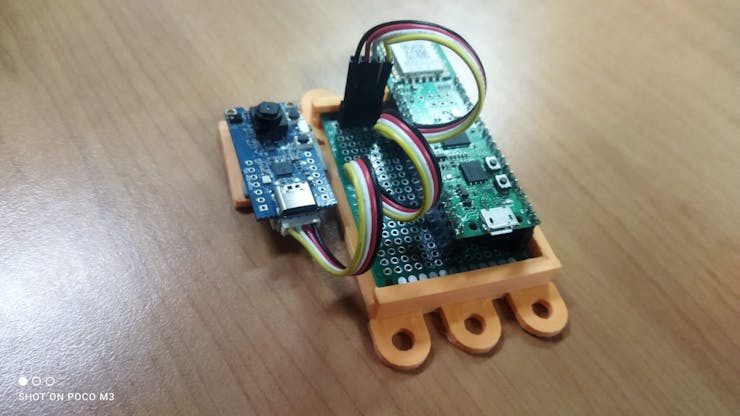
Assembling the Hardware
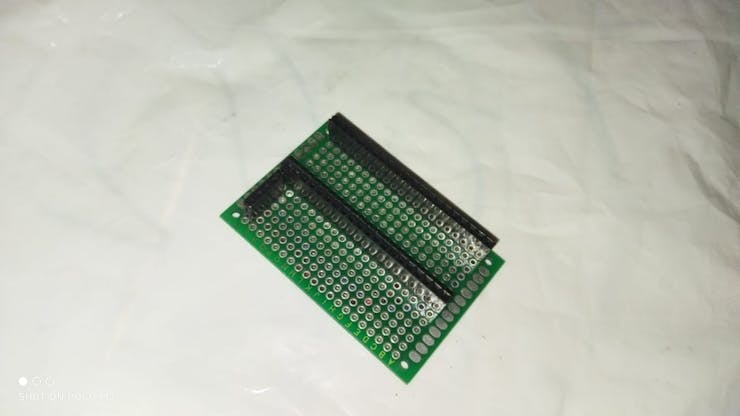
Before we test out the model we will make a simple mounting board for the wizfi360 evb pico using female headers, 4 short wire and 4x6 perfboard. Solder the female header to match the footprint of the wizfi360 evb pico then solder extra 4 pin female header on the perfboard until it look like this:
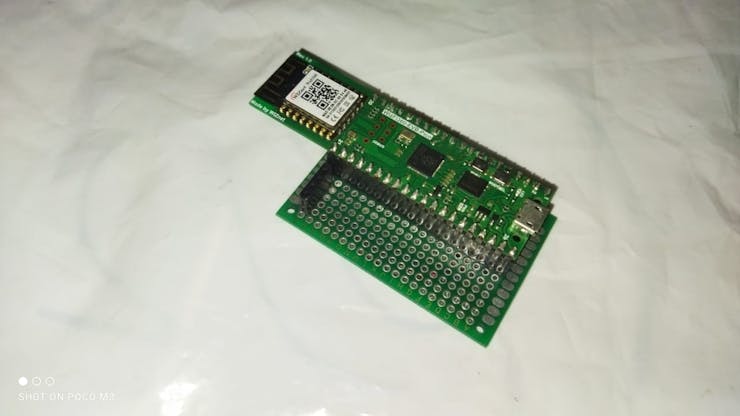
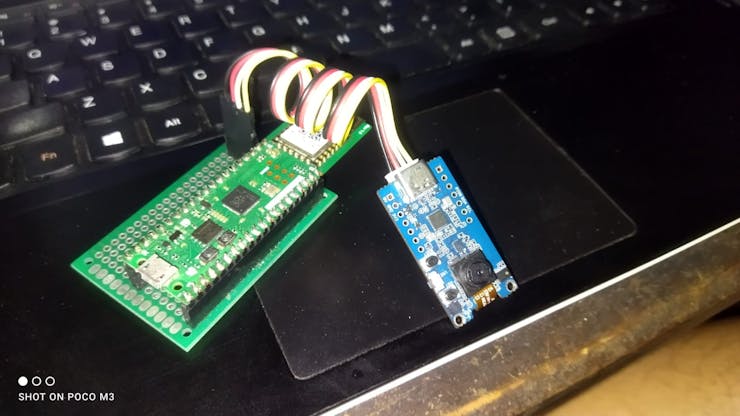
next solder the wires to the 4 headers on the side of the wizfi360 evb pico

the purpose of connecting these wires are to simplify the connection between the grove vision ai module and the mainboard. The connection are made using i2c protocol:
Grove Vision AI | Wizfi360 evb Pico
SDA <--------------------------> GP0
SCL <--------------------------> GP1
VCC <--------------------------> 3v3
GND <--------------------------> GND
Testing the Data Model
To able to read the inference from the grove Ai vision module you need to add this library to the arduino IDE:
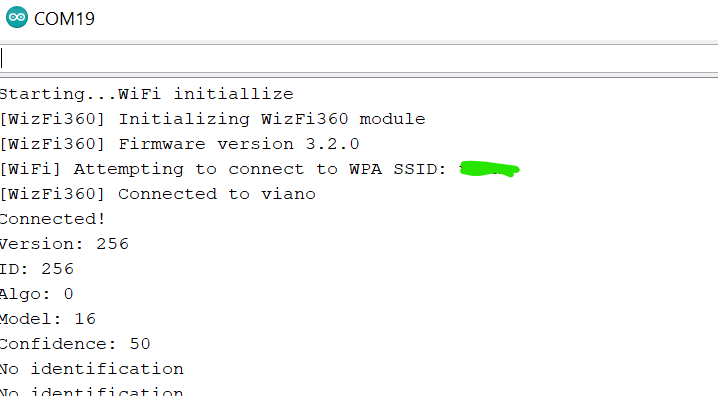
Connect the Grove vision Ai model according to the previous part. Then upload this code to the wizfi360 EVB Pico
#include "Seeed_Arduino_GroveAI.h"
#include <Wire.h>
GroveAI ai(Wire);
uint8_t state = 0;
void setup()
{
Wire.setSDA(0);
Wire.setSCL(1);
Wire.begin();
Serial.begin(115200);
Serial.println("begin");
if (ai.begin(ALGO_OBJECT_DETECTION, MODEL_EXT_INDEX_1)) // Object detection and pre-trained model 1
{
Serial.print("Version: ");
Serial.println(ai.version());
Serial.print("ID: ");
Serial.println( ai.id());
Serial.print("Algo: ");
Serial.println( ai.algo());
Serial.print("Model: ");
Serial.println(ai.model());
Serial.print("Confidence: ");
Serial.println(ai.confidence());
state = 1;
}
else
{
Serial.println("Algo begin failed.");
}
}
void loop()
{
if (state == 1)
{
uint32_t tick = millis();
if (ai.invoke()) // begin invoke
{
while (1) // wait for invoking finished
{
CMD_STATE_T ret = ai.state();
if (ret == CMD_STATE_IDLE)
{
break;
}
delay(20);
}
uint8_t len = ai.get_result_len(); // receive how many people detect
if(len)
{
int time1 = millis() - tick;
Serial.print("Time consuming: ");
Serial.println(time1);
Serial.print("Number of people: ");
Serial.println(len);
object_detection_t data; //get data
for (int i = 0; i < len; i++)
{
Serial.println("result:detected");
Serial.print("Detecting and calculating: ");
Serial.println(i+1);
ai.get_result(i, (uint8_t*)&data, sizeof(object_detection_t)); //get result
Serial.print("confidence:");
Serial.print(data.confidence);
Serial.println();
}
}
else
{
Serial.println("No identification");
}
}
else
{
delay(1000);
Serial.println("Invoke Failed.");
}
}
else
{
state == 0;
}
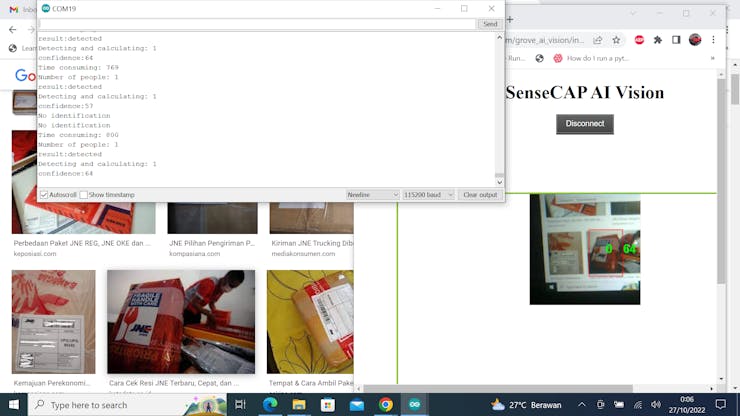
}after uploading plug usb C data cable to the grove vision AI module and open a link that pop up after you connect the module to the usb port of the computer, then you will see the inference of the data model that you build on the previous part
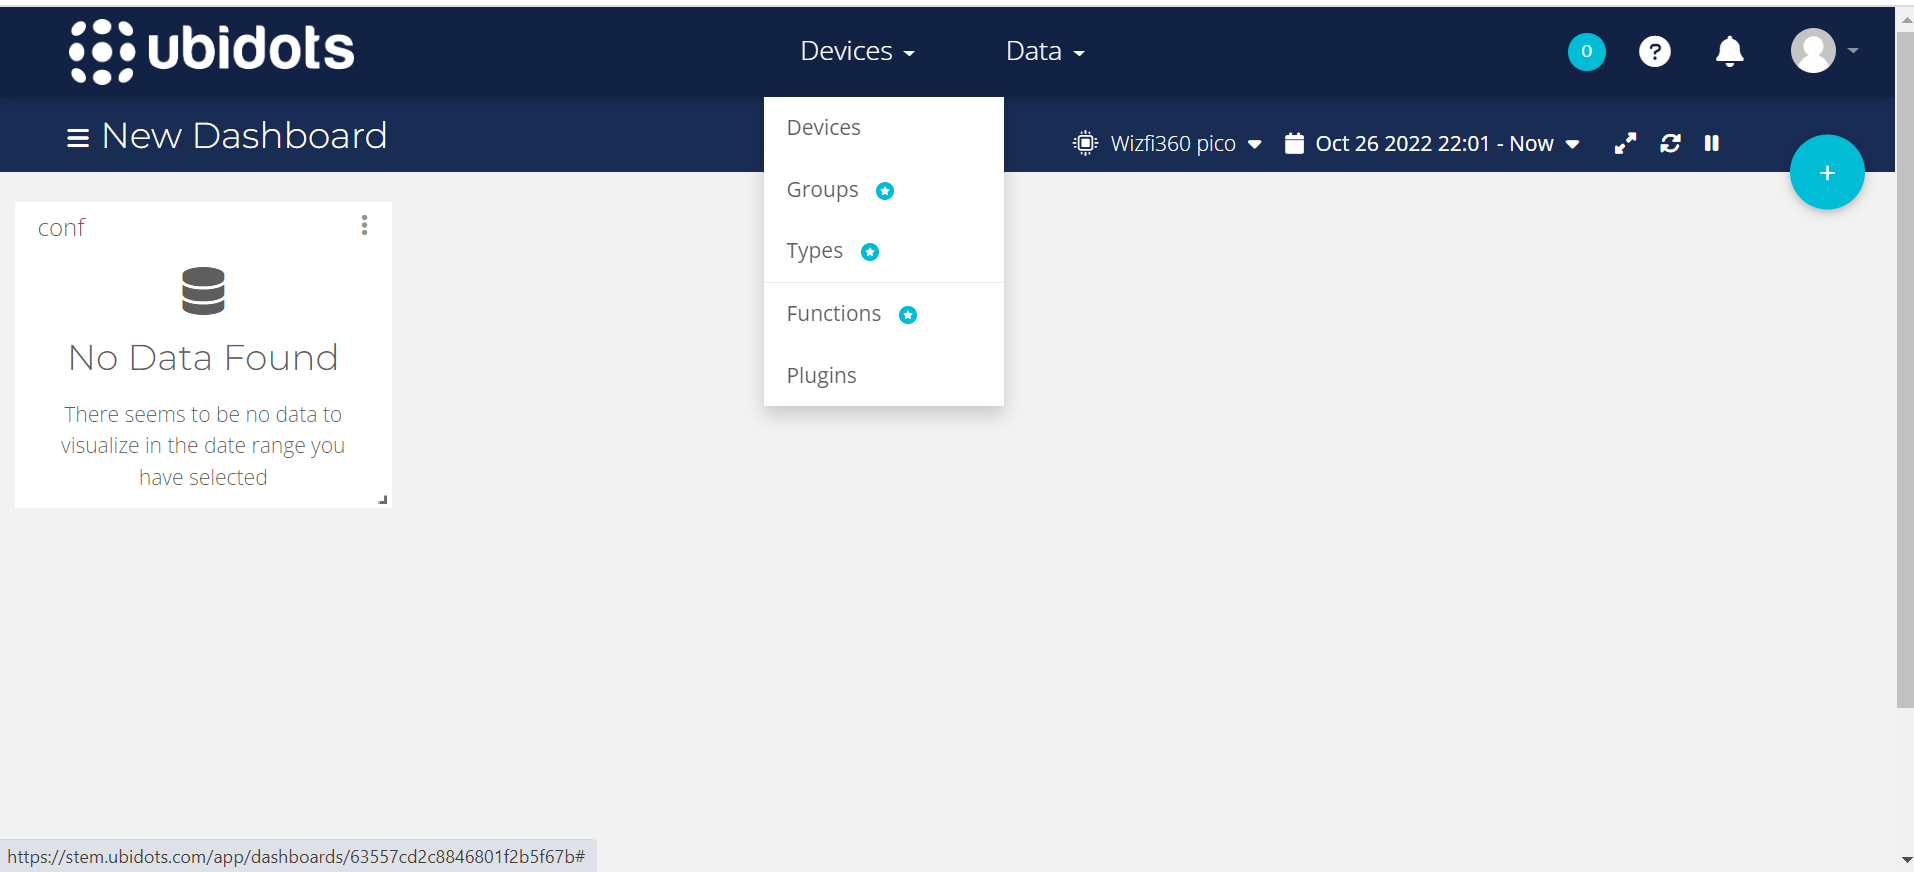
Upload data to Ubidots and get email notification
To be able to send an email notification easily and monitor the package arrival we will be using the ubidots service.

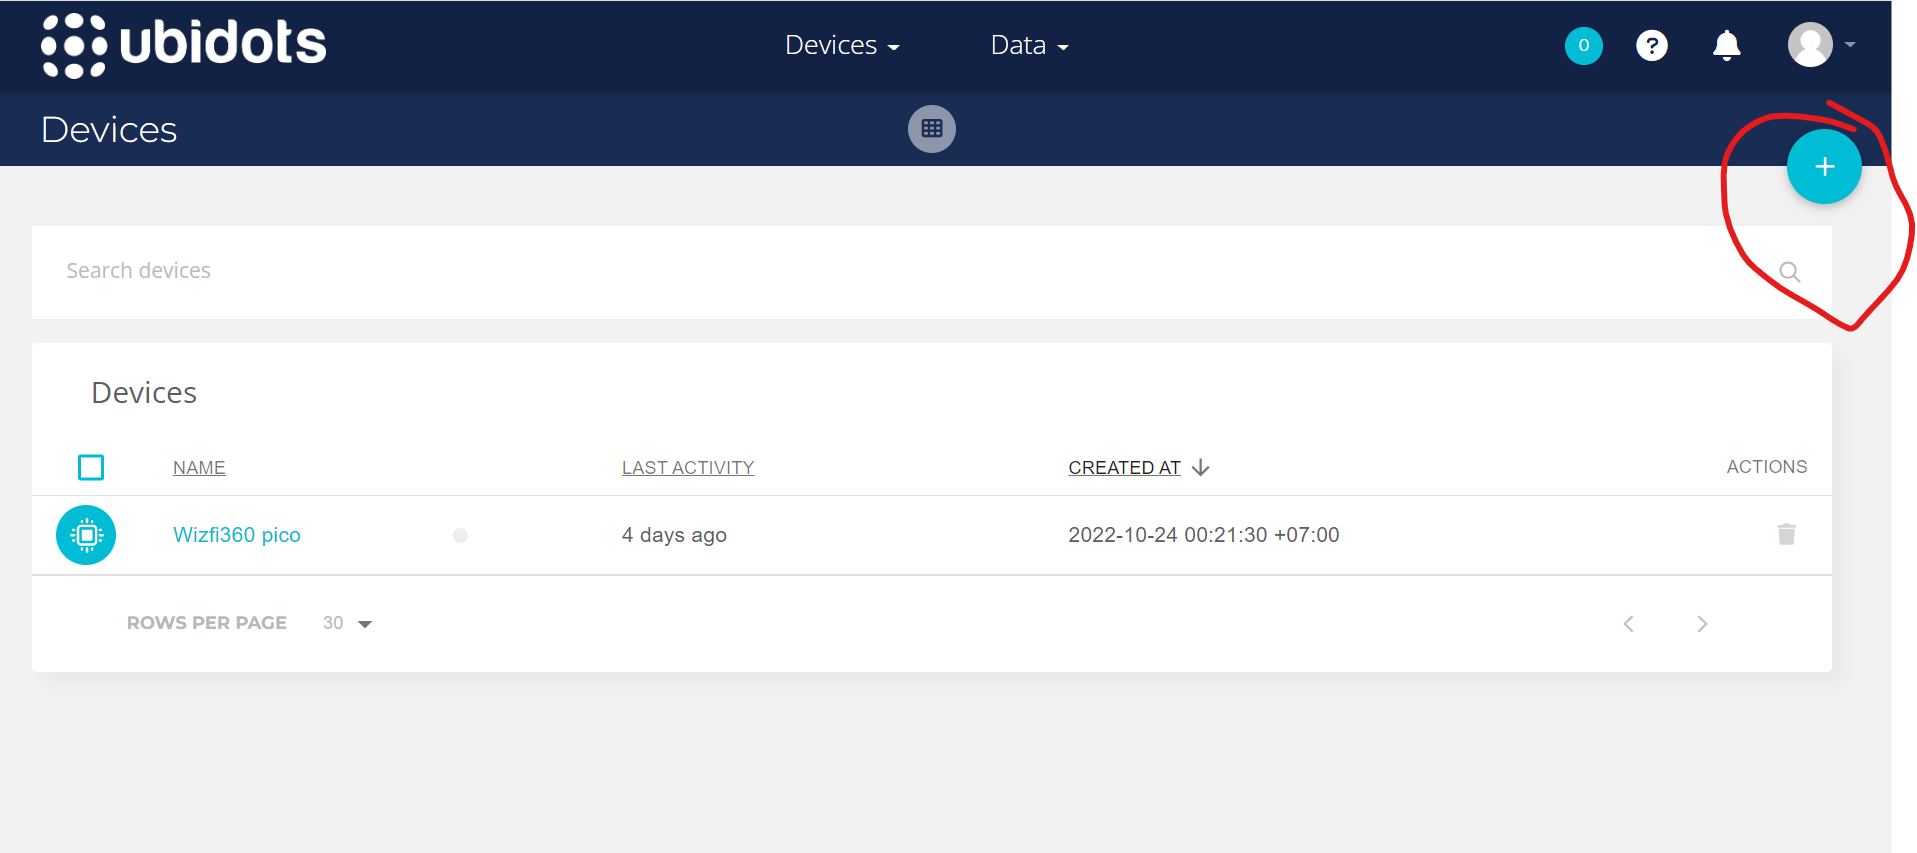
After a successful login you need to add a new device. Click on the device menu
Click on the plus sign to add a new device
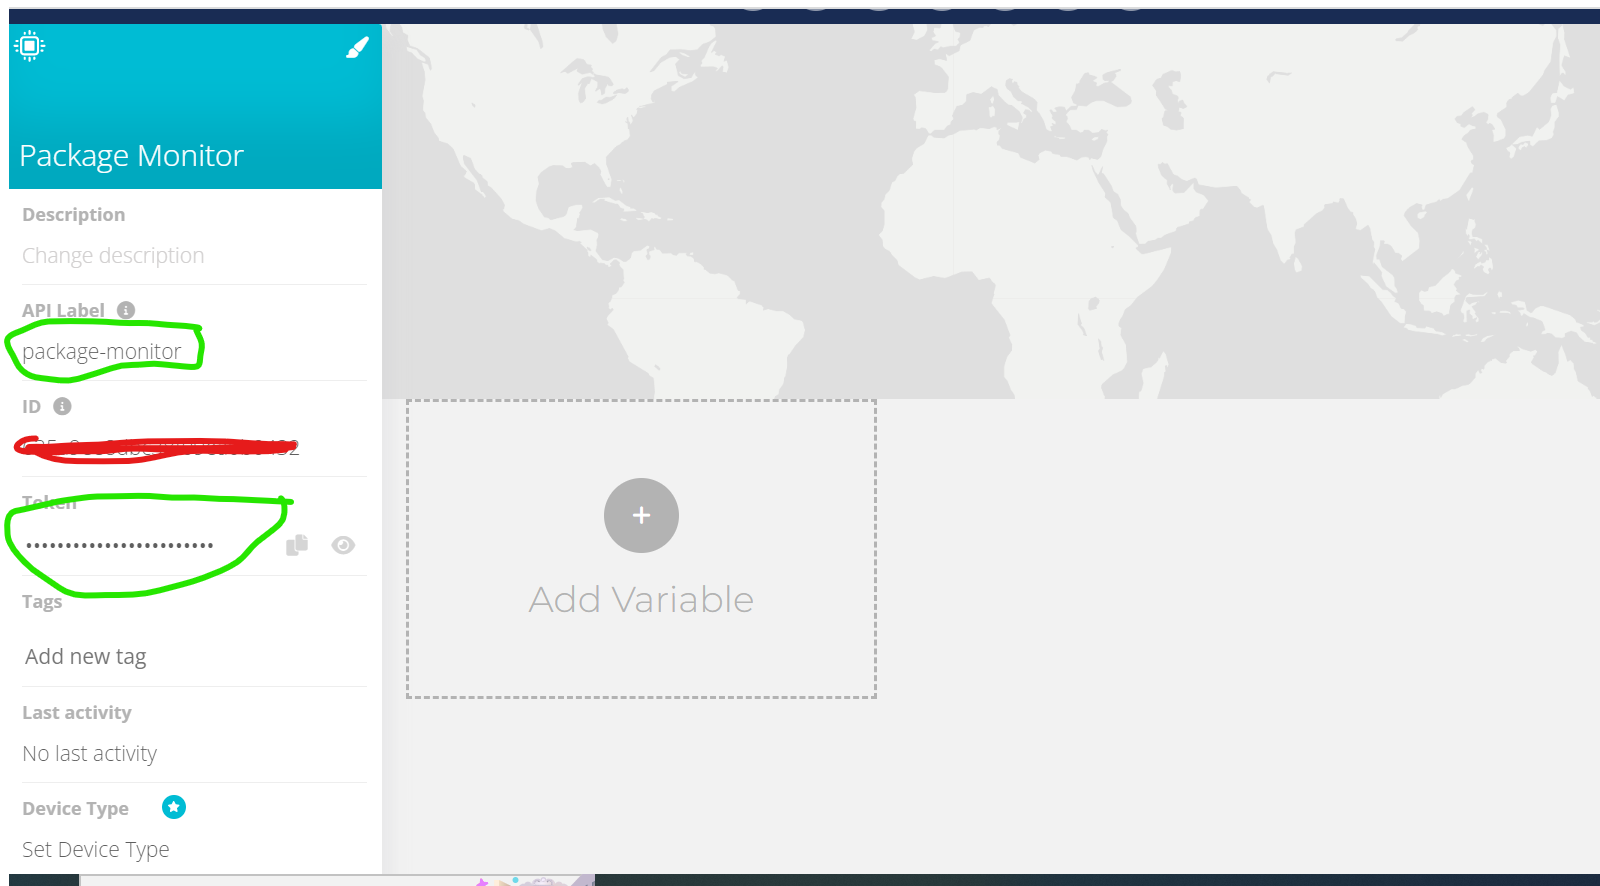
Choose a Blank Device and give it a name then save it. Click on the new device created and save this two parameter for later use
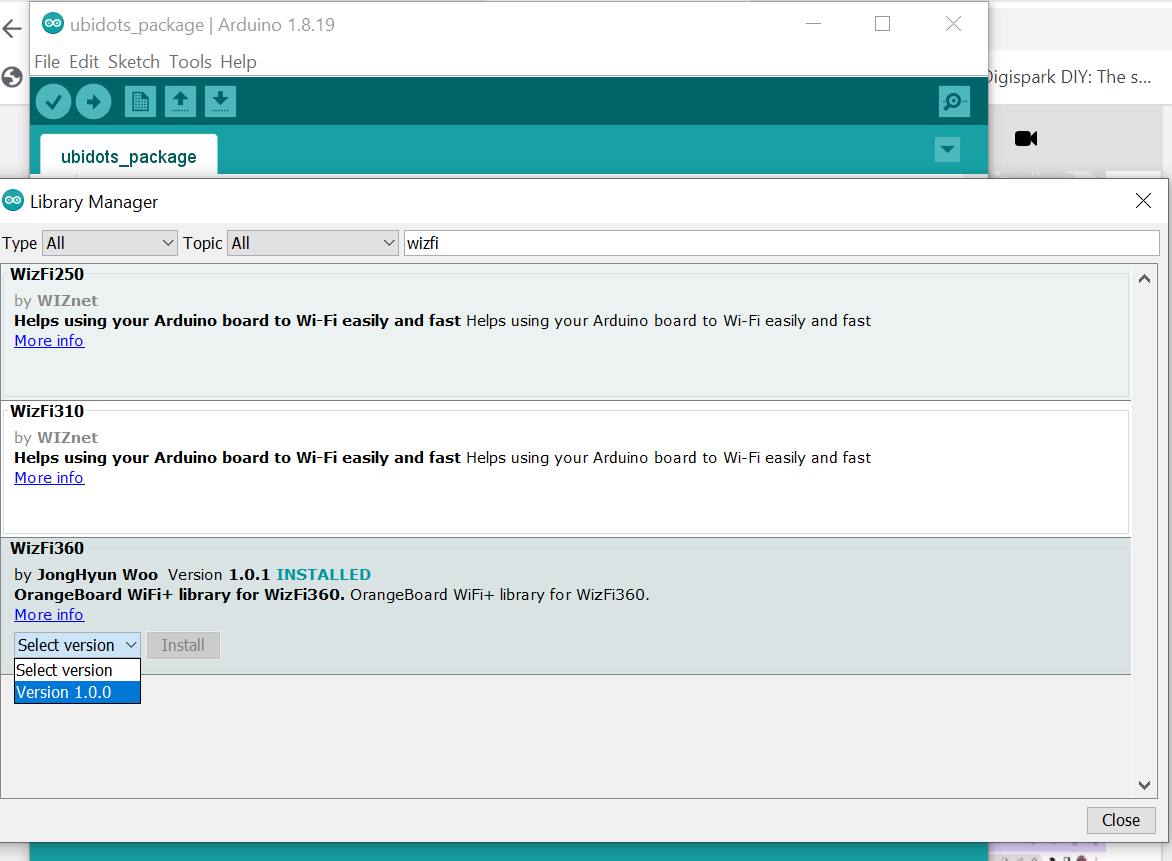
Back to the arduino IDE, we need to install the wizfi library. Open manage libraries menu and search for wizfi360. Install wizfi360 library version 1.0.0
Close the library manager. Copy and paste the code below to the Arduino IDE and make sure to fill the your wifi credential. Change the api label and Token according to the one that you just created and save before.
#include <Arduino.h>
#include "WizFi360.h"
#include "SoftwareSerial.h"
#include "Seeed_Arduino_GroveAI.h"
#include <Wire.h>
#define WIZFI360_EVB_PICO
// Emulate Serial1 on pins 6/7 if not present
#ifndef HAVE_HWSERIAL1
#include "SoftwareSerial.h"
#if defined(ARDUINO_MEGA_2560)
SoftwareSerial Serial1(6, 7); // RX, TX
#elif defined(WIZFI360_EVB_PICO)
SoftwareSerial Serial2(5, 4); // RX, TX
#endif
#endif
namespace {
char ssid[] = "xxxxxx"; // Assign your Network SSID
char pass[] = "xxxxxxxx"; // Assign your Network password
char SERVER[] = "industrial.api.ubidots.com"; // Ubidots Server
const char * TOKEN = "BBFF-xxxxxxxxxxxxxxxxxxxxxxx"; // Assign your Ubidots TOKEN
const char * DEVICE_LABEL = "package-monitor"; // Ubidots Device Label
const char * USER_AGENT = "wiznet";
const char * VERSION = "1.0";
const int PORT = 80;
int status = WL_IDLE_STATUS; // the Wifi radio's status
}
WiFiClient client;
GroveAI ai(Wire);
uint8_t state = 0;
void setup() {
Wire.setSDA(0);
Wire.setSCL(1);
Wire.begin();
Serial.begin(115200);
Serial2.begin(115200);
delay(6000);
Serial.print("Starting...");
Serial.println("WiFi initiallize");
WiFi.init(&Serial2);
if (WiFi.status() == 0) {
Serial.println("Failed to configure WiFi");
// don't continue
while(true)
;
}
//attempt to connect to WiFi network
while (status != WL_CONNECTED) {
Serial.print("[WiFi] Attempting to connect to WPA SSID: ");
Serial.println(ssid);
//Connect to WPA/WPA2 network
status = WiFi.begin(ssid, pass);
Serial.println("Connected!");
}
delay(1000);
if (ai.begin(ALGO_OBJECT_DETECTION, MODEL_EXT_INDEX_1)) // Object detection and pre-trained model 1
{
Serial.print("Version: ");
Serial.println(ai.version());
Serial.print("ID: ");
Serial.println( ai.id());
Serial.print("Algo: ");
Serial.println( ai.algo());
Serial.print("Model: ");
Serial.println(ai.model());
Serial.print("Confidence: ");
Serial.println(ai.confidence());
state = 1;
}
else
{
Serial.println("Algo begin failed.");
}
}
void loop() {
if (state == 1)
{
uint32_t tick = millis();
if (ai.invoke()) // begin invoke
{
while (1) // wait for invoking finished
{
CMD_STATE_T ret = ai.state();
if (ret == CMD_STATE_IDLE)
{
break;
}
delay(20);
}
uint8_t len = ai.get_result_len(); // receive how many people detect
if(len)
{
int time1 = millis() - tick;
Serial.print("Time consuming: ");
Serial.println(time1);
Serial.print("Number of package: ");
Serial.println(len);
object_detection_t data; //get data
for (int i = 0; i < len; i++)
{
Serial.println("result:detected");
Serial.print("Detecting and calculating: ");
Serial.println(i+1);
ai.get_result(i, (uint8_t*)&data, sizeof(object_detection_t)); //get result
Serial.print("confidence:");
Serial.print(data.confidence);
Serial.println();
//Serial.print("detected object:");
//Serial.print(animalclass[data.target]);
//Serial.println();
}
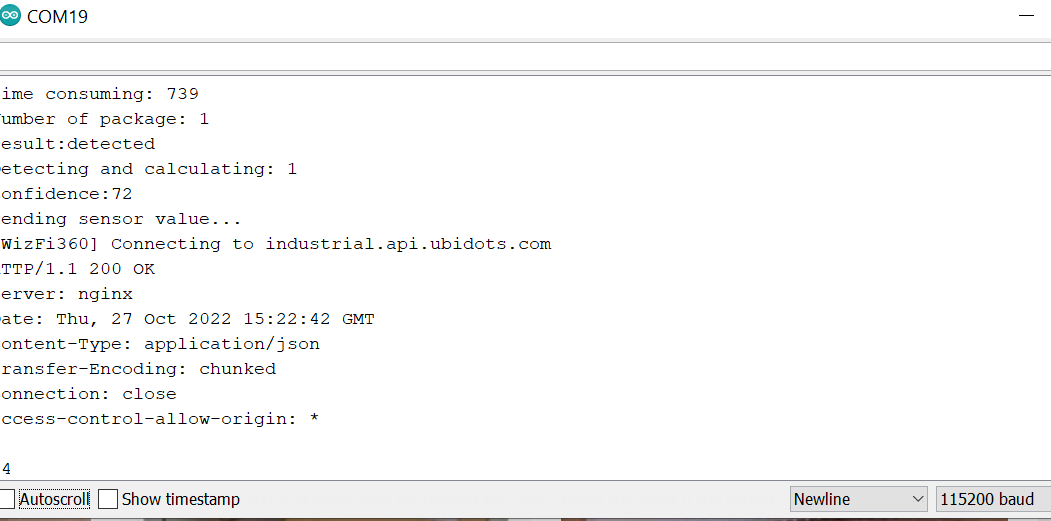
Serial.println("Sending sensor value...");
sendValue("confidence", data.confidence);
sendValue("total_package", len);
}
else
{
Serial.println("No identification");
}
}
else
{
delay(1000);
Serial.println("Invoke Failed.");
}
}
else
{
state == 0;
}
//int sensor_value = 15;
delay(1000);
}
void sendValue(const char * variable_label, int value) {
/* Build the body to be POST */
char* body = (char *) malloc(sizeof(char) * 100);
sprintf(body, "{\"%s\":%d}", variable_label, value);
/* Builds the HTTP request to be POST */
char* data = (char *) malloc(sizeof(char) * 300);
sprintf(data, "POST /api/v1.6/devices/%s", DEVICE_LABEL);
sprintf(data, "%s HTTP/1.1\r\n", data);
sprintf(data, "%sHost: industrial.api.ubidots.com\r\n", data);
sprintf(data, "%sUser-Agent: %s/%s\r\n", data, USER_AGENT, VERSION);
sprintf(data, "%sX-Auth-Token: %s\r\n", data, TOKEN);
sprintf(data, "%sConnection: close\r\n", data);
sprintf(data, "%sContent-Type: application/json\r\n", data);
sprintf(data, "%sContent-Length: %d\r\n\r\n", data, dataLen(body));
sprintf(data, "%s%s\r\n\r\n", data, body);
if (client.connect(SERVER, PORT)) {
client.print(data);
} else {
Serial.println("connection failed");
}
while (!client.available());
//Serial1.println("Reading..");
while (client.available()) {
char c = client.read();
Serial.print(c); // Response Monitoring
}
client.flush();
client.stop();
free(body);
free(data);
}
int dataLen(char* variable) {
uint8_t dataLen = 0;
for (int i = 0; i <= 250; i++) {
if (variable[i] != '\0') {
dataLen++;
} else {
break;
}
}
return dataLen;
}Upload the code then open serial monitor to make sure that your connected to your local wifi
After the connection is established try to detect a package near and see the result on the serial monitor
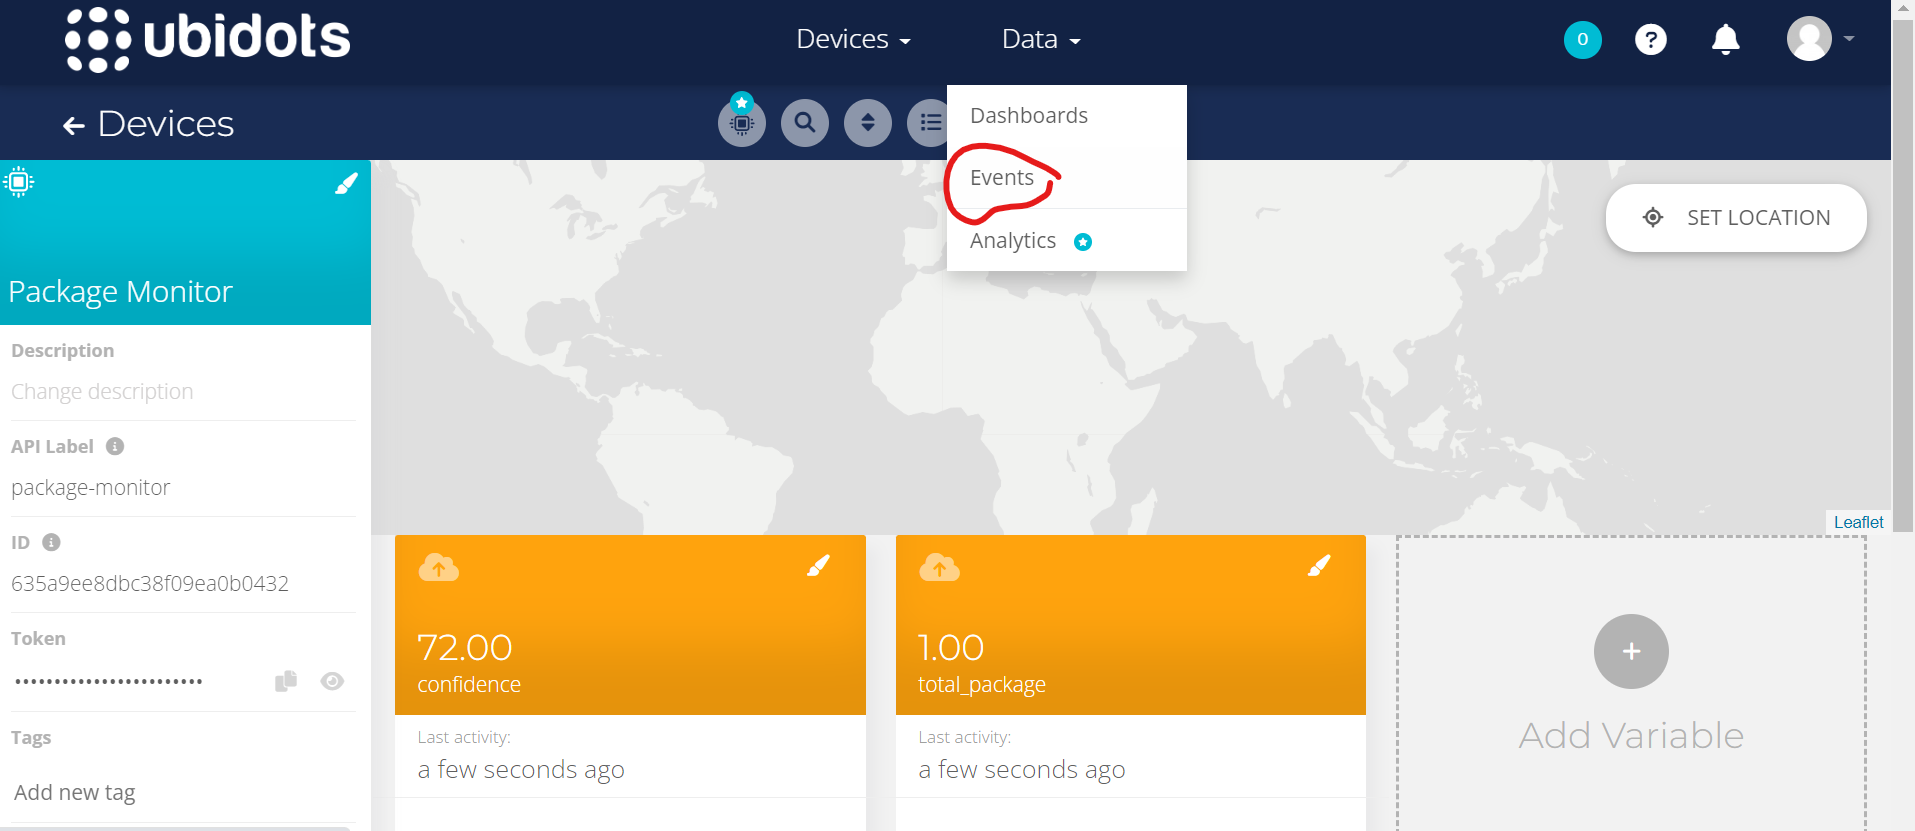
Go back to the Ubidots device page and see the result

There will be 2 Data shown, one is the amount of total package detected while the other is the confidence of the detecting the package.
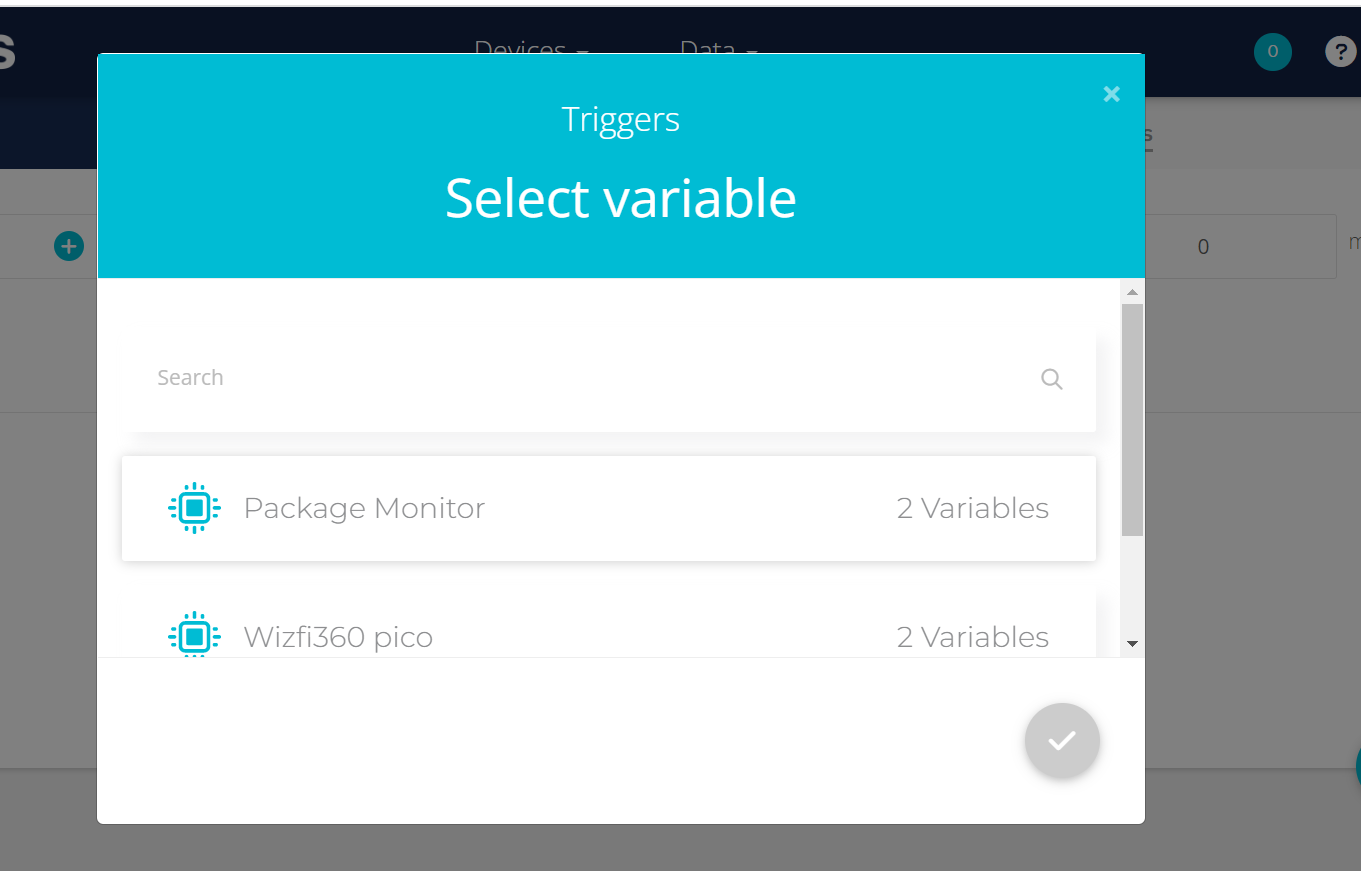
To be notified about when a package arrive we will be using another Ubidots feature called event. Click on Data menu and choose events
Create new event by clicking the Plus sign

Click on the select variable and choose the device that just created, pick on the total_package variable as the trigger. This device will be the trigger for the notification
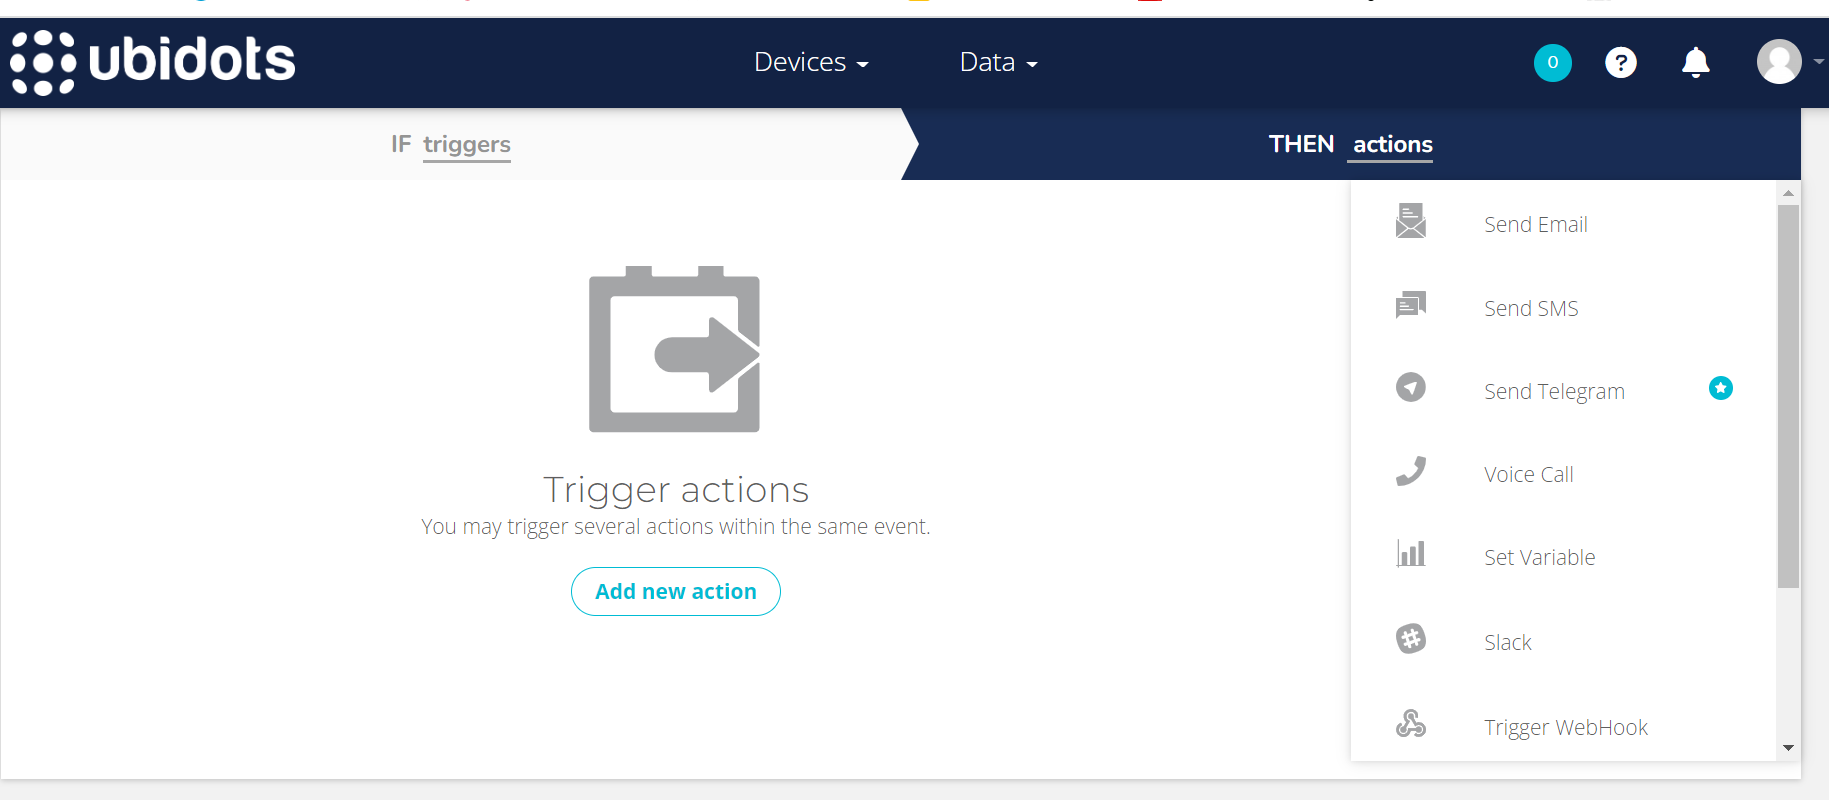
then set the rest of the trggers as follow then click the next button:

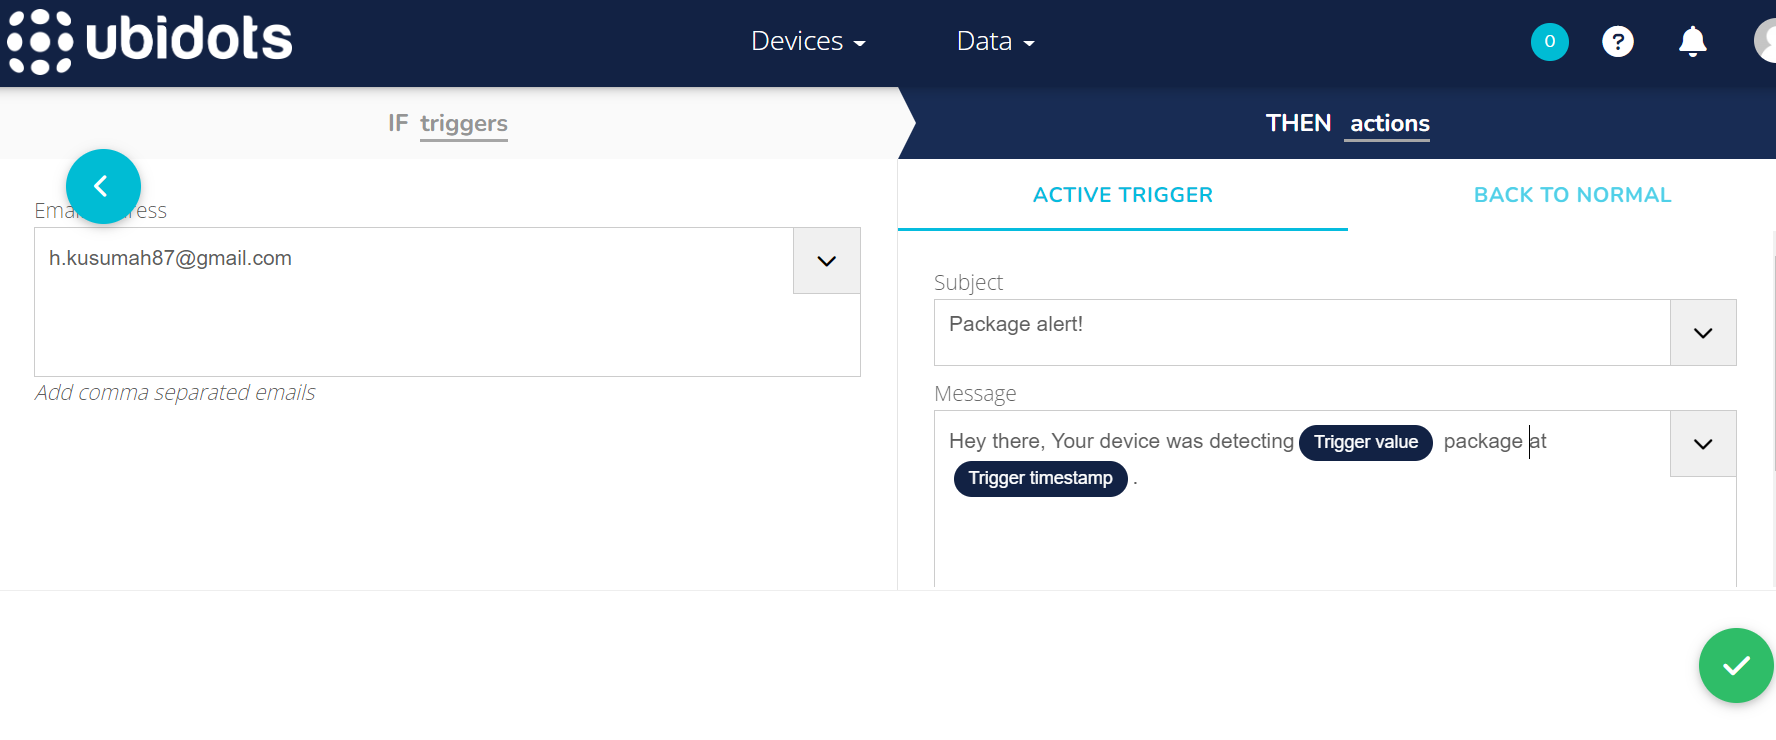
add a new action and choose Send email, set the content of the mail based on what you need. after all set click the check mark then the next button
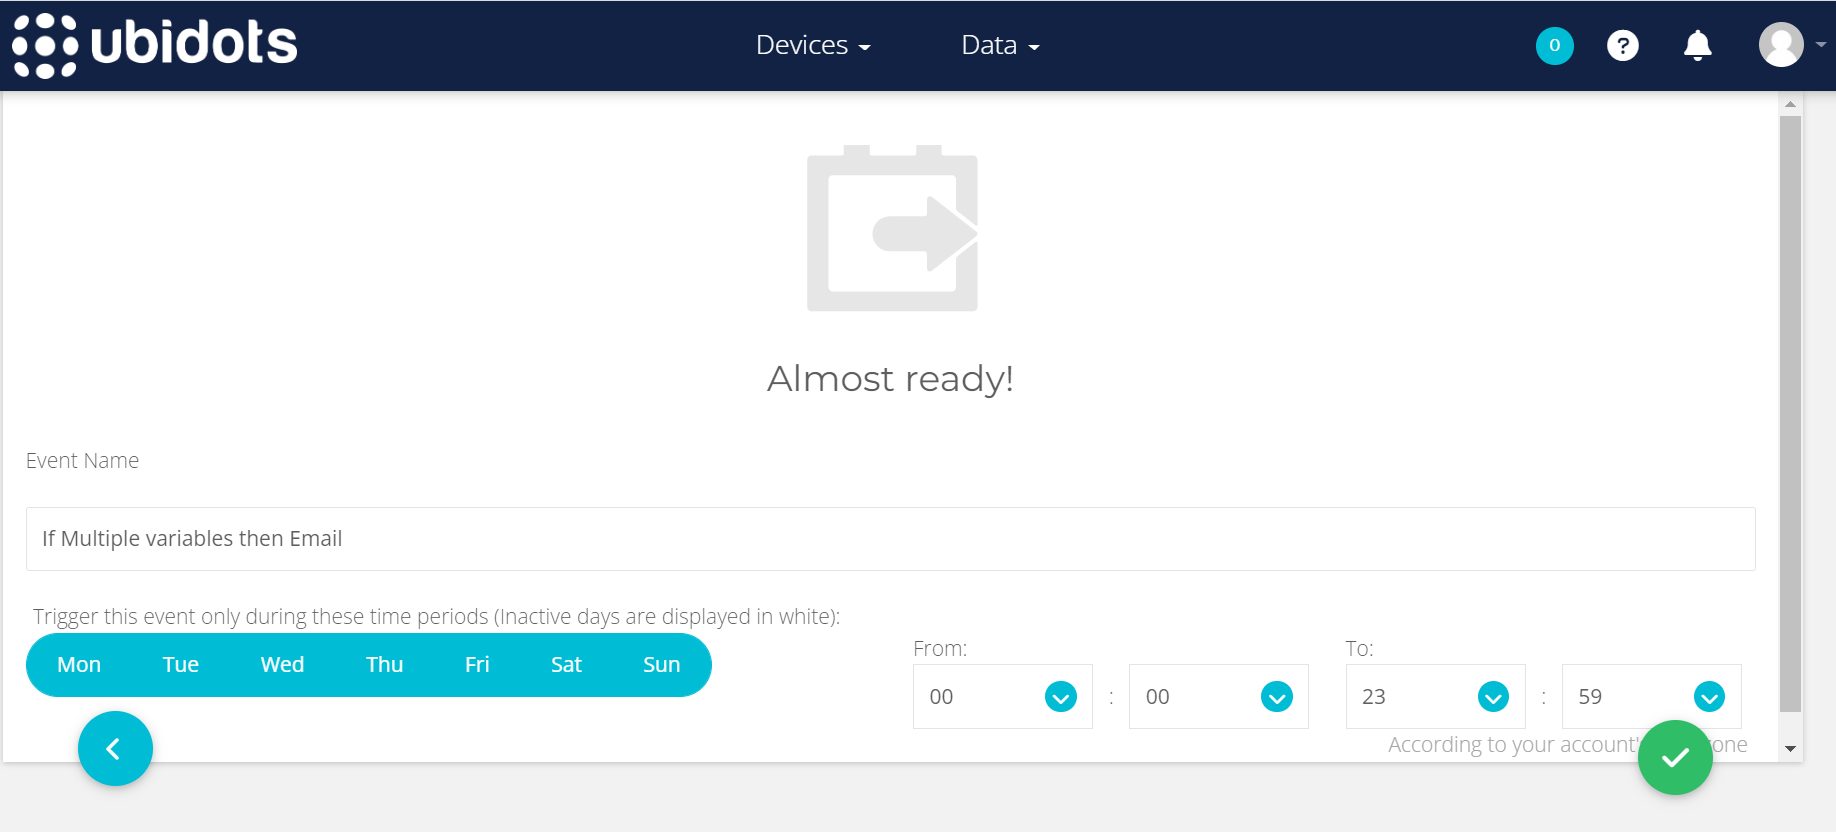
On this page you can set the schedule for the notification. After done setting the click on the check mark. Now we are ready to test out the notification
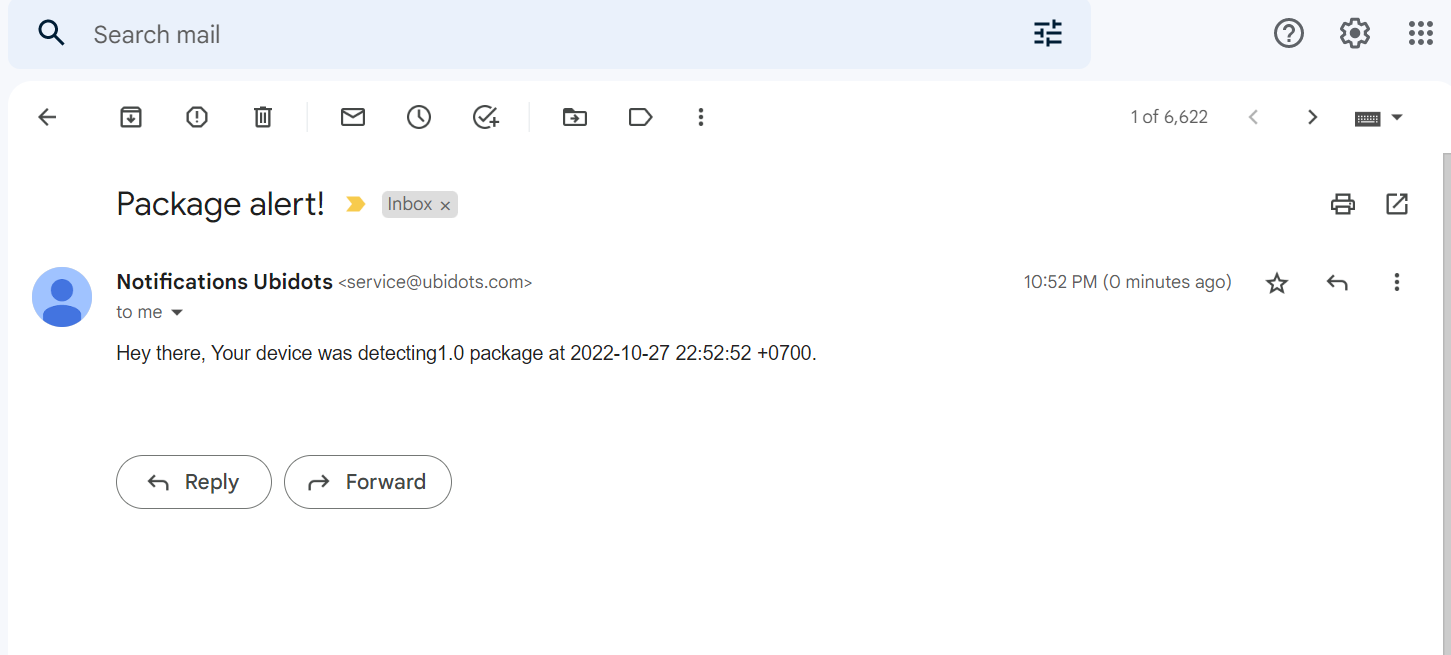
Now when a package is detected there will be an email informing you that a package has arrive at your house
Building the case
I am gonna use tinkercad123 to build a custom case remixed from an STL file I found on Thingiverse made by BenitoMR on thingiverse. I added a mounting hole for the grove vision ai module to make everything nice and tidy
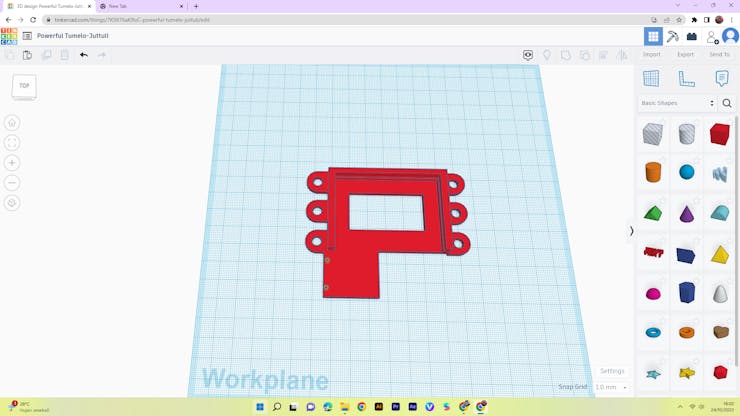

And here is the result:
_5XqTLd3Zh8.jpeg?auto=compress%2Cformat&w=740&h=555&fit=max)
Now you can mount the device on the wall where you used to have your package arrive.
Promoting the project:
Promoting the project:
Documents
-
Inferencing
test inference on the board

-
Wiring
-
Main Code
Main code to run the feature
Comments
Write