Small web server
Learn to access an Arduino's SD card website, control pins via webpage, with prior experience recommended.

Small web server
Objectives of the station
In this station we want to learn how to access a website that is stored on the Arduino's SD card. Individual pins of the Arduino should then be switched via this page.
The project is more complex than the entry-level projects; So you should have some experience from other projects before you start with the web server. The topics of network access and HTML are so extensive that we can only touch on them in this project. Further information is easy to find on the internet!
materials
Materials that are not included in the senseBox
- AND Cable
Basics
Ethernet-Shield
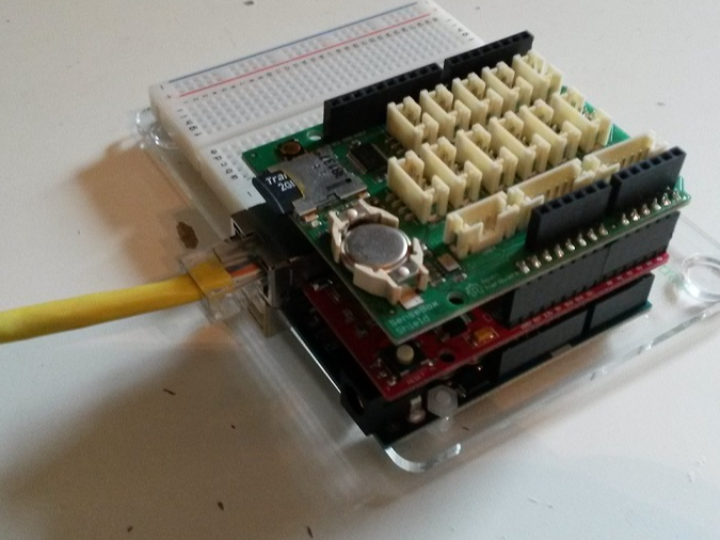
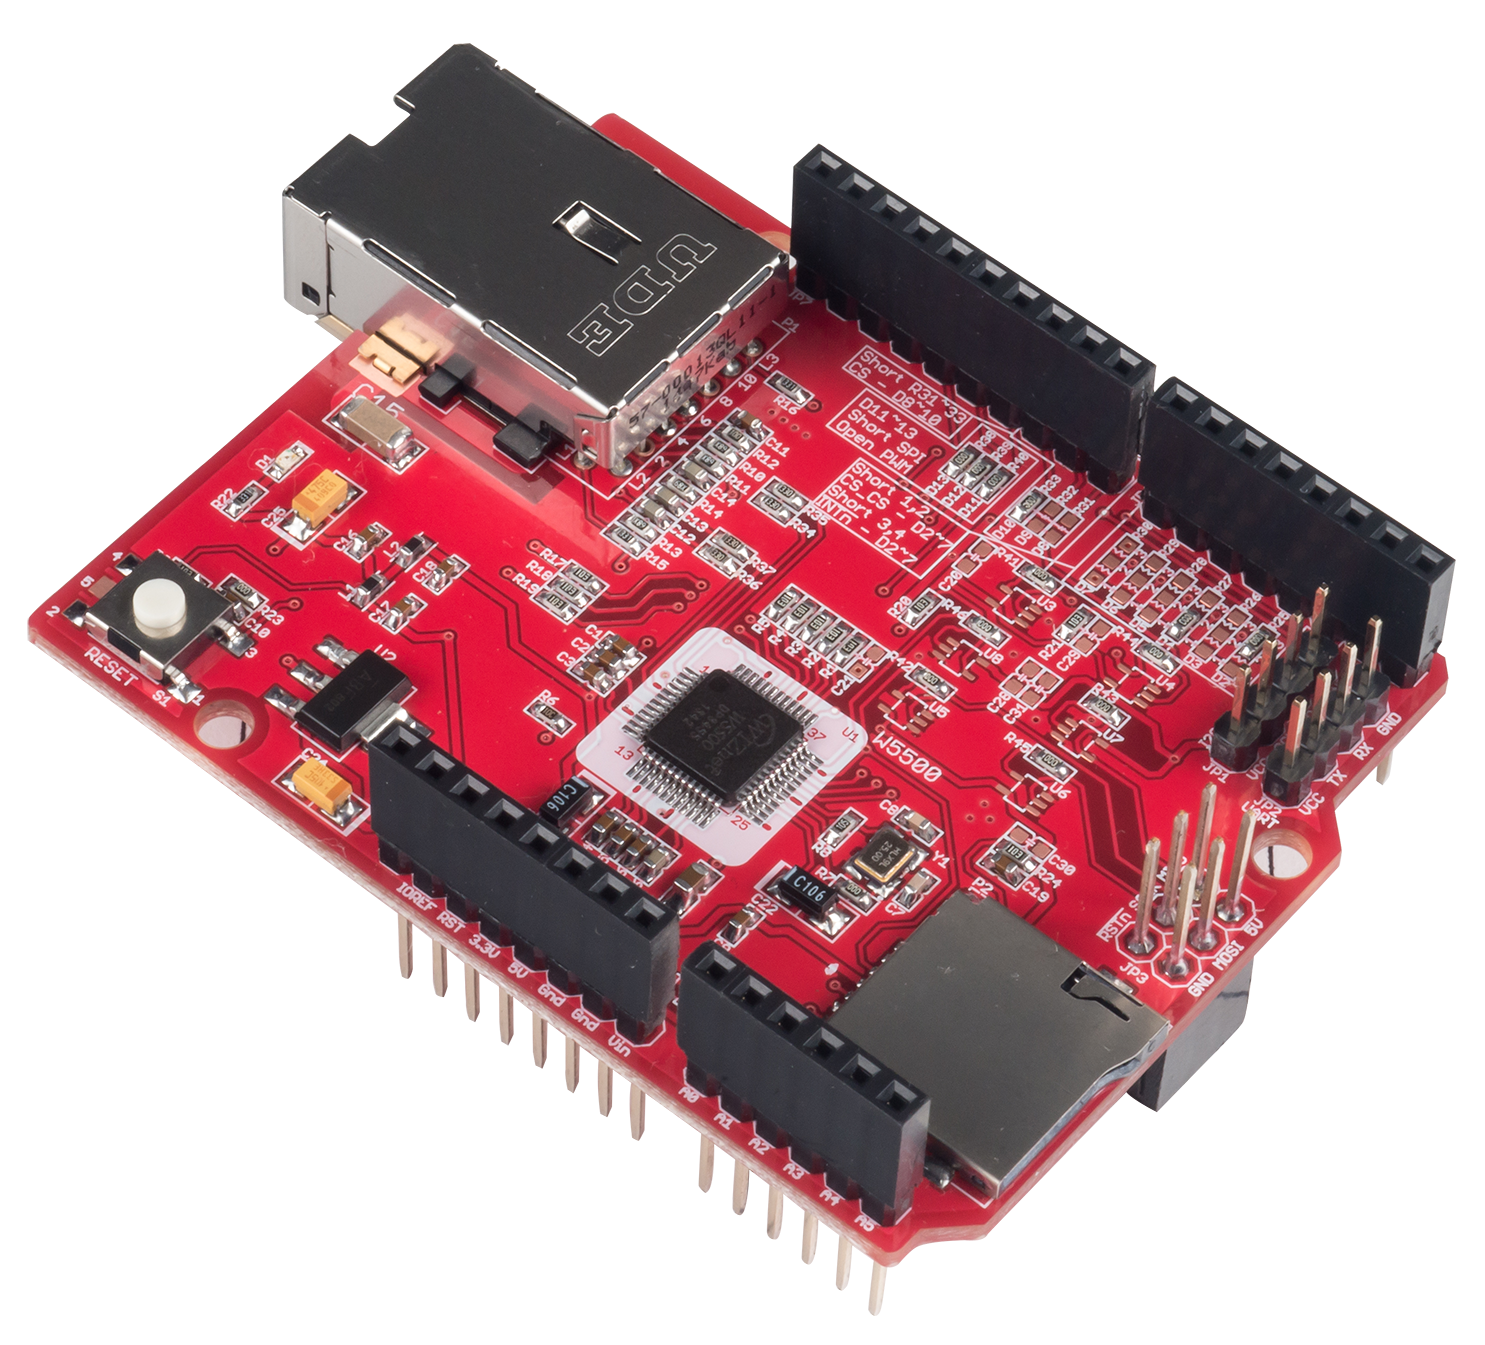
An Ethernet shield is included in the senseBox. This allows you to connect the Arduino to the network using the LAN cable.
Since it is usually very difficult to access a school network via the Internet, we will only access the Arduino via the local network .
If you still want to make the Arduino accessible via the Internet and have access to your router, there is the possibility of doing this via port forwarding . You can find more information about this here .
Webserver
A web server (English server 'servant') is a computer with web server software (in our case the Arduino ) that transmits documents to clients such as web browsers. For us, the document is the content of index.htm.
Construction

Task 1
Three libraries are required for the server:
#include <Ethernet.h>
#include <TextFinder.h>
#include <SD.h>
Attention It is important that you use our version of the Ethernet library (see Downloads ). Our Ethernet shield does not work with the Arduino standard library . The Arduino environment will always want to 'update' the Ethernet library; you can't do that.
The MAC address and the IP address of the Arduino server must then be set in two variables. In addition, pin 4 must be set as an SD card pin. We also define an Fileobject webFilein which the HTML page is stored.
// MAC-Adresse des Ethernet-Shield
byte mac[] = { 0xDE, 0xAD, 0xBE, 0xEF, 0xFE, 0xED };
// Lokale IP zum aufrufen des Webservers
IPAddress ip(192, 168, 0, 42);
// Pin der SD-Karte
byte sdPin = 4;
File webFile;
We now have to assign a port to the server. We also introduce a variable that defines whether we are in test mode. In this case, additional status information is output via the serial port, which, however, slows down the system.
// Server port
EthernetServer server(80);
boolean testmode = false;// Auf true setzen falls etwas nicht funktioniert.
Dann werden Informationen über die serielle Schnittstelle ausgegeben.
In the setup method, the mac address and the IP address are passed to the server in the first step. It is then checked whether there is access to the SD card and whether a file with the name index.htmexists on the card. If the variable was set testmodeto true, status information is output via the serial interface. This can help you find errors.
void setup() {
  if(testmode) Serial.begin(9600);
  Ethernet.begin(mac, ip); // Client starten
  server.begin();          // Server starten

  if(testmode) Serial.println("Initialisiere SD-Karte...");
  if(!SD.begin(sdPin)) {
    if(testmode)Serial.println("Initialisierung der SD-Karte fehlgeschlagen!");
    return;
  }
  if(testmode) Serial.println("SD-Karte erfolgreich initialisiert.");

  if(!SD.exists("index.htm")) {
    if(testmode) Serial.println("Datei (index.htm) wurde nicht gefunden!");
    return;
  }
  if(testmode) {
    Serial.println("Datei (index.htm) wurde gefunden.");
    Serial.println("Verbraucher schalten");
  }
}
The loopmethod is divided into two areas. In the first part, actions on the website are evaluated, in the second part the website is read from the SD card and sent to the browser.
Evaluation of inquiries
If the client is available, it waits finderfor a request from the client. If he gets this, he searches for the keyword “pin” and saves the next two characters in the variables typ, pinand val. Depending on the type, an action is then carried out. By default, types D, A and a are defined. D = switch digital pin A = switch analog pin a = read out analog pin
void loop() {
  /**********************
   * Anfragen auswerten *
   **********************/
  EthernetClient client = server.available(); // Auf Anfrage warten
  if(client) {
    TextFinder finder(client);

    if(finder.find("GET")) { //erkennt Aktion auf der Website
      while(finder.findUntil("pin", "\n\r")) {// Bis das Schlüsselwort "pin" erkannt wird
        char typ = char(client.read());
        int  pin = int(finder.getValue());
        int  val = int(finder.getValue());

        if(typ == 'D') {
          pinMode(pin, OUTPUT);
          digitalWrite(pin, val);
          if(testmode)Serial.print(" - D"+String(pin));
        }
        else if(typ == 'A') {
          analogWrite(pin, val);
          if(testmode)Serial.print(" - A"+String(pin));
        }
        else if(typ == 'a') { // a -> Sensorwert auslesen und ausgeben
          val = analogRead(pin);
          if(testmode)Serial.print(" - a"+String(pin));
        }
        else {
          if(testmode) Serial.print(" - Falscher Typ");
        }
        //Hier können neue Befehle definiert werden die aus dem Browser gestartet werden.
        if(testmode) {
          if(val==1) Serial.println(" ein");
          else if(val==0) Serial.println(" aus");
          else Serial.println(" "+ val);
        }
      }
    }
View web form
Every line of the HTML document is read and sent to the browser. Since the storage space for variables is very limited, the string is split at every space or line break. The string is then searched for specific keywords. These can be filterdefined as required in the method. These keywords can then be replaced with sensor values.
    /************************
    * Webformular anzeigen  *
    ************************/
    boolean current_line_is_blank = true;         // eine HTTP-Anfrage endet mit einer Leerzeile und einer neuen Zeile
    String htmlline = "";
    while (client.connected()) {
      if (client.available()) {                   // Wenn Daten vom Server empfangen werden

        char c = client.read();                   // empfangene Zeichen einlesen
        if (c == '\n' && current_line_is_blank) { // wenn neue Zeile und Leerzeile empfangen
          // Standard HTTP Header senden
          client.println("HTTP/1.1 200 OK");
          client.println("Content-Type: text/html");
          client.println("Connection: close");
          client.println();

          // Website von SD-Karte laden
          webFile = SD.open("index.htm");  // Website laden
          if (webFile) {
            while(webFile.available()) {
              char temp = char(webFile.read());
              //Bei jedem Leerzeichen wird ein neuer String generiert
              if((int(temp) != 10)&&(int(temp) != 32)&&(int(temp) != 13)){
                htmlline = htmlline + char(temp);
              }
              else {
                htmlline = filter(htmlline); //Ersetzt Schlüsselwörter zum Beispiel durch Sensorwerte
                client.println(htmlline);
                if(testmode) Serial.println(htmlline);
                htmlline = "";
              }
            }
            webFile.close();
          }
          break;
        }
        if (c == '\n') {
          current_line_is_blank = true;
        }
        else if (c != '\r') {
          current_line_is_blank = false;
        }
      }
    }
    delay(1);
    client.stop();
  }
}

//Ersetzt Schlüsselwörter zum Beispiel durch Sensorwerte
// Es können nach belieben neue Schlüsselwörter definerit und durch andern Text ersätzt werden
String filter(String htmlline){
  htmlline.replace("sa0en",String(analogRead(A0)));
  htmlline.replace("sa1en","No sensor");
  htmlline.replace("sa2en","No sensor");
  htmlline.replace("sa3en","No sensor");
  htmlline.replace("sa4en","No sensor");
  htmlline.replace("sa5en","No sensor");
  return htmlline;
}
HTML Dokument
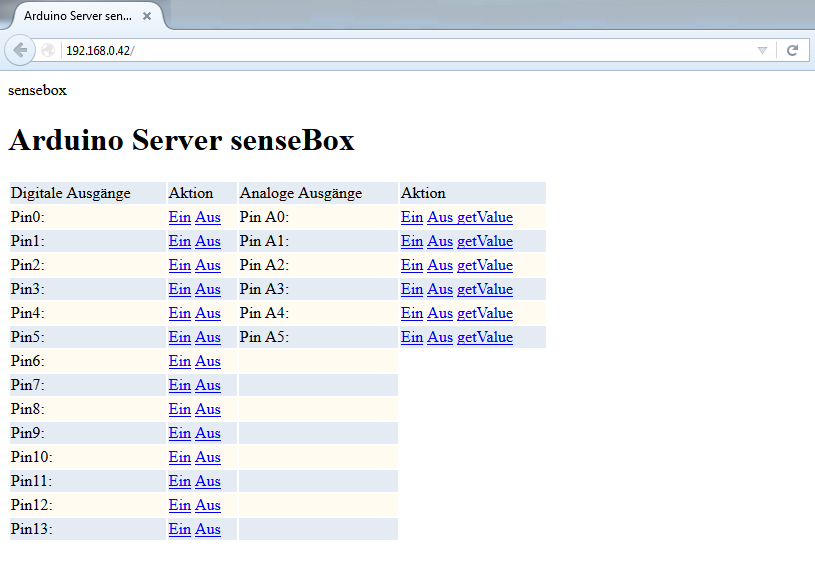
Our first little website looks like this: 
You have to copy this code and save it in a text file. You then have to change the name of the text file to index.htm. The HTML document must then be saved on the SD card and inserted into the Ethernet shield.
<!DOCTYPE html>
<html>
<head>
<title>Arduino Server senseBox</title>
<style type="text/css">
h2 { margin-bottom:5px; }
table {width: 40%;} th { background-color: #666; color: #fff; } tr { background-color: #fffbf0; color: #000; } tr:nth-child(odd) { background-color: #e4ebf2 ; } </style>
</style>
</head>
<body>
<img src="sensebox_logo_neu.png" alt="sensebox" width="700" height="150"/>
<h1>Arduino Server senseBox</h1>
<!-- D for digitalWrite, A for analogWrite, d for digitalRead, a for analogRead -->
<table>
<tr> <td>Digitale Ausgänge</td> <td> Aktion </td><td>Analoge Ausgänge</td><td>Aktion</td></td></tr>
<tr> <td>Pin0:</td> <td> <a href="/?pinD0=1" target="ifr">Ein</a> <a href="/?pinD0=0" target="ifr">Aus</a> </td> <td> Pin A0:</td> <td><a href="/?pinA0=1" target="ifr">Ein</a> <a href="/?pinA0=0" target="ifr">Aus </a> <a href="/?pina0=2" target="ifr"> getValue </a></td></tr>
<tr> <td>Pin1:</td> <td> <a href="/?pinD1=1" target="ifr">Ein</a> <a href="/?pinD1=0" target="ifr">Aus</a> </td> <td> Pin A1:</td> <td> <a href="/?pinA1=1" target="ifr">Ein</a> <a href="/?pinA1=0" target="ifr">Aus</a> <a href="/?pina1=2" target="ifr"> getValue </a></td></tr>
<tr> <td>Pin2:</td> <td> <a href="/?pinD2=1" target="ifr">Ein</a> <a href="/?pinD2=0" target="ifr">Aus</a> </td> <td> Pin A2:</td> <td> <a href="/?pinA2=1" target="ifr">Ein</a> <a href="/?pinA2=0" target="ifr">Aus</a> <a href="/?pina2=2" target="ifr"> getValue </a></td></tr>
<tr> <td>Pin3:</td> <td> <a href="/?pinD3=1" target="ifr">Ein</a> <a href="/?pinD3=0" target="ifr">Aus</a> </td> <td> Pin A3:</td> <td> <a href="/?pinA3=1" target="ifr">Ein</a> <a href="/?pinA3=0" target="ifr">Aus</a> <a href="/?pina3=2" target="ifr"> getValue </a></td></tr>
<tr> <td>Pin4:</td> <td> <a href="/?pinD4=1" target="ifr">Ein</a> <a href="/?pinD4=0" target="ifr">Aus</a> </td> <td> Pin A4:</td> <td> <a href="/?pinA4=1" target="ifr">Ein</a> <a href="/?pinA4=0" target="ifr">Aus</a> <a href="/?pina4=2" target="ifr"> getValue </a></td></tr>
<tr> <td>Pin5:</td> <td> <a href="/?pinD5=1" target="ifr">Ein</a> <a href="/?pinD5=0" target="ifr">Aus</a> </td> <td> Pin A5:</td> <td> <a href="/?pinA5=1" target="ifr">Ein</a> <a href="/?pinA5=0" target="ifr">Aus</a> <a href="/?pina5=2" target="ifr"> getValue </a></td></tr>
<tr> <td>Pin6:</td> <td> <a href="/?pinD6=1" target="ifr">Ein</a> <a href="/?pinD6=0" target="ifr">Aus</a> </td> <td></td></tr>
<tr> <td>Pin7:</td> <td> <a href="/?pinD7=1" target="ifr">Ein</a> <a href="/?pinD7=0" target="ifr">Aus</a> </td> <td></td></tr>
<tr> <td>Pin8:</td> <td> <a href="/?pinD8=1" target="ifr">Ein</a> <a href="/?pinD8=0" target="ifr">Aus</a> </td> <td></td></tr>
<tr> <td>Pin9:</td> <td> <a href="/?pinD9=1" target="ifr">Ein</a> <a href="/?pinD9=0" target="ifr">Aus</a> </td> <td></td></tr>
<tr> <td>Pin10:</td> <td> <a href="/?pinD10=1" target="ifr">Ein</a> <a href="/?pinD10=0" target="ifr">Aus</a> </td> <td></td></tr>
<tr> <td>Pin11:</td> <td> <a href="/?pinD11=1" target="ifr">Ein</a> <a href="/?pinD11=0" target="ifr">Aus</a> </td> <td></td></tr>
<tr> <td>Pin12:</td> <td> <a href="/?pinD11=1" target="ifr">Ein</a> <a href="/?pinD12=0" target="ifr">Aus</a> </td> <td></td></tr>
<tr> <td>Pin13:</td> <td> <a href="/?pinD13=1" target="ifr">Ein</a> <a href="/?pinD13=0" target="ifr">Aus</a> </td> <td></td></tr>
</table>
<iframe name="ifr" style="display:none;" width="0" height="0"></iframe>
</body>
</html>


