
Rust-based TCP socket communication in W5500-EVB-Pico (with embassy)
I found out about a Rust-based framework called embassy, and since this framework provides the W5500-EVB-Pico library and examples, I deci
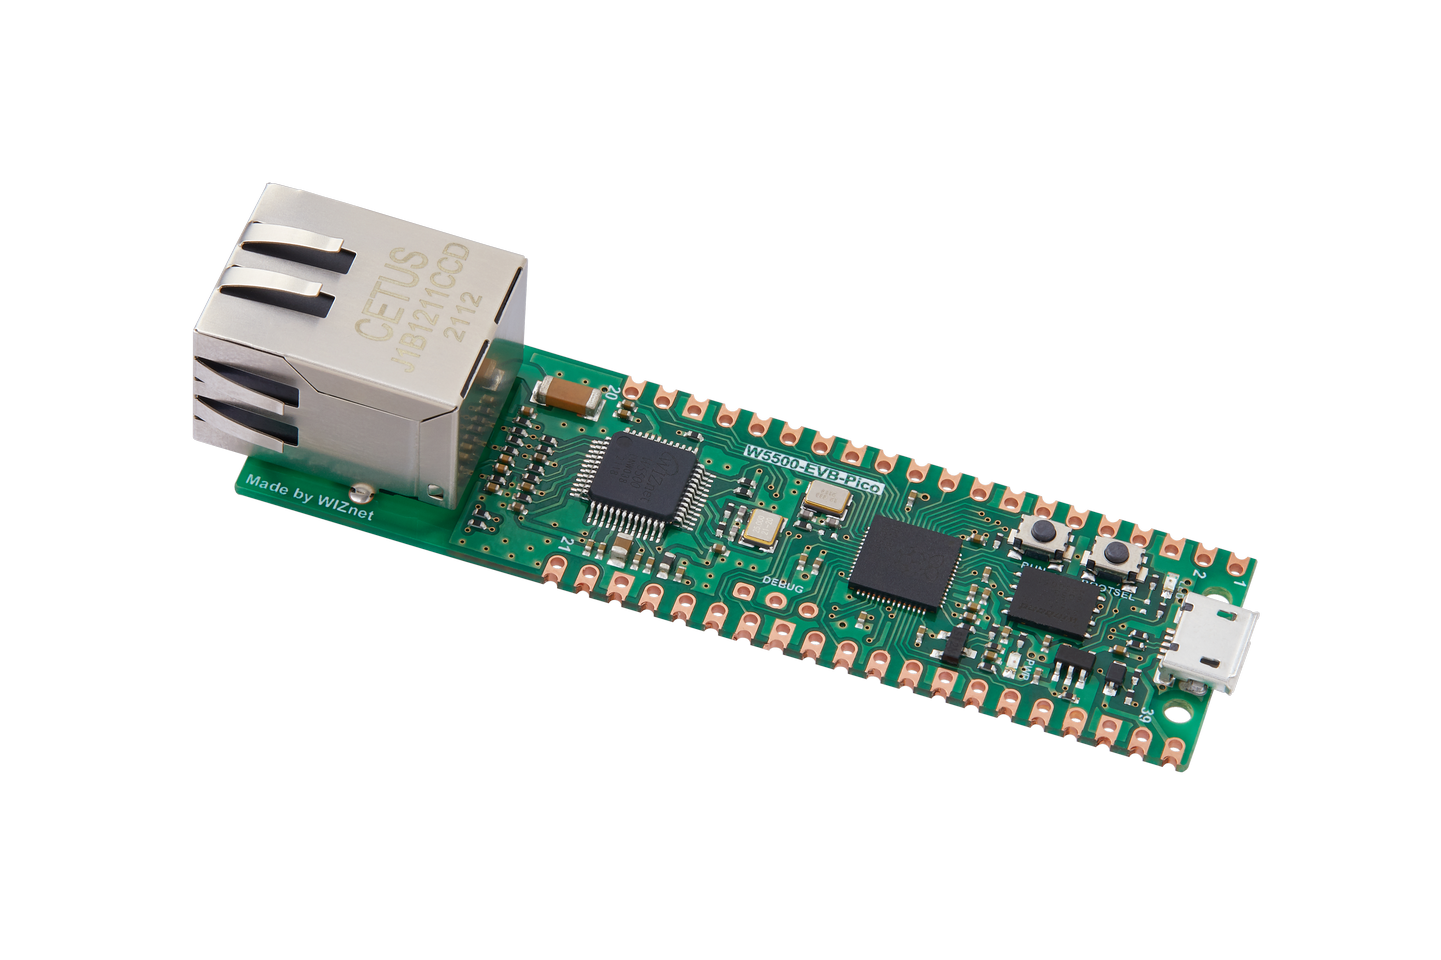
WIZnet - W5500-EVB-Pico
x 1
Introduction
I found out about a Rust-based framework called embassy, and since this framework provides the W5500-EVB-Pico library and examples, I decided to test it out.
Last June, I introduced the embassy-net-w5500 project.
When I searched for the keyword, the website of the embassy came up. So instead of searching for embassy, you can find the page right away by searching for embassy rust.
An organization called embassy-rs has been formed on Github, and updates are actively being made.
In this article, configure the environment using W5500-EVB-Pico and run the TCP socket communication example.
Prerequisite
- Linux environment
- Using Virtual Machine
- W5500-EVB-Pico
- Extra Pico boards of any kind
- Used as a picoprobe
- We used WizFi360-EVB-Pico here.
- Breadboard
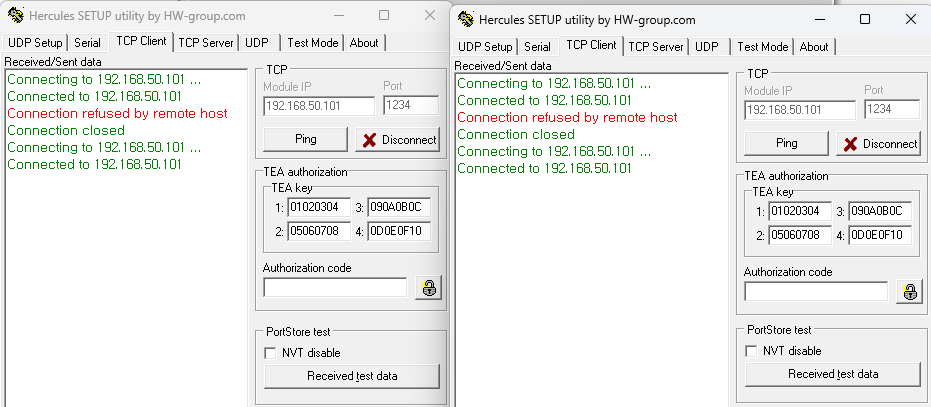
- Hercules Tool
- Used for socket communication test
Development environment
I tried to use it in the WSL2 environment, but it was done in a VM environment due to USB port problems.
There was a way to enable USB ports in WSL, but I didn't want to touch it, so I used a VM I had configured.
VirtualBox (free) or VMware (paid) programs allow you to pull hardware devices connected to the Host Windows into a VM.
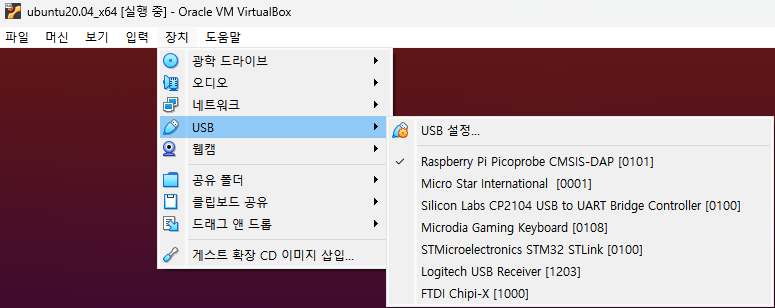
Ubuntu 20.04 VM
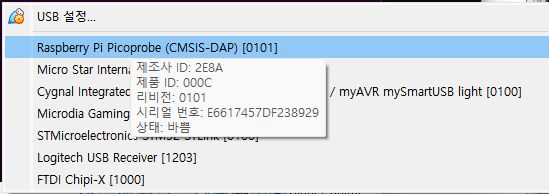
When checking with the lsusb command, W5500-EVB-Pico is recognized as follows.

For reference, after installing picoprobe.uf2 into Pico board, the recognized name changes slightly as follows.

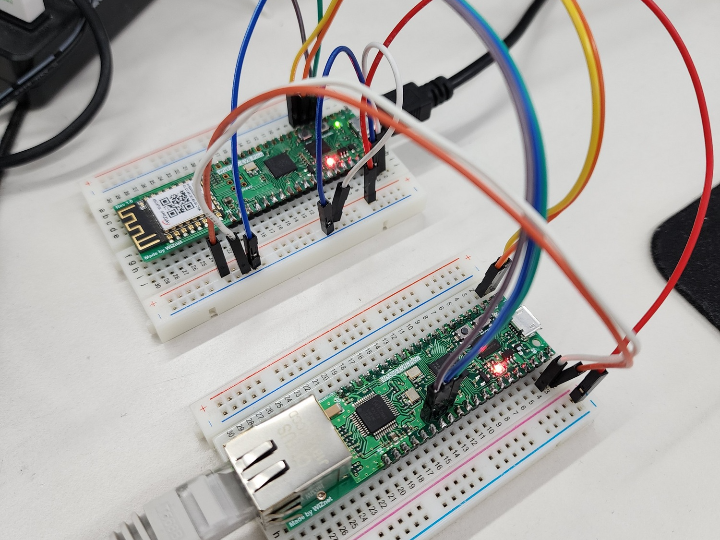
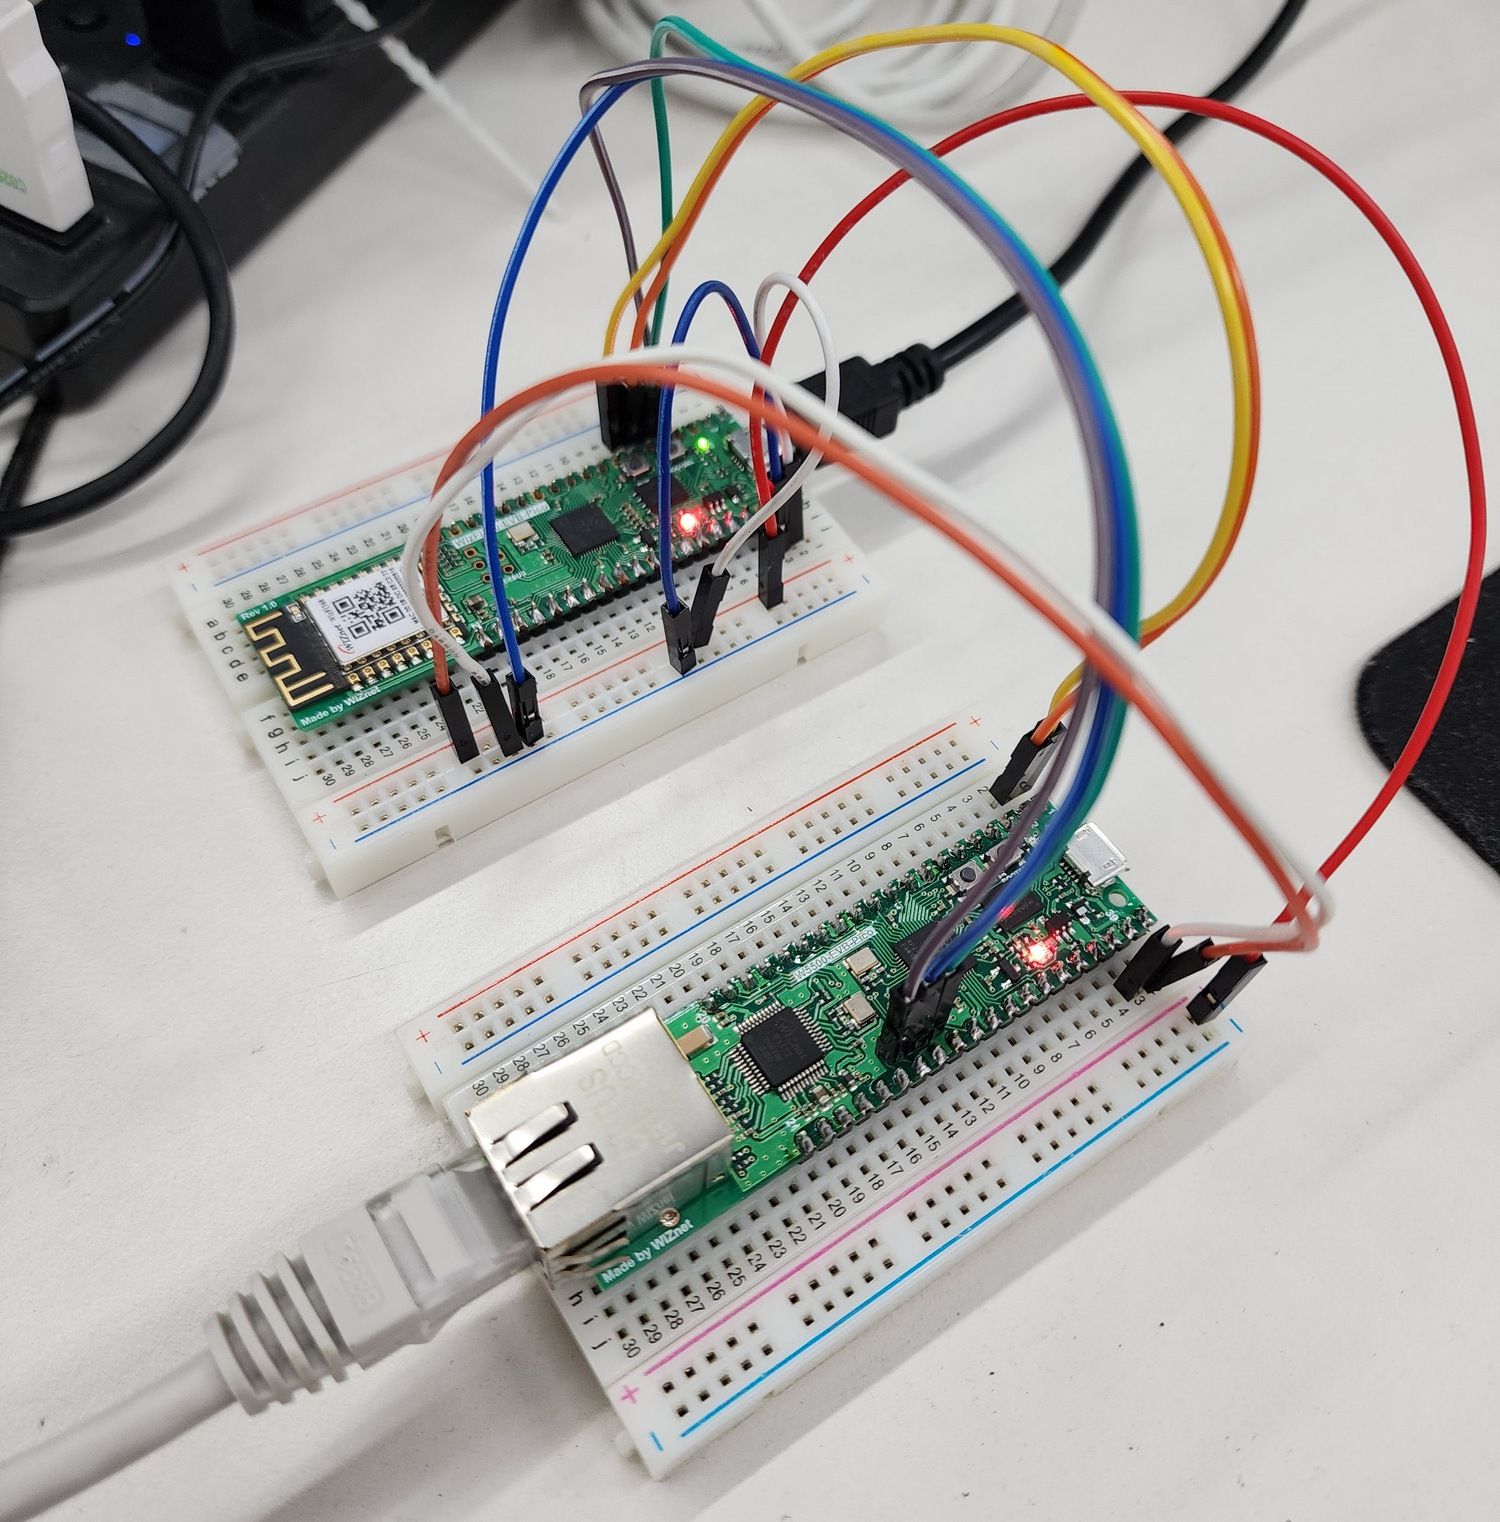
Picoprobe configuration
Referring to the official guide document, I connected the board as follows.
- Official Pico Guide link: https://datasheets.raspberrypi.com/pico/getting-started-with-pico.pdf

Build and flash picoprobe
- It seems to be possible to omit because the already built image is provided, but I proceeded directly.
If Toolchain is not installed, install the package first.
$ sudo apt update
$ sudo apt install cmake gcc-arm-none-eabi libnewlib-arm-none-eabi build-essential
Clone the picoprobe repository and build it.
The commands below are referenced from the Raspberry Pi Pico official guide document.
cd ~/pico
git clone https://github.com/raspberrypi/picoprobe.git
cd picoprobe
mkdir build
cd build
cmake ..
make -j4
Cargo
Cargo is the official package manager for the Rust, serving as the build system and package manager for the Rust project.
It seems to be considered to include the same role as Python's pip.
The official guide explains the development environment configuration and test method well.
The environment setup was carried out according to the guide.
Install Rust and Cargo
curl https://sh.rustup.rs -sSf | sh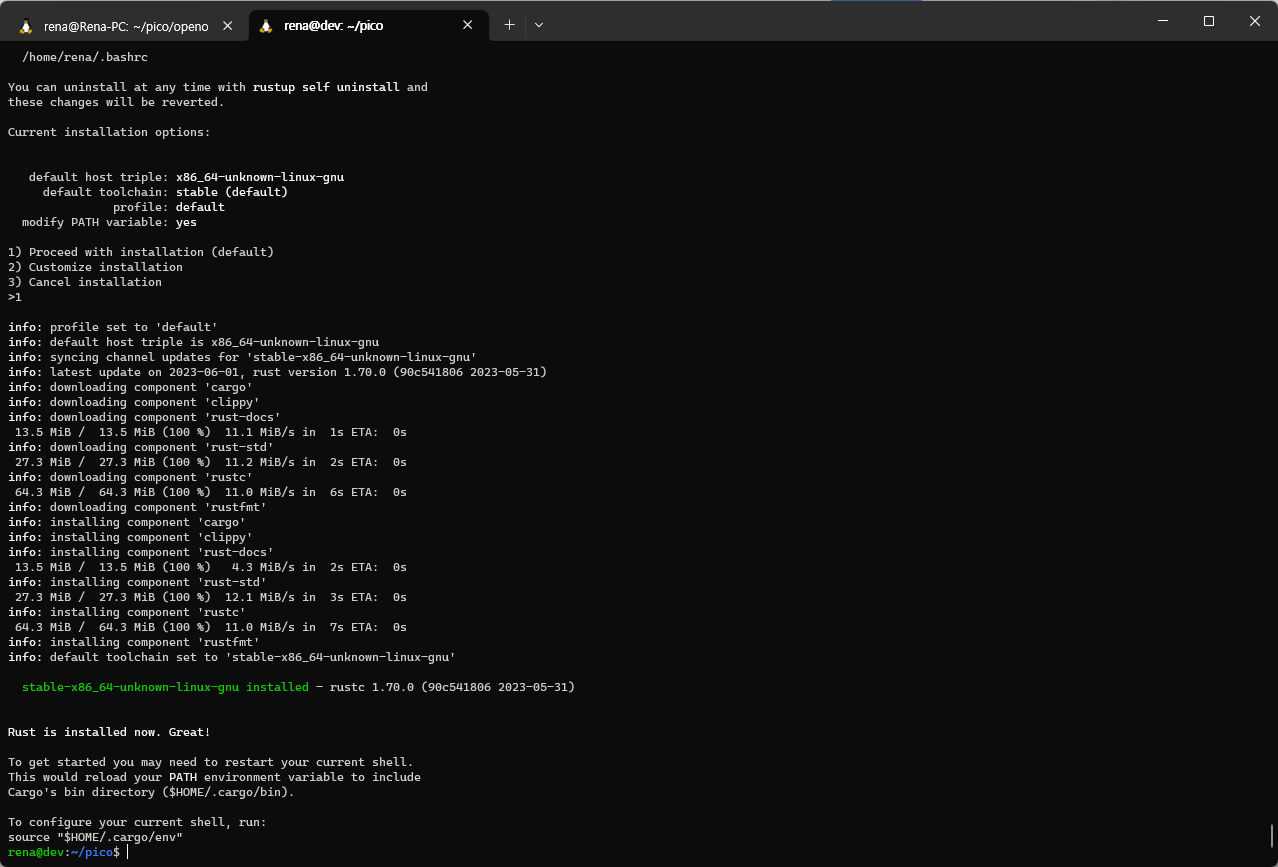
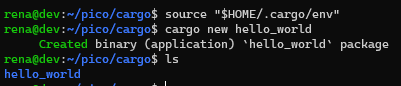
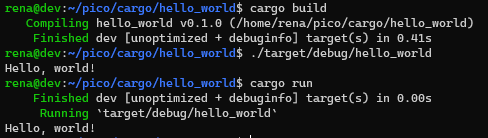
After installing Cargo, proceed with a simple operation test.
Embassy
The official website of the Embassy also serves as a guide, so we proceeded accordingly.
: https://embassy.dev/book/dev/getting_started.html
Prerequisite
Here's what you need:
rustup
curl --proto '=https' --tlsv1.2 -sSf https://sh.rustup.rs | shprobe-run
sudo apt install -y libusb-1.0-0-dev libudev-devcargo install probe-rs-cli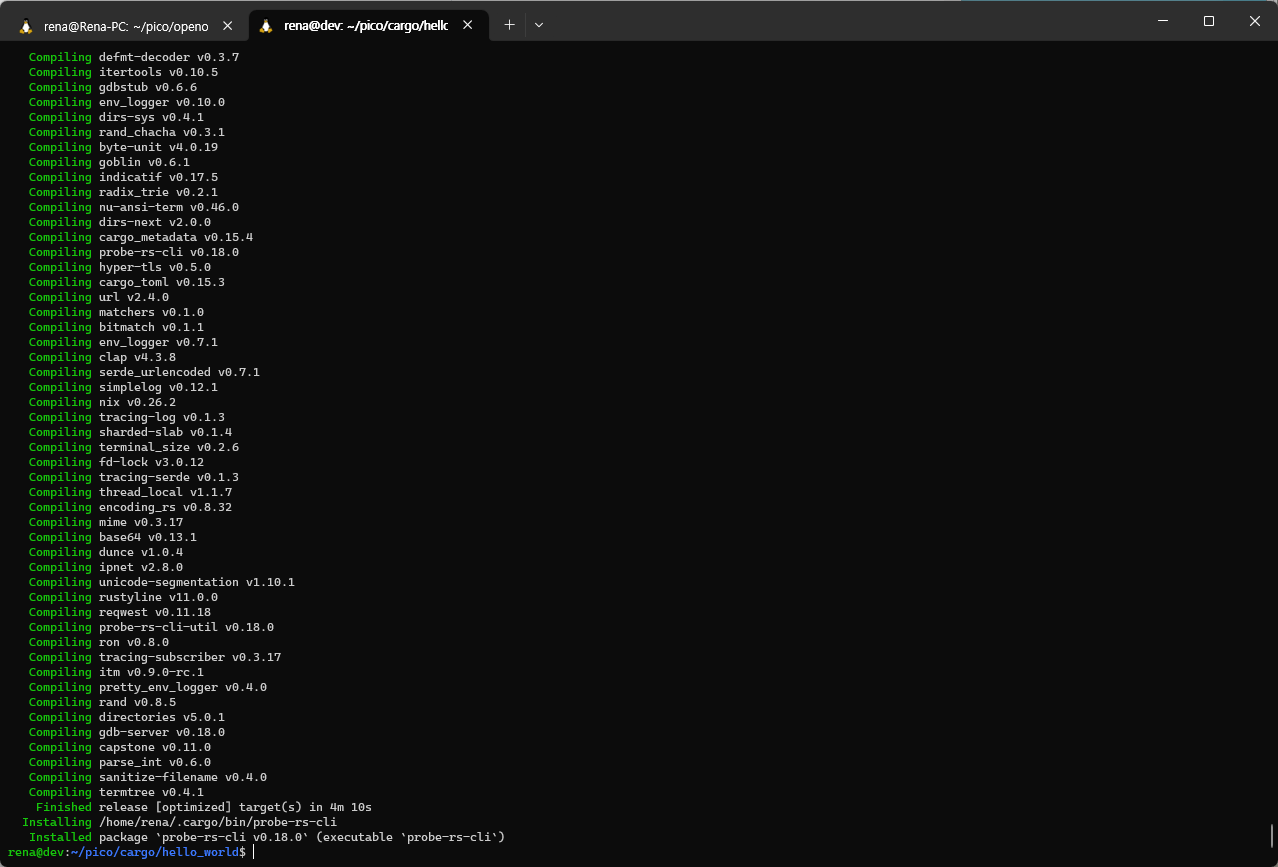
source "$HOME/.cargo/env"embassy download
Now, let's download the embassy source code and run the example.
git clone https://github.com/embassy-rs/embassy
cd embassy
Blinky
cd examples/rp
cargo run --release --bin blinky
# This takes a few minutes
There is a problem that Cargo does not recognize the probe board here.
It wasn't easy to solve, so I searched quite a bit, and there seemed to be quite a few people experiencing similar problems to me, but I couldn't find a clear solution.
As a result, Github Issues and blog posts were very helpful.
The blog post referenced the middle content.
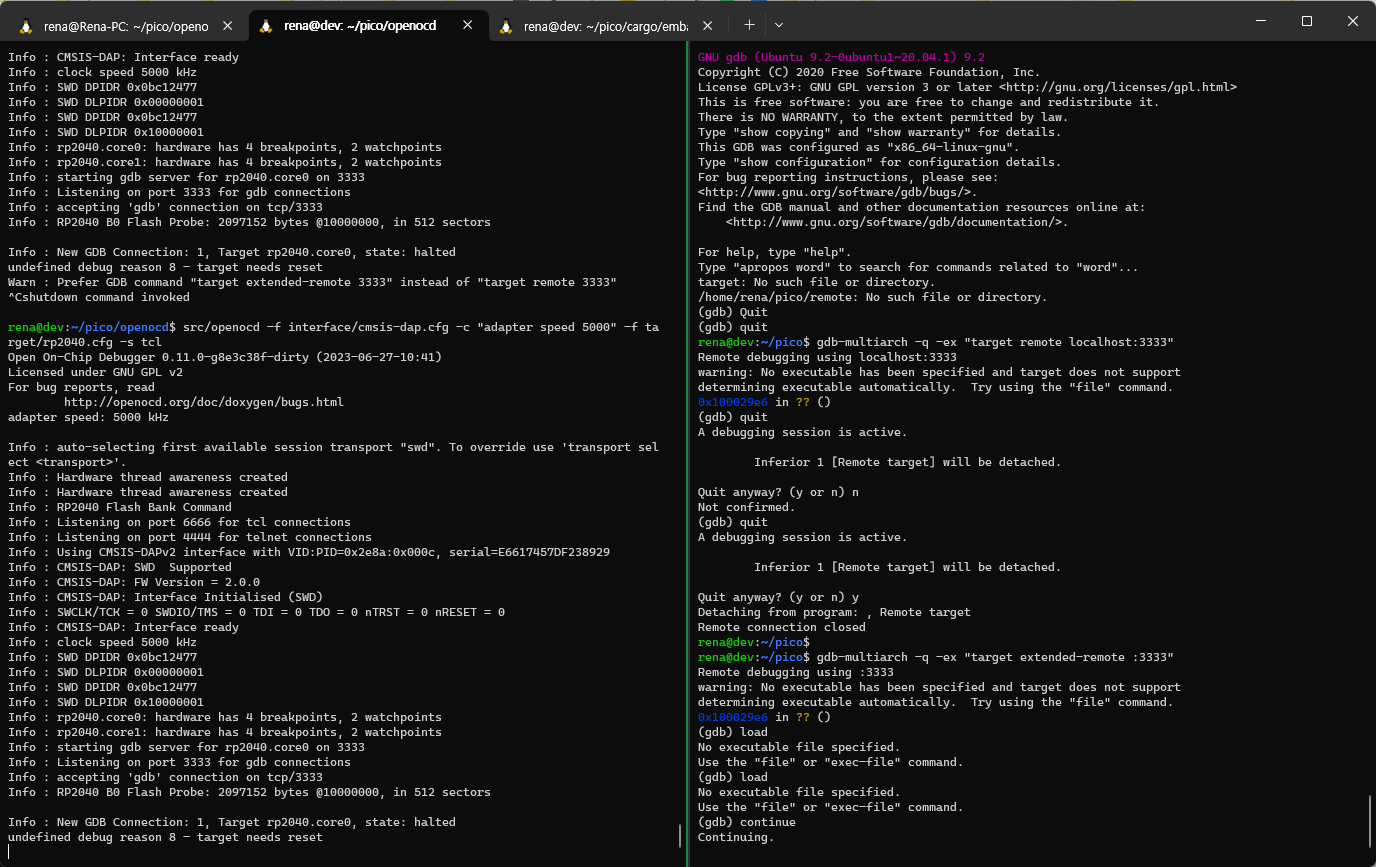
Open two terminals and run:

Terminal 1
$ cd ~/pico/openocd
$ src/openocd -f interface/cmsis-dap.cfg -f target/rp2040.cfg -s tcl -c "adapter speed 5000"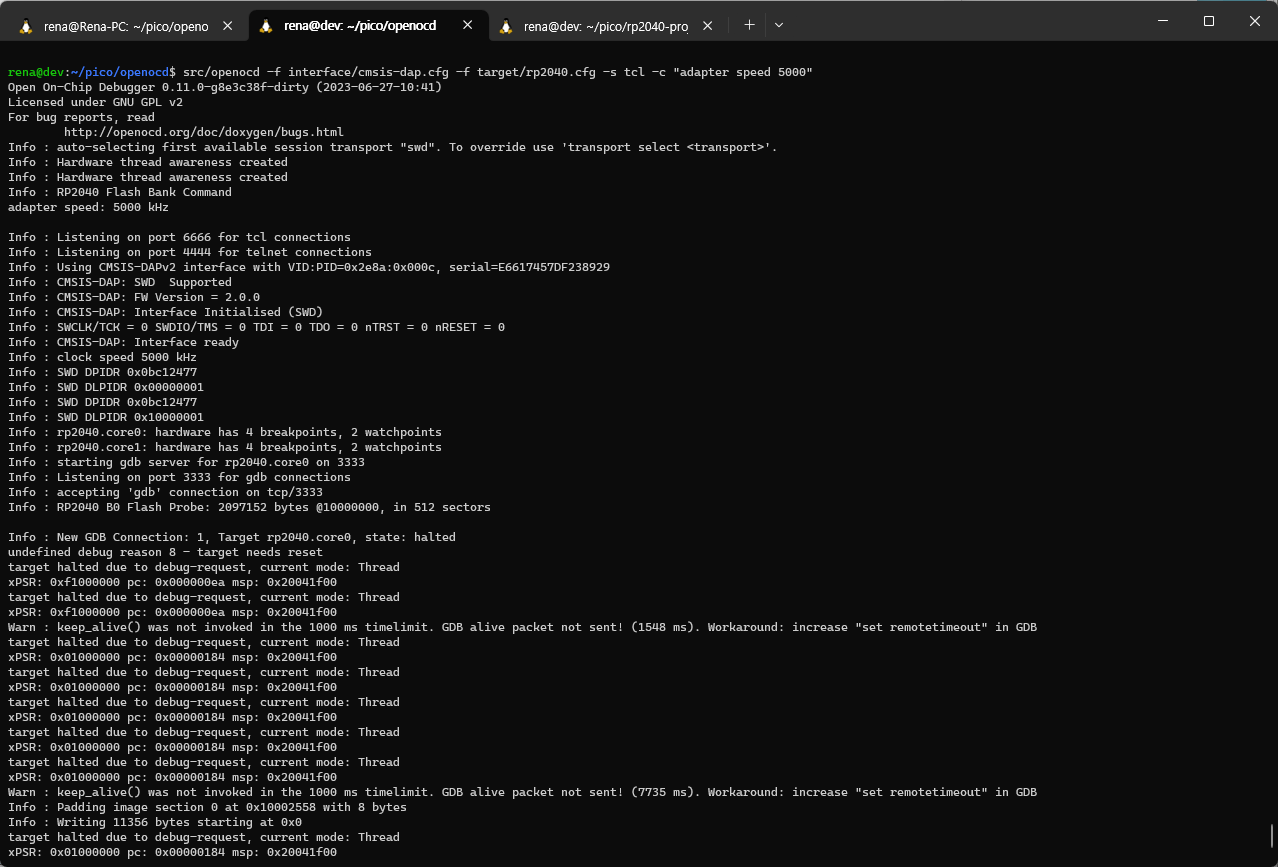
Terminal 2
$ cd ~/pico/rp2040-project-template
$ gdb-multiarch -q -ex "target extended-remote :3333" target/thumbv6m-none-eabi/debug/rp2040-project-template
You can load and run it using the following command in gdb.
(gdb)

load
continue
Up to this point, we have verified the operation of the board connection.
Back in embassy, run the example in the same way.
We started with the basic example, the blinky example.
cd ~/pico/cargo/embassy/examples/rp
cargo run --release --bin blinky
It works! :)
W5500 example
The TCP server and client examples using the Ethernet function of W5500-EVB-Pico were executed and tested.
ethernet_w5500_tcp_server
First, the TCP server application test was conducted.
I modified and referenced the following in the application code.
- Modify mac address to identify
- IP is set to be assigned by DHCP
- LED is set to turn on when TCP connection is established

$ vi src/bin/ethernet_w5500_tcp_server.rs

let mac_addr = [0x00, 0x08, 0xdc, 0x01, 0x02, 0x03];

$ **cargo run --release --bin ethernet_w5500_tcp_server**

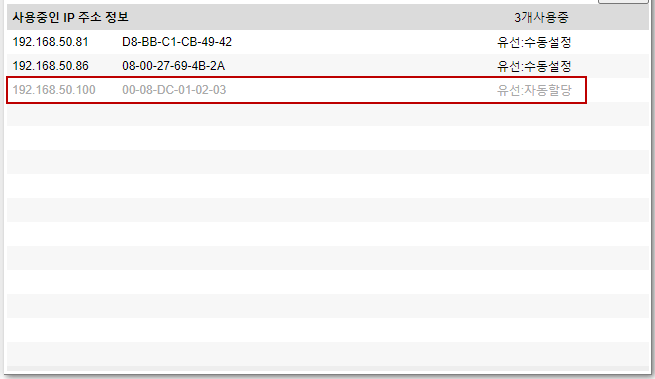
I checked the MAC address and assigned IP address on the router to which the board is connected as below. (192.168.50.100, 00-08-dc-01-02-03)
By default, it operates in Loopback mode.
ethernet_w5500_tcp_client
The following is the TCP client application.
Execute after modifying the code as follows.
host_addrI set the value to the Host PC IP address value of my environment.
$ vi src/bin/ethernet_w5500_tcp_client.rs
let **host_addr** = embassy_net::Ipv4Address::from_str("192.168.50.81").unwrap();
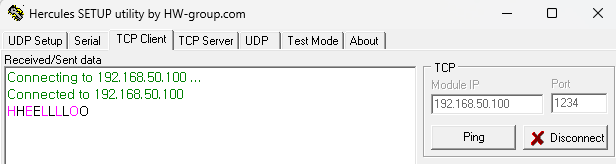
$ cargo run --release --bin ethernet_w5500_tcp_client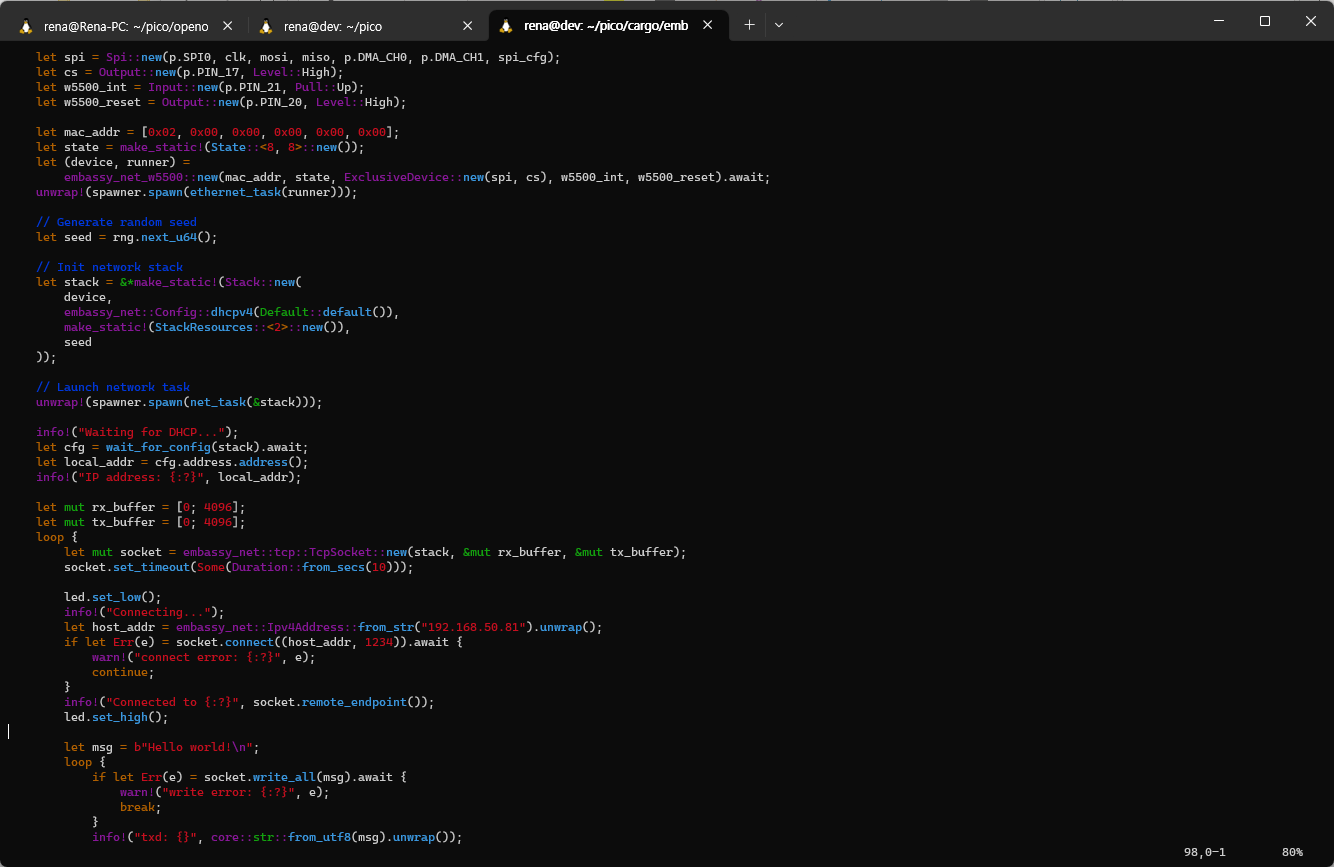
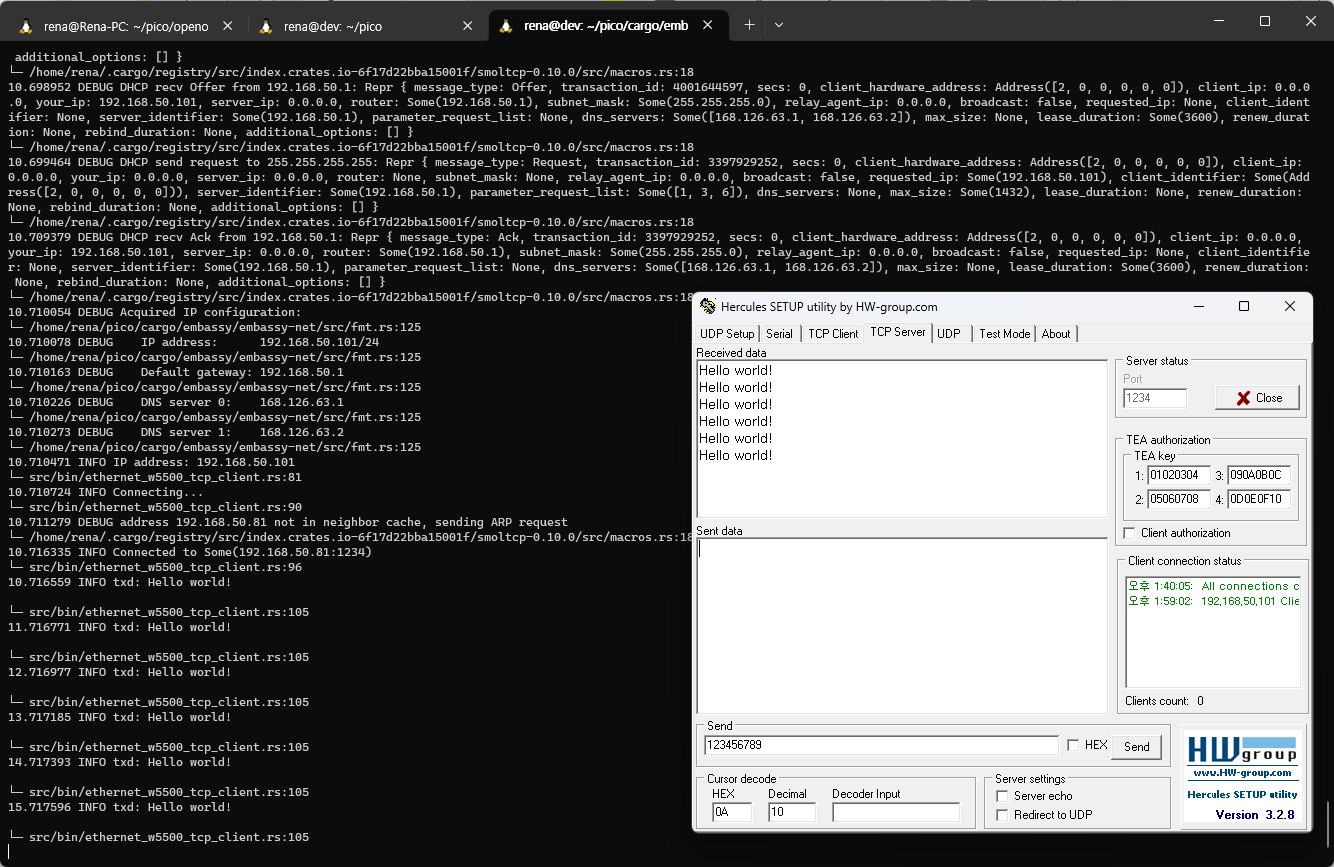
It is implemented so that the client is executed immediately and sends a hello world message periodically.
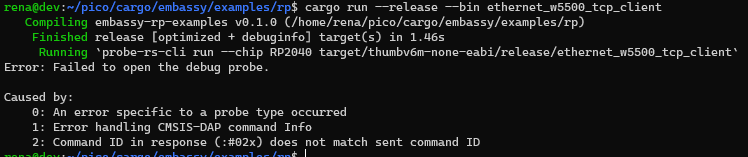
Here, the second run stopped and it seemed that the board was disconnected.
In this case, use reset to recognize the board again.
ethernet_w5500_multisocket
Lastly, it is a multiple socket operation test.
$ cargo run --release --bin ethernet_w5500_multisocket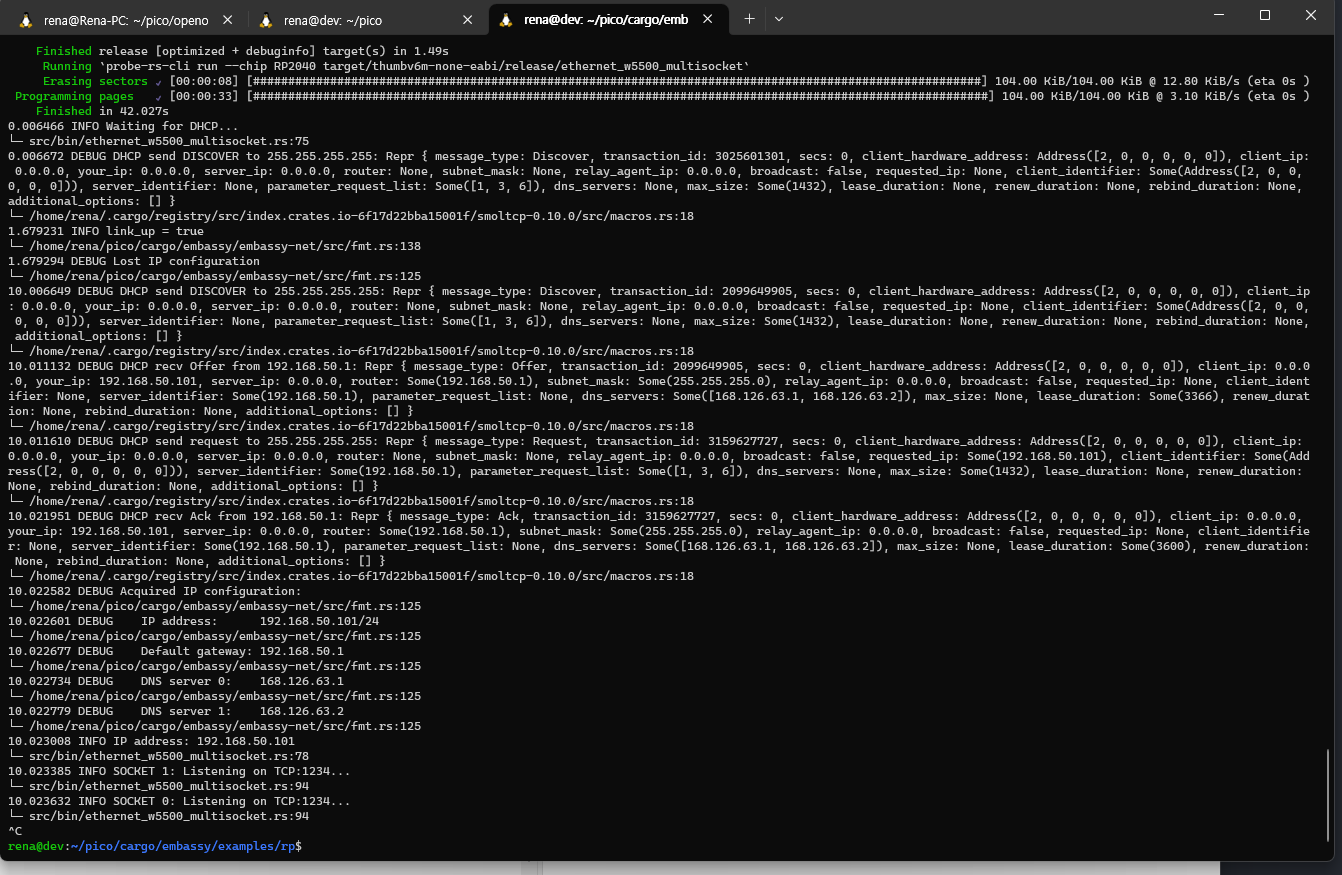
⚠️ Log of cmsis-dap unrecognized issue
During the test, there are cases in which OpenOCD suddenly does not recognize the USB. At this time, if you use the lsusb command to check, the device is recognized.
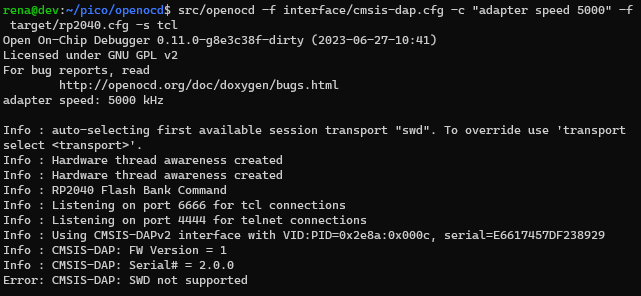
If openocd does not work even though it is recognized as the same when checked with lsusb, after resetting the board, connect the USB to the VM again in VirtualBox.
Reset should be done on the side of the debug board connected to USB power. It is reset by pressing the RUN button.
Perhaps there is an unstable part because of using VirtualBox, but if there is a chance to test it in a real Linux environment later, I will try it.
Concluding
So far, I have tested TCP socket communication with the W5500-EVB-Pico board based on the Rust environment, and it works well.
Now that the basic operation has been tested, I would like to proceed with a test that connects something by attaching a function.
Reference
W5500-EVB-Pico example
https://github.com/embassy-rs/embassy-net-w5500/tree/main/examples