
RollerShutter_Arduino_MQTT_Home_Assistant
RollerShutter_Arduino_MQTT_Home_Assistant

Arduino - Arduino Mega 2560
x 1
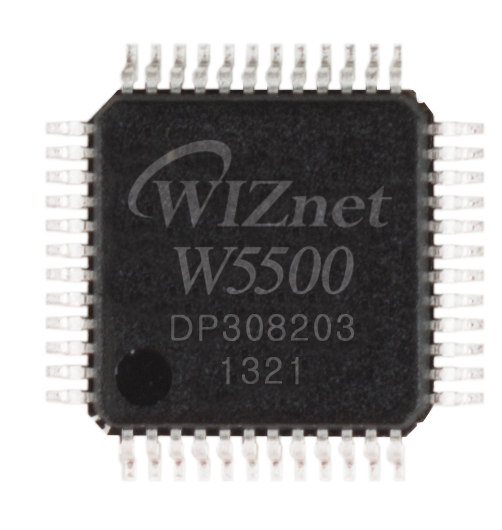
WIZnet - W5500
x 1
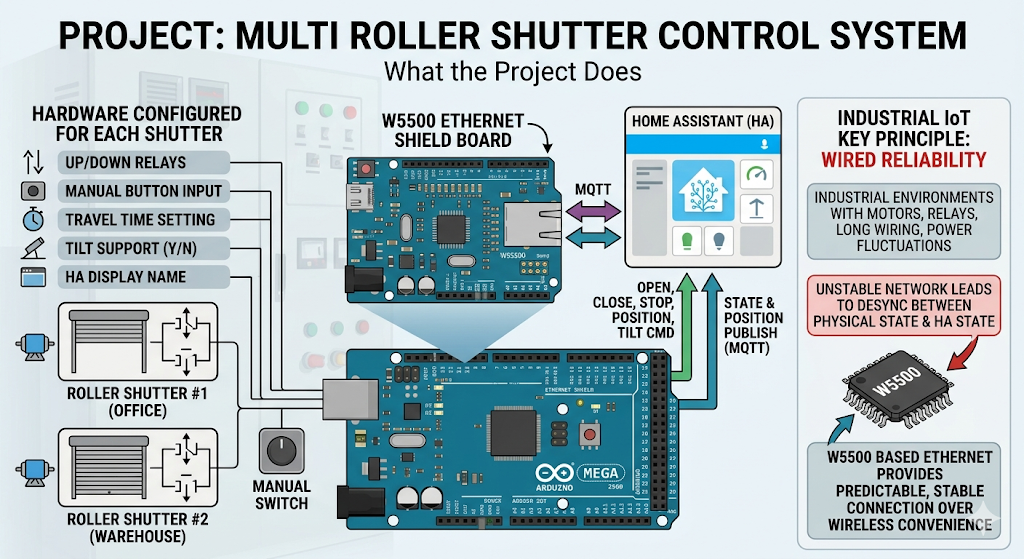
What the Project Does
이 프로젝트는 여러 개의 롤러셔터 또는 블라인드를 하나의 Arduino Mega 2560에서 제어하는 펌웨어입니다. 각 셔터는 UP/DOWN 릴레이, 수동 버튼 입력, 이동 시간, 틸트 지원 여부, Home Assistant 표시 이름을 설정값으로 가집니다.
Home Assistant는 MQTT를 통해 OPEN, CLOSE, STOP, 위치 값, 틸트 값을 Arduino에 전달합니다. Arduino는 명령을 수신해 해당 셔터의 릴레이를 제어하고, 다시 MQTT로 현재 상태와 위치를 발행합니다.
Industrial IoT 관점에서 이 프로젝트의 핵심은 무선 편의성보다 유선 안정성입니다. 롤러셔터는 모터, 릴레이, 긴 배선, 전원 변동이 함께 존재하는 설비이므로 네트워크가 불안정하면 실제 동작과 Home Assistant 상태가 어긋날 수 있습니다. W5500 기반 Ethernet은 이런 환경에서 예측 가능한 연결을 제공하는 역할을 합니다.
이미지 출처 : AI 생성
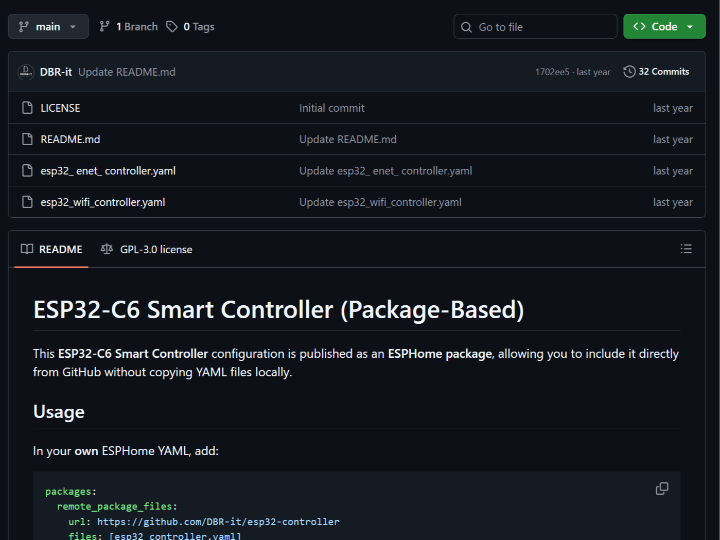
이미지 출처 : https://github.com/damsma/RollerShutter_Arduino_MQTT_Home_Assistant

이미지 출처 : https://github.com/damsma/RollerShutter_Arduino_MQTT_Home_Assistant
Where WIZnet Fits
이 프로젝트에서 사용되는 WIZnet 제품은 W5500 Ethernet Controller입니다. W5500은 Arduino와 SPI로 연결되며, Arduino Ethernet 라이브러리의 EthernetClient를 통해 MQTT 통신을 제공합니다.
W5500은 하드웨어 TCP/IP 스택, 32 KB 내부 버퍼, 8개 소켓을 제공하는 Ethernet 컨트롤러입니다. Arduino Mega 2560처럼 RAM이 제한적인 MCU에서는 네트워크 처리를 외부 Ethernet 컨트롤러에 맡기고, MCU는 셔터 상태 계산, 버튼 처리, 릴레이 제어, MQTT 메시지 처리에 집중할 수 있습니다.
Wi-Fi 기반 제어와 비교하면 W5500은 배선이 필요하지만, 무선 간섭이나 AP 상태에 덜 의존합니다. 분전함, 릴레이 박스, 건물 자동화 패널처럼 금속 구조물과 전원 노이즈가 있는 환경에서는 유선 Ethernet이 더 실용적인 선택이 될 수 있습니다.
Implementation Notes
NetworkConfig.h — W5500, 고정 IP, MQTT 설정
#define MQTT_BASE_TOPIC "homeassistant/cover"
#define MQTT_DEVICE_NAME "RollerShutter"
#define Standard_w5500 1
#define MAINTAIN_ETHERNET_INTERVAL 120000

#define MYIPADDR 192,168,1,199
#define MYIPMASK 255,255,255,0
#define MYDNS 192,168,1,1
#define MYGW 192,168,1,1

byte mac[] = {0x00, 0x10, 0xF1, 0x6E, 0x01, 0x99};
#define MQTT_SERVER "192.168.1.188"
#define MQTT_PORT 1883
이 파일은 네트워크와 MQTT 설정을 모아 둔 구성 파일입니다. Standard_w5500은 W5500 사용 구성을 선택하고, MYIPADDR, MYGW, MQTT_SERVER는 Arduino가 Home Assistant 또는 MQTT 브로커와 통신할 수 있도록 고정 네트워크 값을 지정합니다.
Industrial IoT 환경에서는 DHCP보다 고정 IP가 유지보수에 유리한 경우가 많습니다. 단, 여러 장비가 같은 네트워크에 연결될 경우 IP 충돌을 반드시 피해야 합니다.
RollerShutter_Arduino_MQTT_Home_Assistant.ino — EthernetClient를 MQTT 전송 계층으로 사용
#include "NetworkConfig.h"
#include <SPI.h>
#include <Ethernet.h>
#include <PubSubClient.h>

IPAddress ip(MYIPADDR);
EthernetClient ethClient;
PubSubClient client(ethClient);
이 부분에서 W5500은 MQTT 통신을 위한 Ethernet 인터페이스로 사용됩니다. EthernetClient가 W5500 기반 TCP 연결을 만들고, PubSubClient가 그 위에서 MQTT publish/subscribe를 수행합니다.
즉, W5500은 Home Assistant 기능을 직접 처리하지 않습니다. W5500의 역할은 Arduino와 MQTT 브로커 사이의 안정적인 유선 네트워크 경로를 제공하는 것입니다.
RollerShutter.h — Home Assistant MQTT Discovery 구성
root["device_class"] = "shutter";
root["command_topic"] = commandTopic();
root["state_topic"] = stateTopic();
root["availability_topic"] = availabilityTopic();
root["payload_open"] = "OPEN";
root["payload_close"] = "CLOSE";
root["payload_stop"] = "STOP";
root["set_position_topic"] = positionSetTopic();
root["position_topic"] = positionTopic();
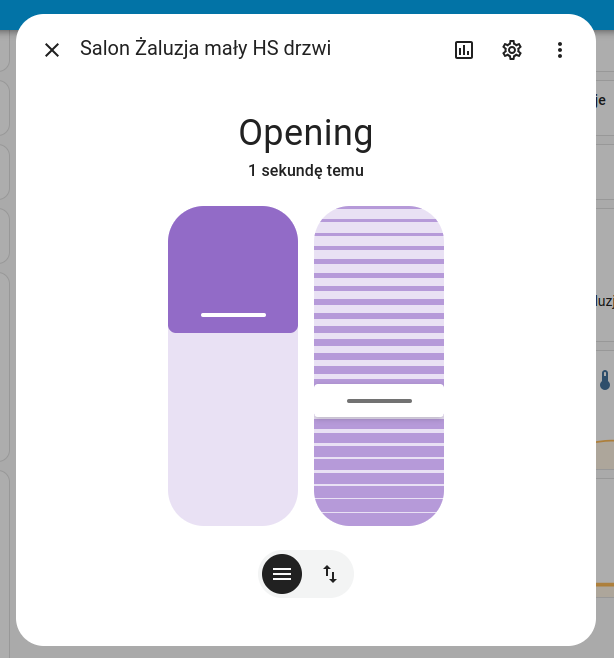
root["optimistic"] = false;이 코드는 Home Assistant가 각 셔터를 MQTT cover 엔티티로 자동 인식하도록 discovery payload를 구성합니다.
optimistic이 false로 설정되어 있기 때문에 Home Assistant는 명령을 보냈다는 사실만으로 상태를 가정하지 않습니다. Arduino가 실제로 발행하는 state_topic과 position_topic을 기준으로 UI 상태를 갱신합니다. 셔터나 블라인드처럼 실제 위치와 명령 상태가 어긋날 수 있는 장치에서는 이 방식이 더 안전합니다.
client.publish(discoveryTopic().c_str(), buffer, true);
client.publish(availabilityTopic().c_str(), "online", true);
client.publish(stateTopic().c_str(), stateStr, true);
client.publish(positionTopic().c_str(), posBuffer, true);
이 구조는 discovery, availability, state, position 메시지를 MQTT로 발행합니다. retained 메시지를 사용하면 Home Assistant나 MQTT 브로커가 재시작된 뒤에도 마지막 설정과 상태를 빠르게 복원할 수 있습니다.
Practical Tips / Pitfalls
- W5500의 CS 핀 설정을 반드시 확인해야 합니다. 프로젝트는
Standard_w5500,Easyswitch_with_w5500,Pico_with_w5500구성을 구분합니다. - MQTT 브로커 IP, Arduino 고정 IP, gateway, subnet이 같은 네트워크 대역에 있어야 합니다.
- Home Assistant discovery payload가 크기 때문에 PubSubClient buffer 크기 설정을 확인해야 합니다.
- 셔터 수가 늘어나면 MQTT topic과 retained 메시지도 함께 증가합니다. 브로커의 retained message 상태를 점검하는 것이 좋습니다.
- 릴레이 방향 전환에는 보호 시간이 필요합니다. 모터가 완전히 멈추기 전에 반대 방향 릴레이가 켜지면 하드웨어 손상이 발생할 수 있습니다.
- 실제 모터를 연결하기 전에 릴레이 출력만 분리한 상태에서 MQTT 명령, 상태 발행, Home Assistant 표시를 먼저 검증해야 합니다.
- LAN 케이블 분리, MQTT 브로커 재시작, Home Assistant 재시작 상황에서 복구 동작을 테스트해야 합니다.
FAQ
Q: 왜 이 프로젝트에 W5500을 사용하는 것이 적합한가요?
A: W5500은 TCP/IP 처리를 하드웨어로 담당하므로 Arduino Mega 2560의 부담을 줄일 수 있습니다. MCU는 네트워크 스택보다 셔터 위치 계산, 버튼 입력, 릴레이 제어, MQTT 메시지 처리에 집중할 수 있습니다.
Q: W5500은 Arduino Mega 2560에 어떻게 연결되나요?
A: SPI로 연결됩니다. 기본적으로 MISO, MOSI, SCK, CS 핀이 필요하며, 보드 구성에 따라 CS 핀을 정확히 지정해야 합니다. 프로젝트에서는 W5500 보드 유형에 따라 서로 다른 CS 핀 구성을 선택할 수 있습니다.
Q: 이 프로젝트에서 W5500은 어떤 역할을 하나요?
A: W5500은 Arduino와 MQTT 브로커 사이의 유선 Ethernet 연결을 제공합니다. Home Assistant 명령은 MQTT를 통해 Arduino로 전달되고, Arduino의 셔터 상태도 같은 경로로 Home Assistant에 보고됩니다.
Q: 초보자도 따라할 수 있나요?
A: Arduino 기본 예제보다는 난이도가 높습니다. Arduino Mega 핀맵, W5500 SPI 연결, MQTT 브로커, Home Assistant MQTT integration, 릴레이 구동 회로를 이해해야 합니다. 특히 실제 셔터 모터를 연결하기 전에는 반드시 저전압 테스트와 릴레이 동작 검증이 필요합니다.
Q: Wi-Fi 기반 ESP 보드와 비교하면 어떤 차이가 있나요?
A: Wi-Fi는 배선이 간단하지만 무선 간섭, AP 상태, 신호 감쇠의 영향을 받을 수 있습니다. W5500 기반 Ethernet은 케이블이 필요하지만 연결 상태가 더 예측 가능하므로, 건물 자동화나 산업용 셔터 제어처럼 안정성이 중요한 환경에 더 적합합니다.
-
Github Code
