
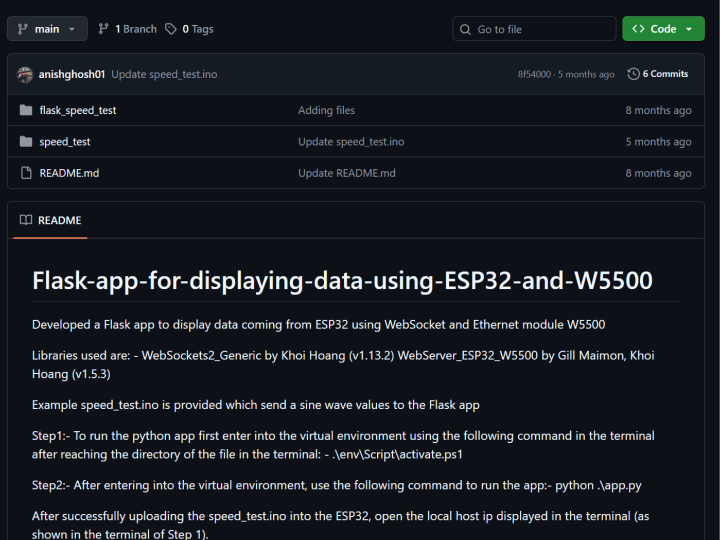
Flask-app-for-displaying-data-using-ESP32-and-W5500
Flask-app-for-displaying-data-using-ESP32-and-W5500
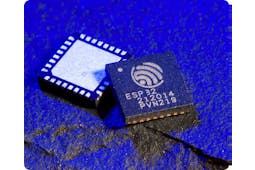
Espressif - ESP32
x 1
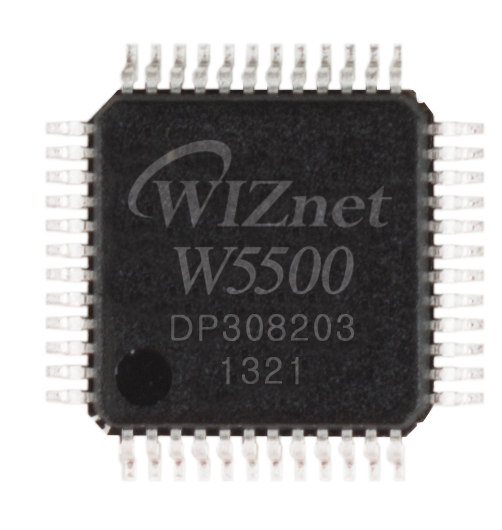
WIZnet - W5500
x 1
What the Project Does
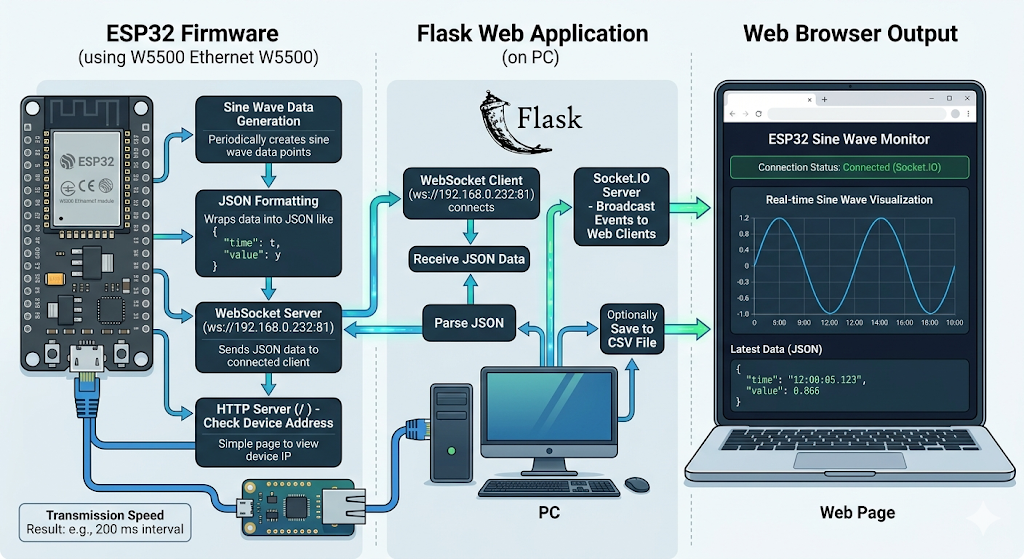
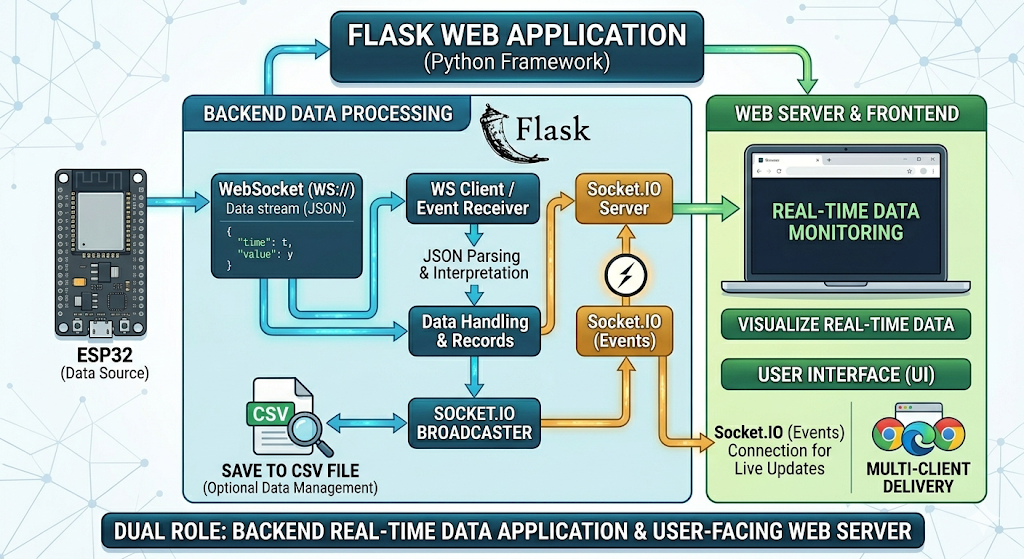
저장소는 두 부분으로 나뉩니다. 하나는 ESP32 펌웨어이며, 다른 하나는 Flask 기반 웹 애플리케이션입니다. ESP32 쪽 코드는 사인파 데이터를 주기적으로 생성한 뒤 JSON 형태의 WebSocket 메시지로 송신합니다. 동시에 간단한 HTTP 루트 핸들러를 열어 현재 장치 주소를 확인할 수 있게 합니다. PC 쪽 Flask 앱은 ws://192.168.0.232:81에 접속해 데이터를 받아 JSON으로 파싱하고, 이를 Socket.IO 이벤트로 웹 페이지에 다시 브로드캐스트합니다. 필요하면 CSV 파일로 기록도 수행합니다. README에는 이 예제가 “ESP32 using WebSocket and Ethernet module W5500”을 기반으로 한다고 명시되어 있고, 예제 업로드 후 로컬 웹 앱에서 사인파를 볼 수 있다고 설명하고 있습니다. 또한 전송 속도 측정 결과도 함께 적혀 있습니다.
이미지 출처 : AI 생성
Flask 앱 개요
Flask 앱은 Python의 Flask 프레임워크로 작성된 웹 애플리케이션입니다. 이 프로젝트에서는 단순한 웹페이지 표시용 프로그램이 아니라, ESP32에서 전달된 데이터를 받아 처리하고 브라우저 화면에 보여주는 서버 역할을 합니다. Flask 앱은 ESP32가 보내는 WebSocket 데이터를 수신하고, 이를 JSON으로 해석한 뒤 웹 클라이언트가 보기 쉬운 형태로 다시 전달합니다. 필요에 따라 CSV 파일로 저장하는 기능도 포함할 수 있어, 단순 시각화뿐 아니라 기록과 데이터 관리에도 활용됩니다. 즉 이 프로젝트에서 Flask 앱은 사용자 화면을 제공하는 웹 서버이면서, 동시에 실시간 데이터를 처리하는 백엔드 애플리케이션이라고 보시면 됩니다.
이미지 출처 : AI 생성
Where WIZnet Fits
이 프로젝트에서 WIZnet 부품은 W5500입니다. 역할은 단순한 물리 계층 부착이 아니라, ESP32가 유선 Ethernet 인터페이스를 통해 안정적으로 WebSocket 서버를 구동하도록 만드는 네트워크 엔드포인트입니다. 코드에서 ETH.begin(...)으로 W5500 인터페이스를 초기화하고, 이어서 ETH.config(...)로 정적 IP를 설정한 다음, WebSocket 서버를 포트 81에서 열고 있습니다. 이 구조는 무선 연결의 채널 혼잡이나 AP 상태에 덜 의존하므로, 측정 실험이나 교육용 시각화 데모처럼 링크가 항상 살아 있어야 하는 상황에 잘 맞습니다. 특히 ESP32가 사인파 생성, JSON 직렬화, 송신 속도 계산을 동시에 수행하는 예제이기 때문에, 네트워크 경로를 유선으로 고정하면 디버깅 포인트가 줄어듭니다.
Implementation Notes
이 저장소는 실제로 W5500을 사용합니다. 가장 중요한 부분은 ESP32 측 Ethernet 초기화와 Flask 측 WebSocket 수신 루프입니다.
speed_test/speed_test.ino
ETH.begin(
MISO_GPIO, MOSI_GPIO, SCK_GPIO, CS_GPIO,
INT_GPIO, SPI_CLOCK_MHZ, ETH_SPI_HOST
);
ETH.config(myIP, myGW, mySN, myDNS);
wsServer.listen(81);
이 코드는 W5500을 SPI 기반 Ethernet 인터페이스로 올리고, 정적 IP를 설정한 뒤, WebSocket 서버를 열어 실제 데이터 스트림의 송신 출발점을 만듭니다. 여기서 중요한 점은 W5500이 단순 센서가 아니라 ESP32의 네트워크 인터페이스 자체라는 점입니다. 이 초기화가 끝나야 이후 wsClient.send(payload)가 의미를 갖습니다.
같은 파일에서 실제 데이터 전송도 확인됩니다.
speed_test/speed_test.ino
",\"value\":" + String(value, 4) +
",\"tx_speed\":" + String(tx_speed_kbps, 1) + "}";
if (wsClient.available()) {
wsClient.send(payload);
total_bytes_sent += payload.length();
}
즉, 이 프로젝트의 데이터 경로는 “사인파 생성 → JSON 패키징 → W5500 기반 Ethernet 링크로 WebSocket 전송”입니다. W5500이 빠지면 이 예제의 유선 전송 경로는 성립하지 않습니다.
Flask 측에서는 다음과 같이 ESP32에 직접 접속합니다.
flask_speed_test/app.py
uri = f"ws://{ESP32_IP}:81"
async with websockets.connect(uri) as ws:
data = await ws.recv()
이 부분은 브라우저가 ESP32에 직접 붙는 구조가 아니라, Flask가 먼저 데이터를 수신한 뒤 이를 다시 웹 UI에 뿌리는 중계 계층임을 보여줍니다. 따라서 프로젝트 전체 관점에서 W5500은 현장 장치 측 uplink, Flask 앱은 시각화와 기록 계층으로 보시면 됩니다.
Practical Tips / Pitfalls
- W5500 배선에서 SPI 핀과 CS, INT 연결이 틀리면 링크 자체가 올라오지 않습니다. 이 프로젝트는 핀 정보를 로그로 출력하도록 작성되어 있으므로 부팅 로그를 먼저 확인하시는 편이 좋습니다.
- 예제는
ETH.config(myIP, myGW, mySN, myDNS);를 사용한 정적 IP 구성입니다. PC와 ESP32가 같은 대역에 있지 않으면 Flask 앱의 WebSocket 연결이 실패합니다. - Flask 앱의
ESP32_IP = "192.168.0.232"는 하드코딩되어 있습니다. DHCP로 바꾸면 이 값을 수동으로 맞춰야 하므로, 실험 재현성 측면에서는 정적 IP가 오히려 편합니다. - 송신 속도 수치는 payload 크기와 전송 주기에 민감합니다. README의 수치는 참고치일 뿐이며, 실제 환경에서는 스위치, 케이블, PC 부하, JSON 길이에 따라 달라질 수 있습니다.
delayMicroseconds(1);같은 짧은 지연만 두고 루프를 빠르게 돌리므로, 장시간 운용 시에는 연결 끊김 복구와 watchdog 전략을 추가하시는 편이 안전합니다.- 브라우저 표시보다 CSV 기록이 병목이 될 수 있습니다. 기록을 활성화하면 디스크 쓰기와 Python 스레드 동기화 비용이 추가됩니다.
FAQ
왜 이 프로젝트에서 W5500을 쓰는가요?
이 저장소의 목적이 ESP32 데이터를 유선 WebSocket 경로로 Flask 앱에 전달하는 것이기 때문입니다. README에서도 Ethernet module W5500 기반이라고 밝히고 있고, 펌웨어는 ETH.begin(...)으로 실제 W5500 경로를 초기화합니다. 따라서 W5500은 선택적 부가 기능이 아니라 전송 매체 자체입니다. Wi-Fi 대신 유선을 쓰면 AP 상태나 무선 간섭 변수 없이 데이터 경로를 고정할 수 있어 측정 예제에 유리합니다.
플랫폼에는 어떻게 연결되는가요?
ESP32와 W5500은 SPI 버스로 연결됩니다. 코드가 MISO_GPIO, MOSI_GPIO, SCK_GPIO, CS_GPIO, INT_GPIO, SPI_CLOCK_MHZ, ETH_SPI_HOST를 사용해 Ethernet 인터페이스를 시작하는 것으로 보아, 기본 구조는 SPI + 칩 셀렉트 + 인터럽트 라인입니다. 즉 이 프로젝트를 재현하시려면 전원과 SPI 배선뿐 아니라 CS 및 INT 핀 정의도 맞아야 합니다.
이 프로젝트 안에서 W5500은 정확히 무슨 일을 하는가요?
사인파 데이터를 브라우저에 직접 그리는 것이 아니라, ESP32가 JSON 페이로드를 생성해 WebSocket 서버로 송신할 수 있도록 유선 네트워크 인터페이스를 제공합니다. 이후 Flask 앱이 해당 소켓에 접속해 데이터를 받아 화면과 CSV로 넘깁니다. 즉 W5500의 기능적 위치는 “센서/신호 생성 장치와 시각화 서버 사이의 유선 transport 계층”입니다.
초보자도 따라 할 수 있나요?
가능은 하지만 완전 초보자에게는 약간 어렵습니다. Arduino/ESP32 업로드, 정적 IP 개념, Python 가상환경, Flask 실행, WebSocket 데이터 흐름을 모두 아셔야 합니다. 반면 구조 자체는 단순합니다. ESP32는 데이터를 보내고, Flask는 받아서 표시합니다. 네트워크를 Wi-Fi 대신 W5500로 고정했기 때문에 오히려 학습용으로는 데이터 경로가 명확한 편입니다.
Wi-Fi와 비교하면 어떤 차이가 있나요?
이 코드에서는 시작 단계에서 WiFi.mode(WIFI_OFF);를 호출해 Wi-Fi를 끕니다. 즉 설계 의도가 처음부터 W5500 기반 유선 경로에 맞춰져 있습니다. Wi-Fi는 배선이 줄어드는 장점이 있지만, AP 의존성, 채널 상태, 전파 환경에 따라 실험 재현성이 흔들릴 수 있습니다. 반대로 이 프로젝트처럼 로컬 네트워크 안에서 ESP32 스트림을 안정적으로 계측하고 Flask로 넘기는 용도라면, W5500 유선 구성은 링크 상태를 더 분명하게 관리하기 쉽습니다.
-
Github Code
