Adafruit Ethernet FeatherWing wired Wings Work Wonders
Adafruit Ethernet FeatherWing wired Wings Work Wonders
0
Project description
Overview

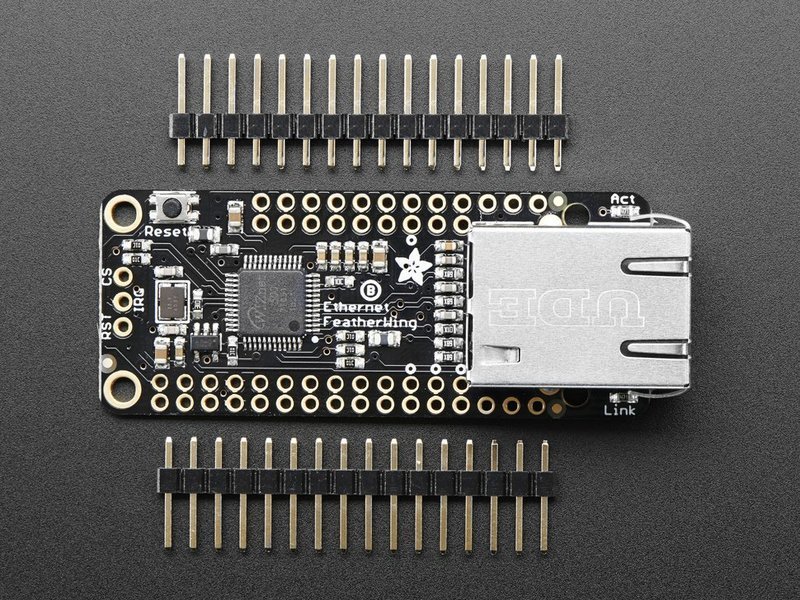
Wireless is wonderful, but sometimes you want the strong reliability of a wire. If your Feather board is going to be part of a permanent installation, this Ethernet FeatherWing will let you add quick and easy wired Internet. Just plug in a standard Ethernet cable, and run the Ethernet2 library for cross-platform networking.

Ethernet is a tried-and-true networking standard. It's supported by every hub and switch, and because there's a physical connection you don't have to noodle around with SSIDs, passwords, authentication schemes or antennas. It works great with any of our Feathers, the WIZ5500 chip communicates over SPI plus a single CS pin. The Arduino Ethernet2 library works great, and within a few seconds after connecting, will do the DHCP setup for you. As a nice extra, the RJ-45 jack has both link and activity lights that will light/blink to let you know the current connection status.

Each order comes with one assembled and tested FeatherWing, plus some header. You will need to solder in the header yourself but its a quick task.

Pinouts

The Ethernet FeatherWing plugs into any Feather and adds hard-wired networking. To make it as cross-platform compatible as possible, we use only SPI plus one extra, configurable pin. It's not going to be gigabit (or even multi-megabit) speeds but it will work!
Power Pins

The WIZ5500 Ethernet chip (and really any ethernet chip) are fairly high current devices, requring about 150mA whether or not actively transmitting. The chip is powered from the?3.3V?and?GND?pins indicated and does not have an internal regulator.
SPI Data Pins

Configuration, setup, and data is received/transmitted over SPI. All Feathers have the default SPI port on the same pins, so we use?MOSI/MISO/SCK?in this location. They are 3.3V logic, 5V tolerant.
A Chip Select pin is also required. By default we use this pin:

Which is connected to pin?#10?on Feather Teensy 3, 32u4, 328p, M4 and M0, pin?#15?on ESP8266, and?PB4?on WICED.
You can also get to the CS pin from the left group of breakouts. To change CS pin, solder this pad to a different pin and cut this jumper:

Other Breakouts

You can also connect to and use the?IRQ?and WIZ?ReSeT?pins. These are not used in the library and are there for advanced usage. They are 3.3V logic, 5V tolerant.
Assembly
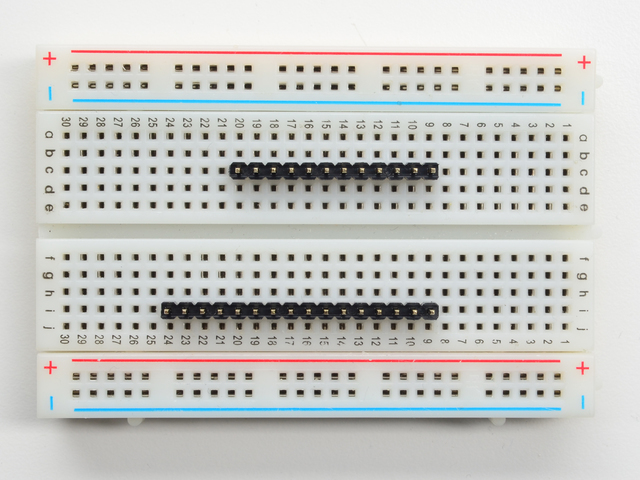
Prepare the header strip:
Cut the strip to length if necessary. It will be easier to solder if you insert it into a breadboard -?long pins down
Add the FeatherWing:
Place the featherwing over the pins so that the short pins poke through the two rows of breakout pads



And Solder!
Be sure to solder all pins for reliable electrical contact. (For tips on soldering, be sure to check out ourGuide to Excellent Soldering). Start by soldering the first row of header


Now flip around and solder the other row completely

You're done !


Attach an ethernet cable, & plug it into your feather of choice!
Usage

The Ethernet chipset we are using (Wiz5500) is well supported and works for all Feathers, all you need is a little library support and you will be sending packets in no time!
Install Ethernet Library
Start by installing the support library for the Wiz5500.?We recommend the Arduino Ethernet library Start by downloading the library. You can do that by using the library manager

Make sure you're running at least version 2.0.0 (or higher)
We also have a great tutorial on Arduino library installation at:
http://learn.adafruit.com/adafruit-all-about-arduino-libraries-install-use
Connect Cable
Make sure you have the FeatherWing plugged into your Feather, and an Ethernet cable connected to your hub, router or switch.
Run Example Code
We recommend opening up the?WebClient?example
At the top of setup() change this section
void setup() {
  // You can use Ethernet.init(pin) to configure the CS pin
  //Ethernet.init(10);  // Most Arduino shields
  //Ethernet.init(5);   // MKR ETH shield
  //Ethernet.init(0);   // Teensy 2.0
  //Ethernet.init(20);  // Teensy++ 2.0
  //Ethernet.init(15);  // ESP8266 with Adafruit Featherwing Ethernet
  //Ethernet.init(33);  // ESP32 with Adafruit Featherwing Ethernet
By uncommenting the line that matches your board:
- ESP8266?Feather uses CS pin?15
- ESP32?Feather uses CS pin?33
- WICED?Feather uses CS pin?PB4
- nRF52832?Feather uses CS pin?11
- Teensy, nRF52840, 32u4, 328p, M0 and M4?Feather uses CS pin 10
Change this line
char server[] = "www.google.com"; // name address for Google (using DNS)
to
char server[] = "wifitest.adafruit.com"; // name address for adafruit (using DNS)
and these lines
client.println("GET /search?q=arduino HTTP/1.1");
client.println("Host: www.google.com");
to
client.println("GET /testwifi/index.html HTTP/1.1");
client.println("Host: wifitest.adafruit.com");
If you're using a LoRa/RFM69 Feather, make sure to add a pinMode(8, INPUT_PULLUP) to disable the LoRa or RFM69 radio
Then open up the serial console of your Feather to see the connection and data:

If you don't get an IP address, check you have a green link light, and that your Ethernet is going out to an internet connected router. You may also have to set up the MAC address to allow it access, check with your system admin if you're not sure.
Power over Ethernet
To keep the FeatherWing small, simple and inexpensive, we do not include PoE support. However, it's a common request that some people want to simplify cabling when the device is far away.
This all-in-one solution will let you plug an Ethernet cable to a PoE switch/hub then split into data and a Feather-friendly micro USB connector on the other

Power over Ethernet (PoE) splitters can make your project wiring a breeze - and best of all they work to connect any 802.3af-capable router to any Ethernet device, even if it...
$10.95
In Stock
Passive PoE
If you don't even have a PoE hub, here's a solution that doesn't even require a PoE hub:?passive PoE injectors!
Simplify your Internet of Things with a passive PoE injector cable. These are quite handy for projects that have Ethernet connectivity and also need a power cable. Of course, you can...
$5.95
In Stock
These cables don't have any active PoE negotation circuitry, intstead, we just use the extra unused wires in the Cat-5+ wires to carry power and ground. They're a simple and afforable solution.
On one end, plug in the Ethernet cable to your router, and a?5V wall adapter into the 2.1mm jack

This is an FCC/CE certified and UL listed power supply. Need a lot of 5V power? This switching supply gives a clean regulated 5V output at up to 2000mA. 110 or 240 input, so it works...
$7.95
In Stock
Then run any standard Ethernet cable to the other end where you will use a?2.1mm to microUSB adapter cable

The premise of this?MicroUSB Plug to 5.5/2.1mm Jack adapter?is simple. There's a MicroUSB plug on one end and a 5.5mm/2.1mm DC barrel jack with center...
$1.95
In Stock
And plug that directly into the Feather. For long power runs there might be a slight voltage droop but since the regulator on board will reduce the input voltage to 3.3V for the chip and peripherals (all Feathers are 3.3V logic) it should not be noticable
Downloads
Files & Datasheets
Schematic
Click to embiggen
Fabrication Print
dimensions in inches
This guide was first published on Jul 27, 2016. It was last updated on Jul 27, 2016.

