
Getting started with W5100S-EVB-Pico2 and Micropython
This project aims to provide a simple guide how to use Ethernet with Micropython on newest W5100S-EVB-Pico2 built around RP2350
Introduction
WIZnet recently unveiled its new evaluation boards built around newest RP2350 chip. W5100S-EVB-Pico2 will soon hit the shelves and I decided to make a simple guide how to use these boards with MicroPython.
IMPORTANT NOTE: WIZnet is now working on adding its boards to MicroPython and CircuitPython websites. The official build will be available soon. This guide aims to test only.
Step 1.
The MicroPython for Pico2 is now available but it is still a pre-build version.
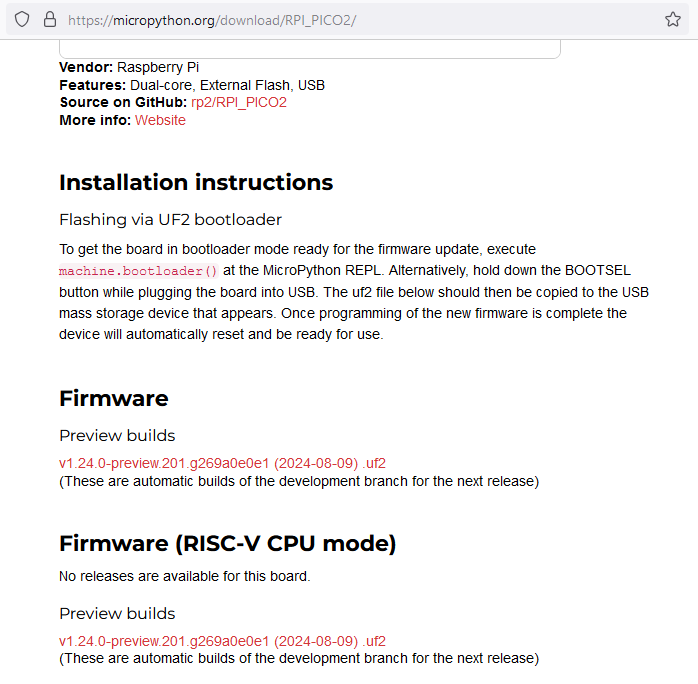
As of this guide creation date, the pull request was not yet merged.
In order to add networking bundle to Pico 2 firmware, it is necessary to clone the forked repository: https://github.com/dpgeorge/micropython/tree/rp2-add-rp2350
I will skip the explanation of how to setup MicroPython on local machine. To add the network bundle to the Pico 2, I just copied lines from W5100S-EVB-Pico config files. The compiled firmware can be found in attachment below.
Step 2.
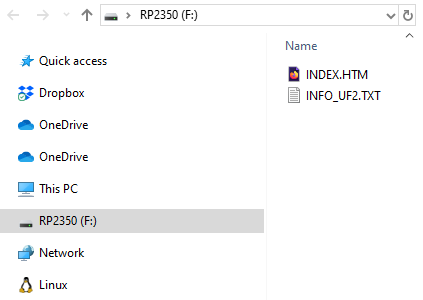
Press & hold the BOOTSEL button on the board and connect it to PC. Then copy compiled firmware to the RP2350 Drive.
Step 3.
I used Thonny IDE for coding.
For tests I decided to proceed with basic loopback test from WIZnet repository:
https://github.com/Wiznet/RP2040-HAT-MicroPython/blob/main/examples/Loopback/W5x00_Loopback.py
IMPORTANT: Update the network configuration according to your environment
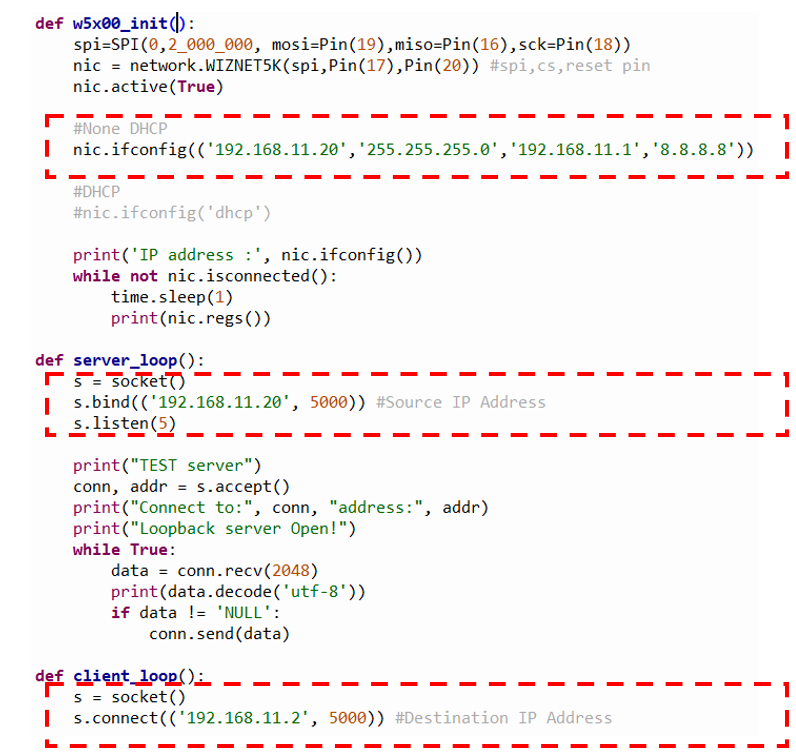
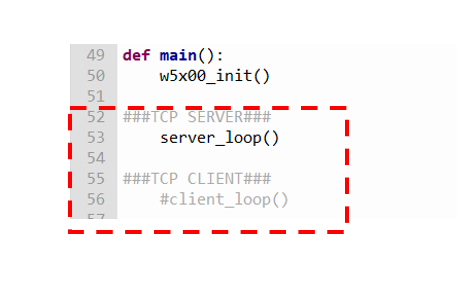
Also, do not forget to select the operation mode in the Main
Step 4.
After running the code, below results can be seen in the shell
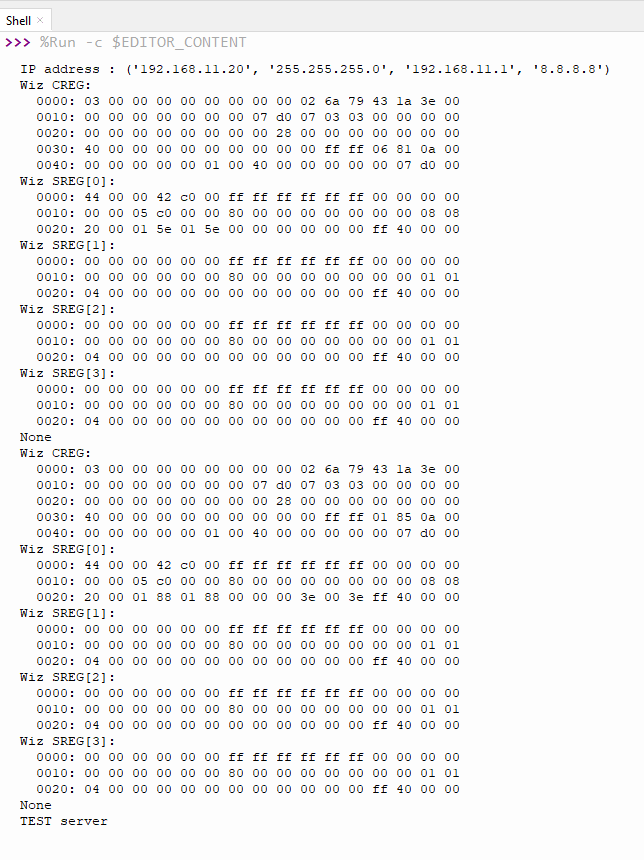
The loopback server is now running. Let's try connecting to it.
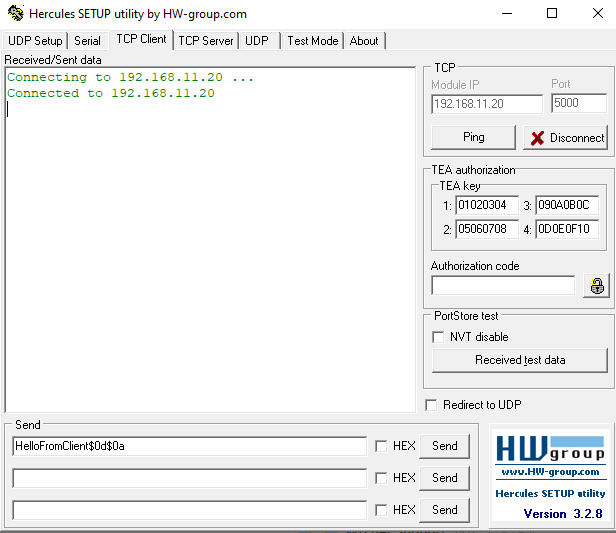
For TCP client I used Hercules software. Enter the server IP & port and press "Connect" button.
In Thonny shell new log can be observed

When sending message from client to server, the board will send back the received message
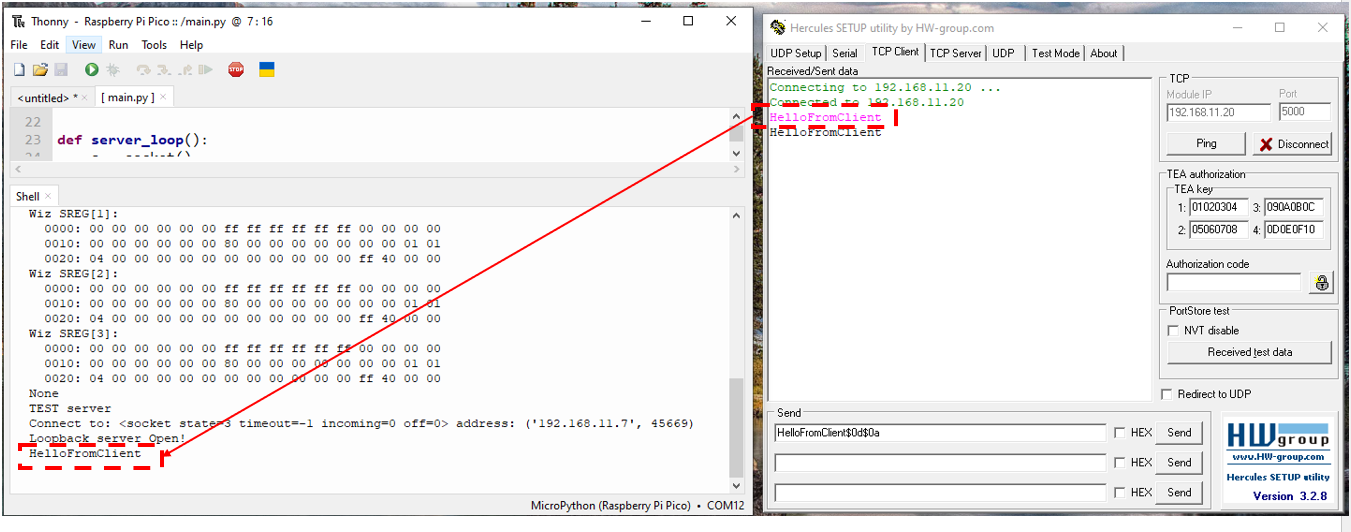
Loopback is running properly!
Full code can be found below and in attachment:
from usocket import socket
from machine import Pin,SPI
import network
import time

#W5x00 chip init
def w5x00_init():
    spi=SPI(0,2_000_000, mosi=Pin(19),miso=Pin(16),sck=Pin(18))
    nic = network.WIZNET5K(spi,Pin(17),Pin(20)) #spi,cs,reset pin
    nic.active(True)

    #None DHCP
    nic.ifconfig(('192.168.11.20','255.255.255.0','192.168.11.1','8.8.8.8'))

    #DHCP
    #nic.ifconfig('dhcp')

    print('IP address :', nic.ifconfig())
    while not nic.isconnected():
        time.sleep(1)
        print(nic.regs())

def server_loop():
    s = socket()
    s.bind(('192.168.11.20', 5000)) #Source IP Address
    s.listen(5)

    print("TEST server")
    conn, addr = s.accept()
    print("Connect to:", conn, "address:", addr)
    print("Loopback server Open!")
    while True:
        data = conn.recv(2048)
        print(data.decode('utf-8'))
        if data != 'NULL':
            conn.send(data)

def client_loop():
    s = socket()
    s.connect(('192.168.11.2', 5000)) #Destination IP Address

    print("Loopback client Connect!")
    while True:
        data = s.recv(2048)
        print(data.decode('utf-8'))
        if data != 'NULL' :
            s.send(data)

def main():
    w5x00_init()

###TCP SERVER###
    server_loop()

###TCP CLIENT###
    #client_loop()

if __name__ == "__main__":
    main()
Conclusion
I hope this guide can help with running MicroPython on EVB-Pico2 boards. The official builds will be soon released. Stay tuned for updates!
-
loopback-test.py

-
custom firmware for W5100S-EVB-Pico2