
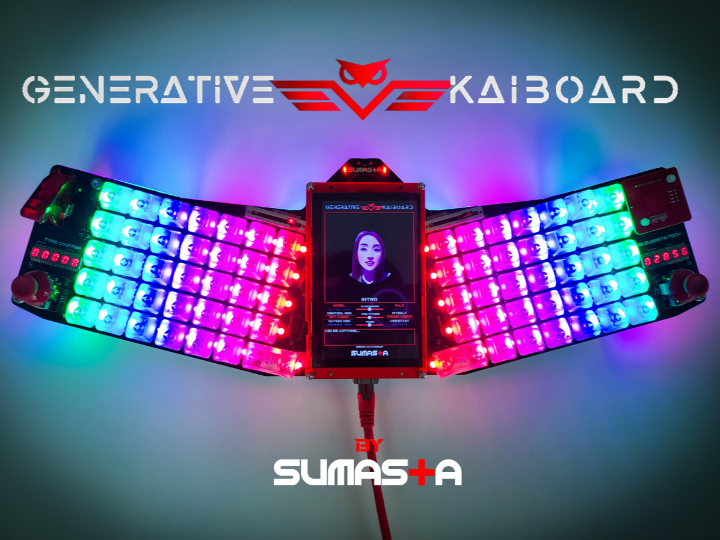
Generative kAiboard - Beyond Typing with Generative AI
An internet-connected, full-fledged, functional keyboard powered by chatGPT with built-in virtual assistant and much more!
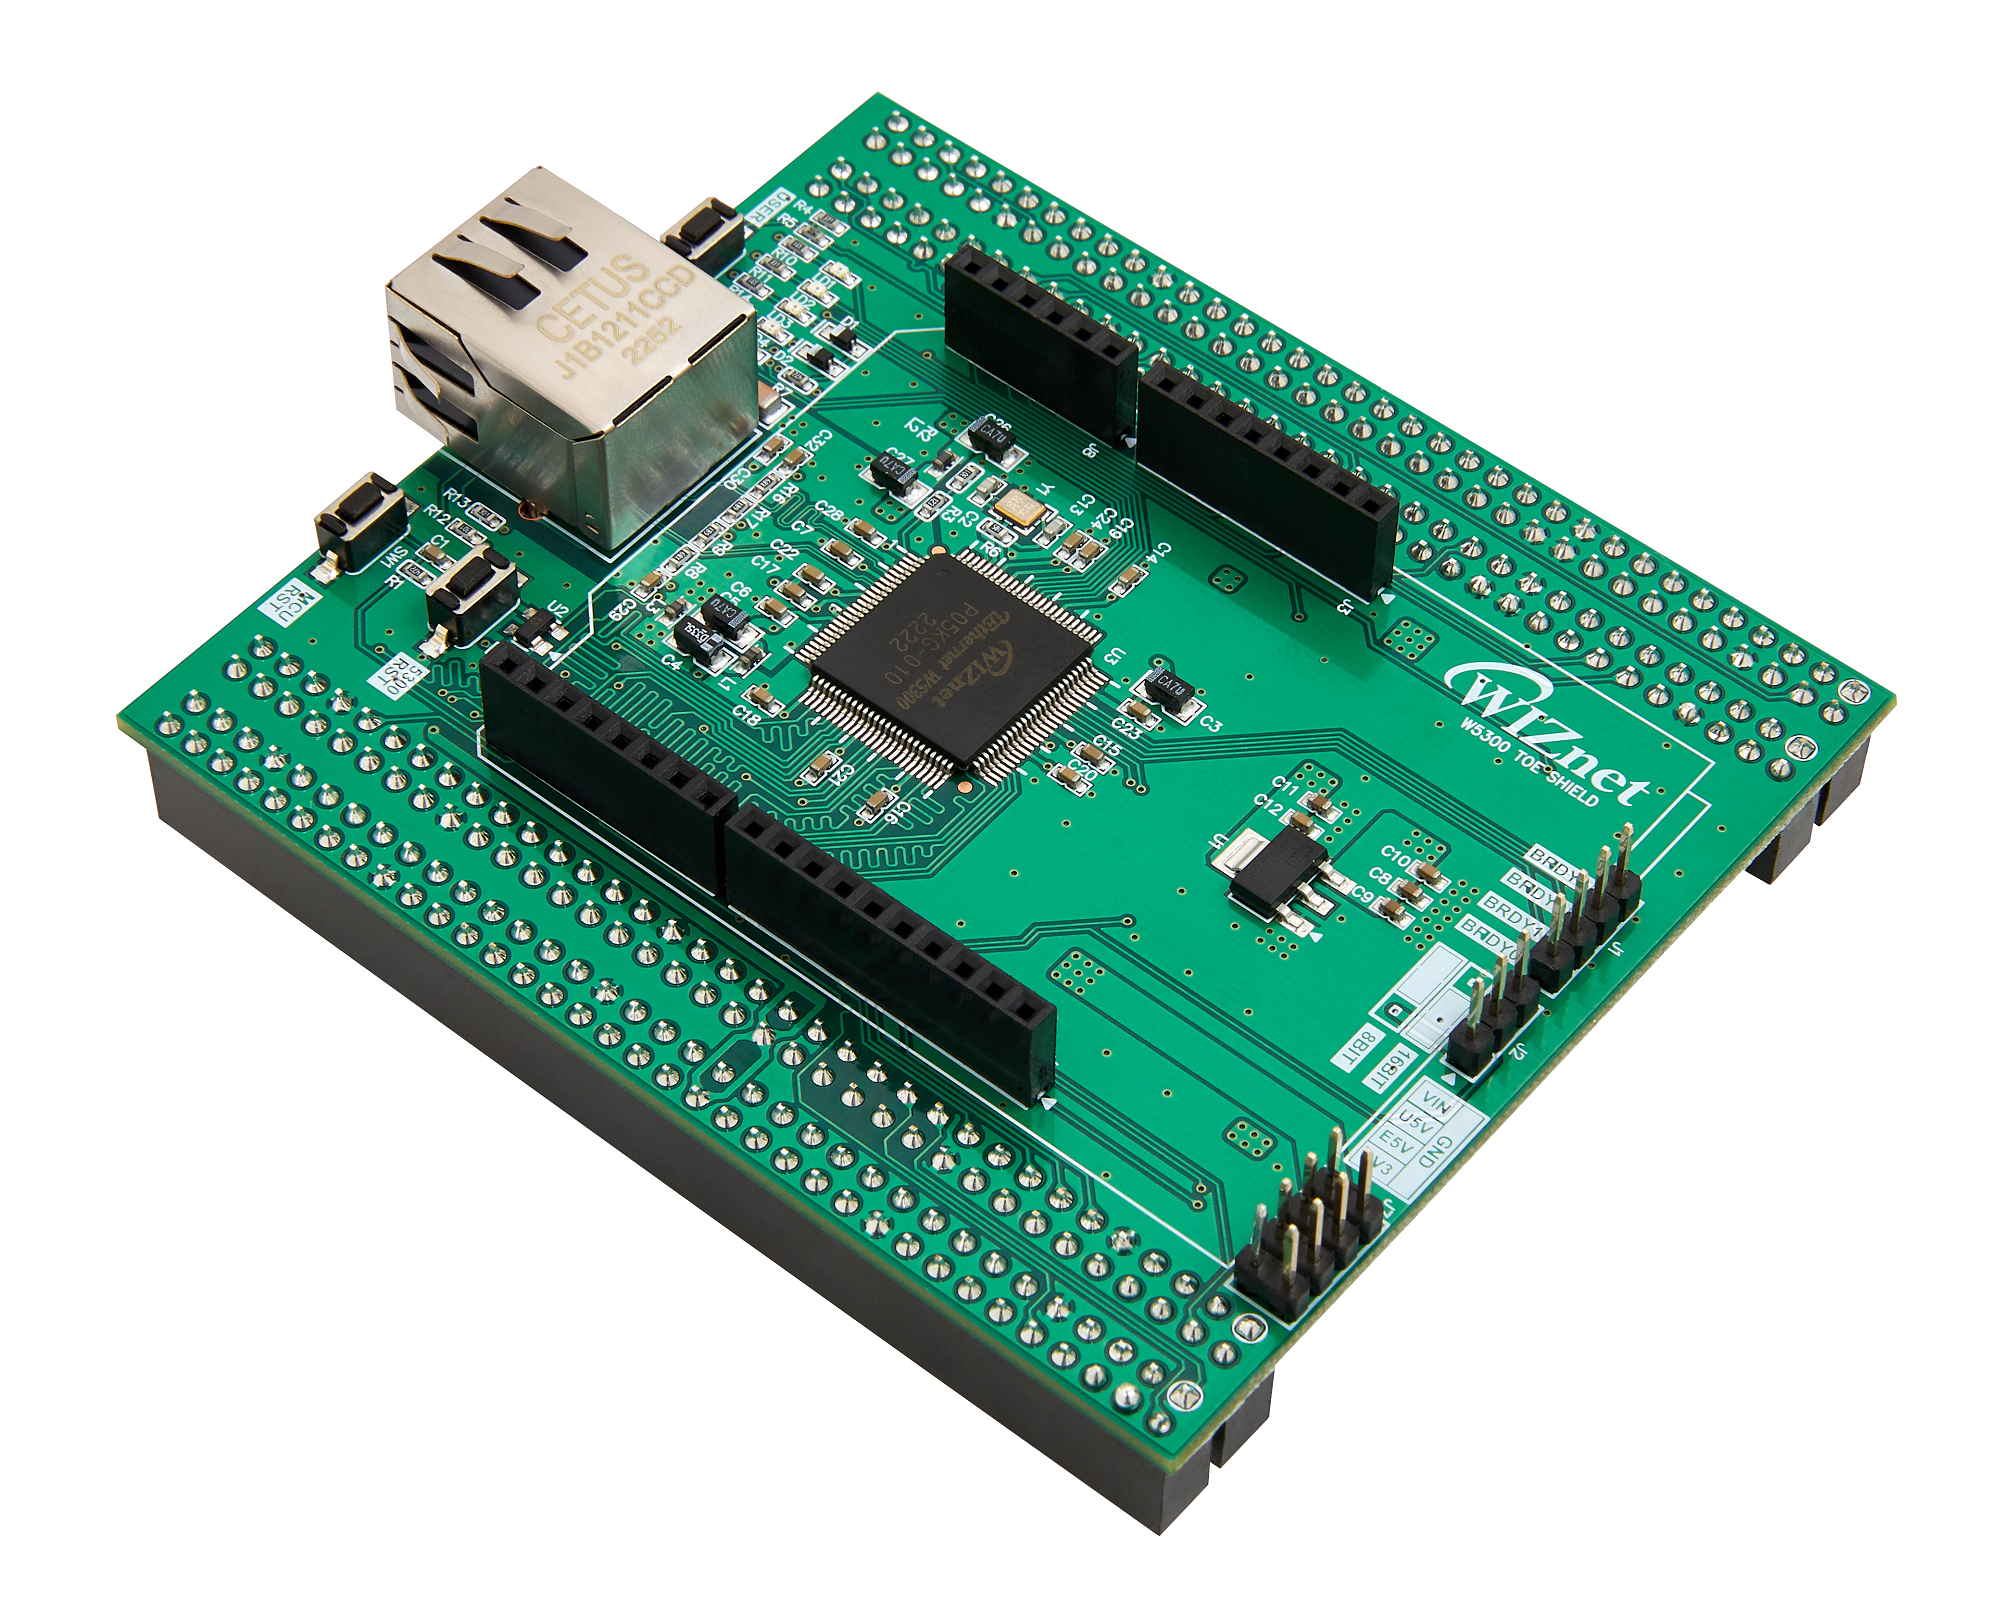
WIZnet - W5300-TOE-Shield
x 1
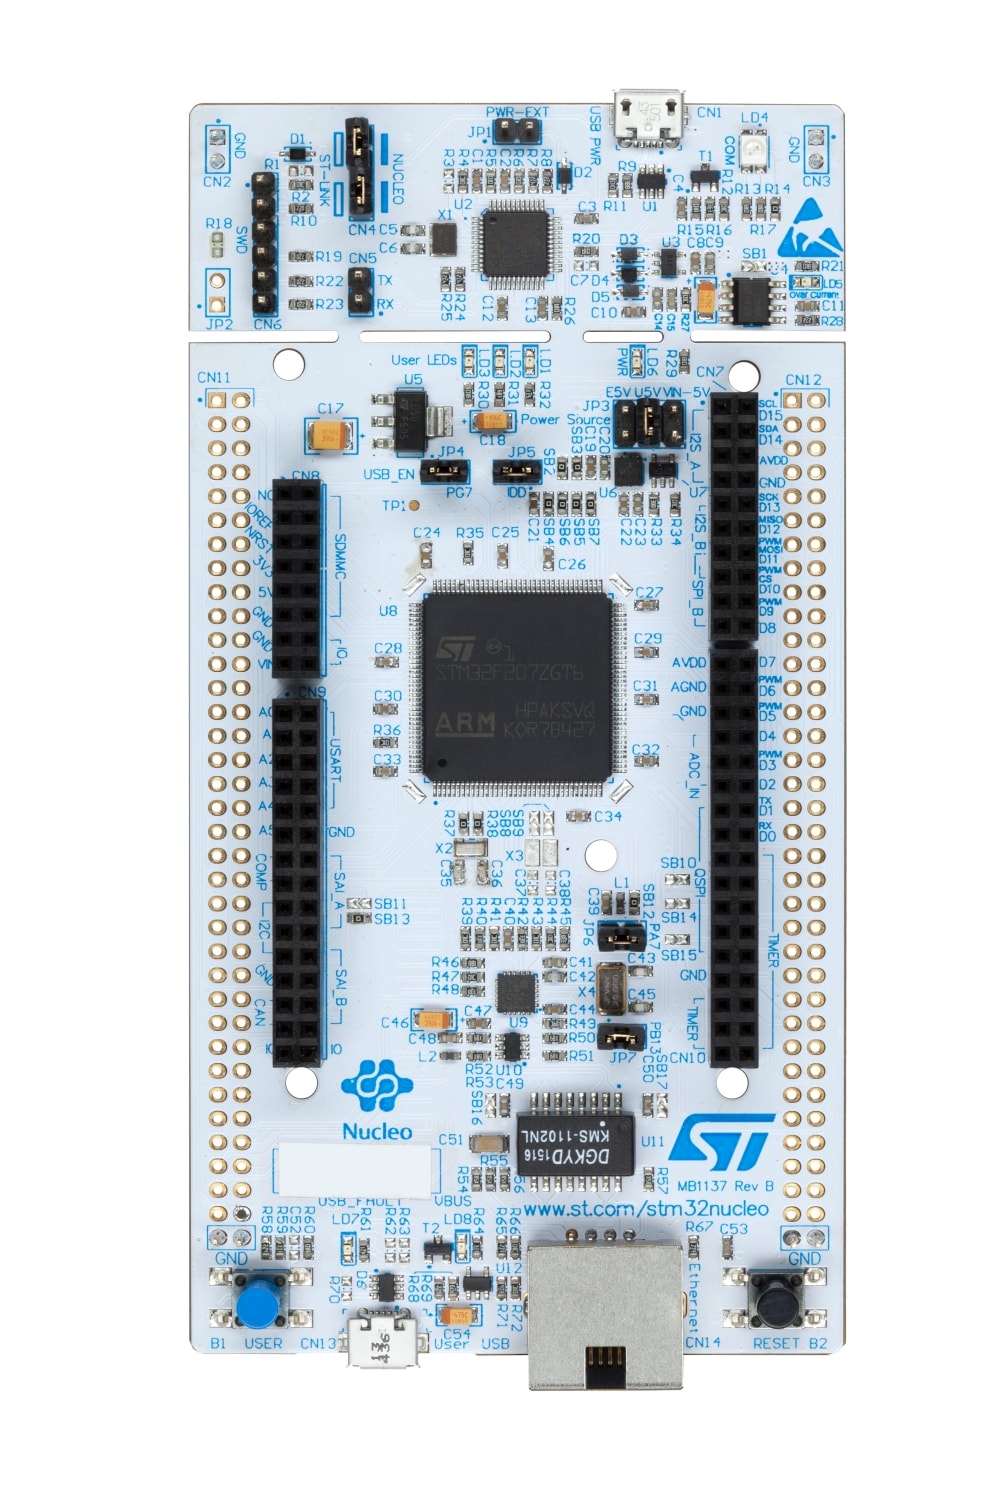
ST - NUCLEO-F429ZI
x 1

platformio - PlatformIO IDE
x 1
OpenAI - ChatGPT
x 1

Arduino - Arduino IDE
x 1
"If a picture is worth a thousand words, a video is worth a million"
The Inspiration
"The ascent of generative AI marks a transformative epoch in the realm of artificial intelligence. Beginning as an innovative intersection of machine learning and creativity, generative AI has swiftly evolved to revolutionize diverse domains. Through its neural networks' adeptness at comprehending and emulating patterns within data, it has birthed astonishing achievements in art, music, writing, and more. From painting gallery-worthy portraits to composing symphonies that tug at the soul's strings, and even crafting coherent narratives that mirror human imagination, generative AI has unveiled unprecedented potentials. Its rise not only underscores the remarkable progress in modeling human creativity but also underscores the ongoing fusion of human ingenuity with the boundless capacity of machines, propelling society into an era where collaboration between humans and algorithms becomes increasingly intertwined and inseparable."
I'm genuinely taken aback by ChatGPT, particularly with its ability to generate text and engage in coherent and contextually relevant conversations. While both ChatGPT and humans generate text, humans mainly use keyboards to transfer their thoughts from the analog world to the digital realm. To me, it's only a matter of time before the keyboard and ChatGPT merge into one, and that time is now.
I built the *Society Keyboard 7 years ago, and it continues to function exceptionally well; I still rely on it daily. This firsthand experience has given me a keen sense of what works effectively. Additionally, it has garnered almost 90k views and has earned a spot among the top 30 most-liked Hackaday projects of all time. However, I believe it's time for a refresh—to invest effort, time, and resources into crafting my next-generation keyboard that will serve me for the coming decade. The momentum of this year's Wiznet TOE design contest has significantly bolstered my motivation and provided valuable insights to guide my design decisions.
The Features
"Envision a stunning and sophisticated keyboard that seamlessly merges aesthetics with functionality. This intelligent marvel, connected to the internet and powered by ChatGPT, redefines the typing experience. Its elegant design complements any setting, while beneath its surface lies the brilliance of AI-generated assistance. This keyboard isn't just a tool; it's a companion that understands context, crafts eloquent responses, and adapts to your style, enhancing productivity and communication in ways previously unimagined."
"This fusion of elegant design, AI-powered intelligence, and virtual assistance creates a harmonious synergy, making the keyboard a centerpiece of both productivity and aesthetic appeal"
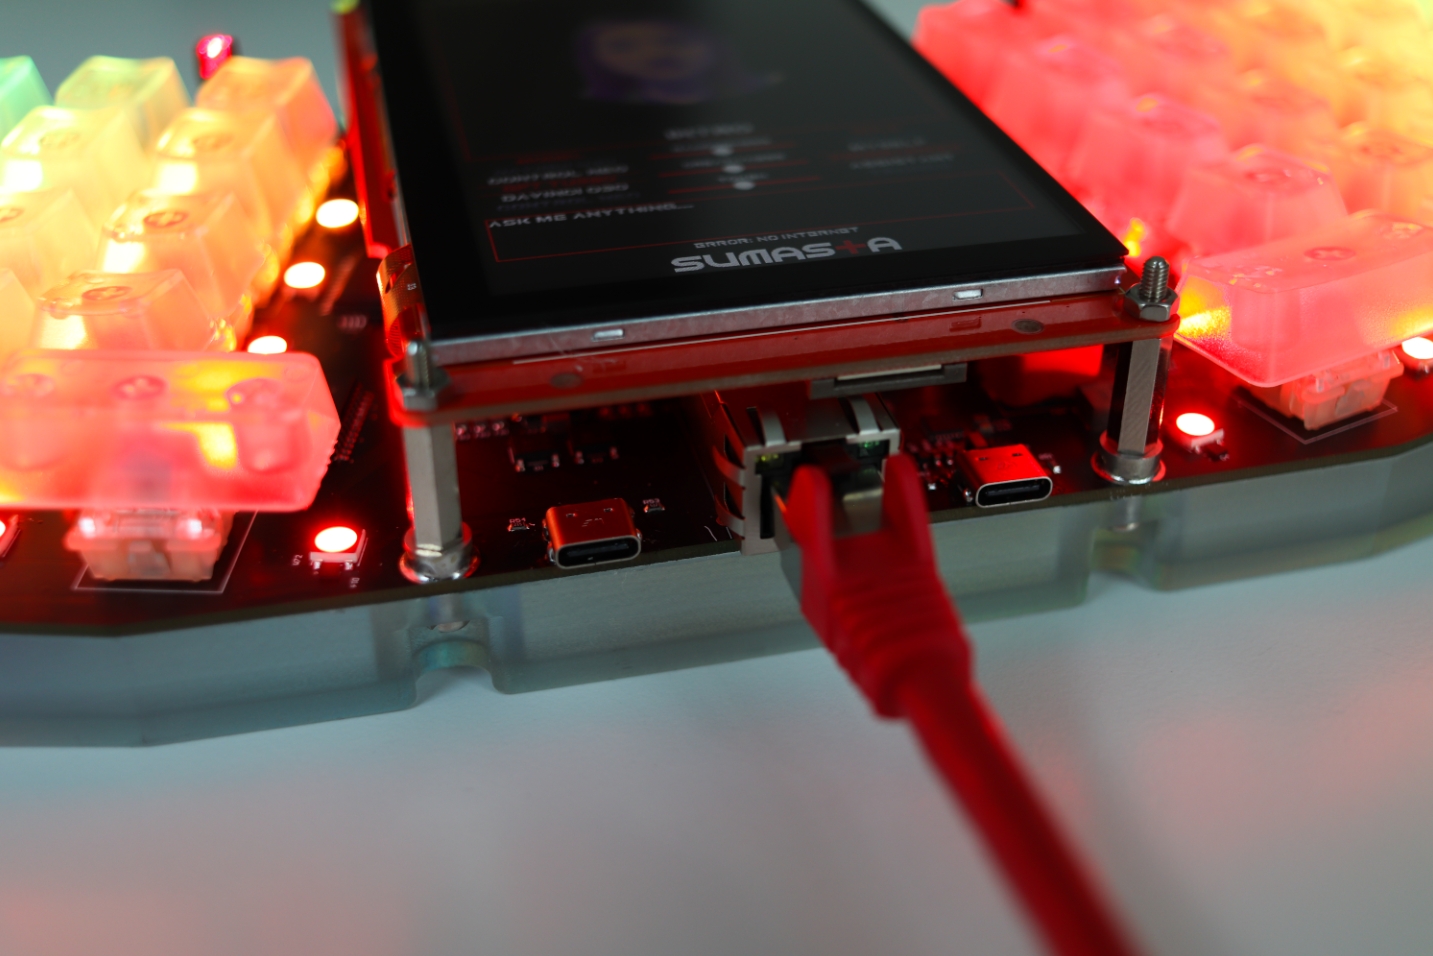
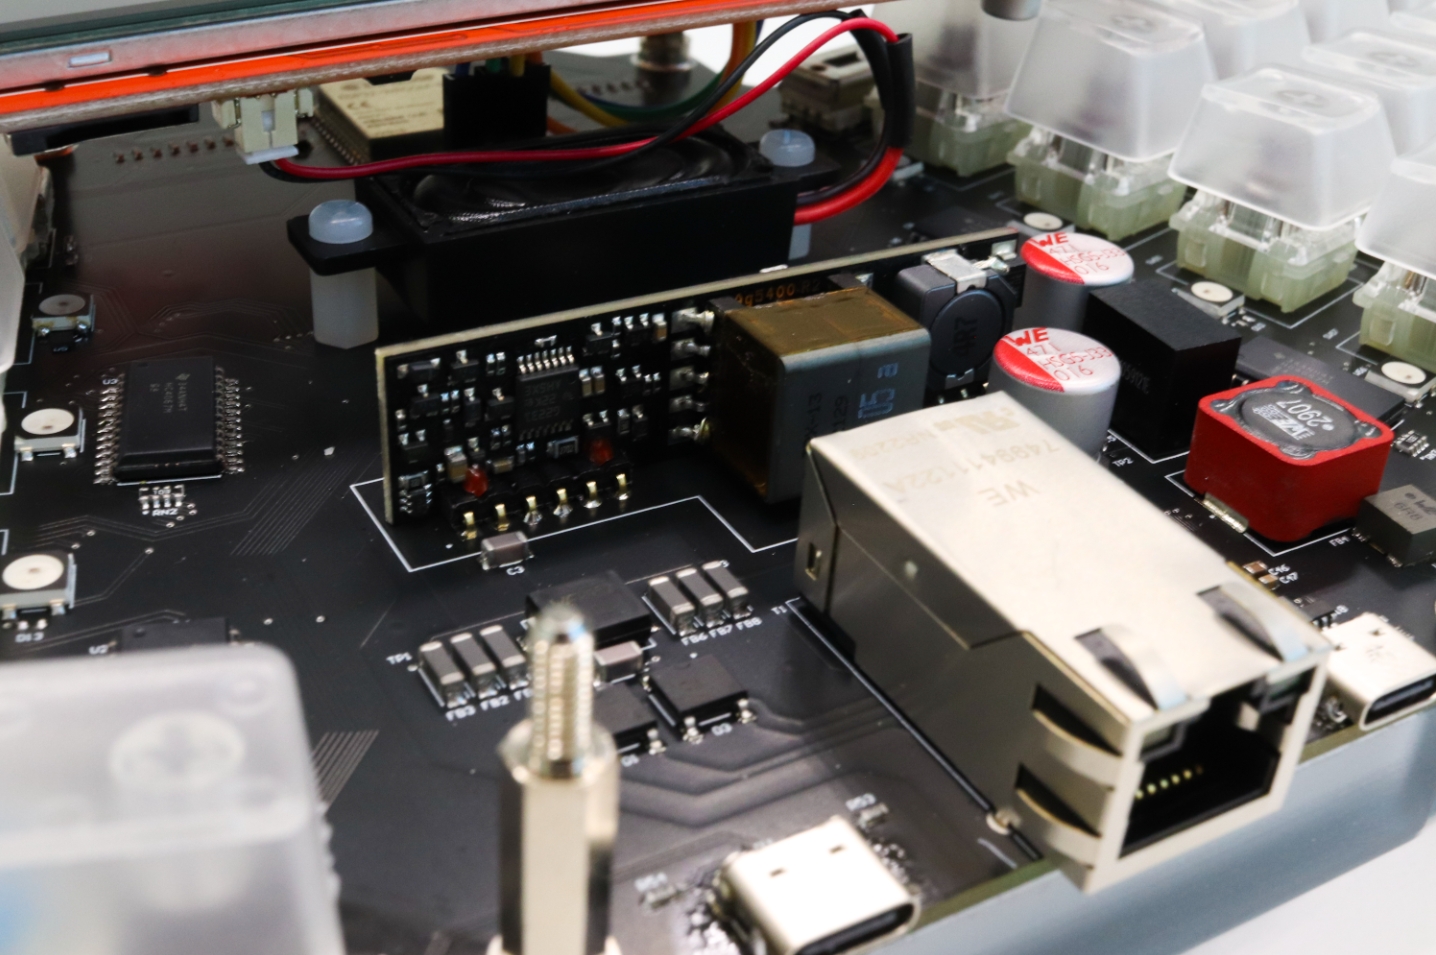
"Notably, this innovation is powered by a single cable utilizing Power-over-Ethernet technology, streamlining both power and connectivity. Additionally, the keyboard features two USB-C ports for seamless programming, allowing for effortless customization and adaptability to individual preferences. Moreover, the integration of the W5300 Ethernet controller marks a remarkable stride in the Generative Keyboard's capabilities. With its cutting-edge networking technology, the W5300 elevates the keyboard's connectivity to new heights, facilitating seamless communication and data transfer."
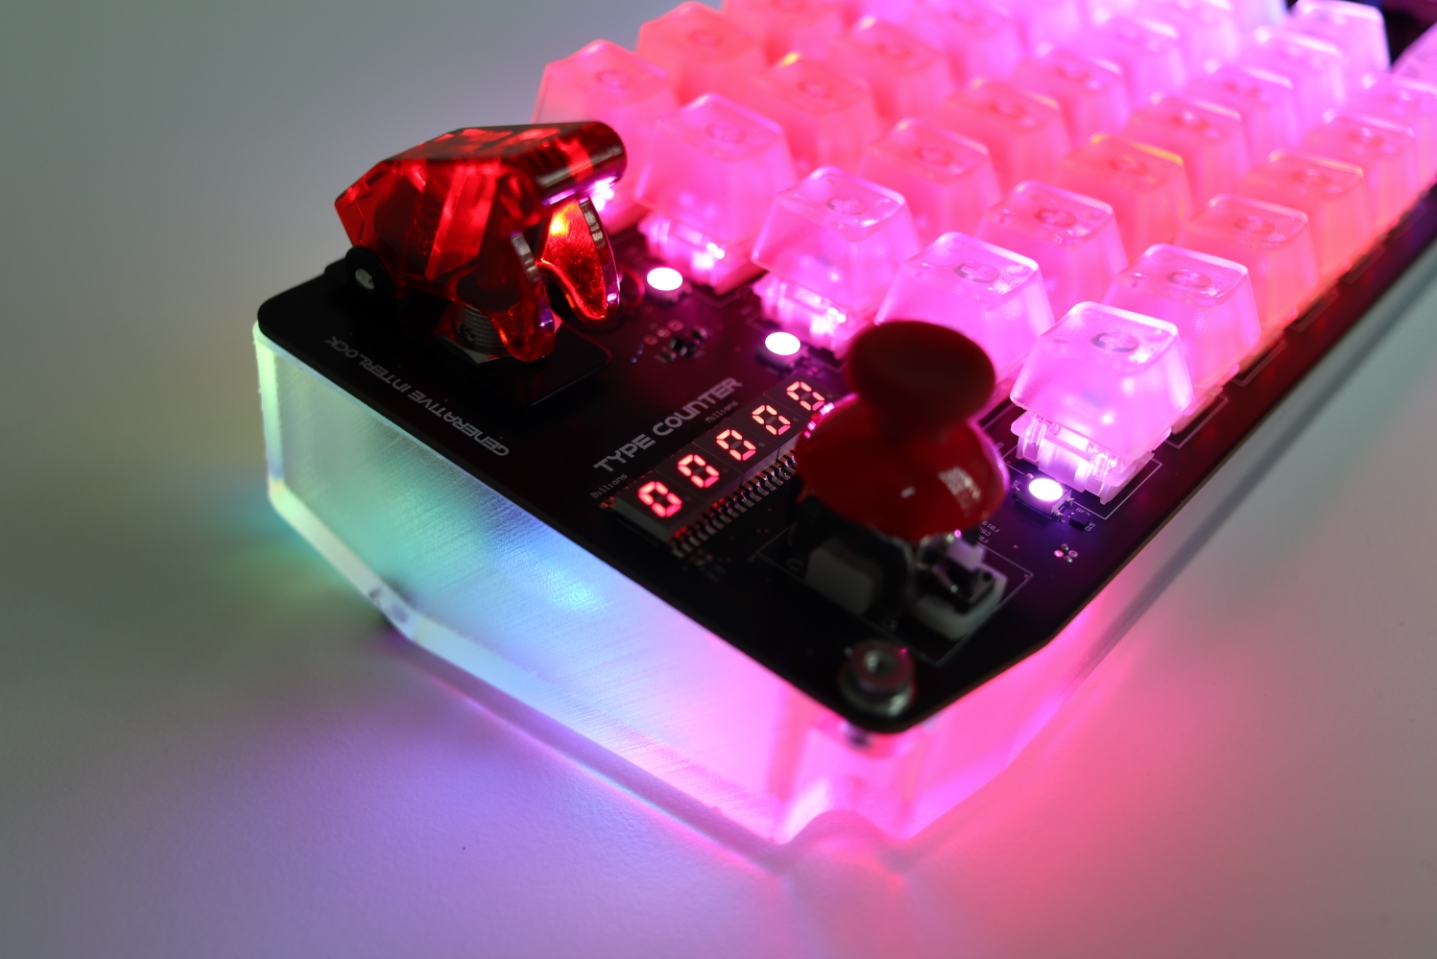
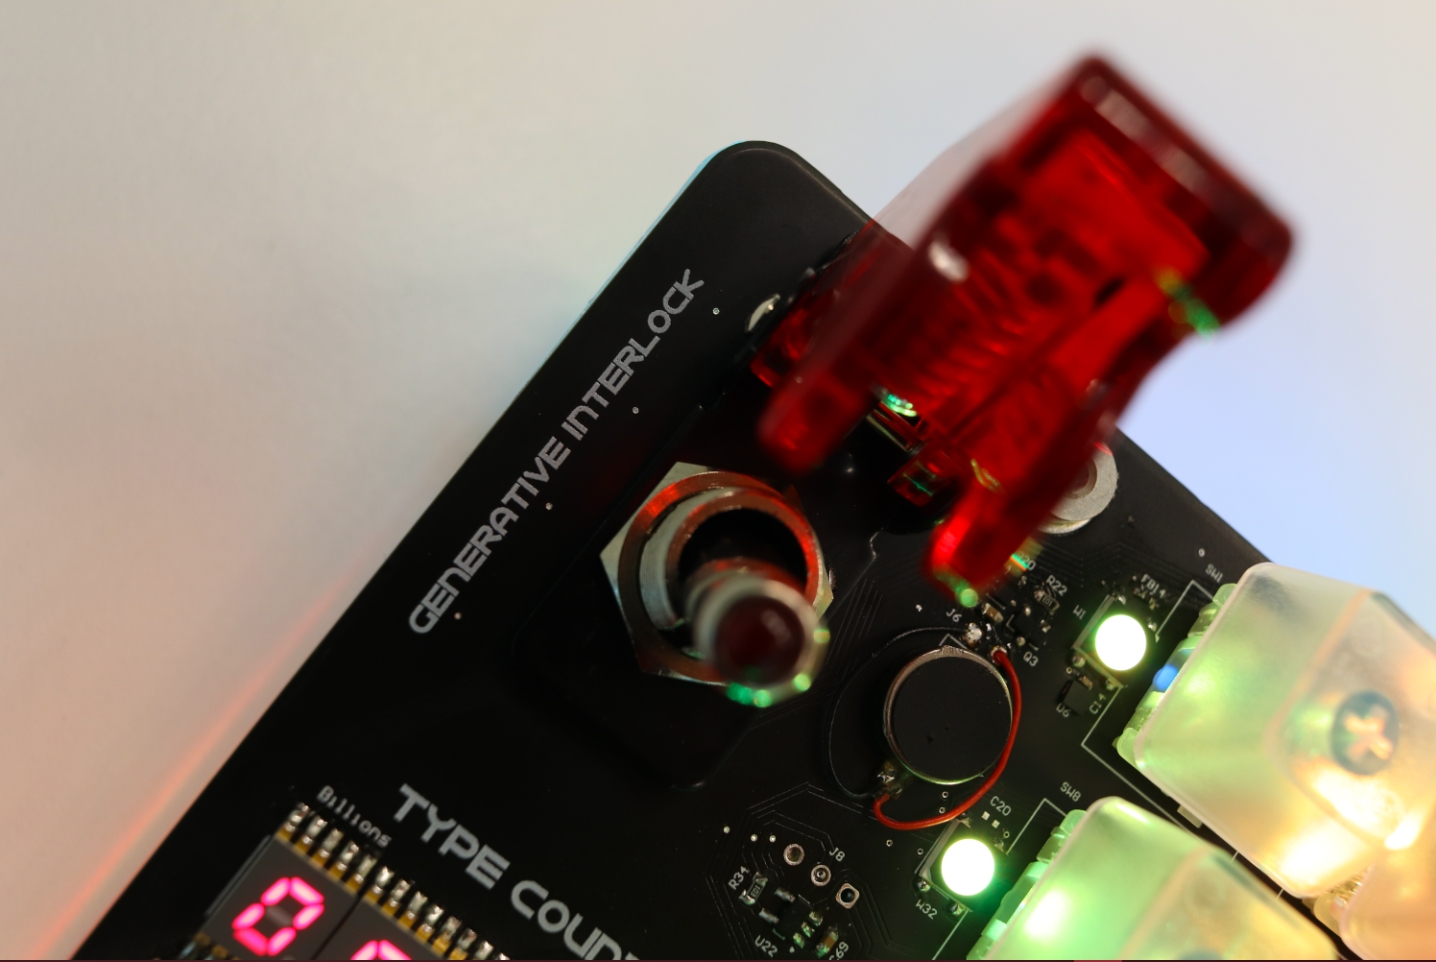
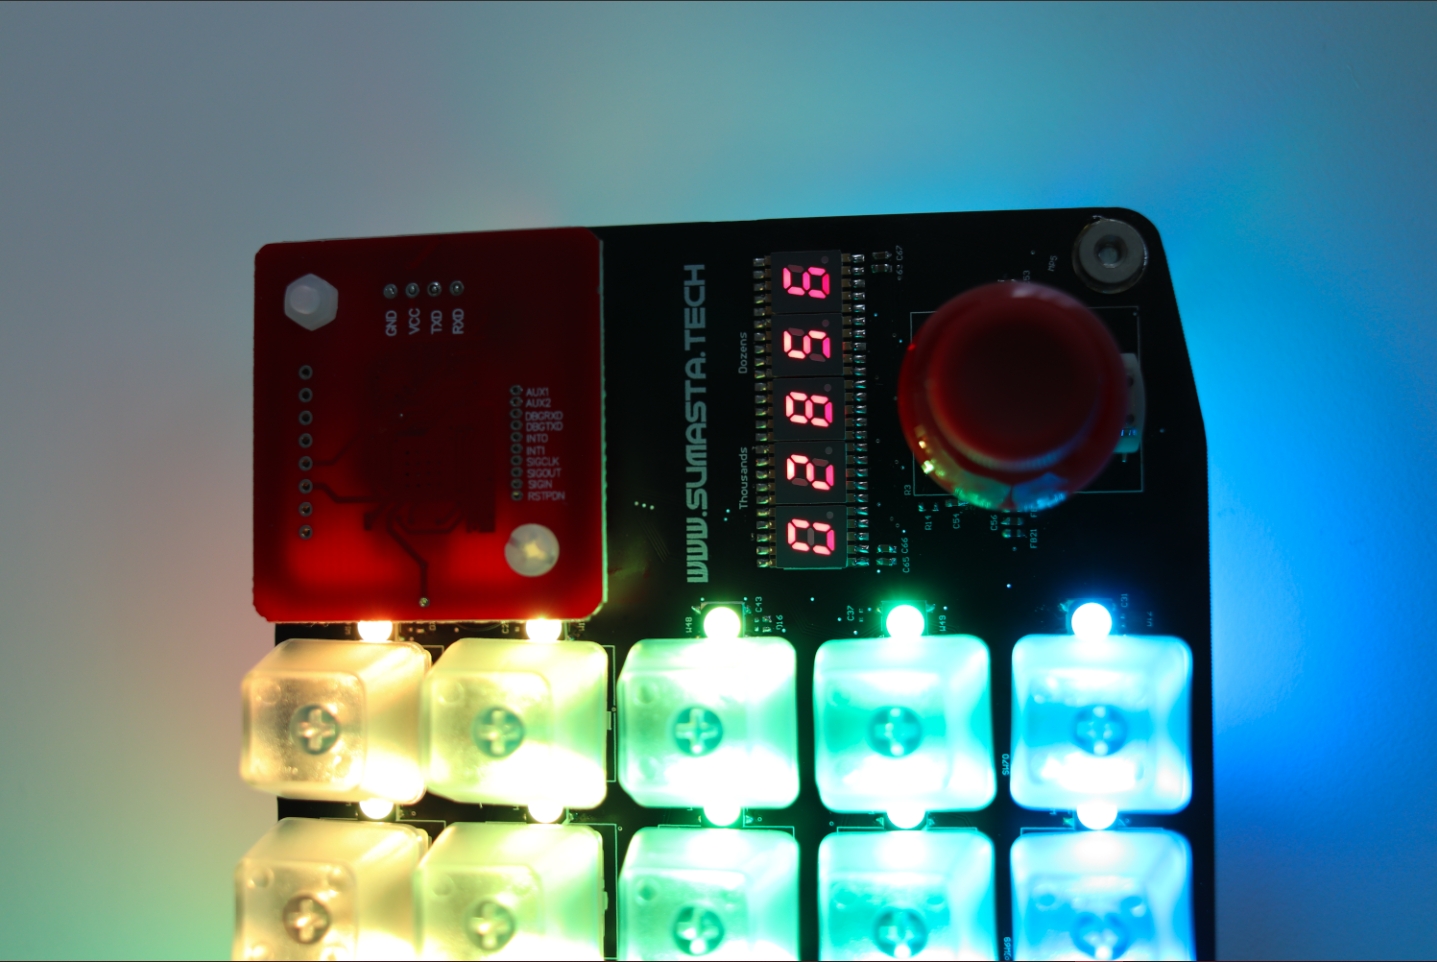
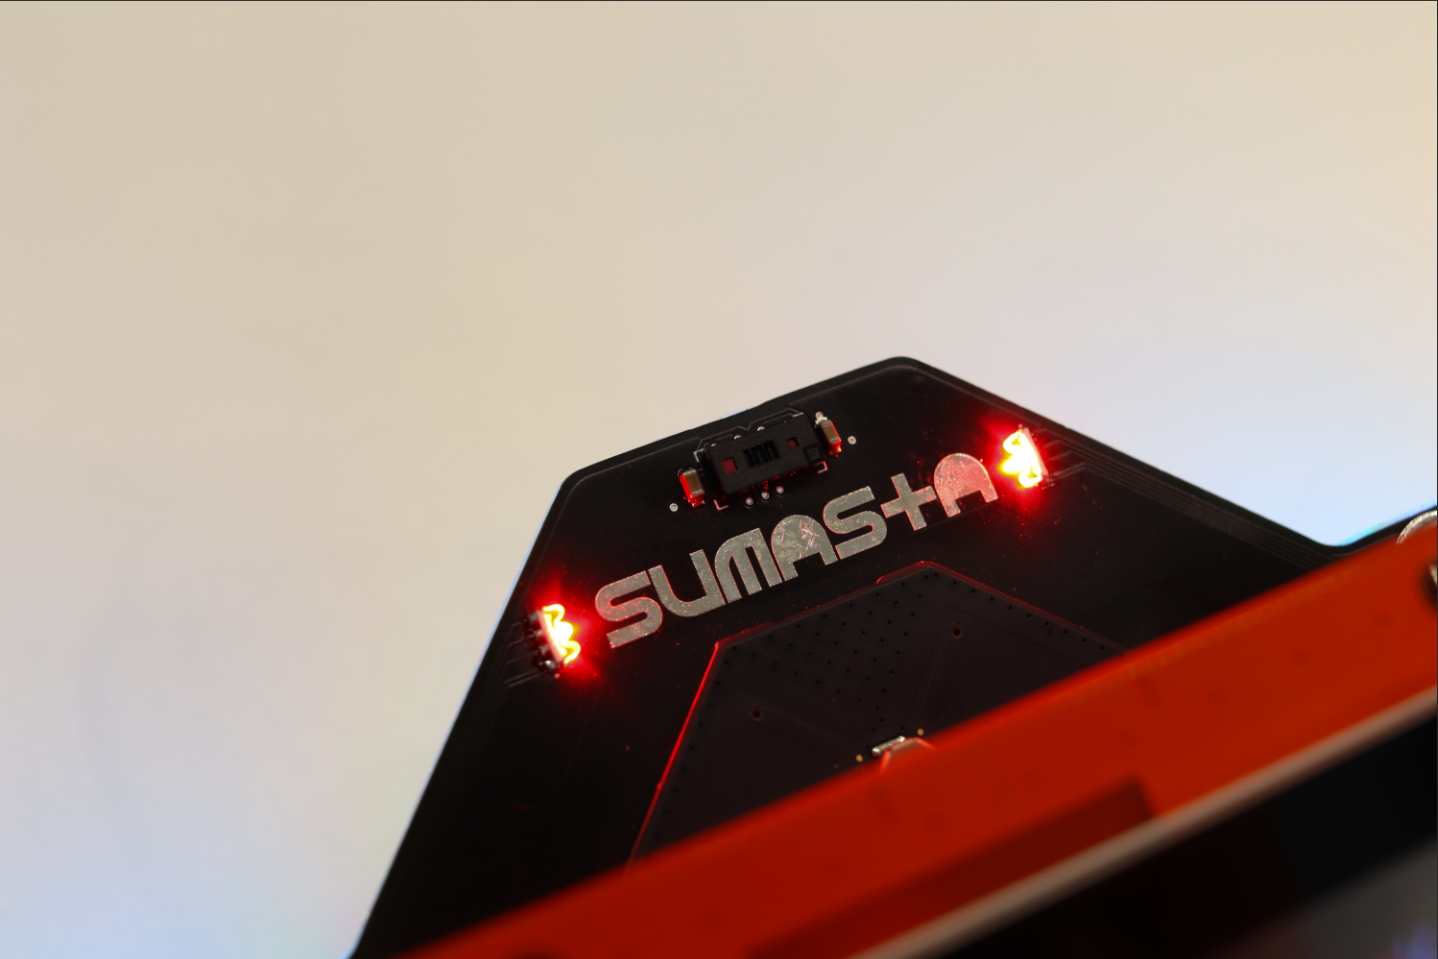
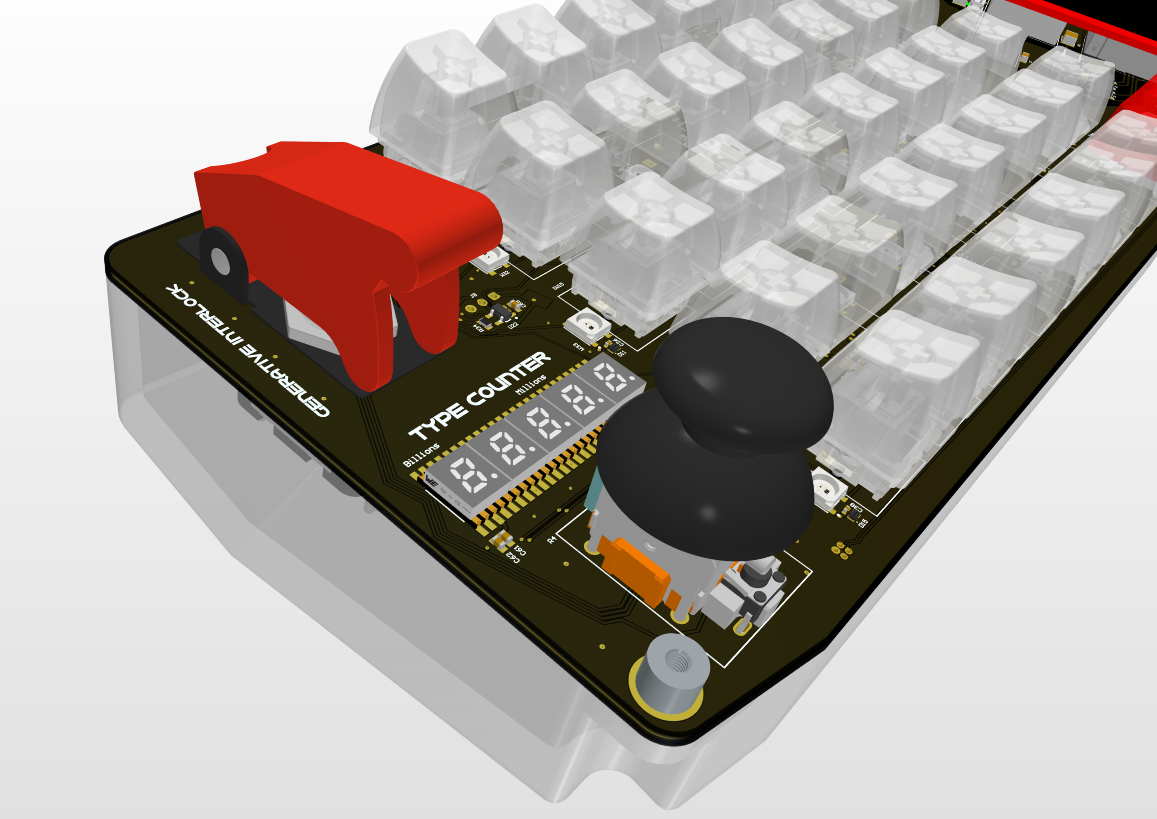
"This keyboard includes a physical generative interlock switch, ensuring a robust defense against remote hacking attempts. Moreover, it offers a type-counter for insightful typing analysis, enabling users to track their productivity and writing patterns. Adding a touch of versatility, a joystick is integrated, granting intuitive navigation for enhanced user experience."
"Completing its array of features, this keyboard incorporates two vibration motors to deliver precise haptic feedback. This tactile enhancement adds a new dimension to the typing experience, providing subtle cues and responses that elevate user engagement."
"To ensure seamless connectivity, a dedicated co-processor is integrated, enabling Bluetooth HID (Human Interface Device) connections to a variety of end-user devices. This strategic inclusion expands the keyboard's versatility, allowing it to effortlessly communicate with smartphones, tablets, laptops, and more. By leveraging this co-processor, the keyboard becomes a versatile hub of interaction, adapting to the diverse technological landscape of modern computing."
"Incorporating advanced security measures, an NFC tag reader is seamlessly integrated into the keyboard for authentication purposes. This feature enhances user privacy and access control by enabling secure authentication through NFC-enabled devices or tags."
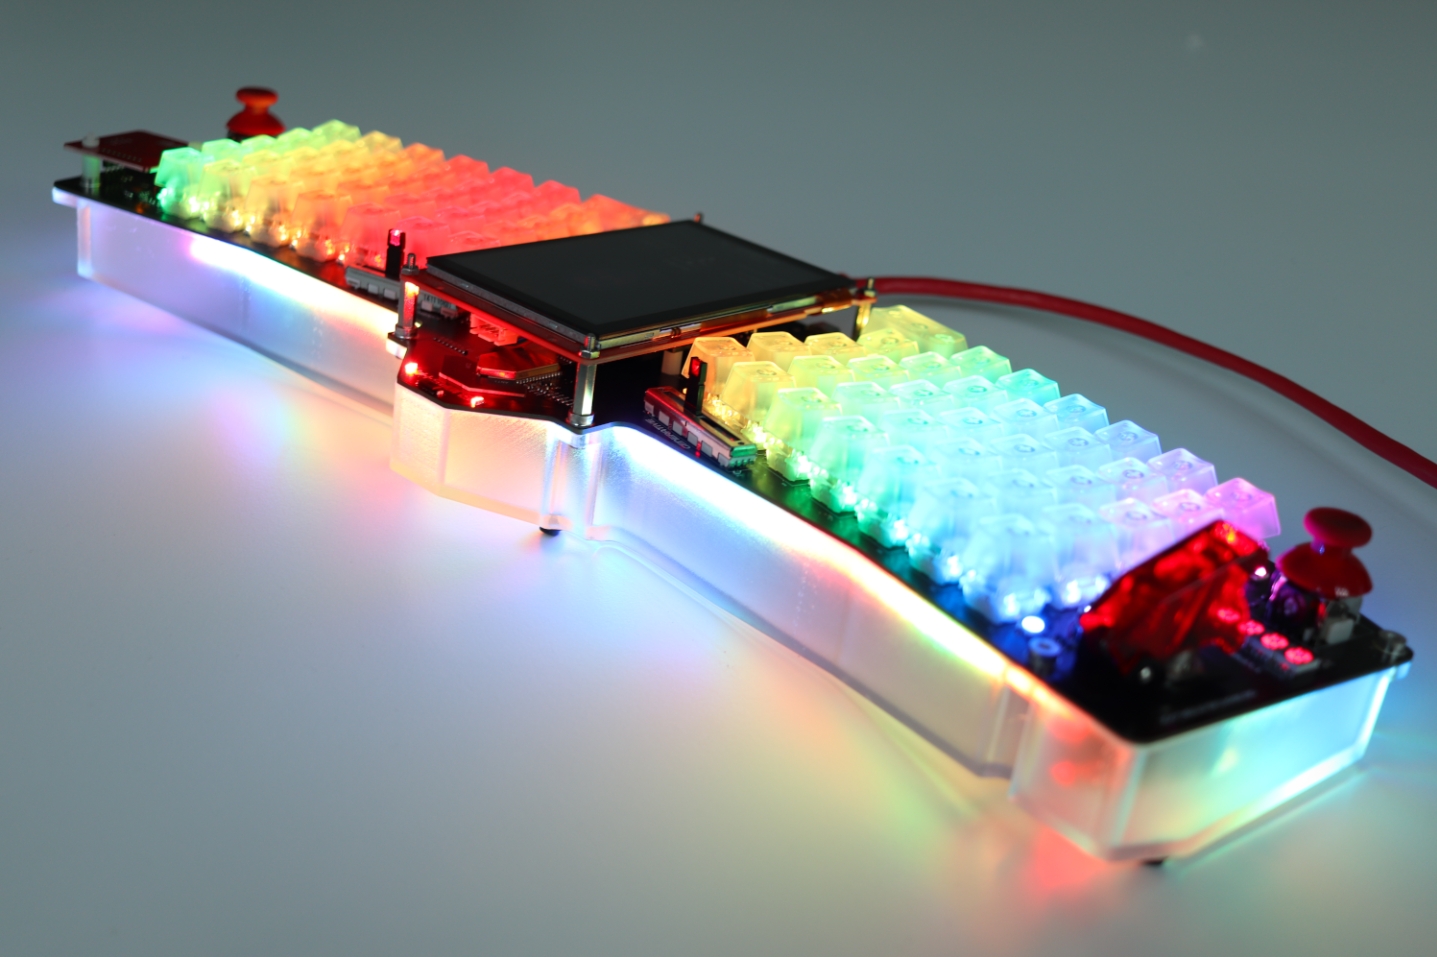
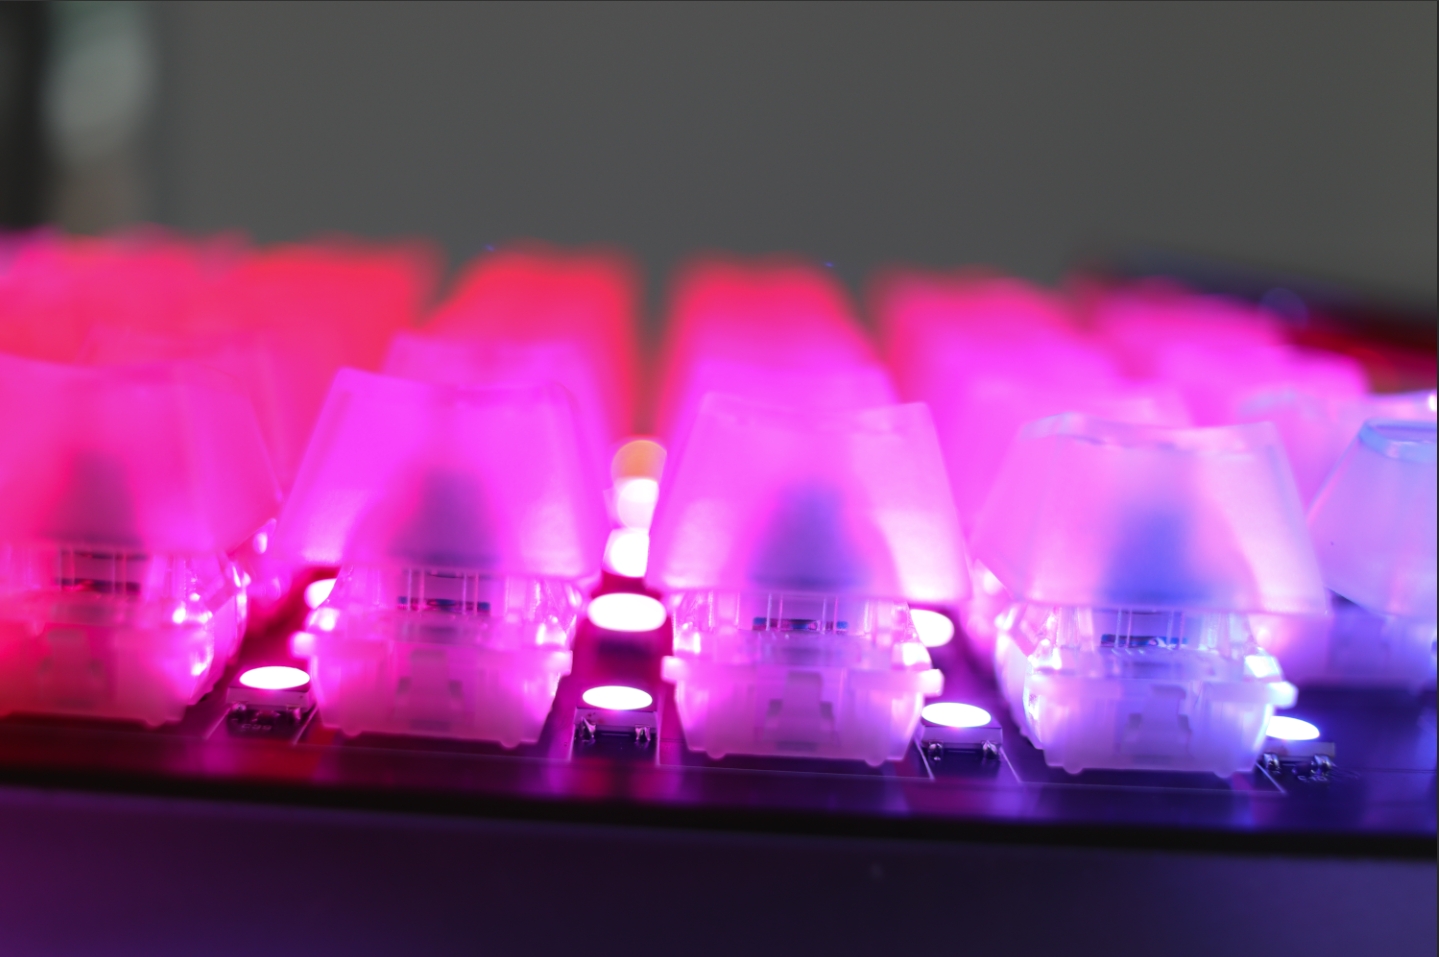
"The keyboard is equipped with 70 high-quality Cherry MX switches, renowned for their exceptional durability and performance. With a guaranteed lifetime of 100 million keystrokes, these switches not only offer a responsive and satisfying typing experience but also ensure longevity that surpasses traditional keyboard standards."

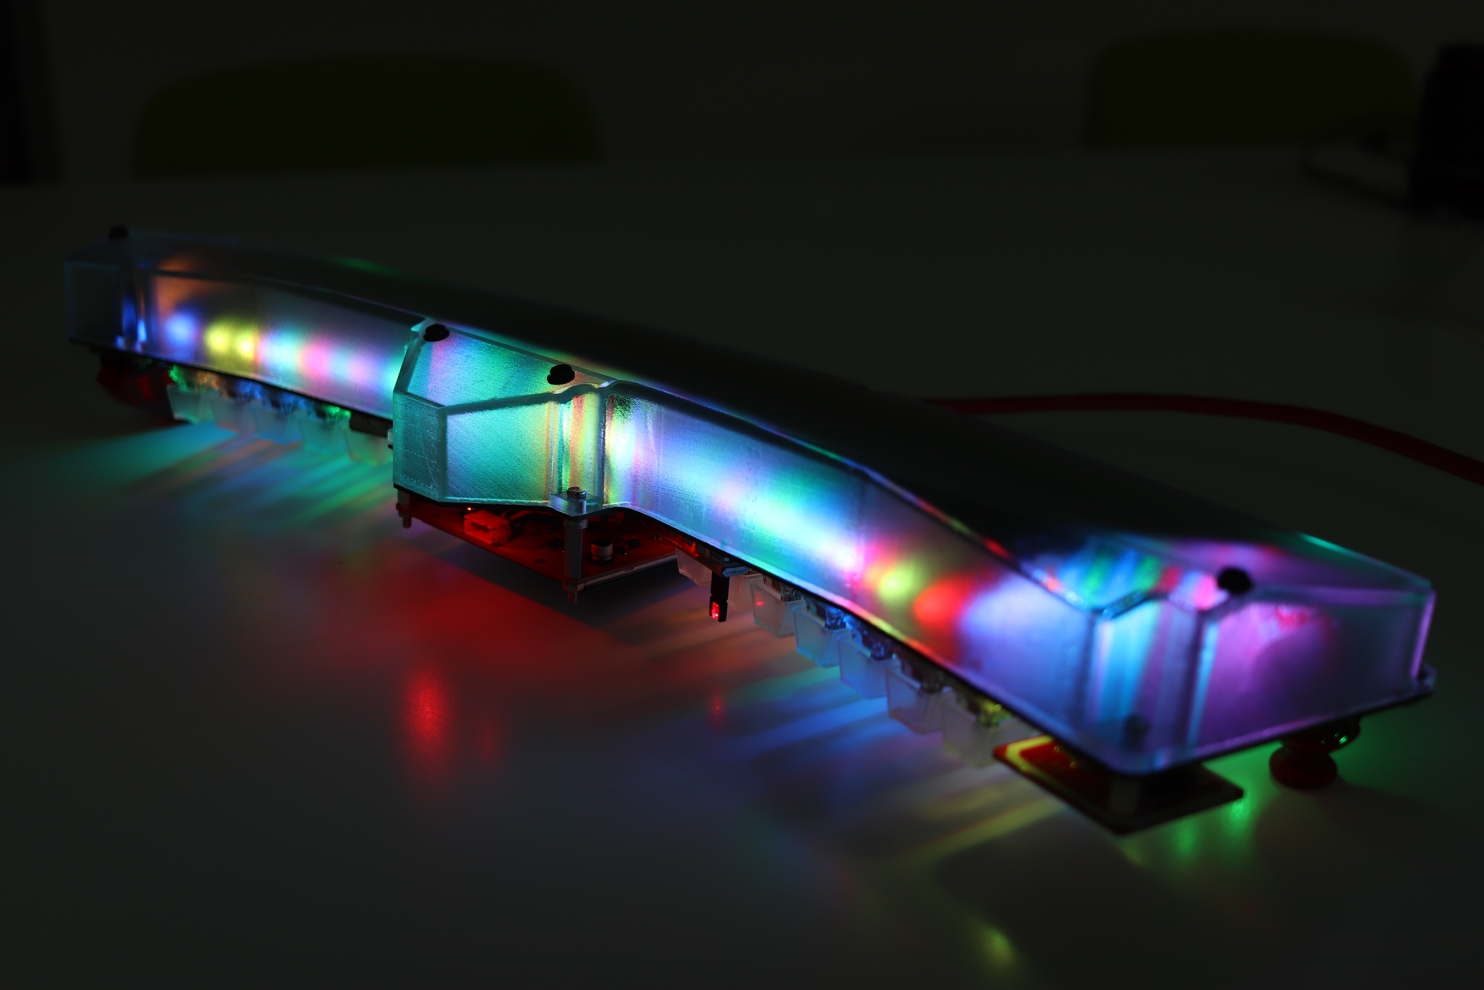
"Enhancing its visual appeal, the keyboard features 80 addressable pixel RGB LEDs that offer a spectrum of vibrant colors and dynamic lighting effects. These LEDs create a mesmerizing display, allowing users to personalize their workspace with captivating illumination patterns."
"To further enhance user control, the keyboard incorporates two dedicated slider switches for miscellaneous functions. These switches provide a convenient and tactile way to access a range of customizable features and shortcuts."
"The keyboard is equipped with an advanced 8x8 multizone time-of-flight sensor that serves multiple purposes including presence detection, gesture recognition, and intrusion detection. This cutting-edge technology enhances user interaction by detecting hand movements and gestures, ensuring security by identifying unauthorized access attempts, and optimizing energy efficiency by responding to user presence."
"the PoE (Power-over-Ethernet) design of the keyboard incorporates robust safety and security measures. With careful consideration, the design ensures that power delivery remains safe and consistent, preventing potential risks such as power surges or voltage fluctuations. Additionally, the PoE approach minimizes the need for multiple cables, simplifying setup and reducing potential points of vulnerability. and Adding to its versatile features, the keyboard is equipped with a mono speaker."
"With an eye towards modularity and future enhancements, the keyboard incorporates a W5300 shield and Nucleo board. This strategic design choice enables seamless upgradeability and ensures the keyboard's compatibility with evolving technologies. By leveraging these components, users can easily integrate new functionalities, software updates, and hardware improvements, ensuring that the keyboard remains adaptable and up-to-date in the face of technological advancements. This commitment to modularity enhances the keyboard's longevity and provides users with a future-proof solution that can evolve alongside their needs."
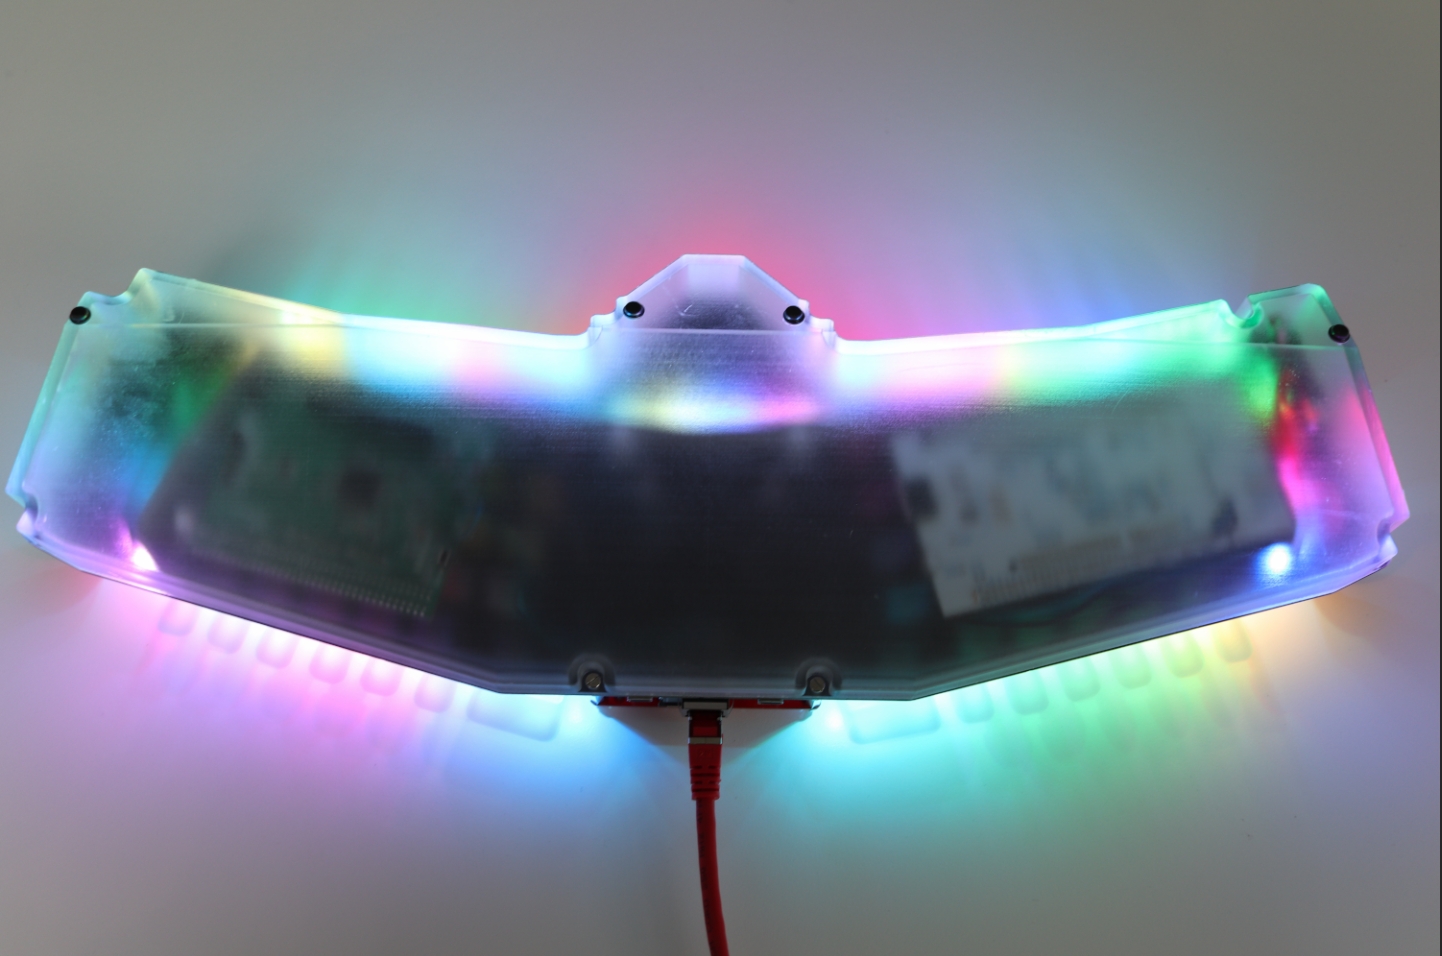
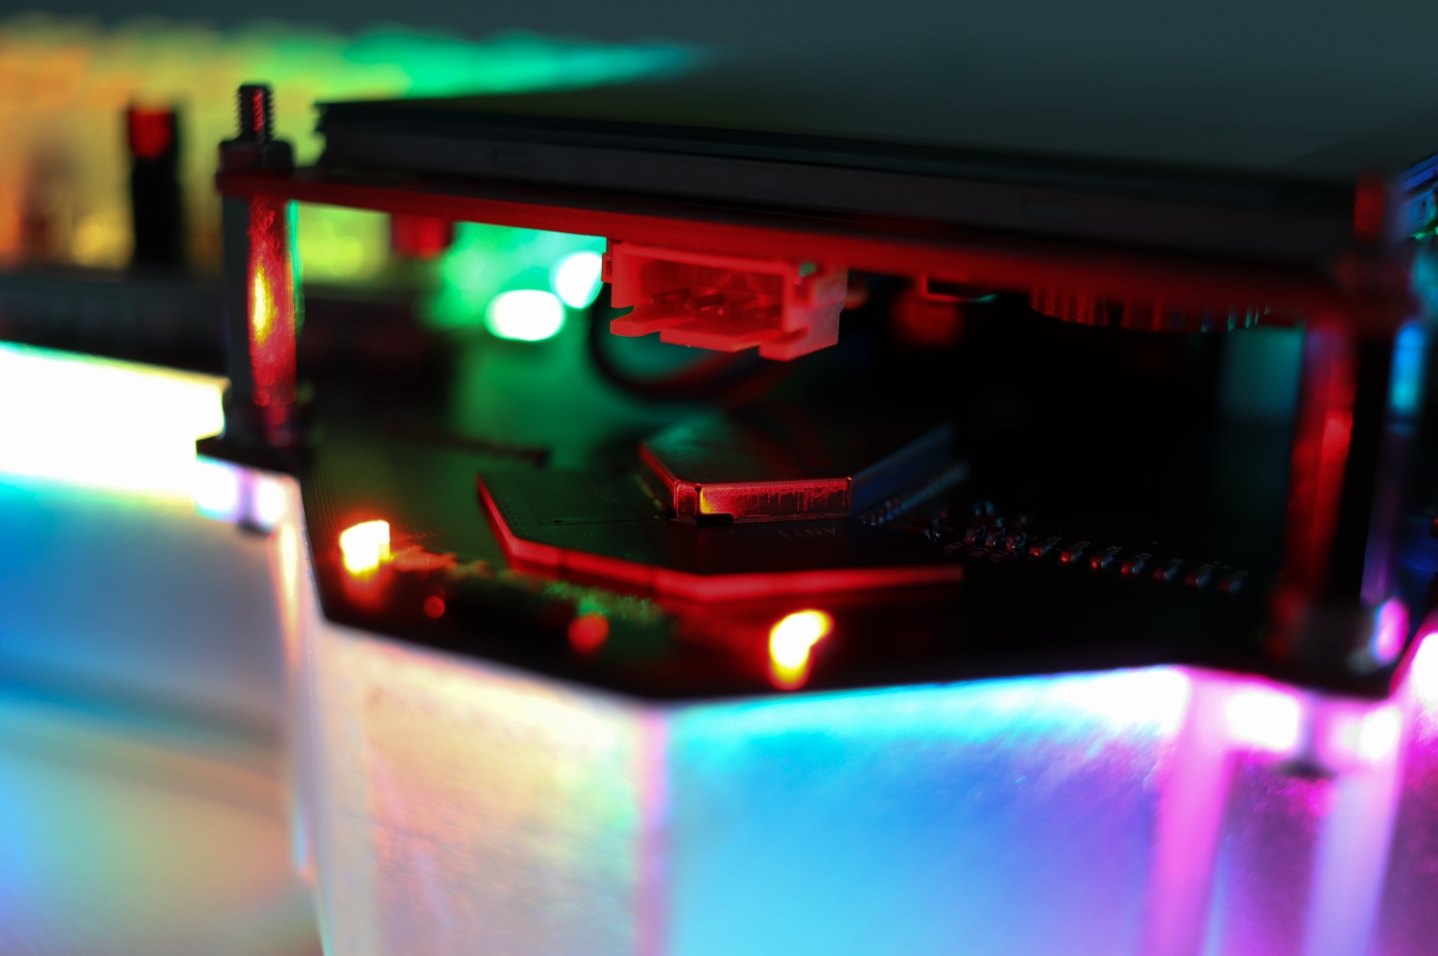
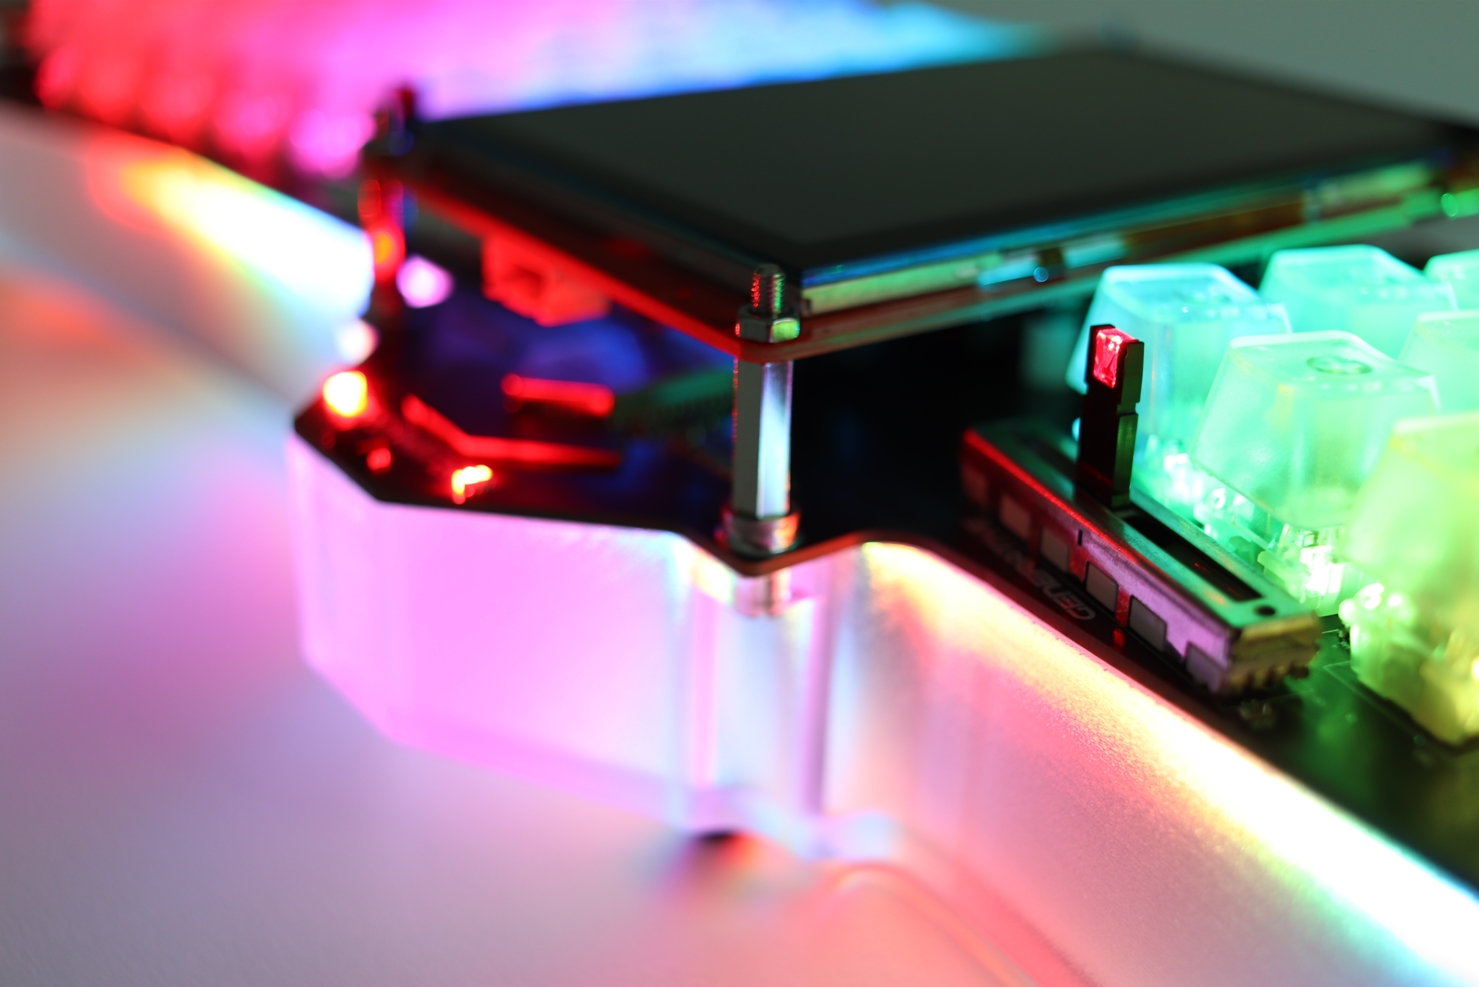
"Enhancing its aesthetic allure, the keyboard features 60 RGB LEDs positioned along its sides. These LEDs create captivating light effects that are diffused through a translucent 3D-printed housing, resulting in a visually stunning illumination that enhances the keyboard's overall design. This harmonious marriage of advanced lighting technology and intricate housing showcases an elegant play of light and shadow, transforming the keyboard into a mesmerizing centerpiece that exudes both functionality and beauty."
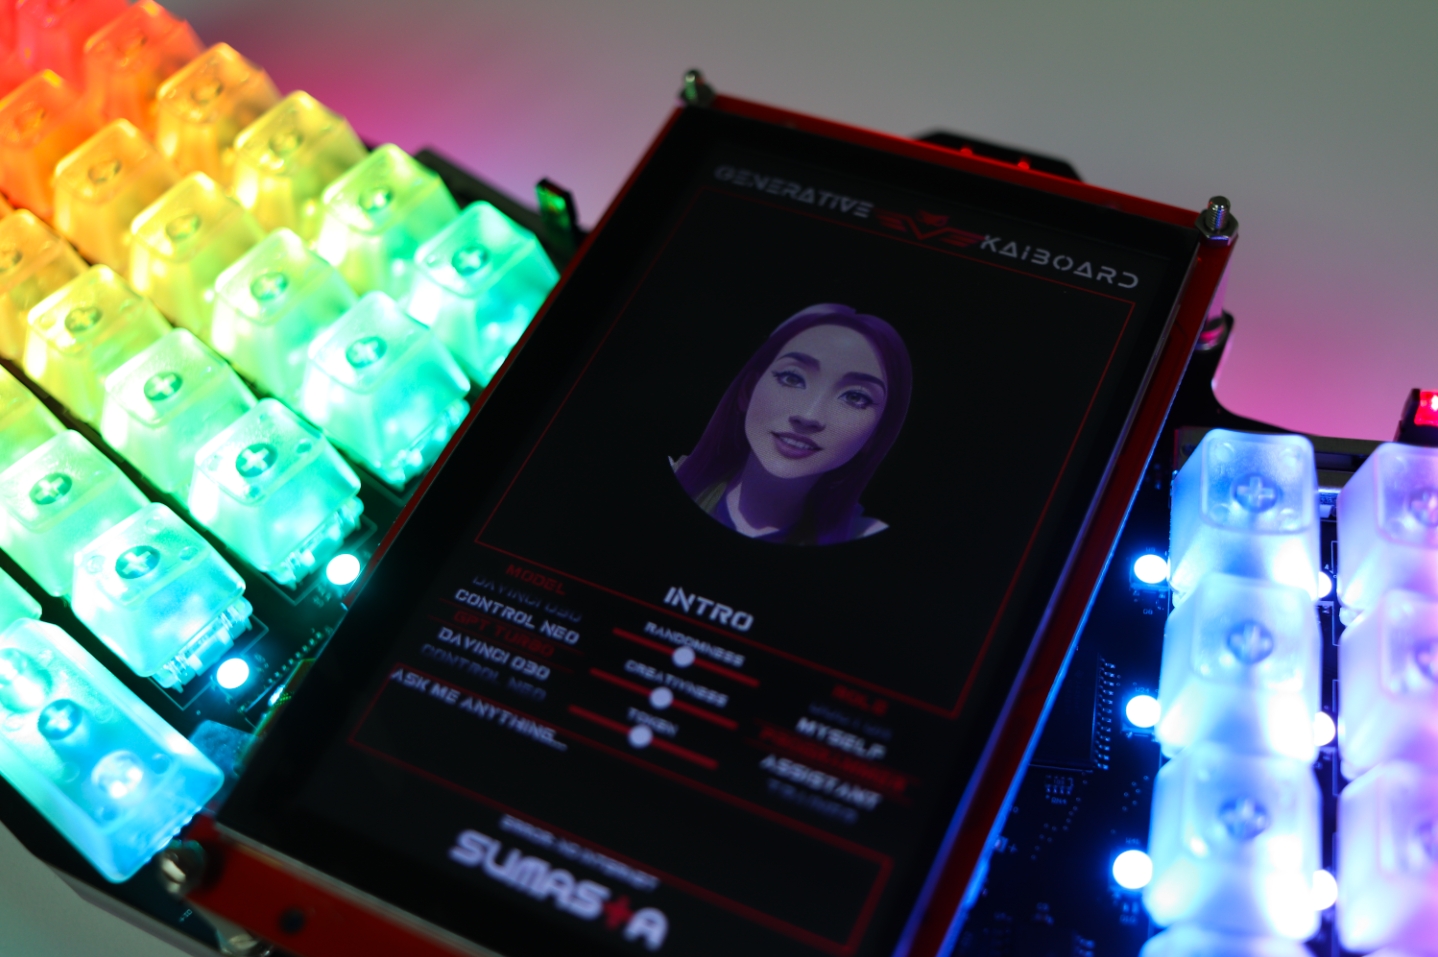
"Crowning its array of features, the keyboard boasts a 5-inch LCD display with a capacitive touch screen positioned at its center. This high-resolution display serves as a dynamic hub of information, offering users a versatile platform for quick access to applications, notifications, and settings."
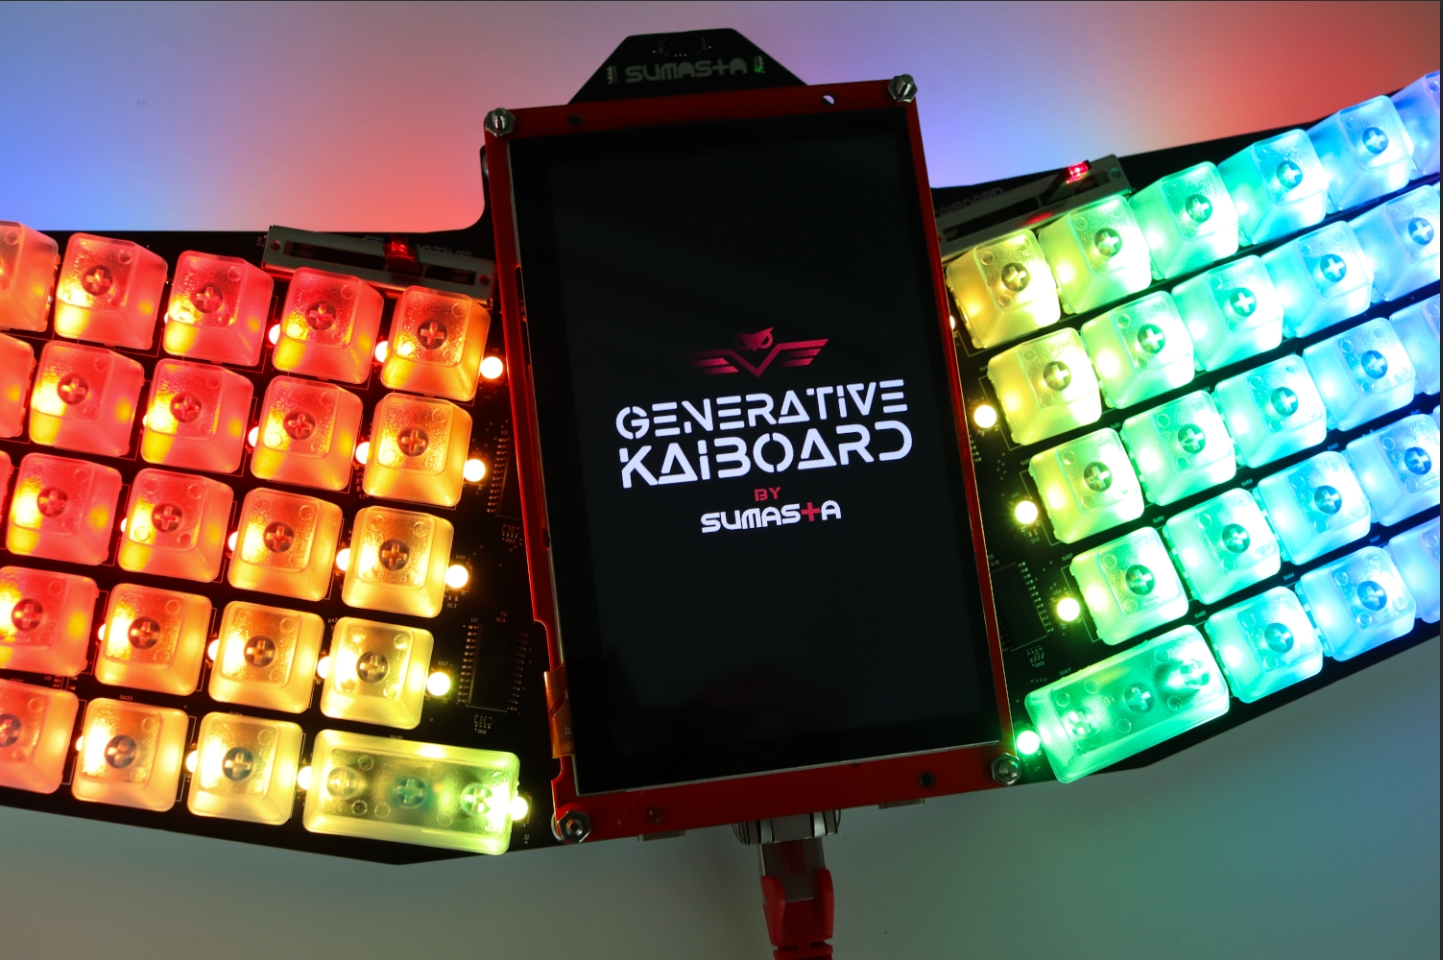
The Architecture Design
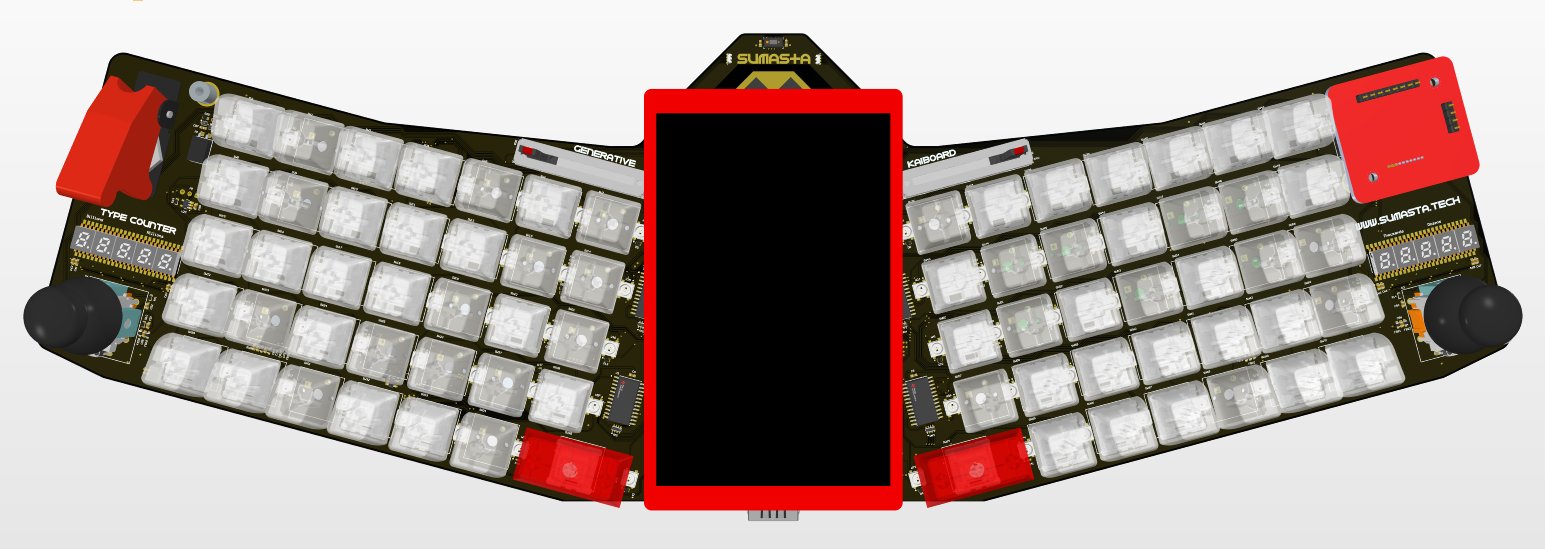
The architecture of the Generative Keyboard revolves around a meticulous symmetry design concept. Featuring a split keyboard layout, this design enables the central 5-inch screen to take center stage, capturing the user's primary focus. The innovation continues with the left and right-hand keyboard sections, each thoughtfully angled at 15 degrees to ensure ergonomic comfort during prolonged usage. Meanwhile, the strategically placed miscellaneous peripherals are positioned along the edges of the device, enhancing accessibility without compromising the keyboard's balanced aesthetic.
Further enhancing functionality and tidiness, the PoE (Power-over-Ethernet) input is positioned at the bottom center of the keyboard. This placement streamlines cable management, directing cables neatly to the underside of your desk and minimizing the clutter that often accumulates on the workspace surface. The resulting synergy of symmetry, ergonomic design, and cable management highlights the meticulous planning that defines the Generative Keyboard's architecture, offering users a blend of aesthetics and functionality.
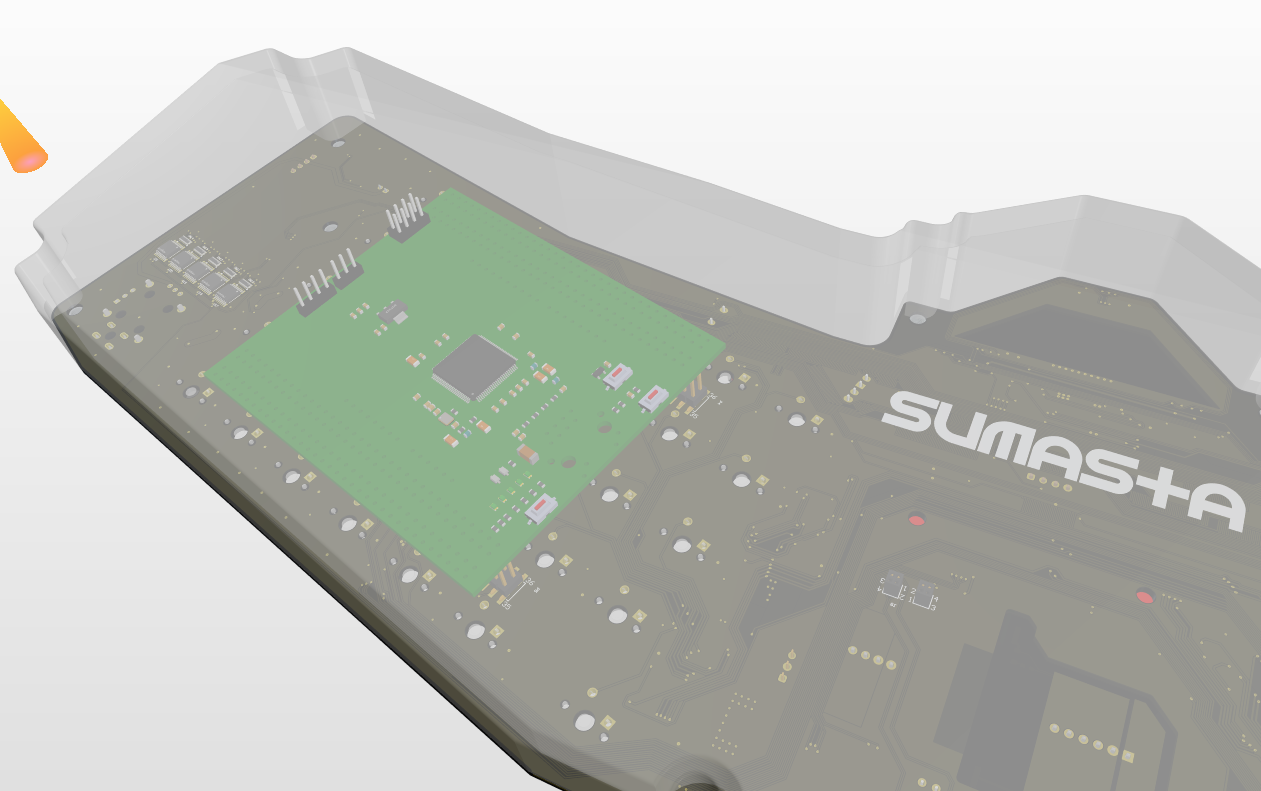
At the hardware level, the system boasts a trio of embedded processors, each contributing to the keyboard's multifaceted functionality. The cornerstone is the primary controller, a dynamic STM32F429 unit that serves as the keyboard's central processing hub, orchestrating its operations. Augmenting this core is the ESP32 co-processor, seamlessly integrated to facilitate Bluetooth HID connectivity, expanding the keyboard's versatility by enabling wireless communication with a wide array of devices.
The third processor takes on the crucial role of rendering and managing graphics, ensuring that visual elements are conveyed flawlessly. Amidst these processing powerhouses, the Ethernet controller W5300 stands as a pivotal component, handling networking with unmatched efficiency and reliability.
This amalgamation of processors harmonizes their capabilities, with each contributing a specialized function to create a holistic hardware ecosystem. This architectural configuration underscores the keyboard's sophisticated design and underscores its ability to seamlessly merge multiple technologies into a cohesive whole.
The hierarchical altium schematic sheet as shown below encapsulates the intricate details that underpin the Generative Keyboard's architecture. This visual representation elegantly maps out the connections, components, and relationships between various elements, showcasing the depth of design considerations.


The Hardware
Creating an all-encompassing elucidation that delves into every nuance of the hardware's features and design choices would unquestionably demand considerable time and effort (for now). Instead, I'm here to provide you with a succinct overview of the core functionality within each hardware component. For a deeper immersion into the intricate details of the hardware, you can refer to the schematic sheet located on my GitHub page, which serves as your gateway to uncovering the specifics.
- Power-Over-Ethernet Sheet: Meticulously outlines the intricacies of the PoE circuitry, emphasizing safety measures and Switch Mode Power Supplies. Additionally, it provides a comprehensive representation of the connector connections to the W5300 shield. This sheet serves as a comprehensive guide, offering insights into the power distribution, safeguards, and integration of the Ethernet controller.
- STM32 & W5300 Sheet: Intricately map out the wiring interconnections between these two pivotal components, along with detailing connections to the various peripherals encircling the keyboard. This comprehensive depiction serves as a vital blueprint, elucidating the intricate network of communication pathways and interactions that orchestrate the keyboard's functionality.
- RGB Lights Sheet: Provides a detailed account of the serial interconnection methodology employed for the addressable WS2812 RGB LED. This sheet acts as a guide to comprehend the intricacies of how these LEDs are intricately linked in a serial arrangement, elucidating the path through which data flows to create stunning and synchronized lighting effects.
- Display Sheet: Outlines the serial connection established between the STM32 controller and the display controller.
- Type-Counter Sheet: Intricately illustrates the connection setup for the 10-digit 7-segment display, encompassing its driver, power configuration, and more. This comprehensive documentation offers a detailed insight into the interplay of components required to bring the numeric display to life, from the connection pathways to the driving mechanisms.
- ESP32 HID Controller Sheet: Meticulously delves into the intricate circuitry governing the interfaces of the co-processor, outlining its direct control functionalities and connections. Furthermore, it provides a comprehensive breakdown of the programming circuitry facilitated through USB-C. This sheet acts as a comprehensive guide, offering insights into how the co-processor interfaces are intricately managed and controlled, while also elucidating the mechanism for programming and updating the system via the USB-C connection.
- GPT-Interlock Sheet: Elucidates the straightforward hardware switch circuitry designed to prevent remote abuse.
- Peripheral Sheet : Intricately outline all the miscellaneous hardware connections, ranging from the joystick to the Time-of-Flight sensor. These sheets provide a comprehensive breakdown of how these components interconnect, bridging the gap between the main processor and the co-processor.
- KBD Sheets: Meticulously details the connectivity of the 70 Cherry MX switches to the main processor. This comprehensive documentation offers insights into the specific arrangement that facilitates the communication between the switches and the central processing unit. Additionally, the sheet outlines the buffering mechanism employed, providing a clearer understanding of how signal flow is optimized to ensure responsive and accurate key detection.
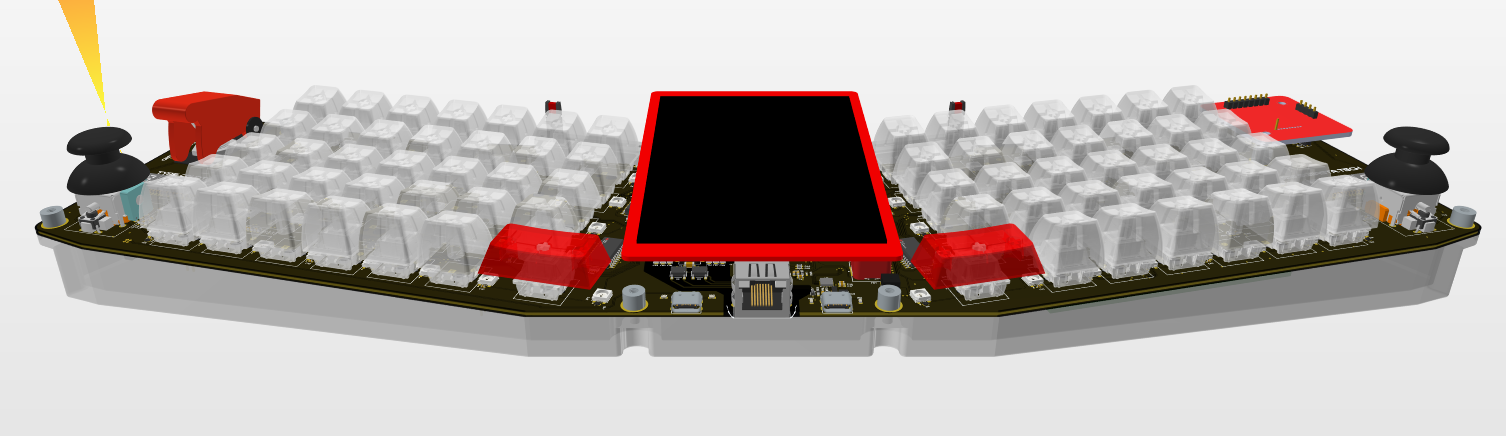
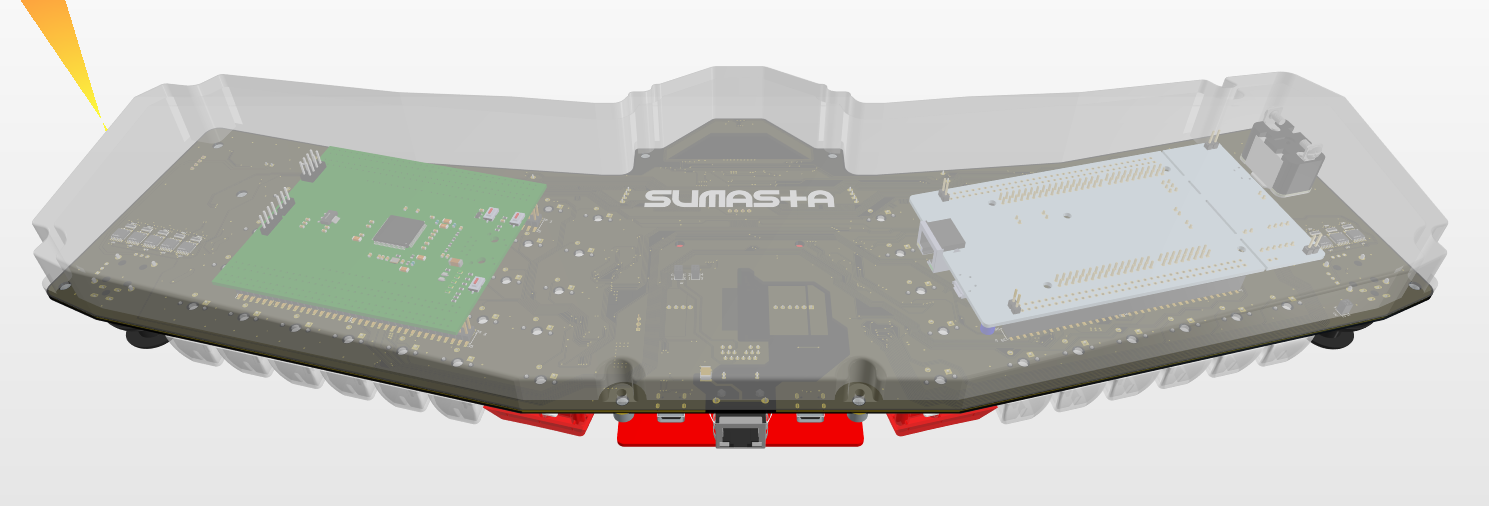
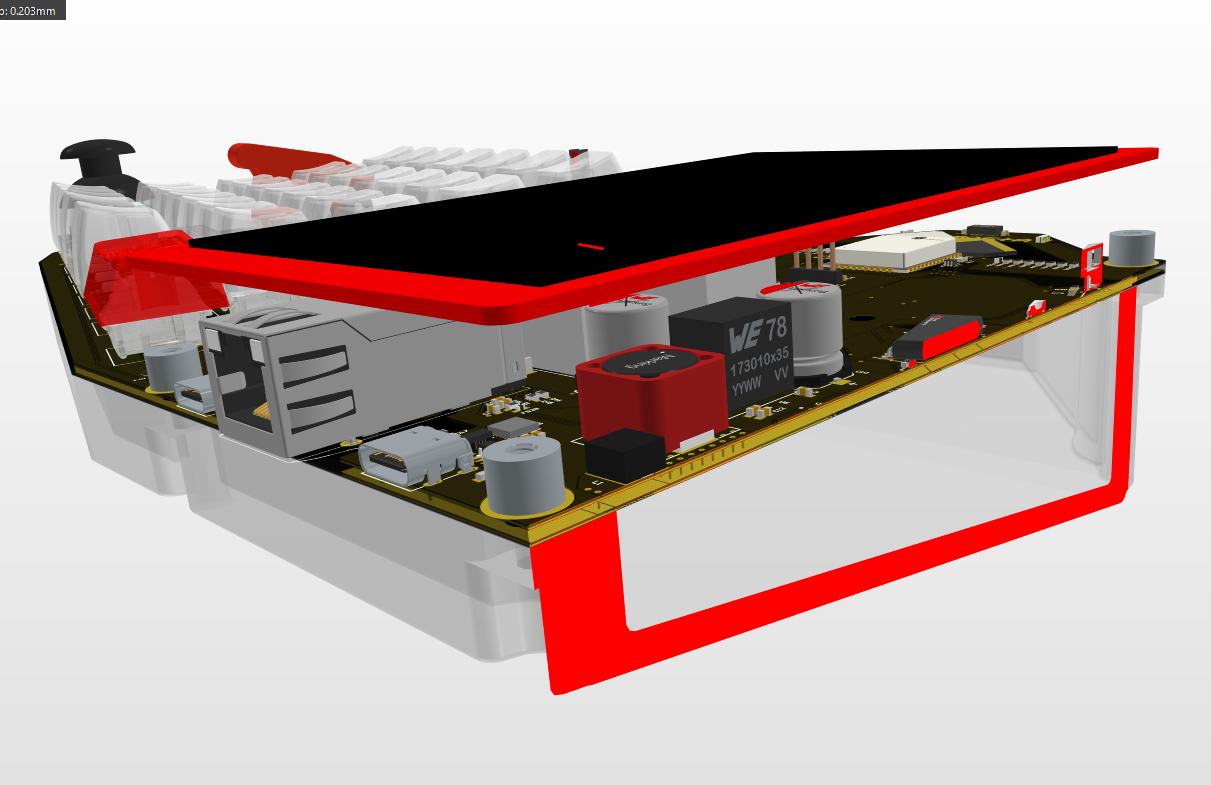
And here are few snapshots of the Board design captured from Altium


The Software
The software development for the board primarily took place in PlatformIO, utilizing the Arduino framework as the backend. This approach streamlined programming for both the STM32 and the co-processor. Leveraging the Arduino environment spared me from reinventing the wheel for specific tasks, allowing me to concentrate my limited time on constructing the application itself. The decision to work within the Arduino ecosystem not only expedited development but also ensures that the project can be easily replicated and comprehended by others, enhancing accessibility and encouraging collaborative engagement.
Much like the hardware segment, delving into the intricate specifics of the software would prove arduous and potentially distracting within this context. Therefore, my focus will center on spotlighting the key facets of the software development process, including vital considerations, noteworthy libraries employed, and other essential aspects that demand attention.
Given that this is built on the Wiznet platform, I will endeavor to explore the network driver and associated library adaptations in greater depth. These modifications were necessary to establish a connection with the OpenAI server, particularly implementing SSL/TLS 1.2 functionality. Interestingly, this aspect posed the most challenging phase of development, requiring considerable mental effort that I hadn't anticipated. Implementing SSL with its intricate nature and the need for extensive buffering proved to be a formidable task, distinct from the comparative ease encountered when dealing with a WiFi chipset.
The entirety of the source code is already available or will soon be accessible on my GitHub repository. Nevertheless, before finalizing the code with comments, license credits, and other essential elements, I believe it's prudent to take a much-needed few good night's sleep. Once refreshed, I can ensure that the code is properly organized and documented to facilitate a comprehensive and user-friendly experience for all interested individuals.
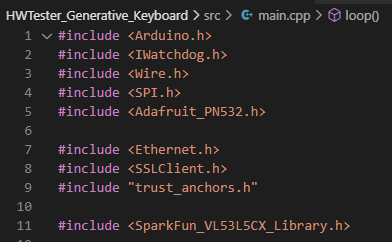
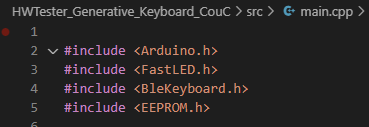
Libraries used on the main processor STM32:

Libraries used on the co-processor ESP32:

How to enable SSL connections with W5300 and STM32F429:
Based on my initial understanding, I believed that connecting to the OpenAI server could be accomplished through a straightforward HTTP request in plain text. However, I've come to realize the extent of my misconception. As outlined in the openAI API reference, it's imperative to employ TLS 1.2 or a more recent version on port 443, alongside a valid public certificate, to establish a successful connection.
Consequently, I embarked on a journey to explore appropriate methods and libraries to achieve this task. After numerous attempts involving debugging and thorough testing, I eventually concluded that the most fitting solution was to employ the SSLClient library developed by OpenSLab. And oh boy, it was not easy journey.
In essence, my approach encompassed four key steps.
- Firstly, I ensured compatibility between the Wiznet-provided Ethernet library and SSLClient on both the software and hardware fronts.
- Secondly, I generated a valid openAI public certificate to serve as a reliable trust anchor.
- Thirdly, I fine-tuned the socket and memory buffer sizes of the W5300.
- Lastly, I implemented a recovery watchdog mechanism to address potential system lock-ups during the request and transmission phases.
Thankfully, the initial phase posed minimal challenges, particularly when utilizing PlatformIO. Overriding the default Ethernet library within the project build was a seamless process, as SSLClient smoothly incorporates this modified object for its subsequent operations.
So Essentially in code the SSLClient object can be created following the three lines below:

Also as you can see it is crucial to provide a floating ADC input pin as this randomness is required by the SSL library during an authentication process.
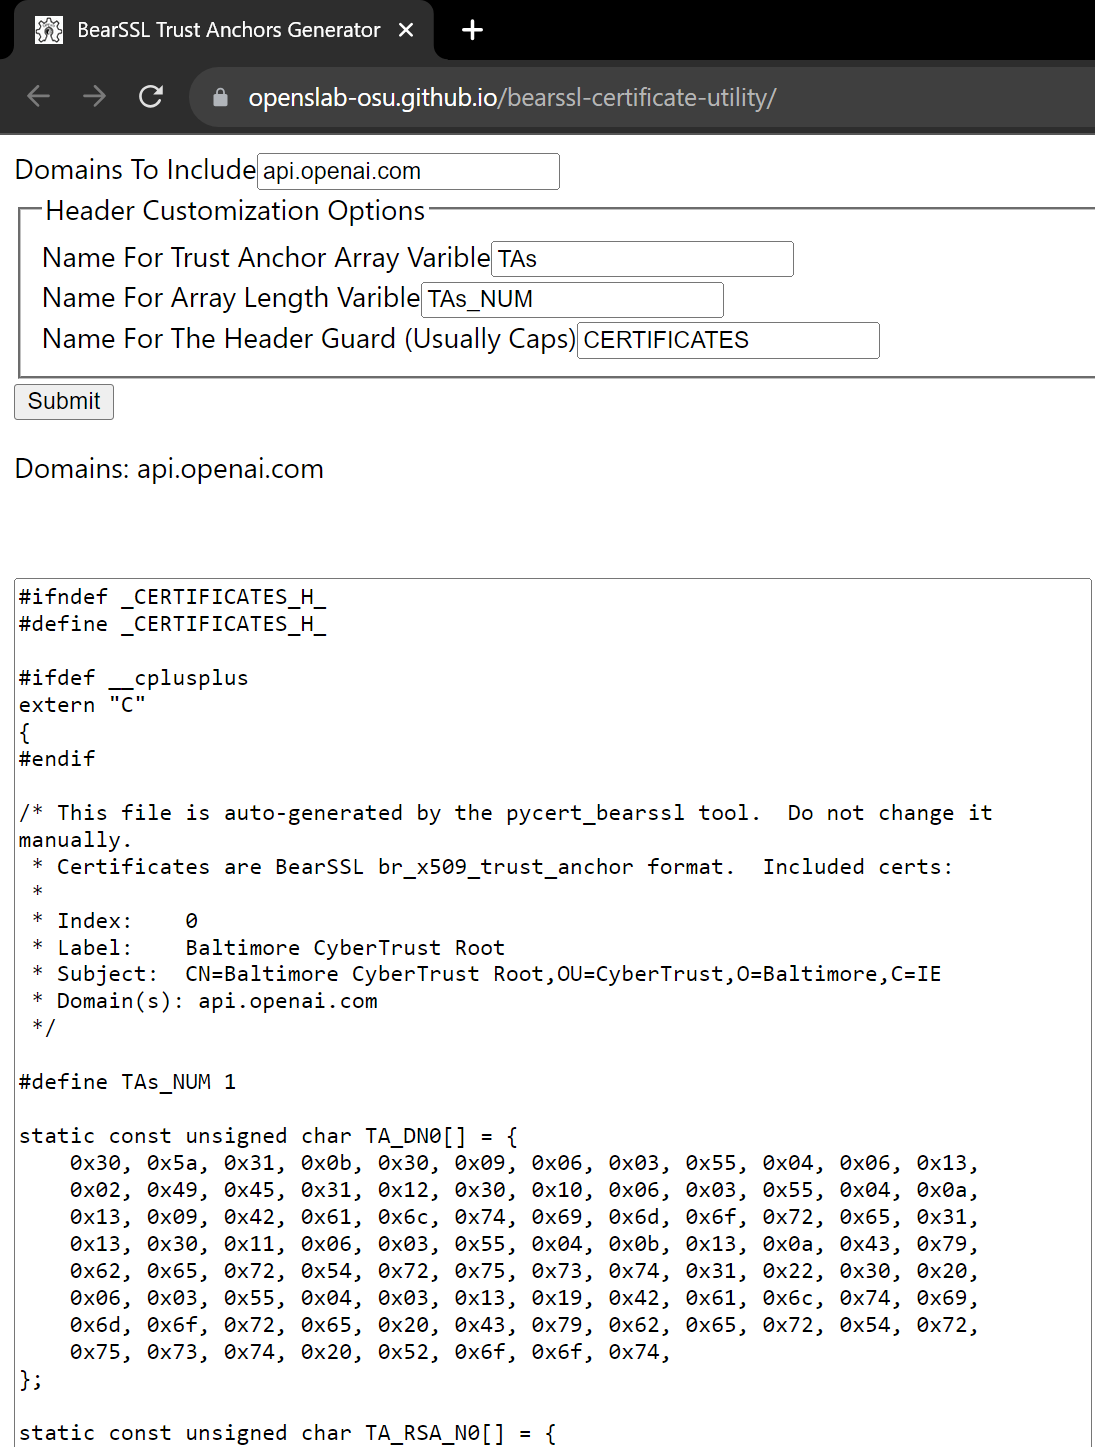
Furthermore, as stated in the documentation, SSLClient uses BearSSL's minimal x509 verification engine to verify the certificate of an SSL connection. This engine requires the developer create a trust anchor array using values stored in trusted root certificates. So I had to find a way to generate this certificate for openAI. Because apparently there are many tools you can use but I ended up using the online tools from openslab. The results you can copy past directly onto the trust_anchors.h file in your project. The outcome should look like below.
Certainly prior to attempting a connection, you have to specify your API key to the openAI, but I will not describe it here as there are tons of instruction out there such as this. In my code you should then replace the String openaiKey with your own key. Keep this private!
On the next steps, this is where things getting a bit tricky, because It appears to me that the read buffer overflows which causes the system to hangs. So I had to tweak few setting inside the internal ethernet library as provided by Wiznet.
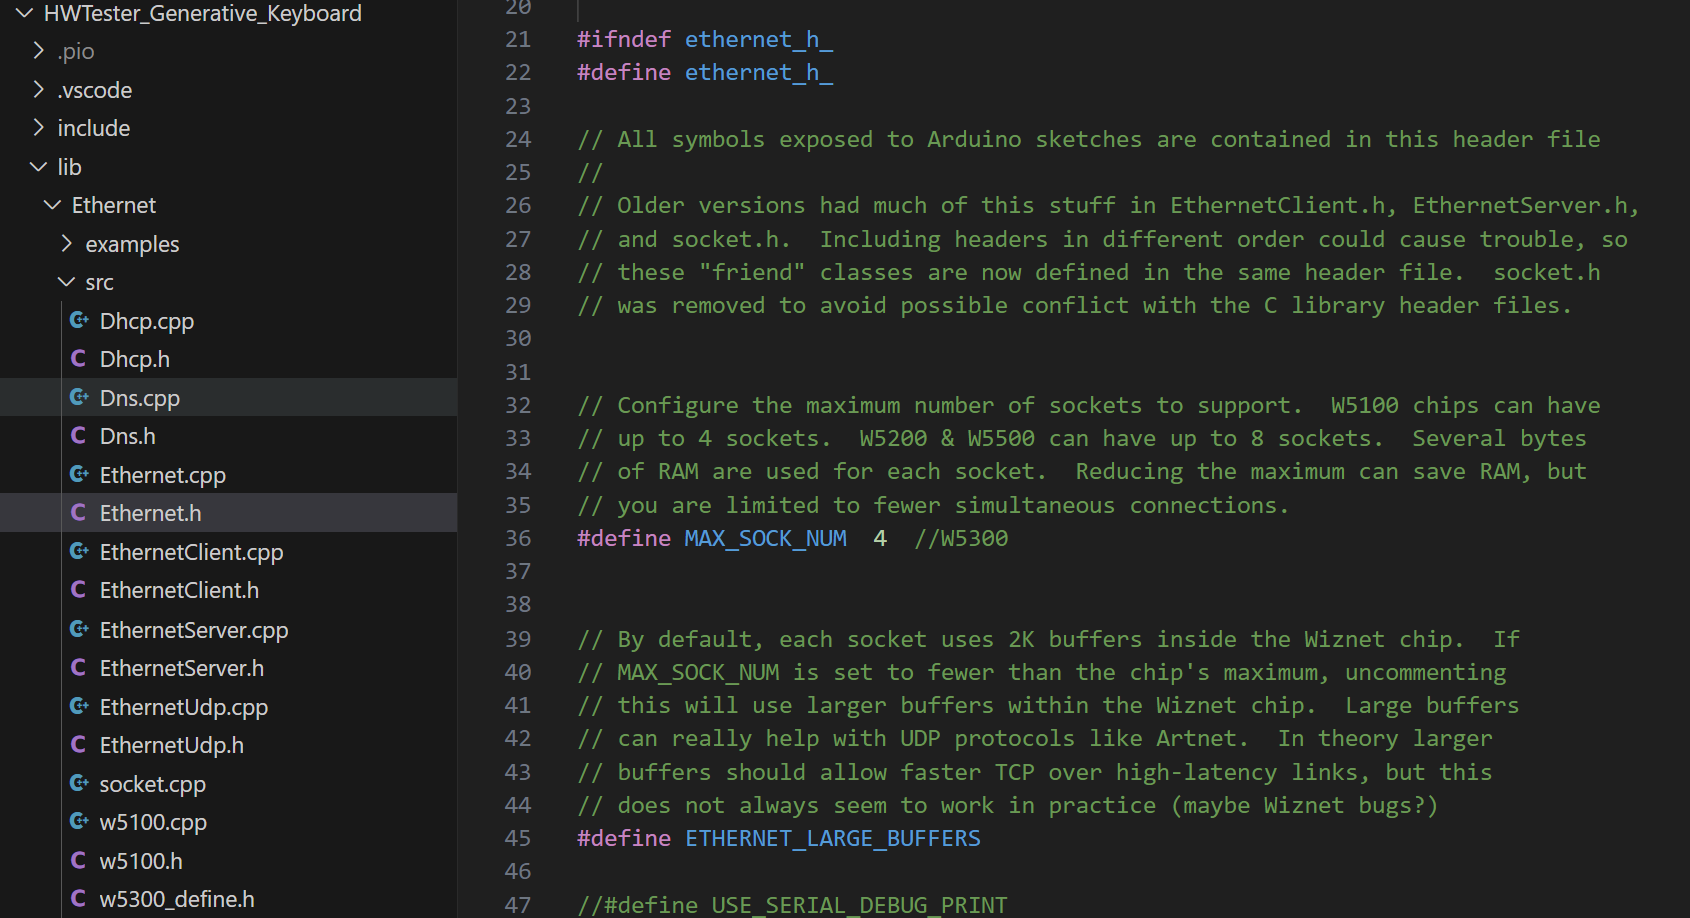
So what I did first I reduced the MAX_SOCKET_NUM from 8 to 4 under the ethernet.h as shown below. You also uncomment the ETHERNET_LARGE_BUFFERS line there.
Furthermore change also the MAX_SOCKET_NUM under the W5300_define.h from 8 to 4.
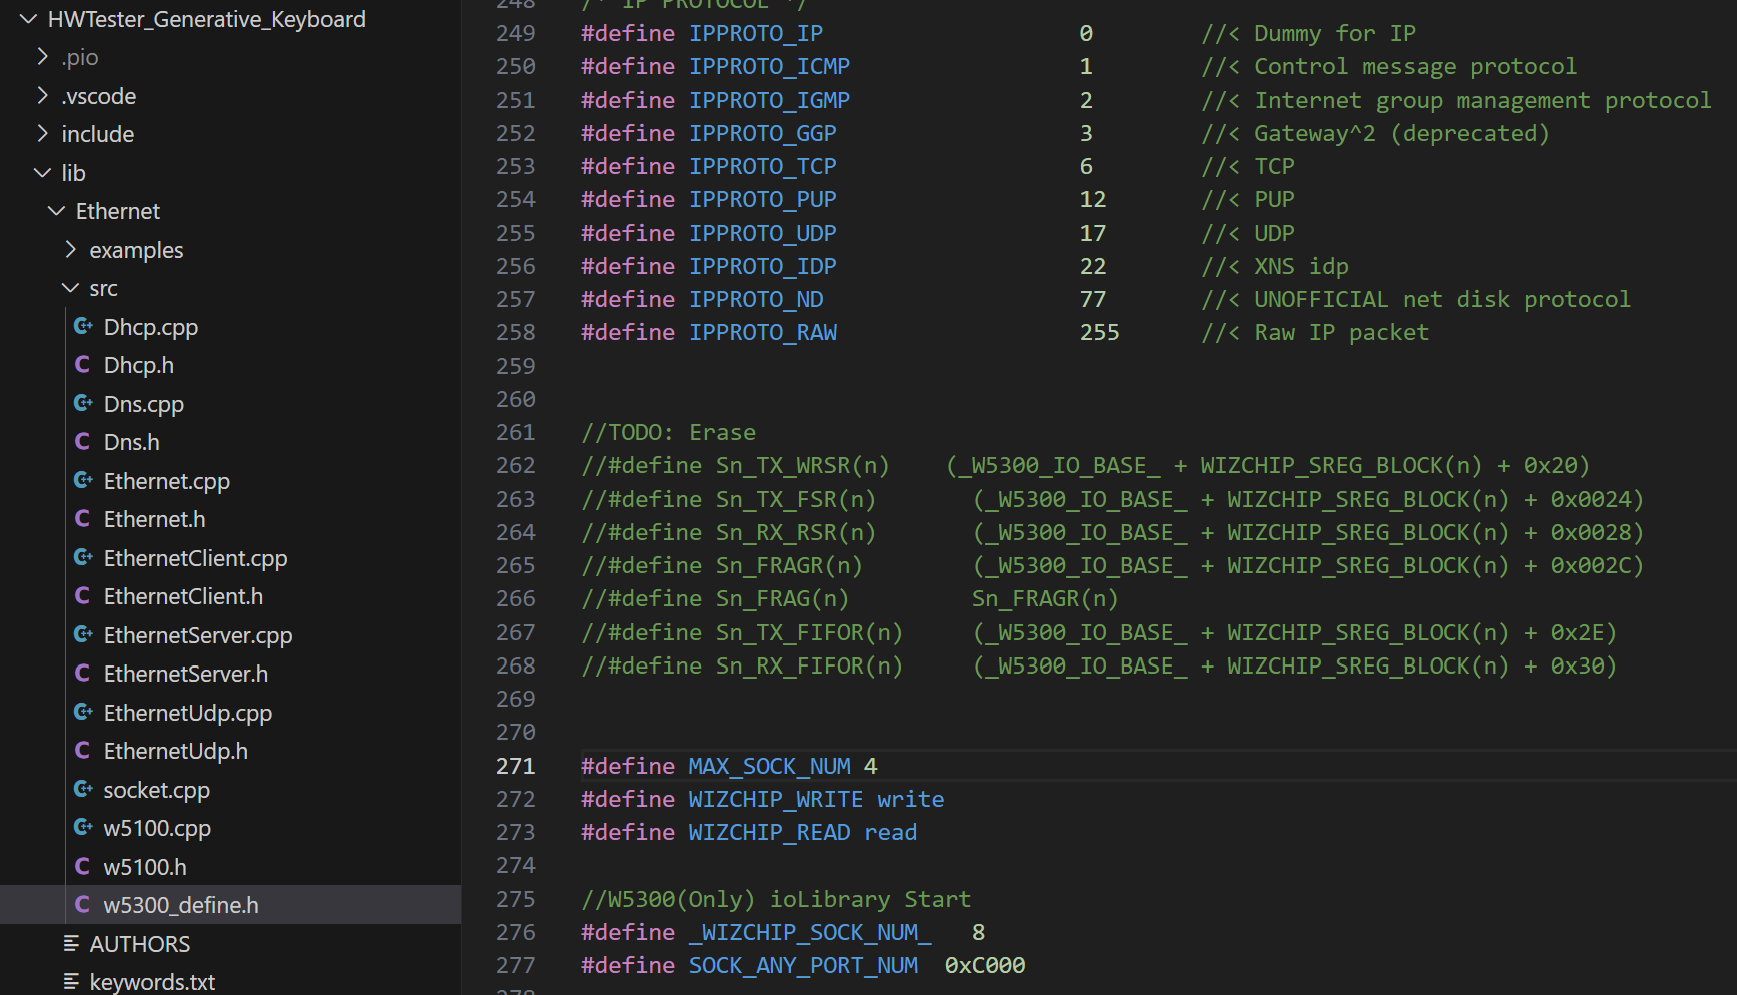
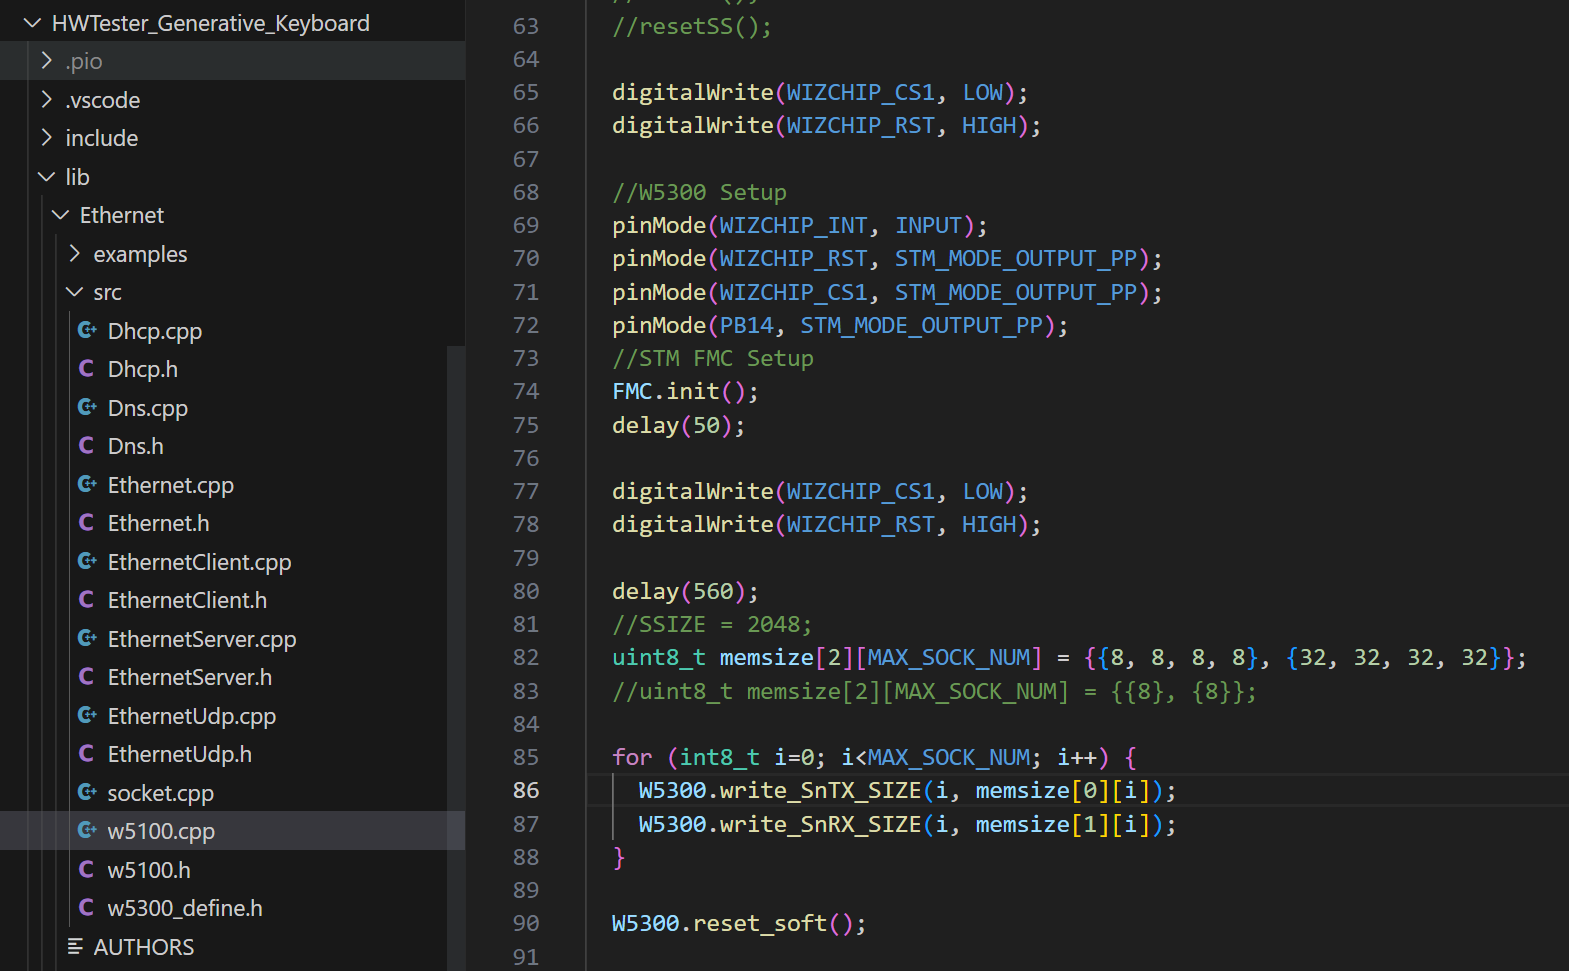
At last you should also change the memory size definition under W5100.cpp as per below. It is a 2D array variable that holds the memory size for TX and RX, originally this was 2x8 array now since we are using only 4 socket max I had to reduce it as shown below.
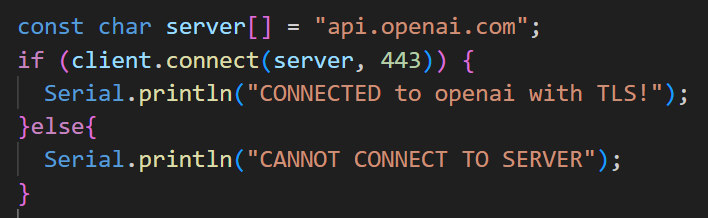
Once you've done that, you should be able to connect to openAI with SSL/TLS encrypted connectivity. For a quick check, a simple command below should attempt the connection and return true if the connection to the server has been successfully made.
At last in the current implementation, I occasionally had to rely on the internal watchdog timer of the STM32 in case the connection gets locked up during the request. If that happens the STM32 resets and reinitialized the W5300 IC.
The Development Highlights
In the following section, I'll shed light on certain captivating aspects of the development journey that I believe are worth sharing.
The PCB Design
As expected, the majority of the work was focused on the PCB design. However, it was necessary to begin with a well-crafted schematic design and careful selection and generation of components. This process has taken me significantly longer than I originally estimated due to the large number of components that required custom footprints. I opted to use Altium, which I am most familiar with, although it is unfortunate that it is not a free software like Kicad.
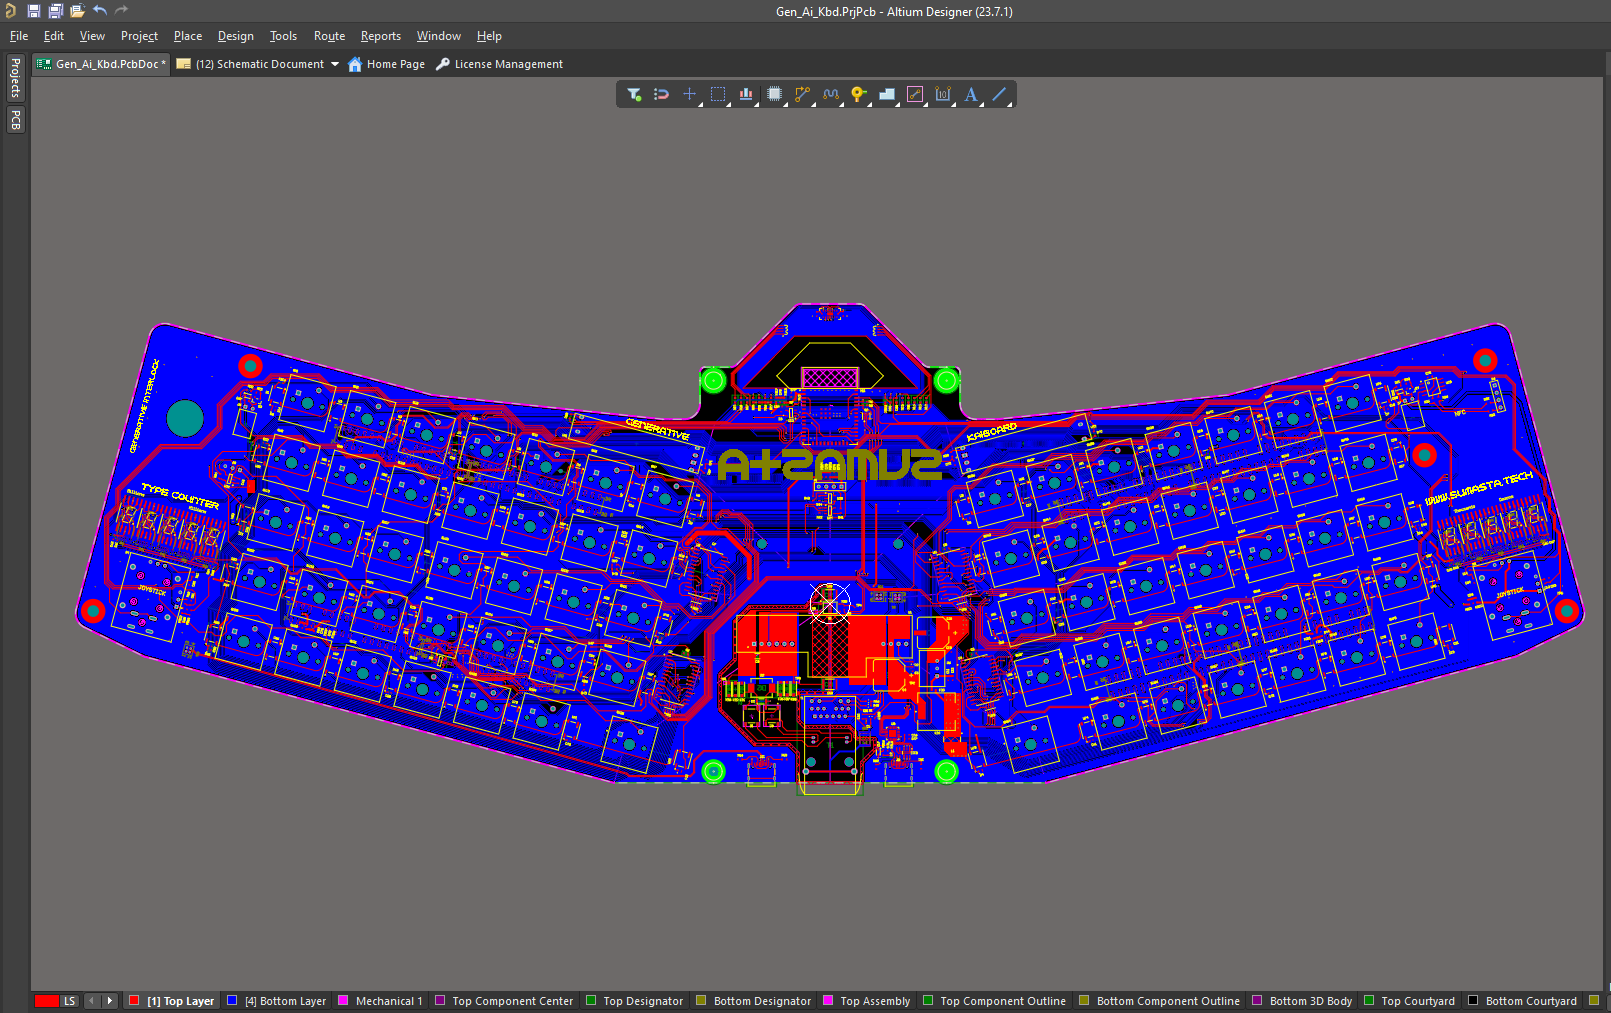
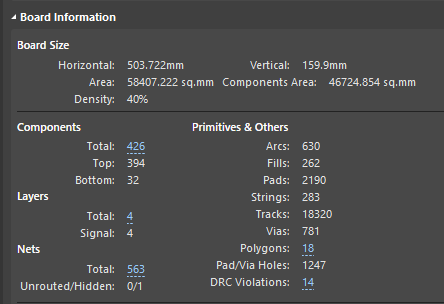
In addition, as indicated in the board details below, the board design is quite complex. The board is slightly over 0.5 meters in length, contains more than 400 components, and required routing and management of nearly 20,000 tracks. Reflecting on the process, I am astounded by the amount of effort that was required and glad that it was done on time.
Generative AI : Text-to-Speech video narration.
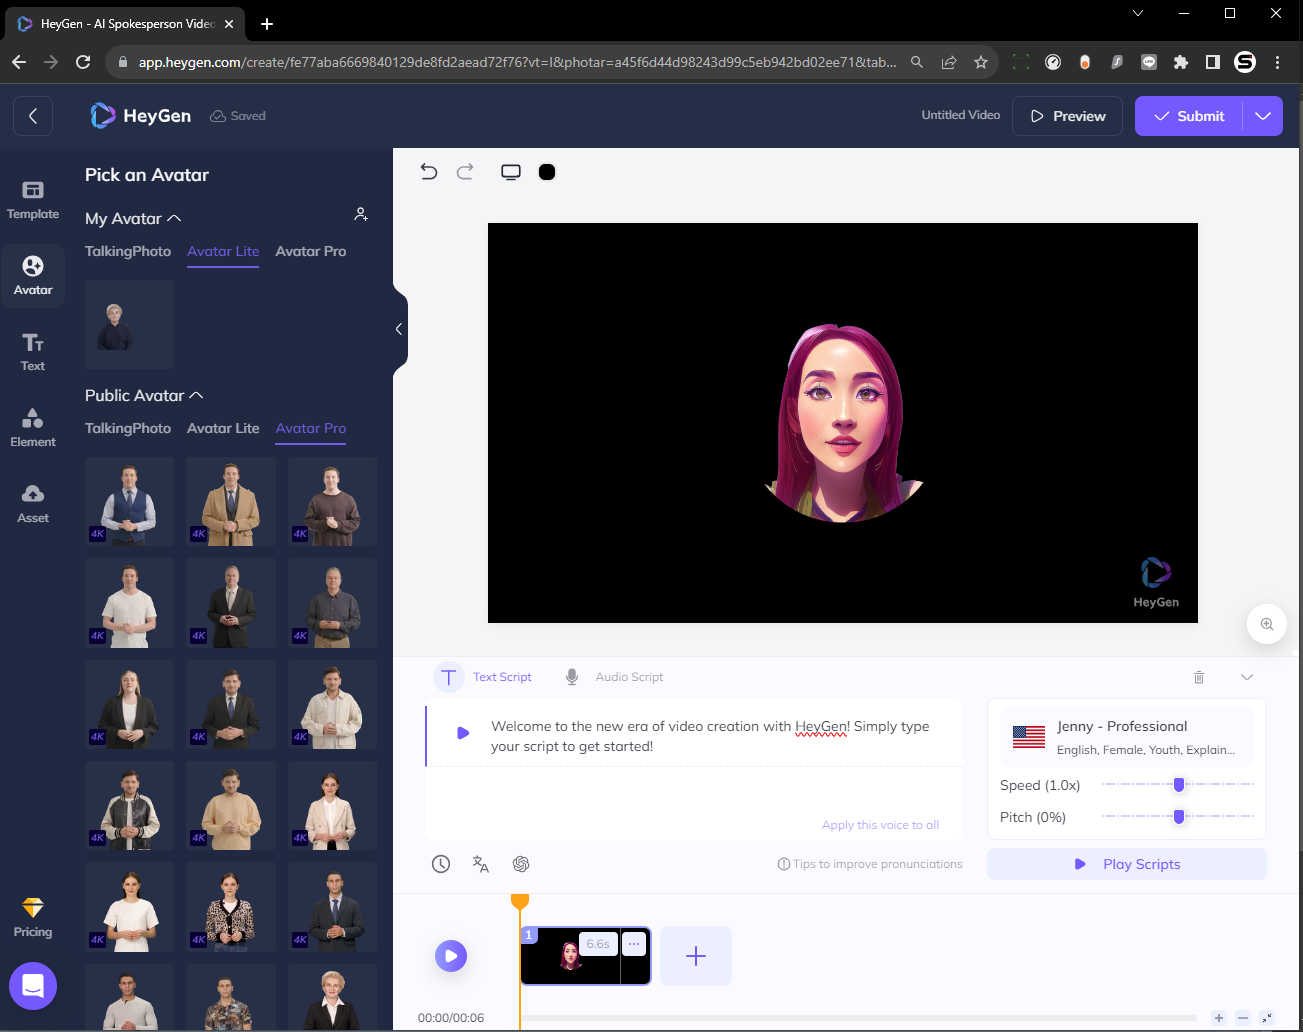
As evident from the YouTube video, I've crafted a virtual assistant complete with a customized avatar. For this task, I've employed HeyGen, an AI video generator that transforms a picture and a sequence of text into an animated video. This marked my inaugural experience with HeyGen, and I was genuinely astounded by the remarkable outcome it produced. The narration's speech exudes a natural quality, while the avatar's lips and facial expressions closely resemble realism. In my scenario, I generated a few videos wherein the avatar narrated specific lines relevant to my application, subsequently downloading them as video files.
Nextion Display and Editor
Once you possess the video, the subsequent steps become more straightforward. In my project, I've opted for a 5-inch Nextion Display boasting a capacitive touch screen. While this choice may come with a higher price tag, it has proven to be one of the most astute design decisions I've made. Firstly, the Nextion Editor software that accompanies it is impressively well-crafted, offering lucid instructions and a user-friendly interface. Although I had used it a few years ago, the remarkable improvements it has undergone since then left me thoroughly impressed. Functionally, it offers a substantial offloading of resources; avoiding the need to independently drive an external display from the main processor. In practice, constructing the GUI and achieving operational status took merely 1-2 days, underscoring the efficiency of this setup.
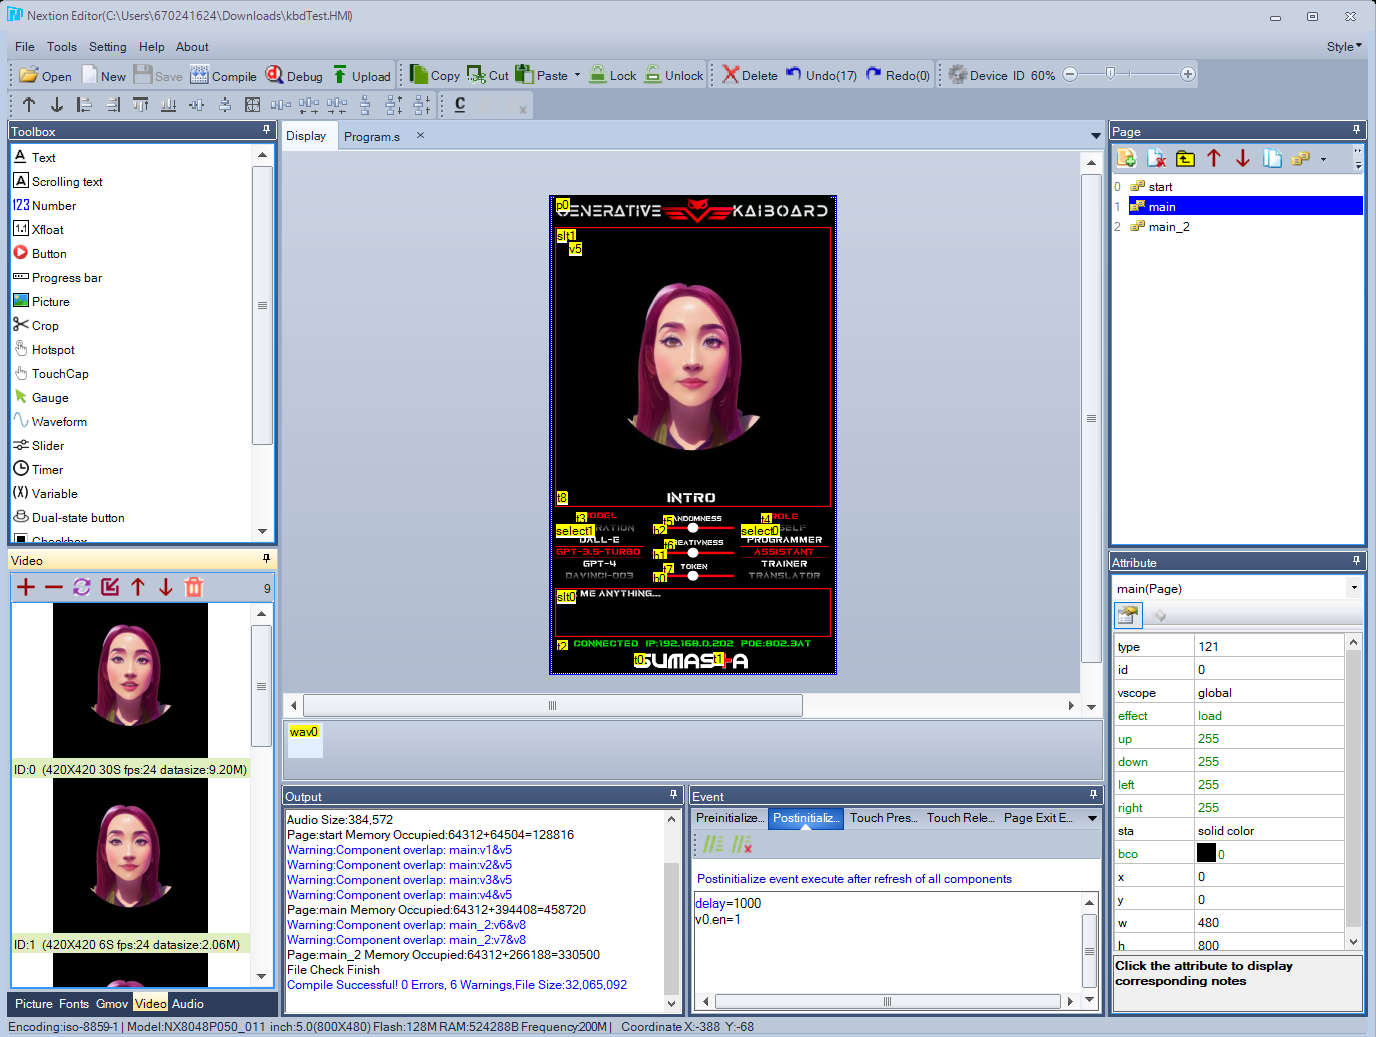
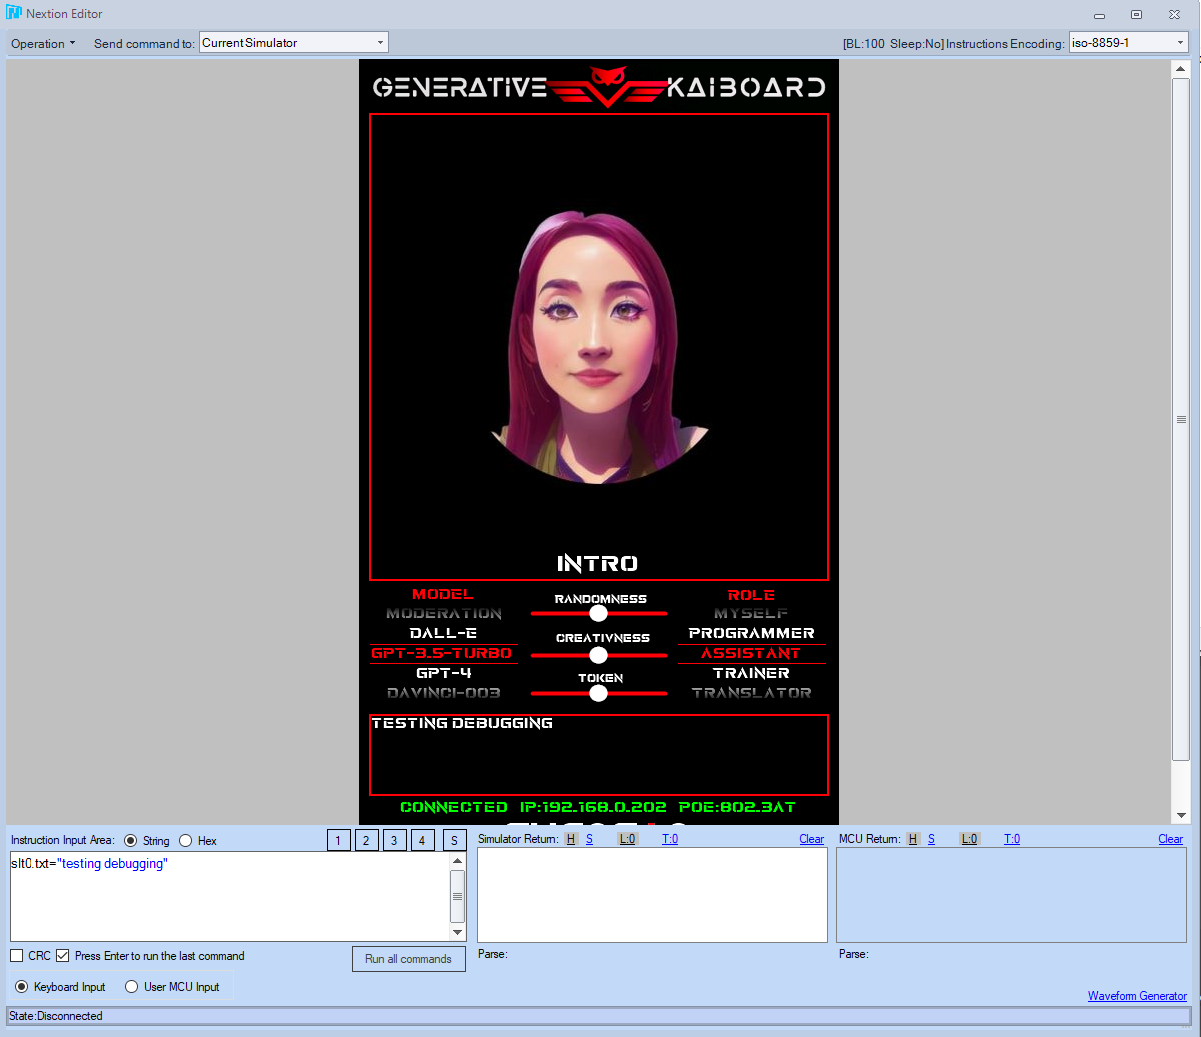
As evident from the details above, once you possess the video, the subsequent steps involve converting it using their tool, subsequently loading it into their editor, and then assigning it to your designated object. Another aspect that particularly fascinates me is the inclusion of a built-in debugger, often referred to as an emulator. This innovation allows you to carry out debugging and testing, even in conjunction with your external MCU, without necessitating a physical screen.
Mechanical Housing
Another intriguing aspect that I find worth accentuating is the mechanical base support. Regrettably, my proficiency in CAD design is rather limited. Fortunately, a colleague, who happens to be a skilled mechanical engineer at my workplace, graciously offered assistance. With the expertise, a sleek base-frame was crafted, a task that consumed merely 2 hours instead of the potential multiple days it might have taken me.
However, the allure doesn't stop at the design; it extends to the manufacturing process. I decided to venture into SLA resin printing, opting for the 8001 Translucent material. This, however, proved to be a complex endeavor due to the considerable width of the base, spanning over 500mm, surpassing half a meter. Ultimately, we had to enhance the wall thickness to 4mm, incurring a slightly higher cost, but the results were undoubtedly rewarding. In a parallel fashion to the PCB, I also entrusted JLPCB for the 3D printed housing. Astonishingly, they managed to print and ship it within a mere 3 days.

The Design Files & Codes
As I've emphasized numerous times in the past, the projects I embark on outside of my daily work are predominantly open source in nature. My endeavors have rarely been motivated by commercial interests, thus the design files are readily accessible for download or can be obtained upon request. This project follows the same ethos; all the pertinent design files are or will be available on my GitHub repository, catering to those who wish to embark on a similar journey.
However, it's important to prepare for a notable expenditure as this particular endeavor is not tailored for those aiming to minimize costs. The overall bill, including shipping, taxes, and other associated expenses I spent, approached near 1000$ mark. Despite the financial investment, my primary objective was to craft something indelible and stimulate your creative imagination.
Certainly, there are no barriers preventing you from customizing and altering the hardware, software, mechanical design files, and other components to align with your specific requirements.
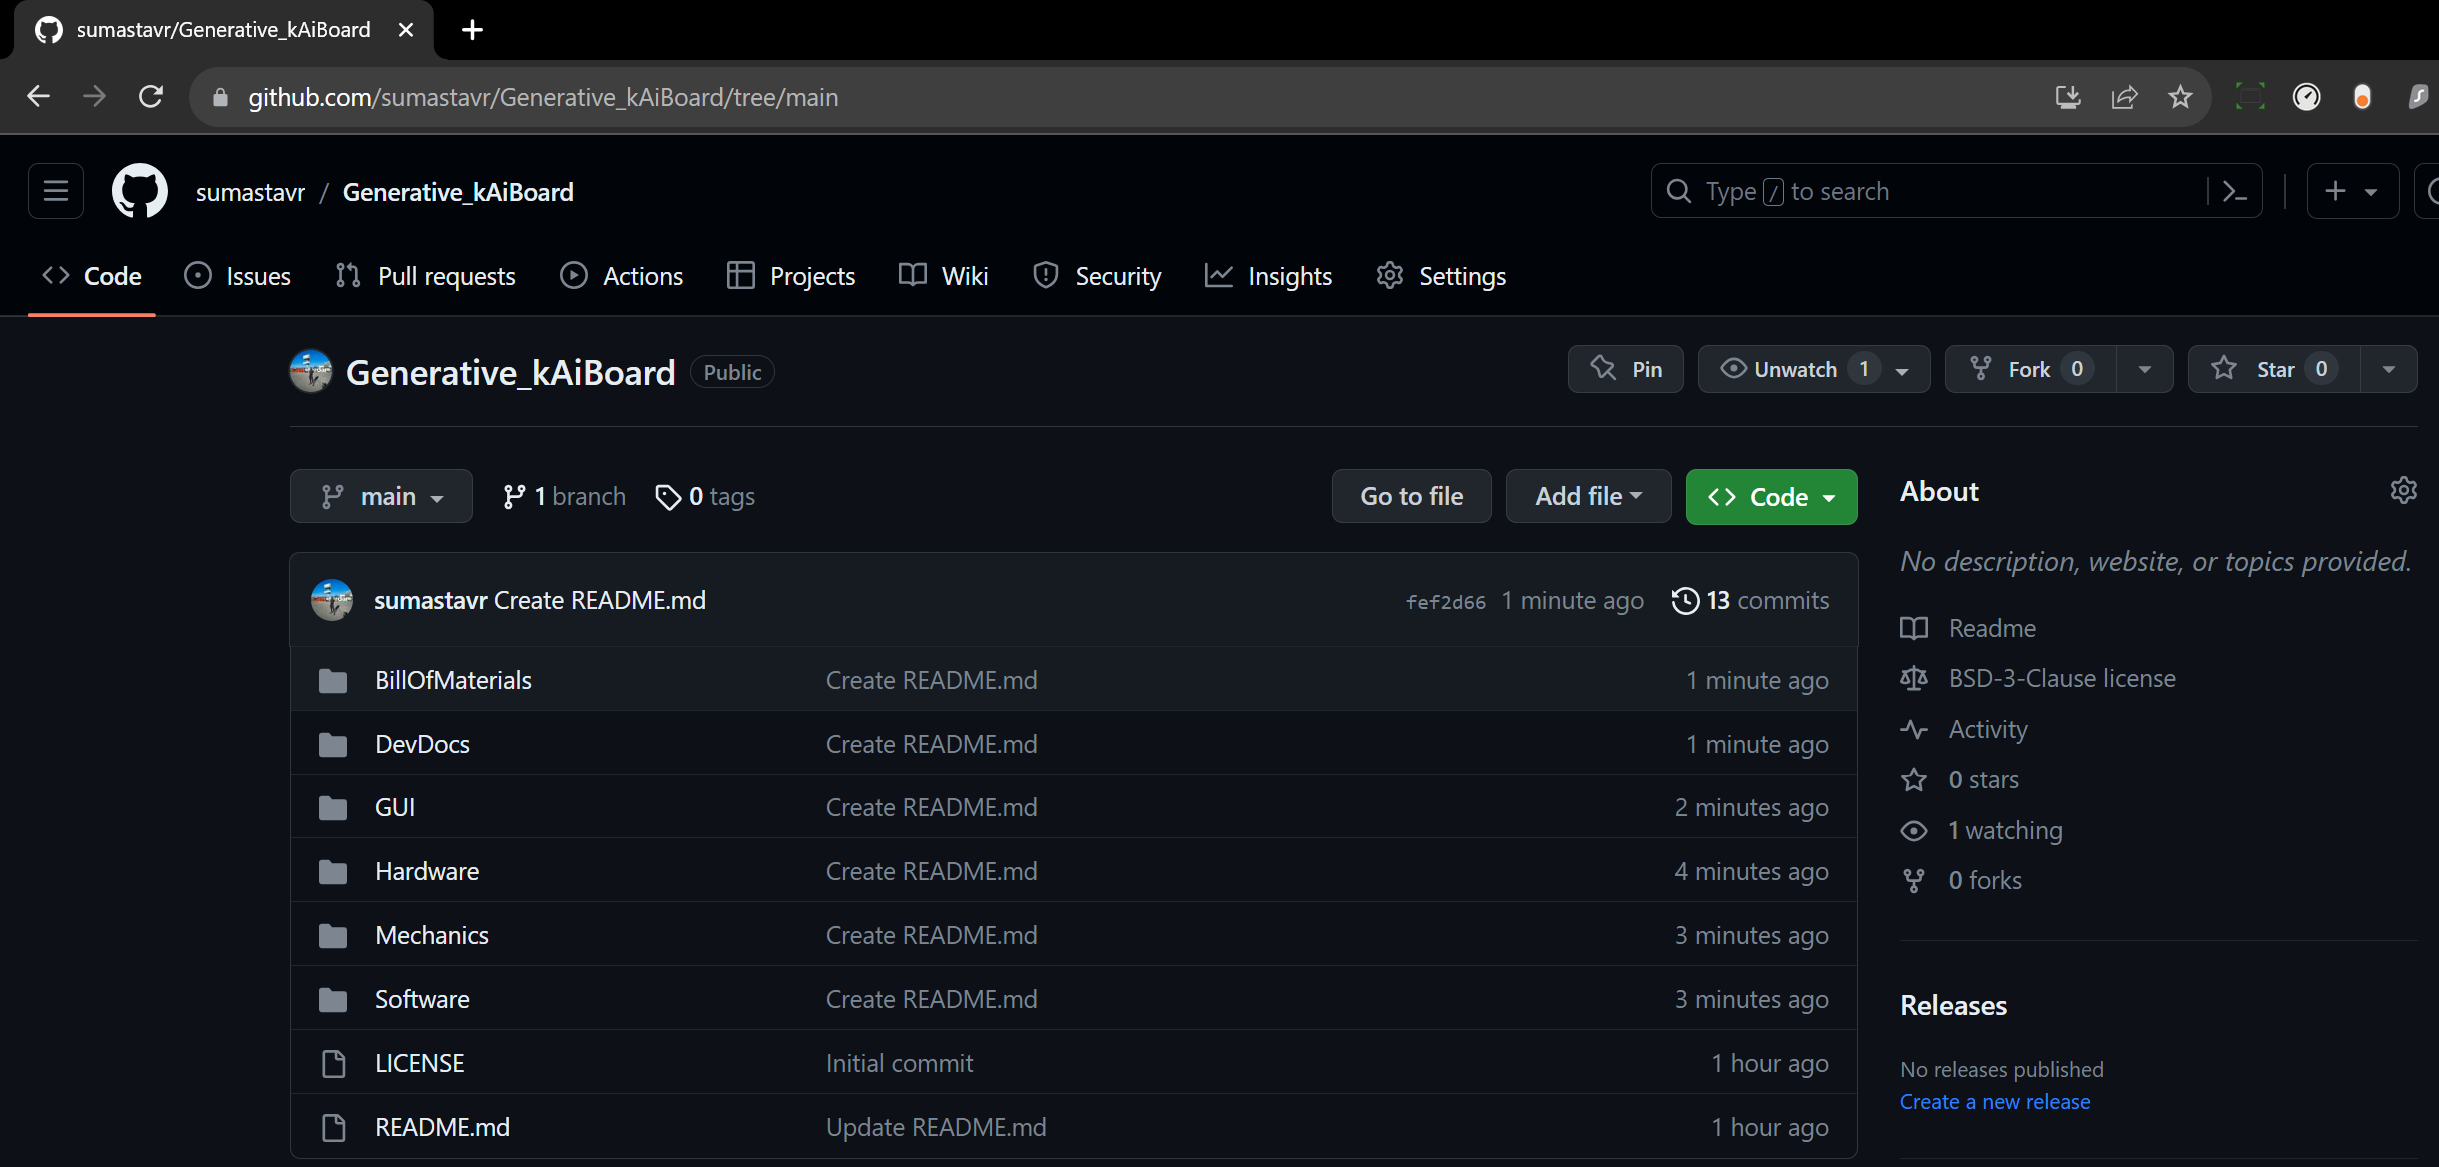
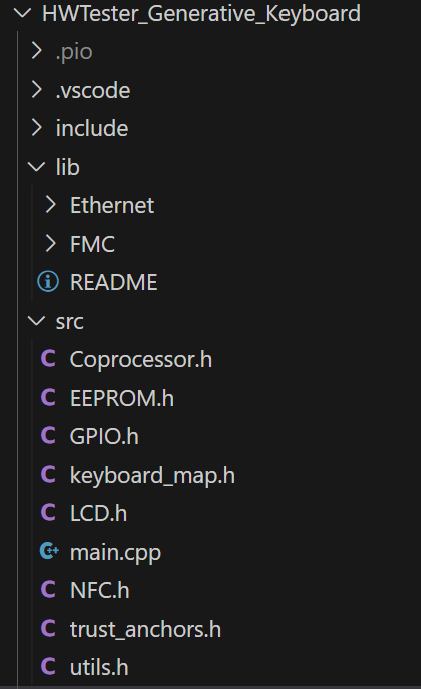
As indicated in the provided screenshot, the location of the required files should be fairly intuitive and self-explanatory. At last the complete Bill-of-Material I'm currently using you can find it in the github folder below.
The Final Words
In wrapping up, the journey of crafting the Generative kAiboard has been an extraordinary endeavor that encapsulates both passion and persistence. Within a span of just five weeks, fueled by countless sleepless nights and unwavering dedication, I have breathed life into this intricate creation. The process has been a fusion of technical prowess and artistic inspiration, resulting in a masterpiece that harmoniously blends cutting-edge technology with a touch of imagination.
Every line of code, every connection meticulously soldered, every sleep-deprived night spent fine-tuning details – all of these have converged to birth a tangible manifestation of innovation. The Generative kAiboard is not just a keyboard; it's a testament to the capabilities of human creativity and the relentless pursuit of turning imagination into reality. As I now present the culmination of this journey, I invite you to explore, experiment, and immerse yourself in the possibilities this keyboard offers. With each keystroke, may it remind you of the remarkable journey it took to bring this vision to life – a journey characterized by determination, sleepless nights, and the sheer joy of creation.
Lastly I extend my heartfelt gratitude to Wiznet for hosting the TOE design contest, which served as the catalyst for this remarkable journey. The contest not only provided the platform for innovation but also ignited a fire within me to push the boundaries of what was achievable. The encouragement, recognition, and support that Wiznet offered throughout this process have been invaluable. It's with immense appreciation that I acknowledge the opportunity they provided to turn a concept into a tangible reality. The Generative kAiboard stands as a testament to the power of such initiatives, and I am honored to have been part of this enriching experience.
-
Main Repository

-
HW Schematic Output