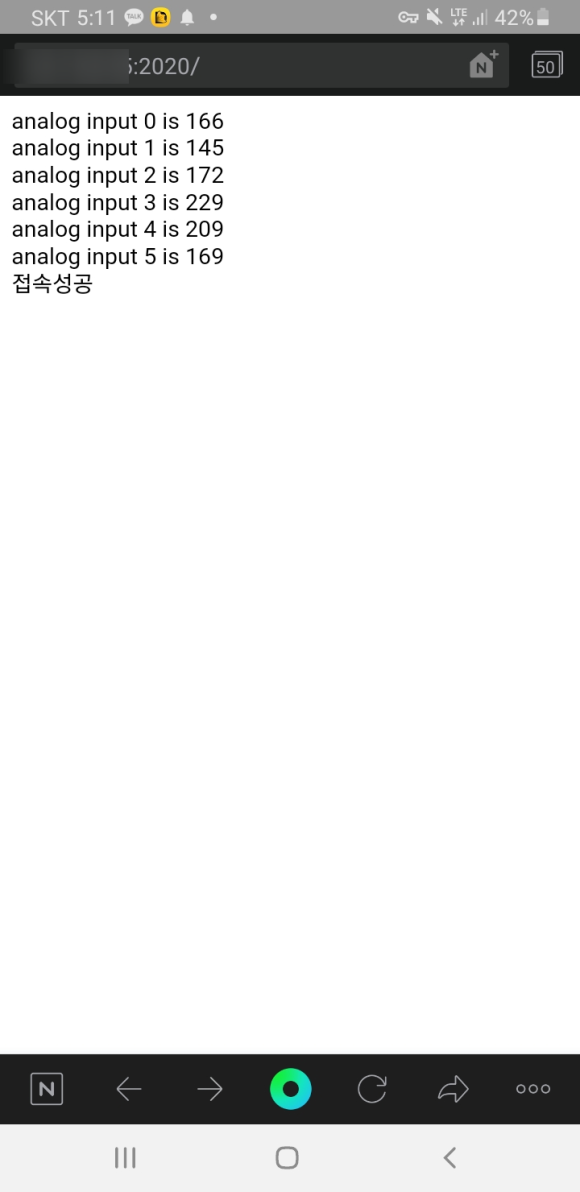
아두이노 이더넷쉴드(웹서버) 외부에서 접속 테스트 성공
아두이노 이더넷쉴드(웹서버) 외부에서 접속 테스트 성공
0
Components
Hardware components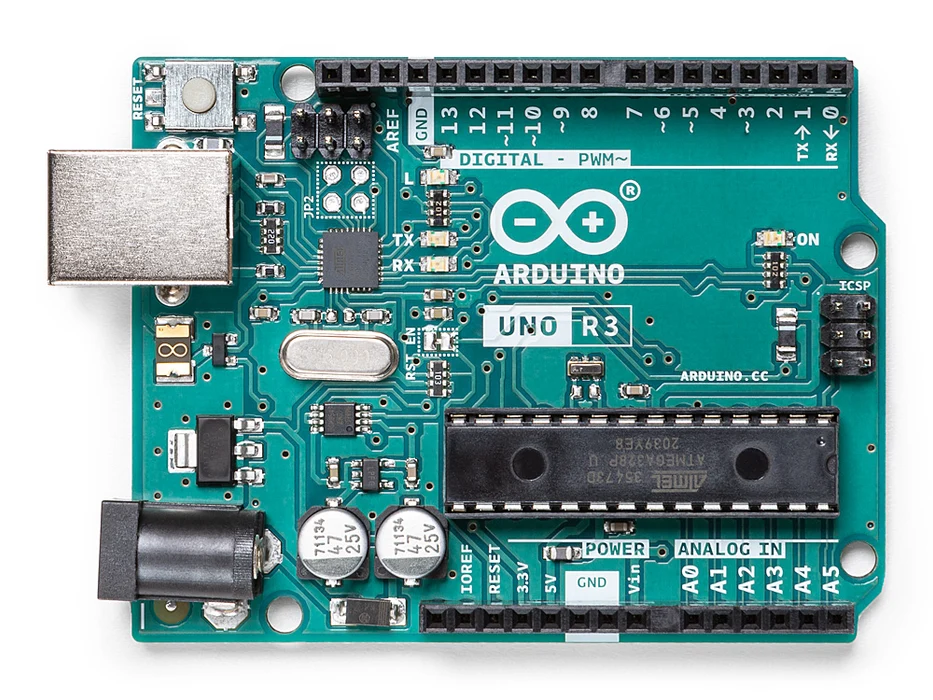
Arduino - Arduino UNO
x 1

Ethernet Shield
x 1
Project description
이 프로젝트는 Arduino UNO를 이용한 Ethernet Shield 예제이다. 글 작성자는 Ethernet Shield를 이용해 WebServer를 간단히 구성을 했다. 공유기를 사용해서 망을 구성했기 때문에 DHCP로 IP를 할당받는 부분도 포함되어 있다. 그리고 외부 인터넷에서 접속하기 위해 공유기의 포트포워딩 설정 방법을 설명하고 있다.
<아두이노 코드>
#include <SPI.h> #include <Ethernet.h> // Enter a MAC address and IP address for your controller below. // The IP address will be dependent on your local network: byte mac[] = { 0xDE, 0xAD, 0xBE, 0xEF, 0xFE, 0xED }; IPAddress ip(192,xxx,xxx,xxx);// 공유기에 할당될 내부아이피 입력 // Initialize the Ethernet server library // with the IP address and port you want to use // (port 80 is default for HTTP): EthernetServer server(80); //내부포트 void setup() { // You can use Ethernet.init(pin) to configure the CS pin //Ethernet.init(10); // Most Arduino shields //Ethernet.init(5); // MKR ETH shield //Ethernet.init(0); // Teensy 2.0 //Ethernet.init(20); // Teensy++ 2.0 //Ethernet.init(15); // ESP8266 with Adafruit Featherwing Ethernet //Ethernet.init(33); // ESP32 with Adafruit Featherwing Ethernet // Open serial communications and wait for port to open: Serial.begin(9600); while (!Serial) { ; // wait for serial port to connect. Needed for native USB port only } Serial.println("Ethernet WebServer Example"); // start the Ethernet connection and the server: Ethernet.begin(mac, ip); // Check for Ethernet hardware present if (Ethernet.hardwareStatus() == EthernetNoHardware) { Serial.println("Ethernet shield was not found. Sorry, can't run without hardware. :("); while (true) { delay(1); // do nothing, no point running without Ethernet hardware } } if (Ethernet.linkStatus() == LinkOFF) { Serial.println("Ethernet cable is not connected."); } // start the server server.begin(); Serial.print("server is at "); Serial.println(Ethernet.localIP()); } void loop() { // listen for incoming clients EthernetClient client = server.available(); if (client) { Serial.println("new client"); // an http request ends with a blank line boolean currentLineIsBlank = true; while (client.connected()) { if (client.available()) { char c = client.read(); Serial.write(c); // if you've gotten to the end of the line (received a newline // character) and the line is blank, the http request has ended, // so you can send a reply if (c == 'n' && currentLineIsBlank) { // send a standard http response header client.println("HTTP/1.1 200 OK"); client.println("Content-Type: text/html"); client.println("Connection: close"); // the connection will be closed after completion of the response client.println("Refresh: 5"); // refresh the page automatically every 5 sec client.println(); client.println("<!DOCTYPE HTML>"); client.println("<html>"); // output the value of each analog input pin for (int analogChannel = 0; analogChannel < 6; analogChannel++) { int sensorReading = analogRead(analogChannel); client.print("analog input "); client.print(analogChannel); client.print(" is "); client.print(sensorReading); client.println("<br />"); } client.println("접속성공"); client.println("</html>"); break; } if (c == 'n') { // you're starting a new line currentLineIsBlank = true; } else if (c != 'r') { // you've gotten a character on the current line currentLineIsBlank = false; } } } // give the web browser time to receive the data delay(1); // close the connection: client.stop(); Serial.println("client disconnected"); } }

<공유기 설정>
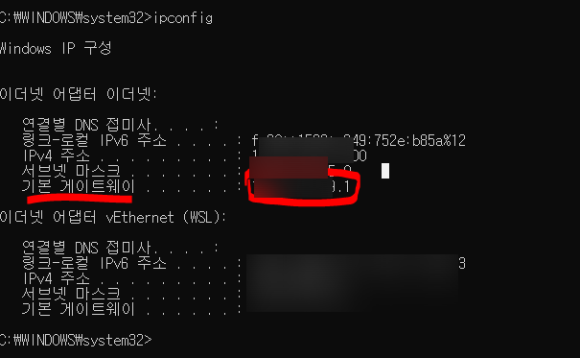
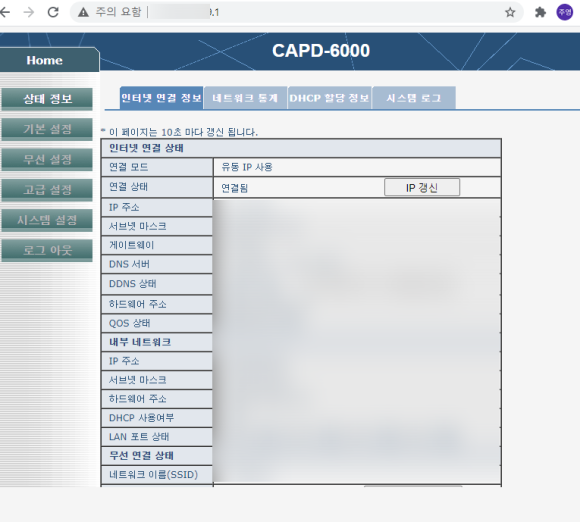
(공유기설정은 cmd->ipconfig치시면 나오는 기본 게이트웨이(아이피)를 인터넷 주소창에 치시면 됩니다)
2. 포트포워딩
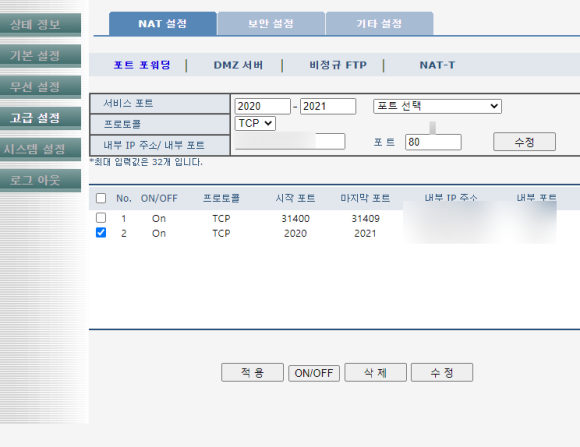
공유기설정에 접속했으면 포트포워딩을 해줍니다
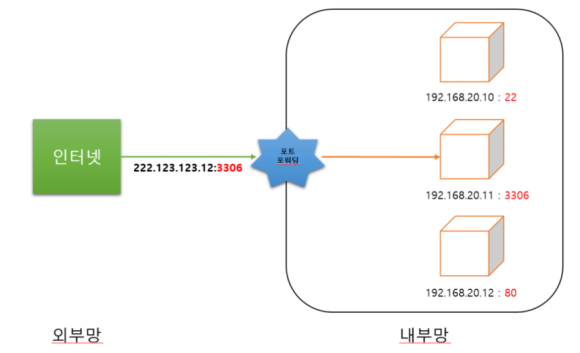
포트포워딩이란 외부에서 공유기(외부IP)에 접속했을때
공유기 내부에 설정된 아이피(내부IP-아두이노)로 접근할수 있도록 길을 하나 뚫어주는거라고 생각하시면 편합니다
?
이렇게 설정하면 이제 외부에서 xxx.xxx.xxx.xxx.:2020,xxx.xxx.xxx.xxx.:2021을 치면 자동으로 제가 설정한
아두이노 내부아이피:80으로 접속이 됩니다
?
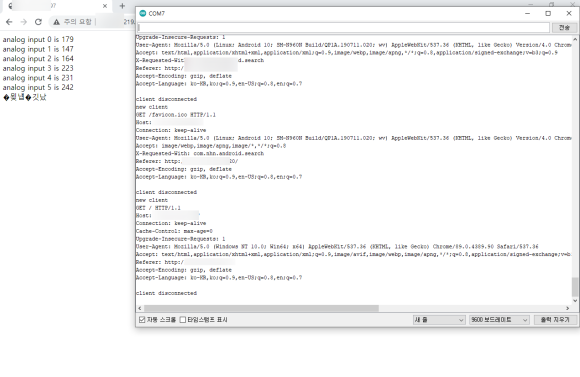
테스트 결과
공유기 내부 아이피 할당한모습
외부 LTE로 아두이노 이더넷 서버 접속한 모습