
Siemens S7-1200 to Arduino Modbus TCP/IP Communications Part 3~5
In this video we have introduced an Arduino into the mix, which communicates with the Siemens S7-1200 PLC and Factory I/O using the Modbus T
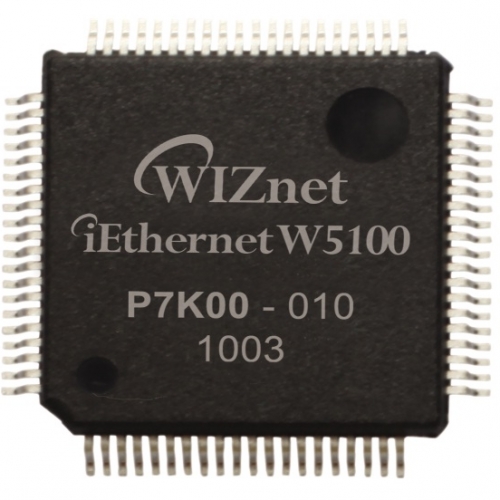
WIZnet - W5100
x 1
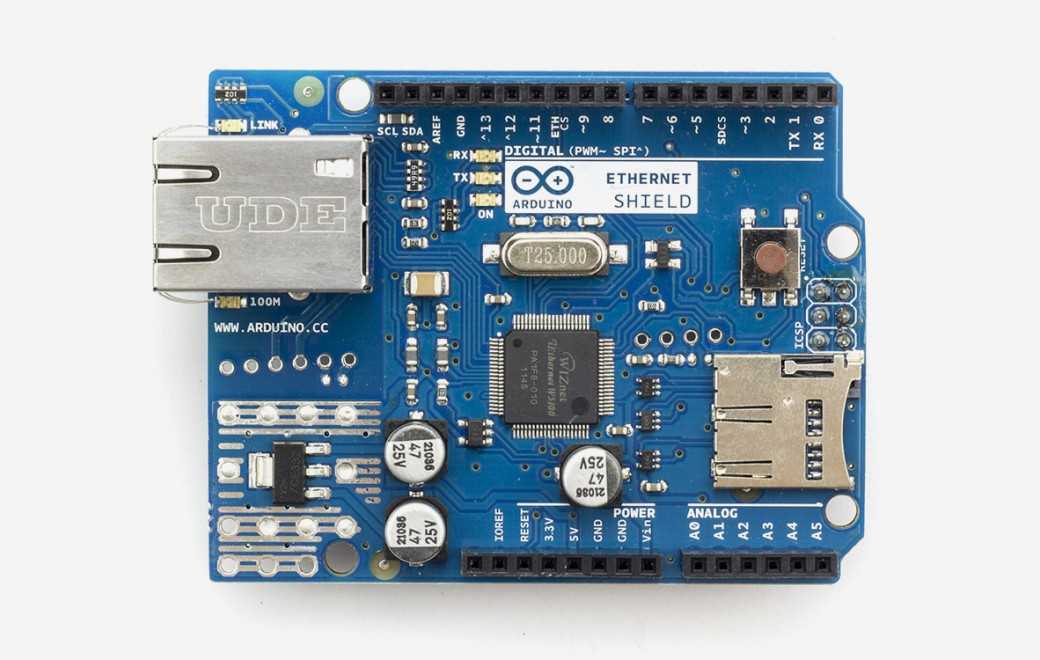
Arduino - Arduino Ethernet Shield
x 1

Arduino - Arduino IDE
x 1
Welcome to a Siemens S7-1200 to Arduino Modbus TCP/IP Communications Tutorial
In this video we have introduced an Arduino into the mix, which communicates with the Siemens S7-1200 PLC and Factory I/O using the Modbus TCP/IP Protocol.
This Siemens S7-1200 Modbus TCP/IP Video is 1 of 3 Modbus videos where we deal with the Arduino; programming it to function as a Modbus Server. The Arduino reads a potentiometers’ rotational position via an analogue input then stores that value in an input register.
In the following videos, the Siemens S7-1200 PLC, being on the same local area network is able to read the value stored in the Arduino Input register and use it as a setpoint to control the Water Level in the Tank.
As a prelude to this video you may want to watch the previous two videos on Water Tank Level Control as they will definitely help you understand what we are trying to achieve. The Links are below
Siemens S7-1200 Water Tank Level Control Part 1. https://youtu.be/-hEjh5SEbrc
Siemens S7-1200 Water Tank Level Control Part 2. https://youtu.be/poi08Wtxkbo To view the next video in the series, Siemens S7-1200 Modbus TCP/IP Communications with Arduino Part 3. select the link: https://youtu.be/OuSlJl8EHz0 A free 30 day Licence of Factory I/O If you would like to get a free 30 day licence of Factory I/O or even purchase a copy, you can use the link below. I will earn a small commission for this, however, it helps me produce videos like this one to help you program PLCs now and in the future and it shouldn't make a difference to the price you pay. Many thanks. https://factoryio.com/url-action?ref=... Details about my patreon account will be added here shortly.
Transcript:
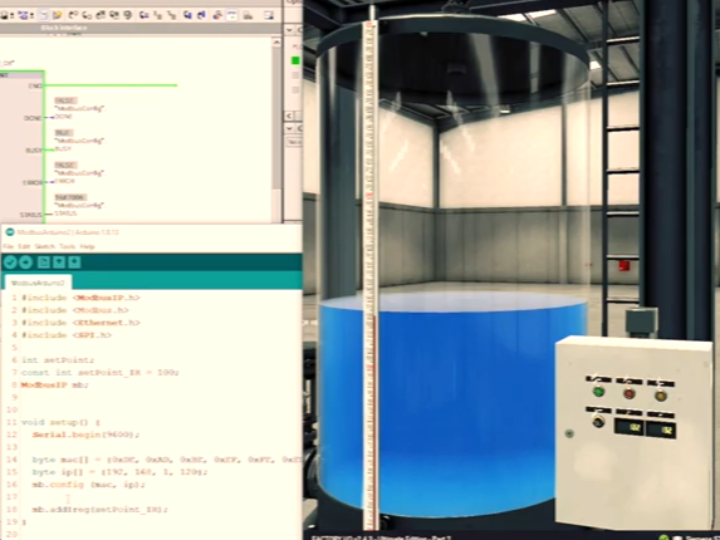
(00:00) hello and welcome back to another siemens s7 1200 and factory io tutorial um it's still locked down here in the uk as you can tell i haven't had my hair cut now for weeks on end but hopefully i've got something interesting for you we have an arduino which communicates with the plc using the modbus tcp ip protocol and if i rotate this potentiometer the water tank starts to fill why well the potentiometer's rotational position is read by the arduino's analog input and stored as a numerical value internally in the
(00:43) arduino's memory then the plc being on the same local area network is able to read the values stored in the arduino and use it as a set point to control the water level in the tank so how is this done well stay tuned to find out okay welcome back so some of you may have realized a slight change in agenda from what was mentioned at the end of the previous water tank video in part two well just to say i will still be implementing pid control after these next few videos on modbus and if you haven't already seen the
(01:36) previous two water tank videos the links for these are in the description below now before we start let's take a closer look at the arduino setup firstly we have an arduino uno atmega328 compatible board at the bottom and sitting right on top of the arduino we have an ethernet shield lan w5100 so i'll just take them apart so you can see them so that's the arduino and that's the shield then we have a 10 kilo ohm potentiometer with three pins connected via these wires to the arduino shield which is linked
(02:23) using the same pins directly to the arduino the wiper pin on the potentiometer goes to a zero one of the analog inputs on the arduino and ground and 5 volts go to their respective inputs now i'll just put this back together and then we'll make a start as you can see it's sometimes difficult to get these pins lined up um and you have to be careful otherwise you'll bend the pins there we have it okay we are ready to have a look at programming the arduino we will be setting up the arduino as a server
(03:23) sometimes referred to as the slave and the siemens plc will be the client sometimes referred to as the master right now the arduino code is quite short so i'll try to explain it step by step and hopefully it will make sense i have to point out that i'm not an expert in the modbus field and all i've done here is read up as much as i could about it watched some videos and being a systems engineer i made some modifications to suit what i was trying to achieve and managed to get it working okay let's open up the arduino ide
(04:09) i'll make a bit of space at the top the first thing we will need to do is include four libraries two of which are already installed when the arduino ide software was installed the remaining two libraries are third party libraries which came from this website and if you scroll down to the section on modbus ip it mentions which libraries are required so the first two libraries spi dot h and ethernet dot h are the libraries installed automatically when the arduino ide is installed so let's include them in the code or
(04:56) sketch however you would like to refer to the program i'll just put the cursor there on line two and from the menu select sketch then include library followed by spi let's do the same again but this time select ethernet ok the next two libraries required modbus ip ip.h and modbus.h are the third-party libraries which we will need to download and install so let's save what we've done so far and then close the arduino ide so that we can install new libraries then from the website at the top of the page
(05:46) click the green button code then download zip we can then go to the download folder where it should say modbus arduino master which really is server or slave then we can right click on the folder to extract all but first i will move it to the folder i created on the desktop for downloads i'll then open the folder and extract all from there and accept the destination by selecting extract we can now see the extracted directory modbus arduino master if we have a look in the folder we see a list of the files as outlined on the website including the
(06:45) libraries folder so let's go into the libraries folder where we can see five different modbus libraries now as we are using the lan w 5100 ethernet shield we need to copy the two libraries modbus ip.h and modbus.h and place them in arduino forward slash libraries so let's do that okay now let's include these two libraries in the code so go to sketch include library and this time you will see contributed libraries with the other two entries we require so let's include them one by one
(07:59) okay that's done i'm just going to save what we've done so far and call it modbus arduino 2 then save now i'll just tidy the code up getting rid of unnecessary spaces so that all the code we write here will fit on the screen okay let's go back to the website for a moment and i'm under notes apart from saying modbus ip uses port 502 which we will also set up in the siemens plc the first paragraph says we need to uncomment the following which is the defined tcp keeper live line so let's do that let's edit the modbus
(08:57) ip.h file i'm using notepad and remove the two forward slashes and then save okay going back to the notes in paragraph two it talks about an offset which we will come to shortly now if we scroll back down to the section modbus ip this is the section that applies closely to what we are doing and therefore i will be referring to this section when coding right so we've included the libraries the program needs to use so now we can declare some of the variables so first we'll declare setpoint as an integer which is 2 bytes 16 bits
(09:54) which are values between minus 32 768 to 32 767 then on the next line we'll declare the arduino register memory address set point underscore ir and make it equal to 100. this is done by declaring const integer and the variable setpoint underscore ir which is the name of my choosing and making it equal to a register address when we get to the siemens plc we will make use of this register's content for the water tank level set point now the register is address 100 which equates to 30 101. now that may sound a bit strange if
(10:47) you haven't dealt with modbus before but i'll try to give an initial explanation it's 30 000 because the address of modbus input registers start from base 30 000 and because we have defined 100 as the address we need to add 100 to the 30 000 and then an additional one for the modbus offset therefore we end up with thirty thousand one hundred and one now this may become a little bit clearer when we start configuring the plc however if you have a look at the s7 1200 programmable controller system manual in section 13.5
(11:33) modbus communication and scroll down to page 1097 it shows the modbus data address interestingly it refers to this register as a word i've put the system manual version and date in the description below okay next set the modbus ip object or instance as it is sometimes called by declaring modbus ipmb we can see an explanation for these last two declarations on this web page again okay now we move to the setup section of the sketch i'll first delete the comment and we'll enter the speed for the serial communication
(12:29) which is a baud rate of 9600 now i need to enter the mac address and ip address for the arduino so if we look at the notes again we'll just copy this part into our code and configure the instance by using mb.config now i have a feeling this should be byte before mac and also ip but i'll leave it for now and check it when we try to compile the code okay we can now carry on by defining the register type so let's go to the modbus ip section again and it shows mb.
(13:19) ad ists but we need something slightly different i'll put this in the code for now and then edit it what we need is mb dot add ireg this is shown under modbus jargon on the bottom line of the table here mb.ad ists is for digital inputs and we need an analog input to input register so let's go back to the code and give the input register the address setpoint underscore ir which is 30 101.
(14:10) the last thing we do to complete the modbus ip server is add in a task statement early in the loop section i'll just get rid of the comment and tidy things up a little again first and if we go back to the modbus ip section in the notes we can see how this is done i'll just copy and paste this as it is okay now we can start reading in the value of the potentiometer and placing it into the input register so the plc can read it and act on it by opening up the fill valve first we'll read in the analog input a zero which is written into the variable
(15:04) setpoint on the next line we take the value in the setpoint variable which is between naught and 1.023 which represents naught to 5 volts and we'll place it in the input register which is addressed by setpoint ir by using mb.ireg which is the other library method listed under modbus jargon copy it and paste it in the sketch so now at mb in front and referring to the info under modbus ip again i'll copy and paste again and make some modifications i'll paste it over what we've already done so ists should be i reg
(16:05) then switch ists should be set point underscore ir and the last bit should be setpoint meaning the analog value from naught to 1023 will be written into the input register addressed by set point ir which is thirty thousand one hundred and one okay now i'd like to print the value of the setpoint to the screen by using the serial monitor so i'm going to create a function and call it display setpoint values and before i print the values i would like to see the message saying set point value equals followed by the actual set point value
(16:55) so to do that we'll use a string so first i'll define the string as print str then make it equal to set point value equals plus and add the value to it next i'll print it to the screen using the serial print ln command i'll then go back to the loop function and call display set point values followed by a short delay of 200 milliseconds before going through the loop again okay let's save the sketch and compile to see if there are any errors in the code ah there seems to be an error with the mac address as suspected
(17:49) so i'll edit it and put byte first i'll do it to the ip address line too let's compile again okay that has solved that one but there seems to be a missing semicolon on line 18 so i'll add that in then compile one more time oops uh yes i've written analog incorrectly so i'll get rid of the ue at the end and this time we have compiled without any errors great
(18:52) now before i upload the code to the arduino i'm going to check that we are on the right com port and we have arduino uno selected so upload and all is okay i'm just going to bring up a command prompt in windows and i'll type ipconfig and no that's not what i wanted to do what i wanted to do was ping the ip address 192.168.
(19:38) 1 dot and see if the arduino is indeed contactable via the network and yes it is great stuff i'll do it one more time use the up arrow and enter it seems fine i'll save the sketch oh i just forgot to view the serial monitor so tools then serial monitor and although we're getting the right information i wanted the results of every scan to be on a separate line so let's see what's happening there serial print uh it should be serial print ln so i'll make that change save the code and test again
(20:35) i forgot to upload the sketch so let's do that and then clear the output and that seems okay the potentiometer seems to be on zero so let's rotate it clockwise let's rotate it back to zero great that seems to be working okay back up then down great stuff so that now all seems to be working as expected so in the next video we'll configure the plc to read the input register so that the value can be used to open the fill valve to let water into the tank again thanks for watching if you've enjoyed the video and would
(21:20) like to learn more then please click the subscribe button and the bell so you'll be informed as soon as a new video is uploaded and also please see the links in the description should you wish to get a free 30-day license of factory io and also check out my patreon account and i'll see you in the next video so thanks for watching again and bye for now [Music] you