



MicroPython Ethernet Practical Practice: Detailed Explanation of Pico+W5500 TCP Client
It explains practical TCP‑client development based on Raspberry Pi Pico and W5500 under MicroPython, including code parsing and experimental operation.
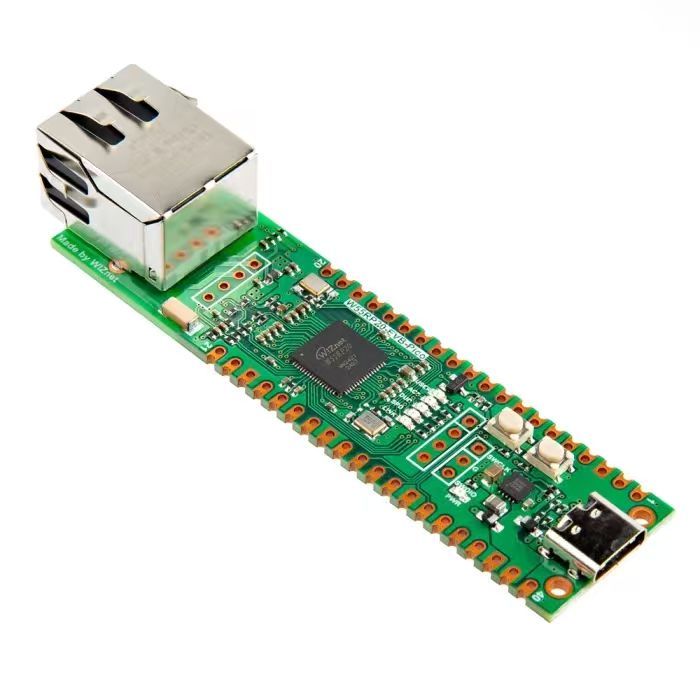
TCP Client Experiment
The following source code can be found in the supplied resource package under elegance‑devkit v1\Demo\41 ETH_TCP_Client.
In this experiment, we configure W5500 and Raspberry Pi Pico to act as a TCP client, which transmits data to a TCP server created inside a network debugging assistant tool. Sample code is shown below:
# Python env   : MicroPython v1.23.0 on Wiznet W5500
# -*- coding: utf-8 -*-
# @Time    : 2024/8/7 9:12 PM
# @Author  : Li Qingshui
# @File    : main.py
# @Description : Ethernet experiment for TCP‑client test
# ======================================== Import related modules ========================================
# Import socket module for creating and managing network connections
from usocket import socket
# Import hardware‑related modules
from machine import Pin,SPI
# Import time‑related modules
import time
# Import network‑related modules
import network
# ======================================== Global variables ============================================
# TCP‑client IP address
ip = '192.168.1.20'
sn = '255.255.255.0'
gw = '192.168.1.1'
dns= '8.8.8.8'
# Tuple object for network configuration
netinfo=(ip, sn, gw, dns)
# TCP‑server IP address: use host PC’s IP address
destip = '192.168.1.6'
# TCP‑server port number
destport = 8080
# Connection‑information tuple
conn_info = (destip, destport)
# Global flag for connection status
conn_flag = False
# ======================================== Function definitions ============================================
# Initialize network interface
def w5x00_init() -> network.WIZNET5K:
    """
    Initialize network.WIZNET5K instance, set static IP and bring‑up network connection.
    Args:
        None
    Returns:
        network.WIZNET5K: Initialized and connected network.WIZNET5K instance.
    Raises:
        None
    """
    # Declare global variable
    global netinfo
    # Initialize SPI object
    spi = SPI(0, 2_000_000, mosi=Pin(19), miso=Pin(16), sck=Pin(18))
    # Instantiate network.WIZNET5K, pass chip‑select pin CS and reset pin RST
    nic = network.WIZNET5K(spi, Pin(17), Pin(20))
    # Activate network interface
    nic.active(True)
    # Apply static‑IP settings: host‑ip, subnet‑mask, gateway, dns‑server
    nic.ifconfig(netinfo)
    # Block until network link becomes available
    while not nic.isconnected():
        time.sleep(1)
        # Print register debug information
        print(nic.regs())
    # Print applied network parameters
    print('ip :', nic.ifconfig()[0])
    print('sn :', nic.ifconfig()[1])
    print('gw :', nic.ifconfig()[2])
    print('dns:', nic.ifconfig()[3])
    # Return WIZNET5K instance
    return nic

def client_loop() -> None:
    """
    Client main loop: continuously receive data from server and echo it back.
    This function attempts to connect to specified server address and port.
    After successful connection it receives data sent by server and echoes received payload.
    It will try to reconnect automatically once the connection drops.
    Args:
        None
    Returns:
        None
    Raises:
        None
    """
    # Declare global variable
    global conn_flag
    # Socket‑object placeholder
    s = None
    # Infinite loop for receive‑send logic
    while (True):
        # When not connected
        if not conn_flag:
            # Close existing socket if it exists
            if s:
                try:
                    s.close()
                except:
                    pass
            # Wait 100 ms before creating new socket
            time.sleep_ms(100)
            # Try creating new socket
            try:
                s = socket()
                print("Created new socket")
            except:
                print("Failed to create socket")
                # Retry loop if socket creation fails
                continue
            # Try connecting to target IP and port
            try:
                s.connect(conn_info)
                conn_flag = True
                print("Loopback client Connect!")
            except:
                print('connect error')
                conn_flag = False
        # Already connected and socket object is valid
        elif conn_flag and s:
            try:
                # Receive up to 2048 bytes of data
                data = s.recv(2048)
                # Check whether any data was received
                if data:
                    # Decode byte payload to UTF‑8 string
                    data_str = data.decode('utf‑8')
                    print(f'recv from {conn_info[0]}:{conn_info[1]}: {data_str}')
                    # Echo received data back to server
                    s.send(data)
                else:
                    # Empty read indicates connection closed by remote side
                    print('Connection closed by server')
                    conn_flag = False
            except:
                print('disconnect')
                conn_flag = False
# ======================================== Custom classes ============================================
# ======================================== Initialization ==========================================
# 3‑second power‑on delay for hardware stabilization
time.sleep(3)
# Print debug banner
print("FreakStudio : Using W5x00 Ethernet to do TCP Client Test")
# Initialize W5500 module
nic = w5x00_init()
# ======================================== Main program ===========================================
# Run client processing loop
client_loop()
First configure IP addresses and network parameters for TCP client and TCP server. Note that the TCP‑server IP address must be set to your host PC’s IP address. Normally the embedded MicroPython board works as TCP client and connects to a TCP‑server program running on the computer. Therefore the server IP must match the host PC IP to work with your real‑world network environment.
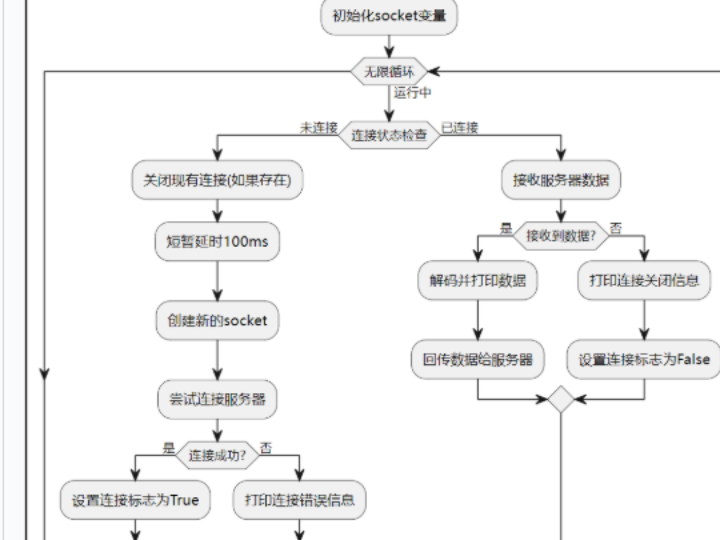
Then initialize the W5500 module. Inside the client_loop() function these operations are executed:
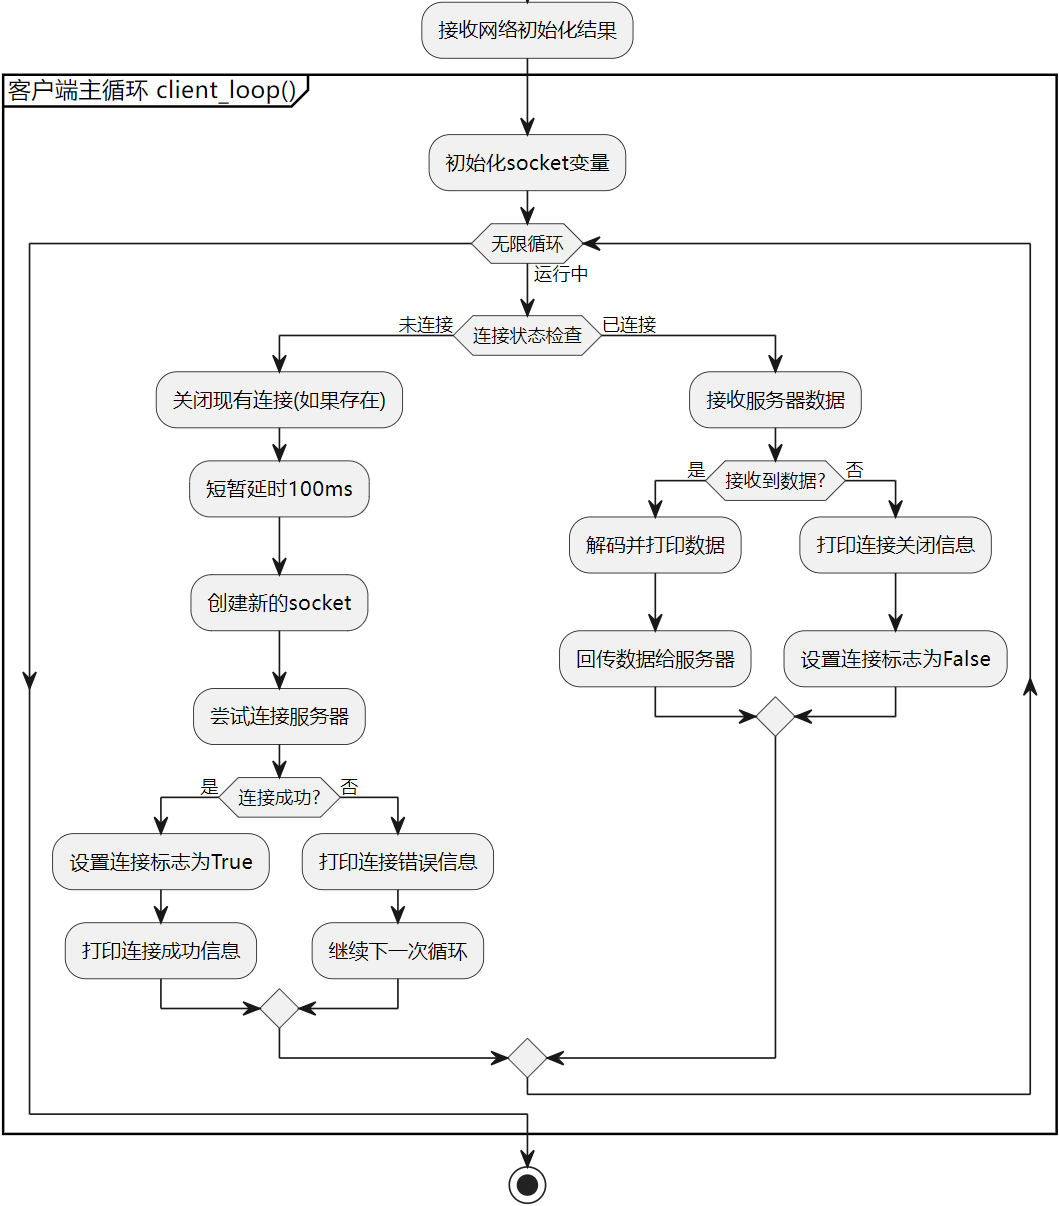
Initialize socket variable and enter infinite loop.
If currently disconnected (conn_flag equals False): Close existing socket if present; wait 100 ms then instantiate a new socket object. Attempt to establish connection toward server: If connection succeeds, set conn_flag to True and print connection‑success message. If connection fails, print error message and keep conn_flag as False.
If already connected (conn_flag is True and socket handle is valid): Try receiving incoming data. When data arrives decode bytes to string, print content and echo payload back to remote server. Upon empty read (meaning server closed connection) or any exception, print corresponding log and set conn_flag to False.
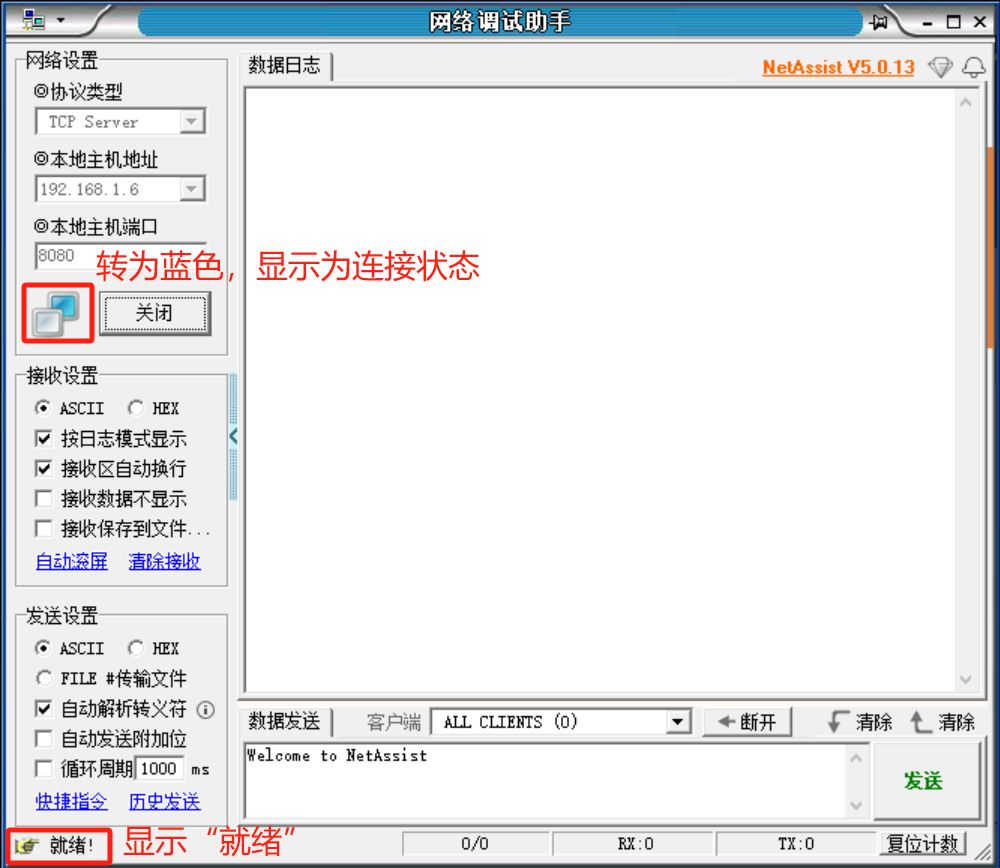
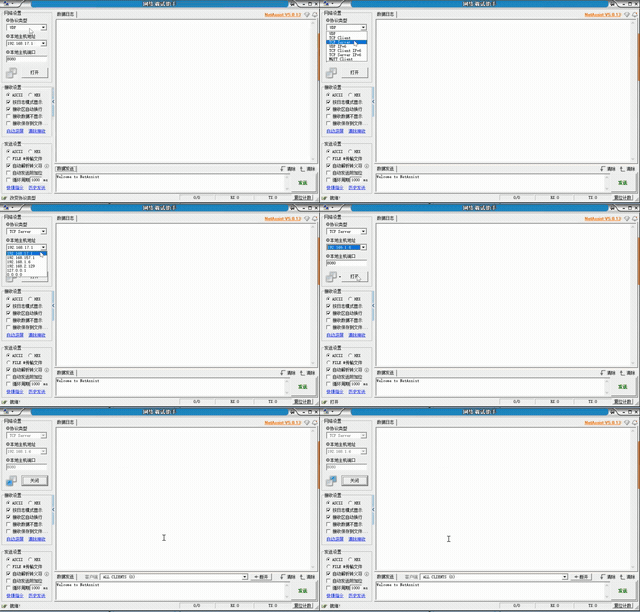
Launch the NetAssist network‑assistant software. Select protocol type as TCP Server. Set local host IP to 192.168.1.6 (obtain host IP by executing ipconfig inside terminal). Set local listening port to 8080, matching the value written in source code. Keep remaining options as default values, then click the Open button.
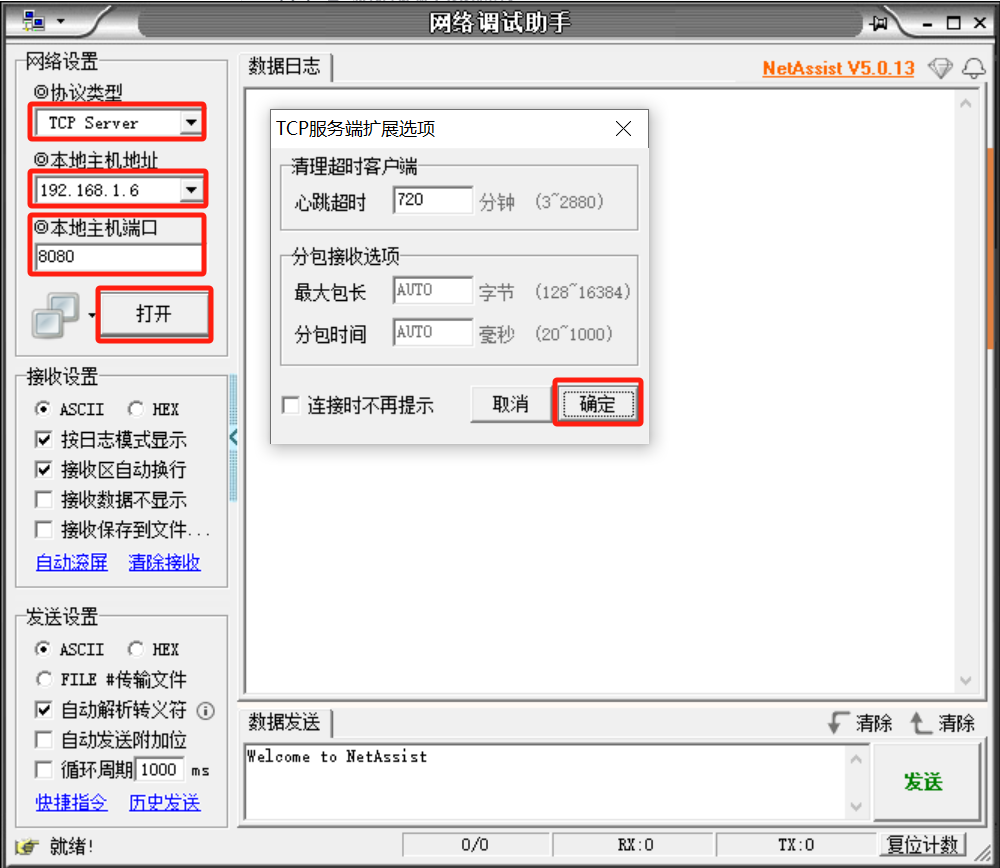
The status text Ready appears at the bottom‑left corner of application window.
Flash firmware and open remote serial terminal.

Now TCP client and TCP server have completed connection handshaking.
Send data from server side toward the client.
You can observe that payload received by client is echoed and sent back to the server.