It introduces uPyPi, a MicroPython package hub, its advantages over other tools, and guides package installation & driver release for RP2040.
COMPONENTS
PROJECT DESCRIPTION
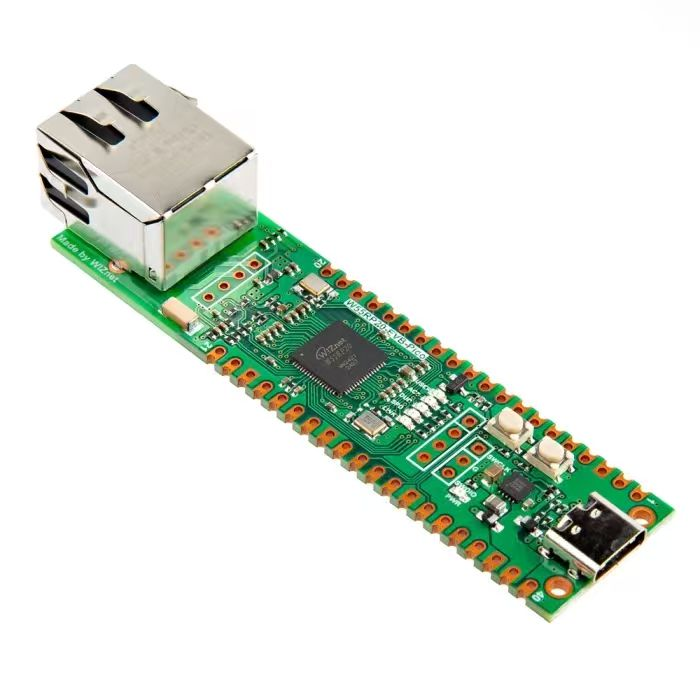
【Preliminary Note】The original hardware example in this article was written based on the RP2040. The actual hardware used in this hands-on demonstration features the W55RP20 as the main controller chip. The circuit logic and UF2 flashing operation principles are universally applicable, with only the main controller model differing. The original chip model mentioned in the circuit descriptions below is provided for reference purposes only.
1. Project Background
In the early days of the MicroPython ecosystem, when developers shared or used third-party libraries, they often needed to manually download multiple files and then copy them to the project directory. This "copy-paste" approach has many pain points:
Files are easily omitted, leading to program errors
Version confusion: it is unclear which version of the library is being used.
Dependency management is cumbersome, as users need to find all required dependency files on their own
When sharing with others, you also need to package all the files, which involves complicated steps.
Later, the MicroPython community launched the mip (short for mip installs packages) tool, which is similar to pip in Python and can automatically download and manage packages. However, its default index is micropython-lib, making the release and discovery of third-party libraries still inconvenient.
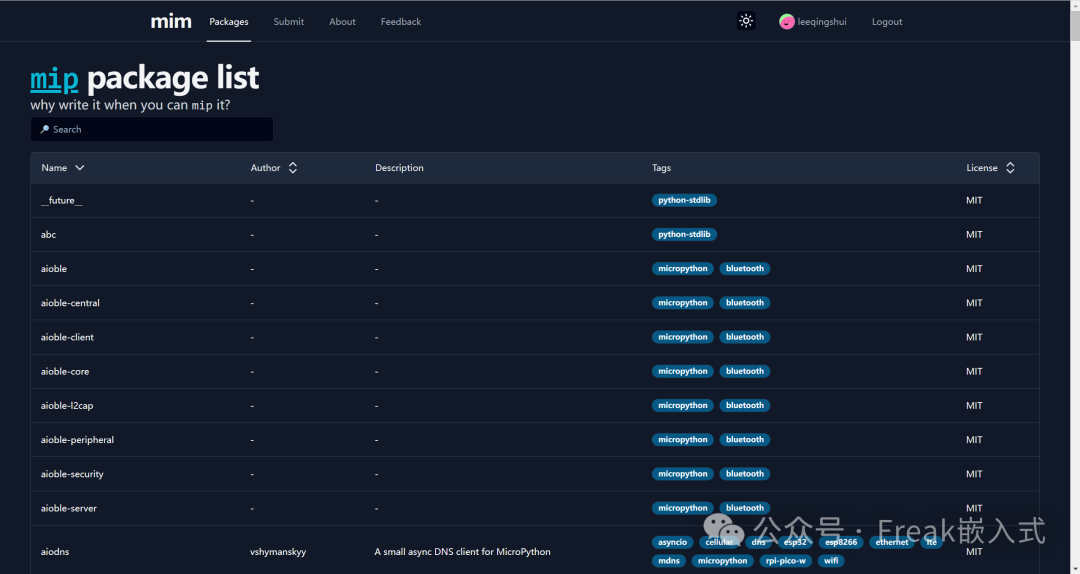
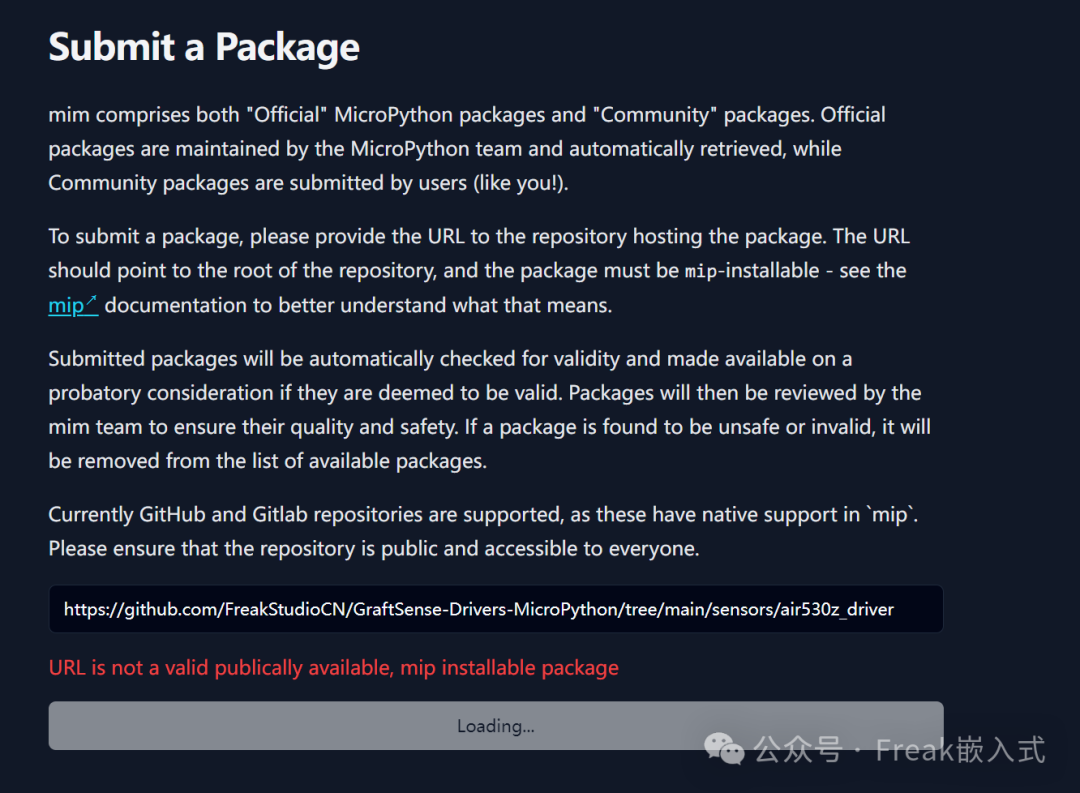
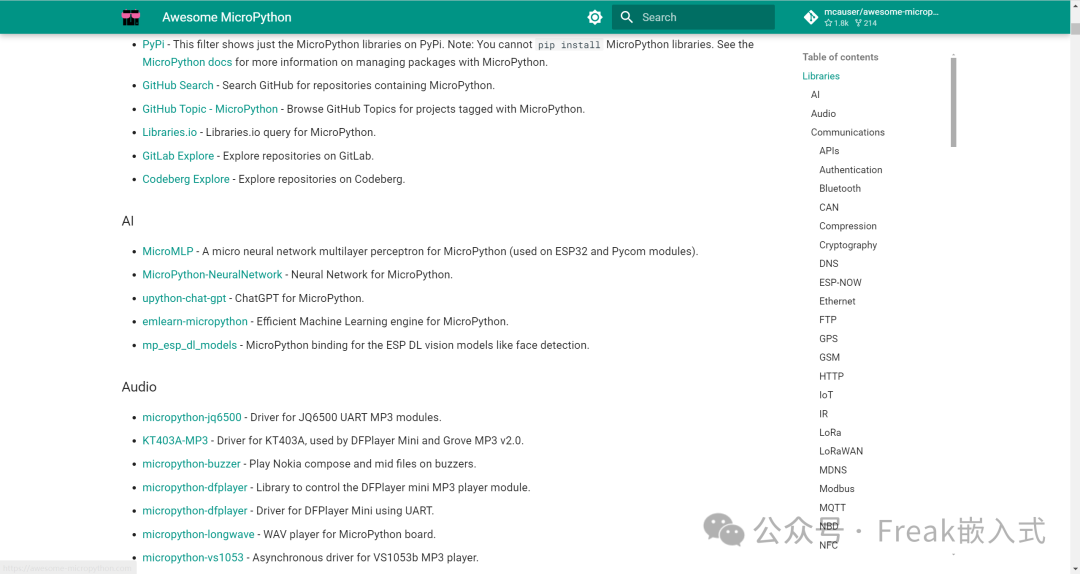
Other PyPI-like package platforms for MicroPython include mim and awesome-micropython, but both have significant issues:
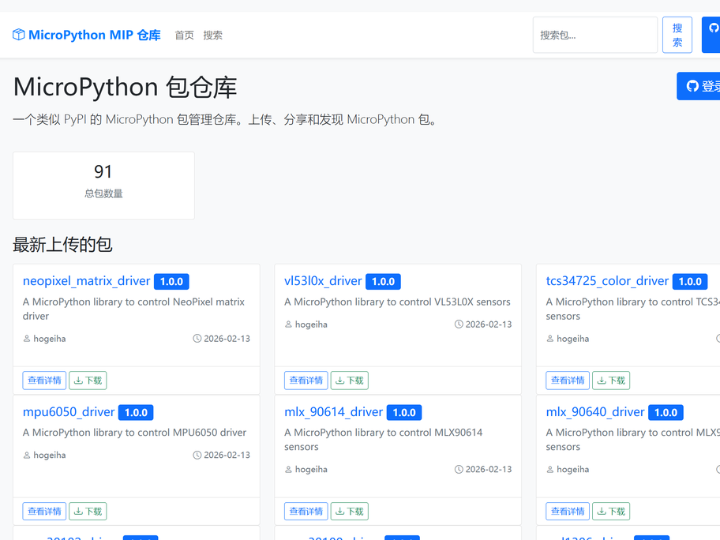
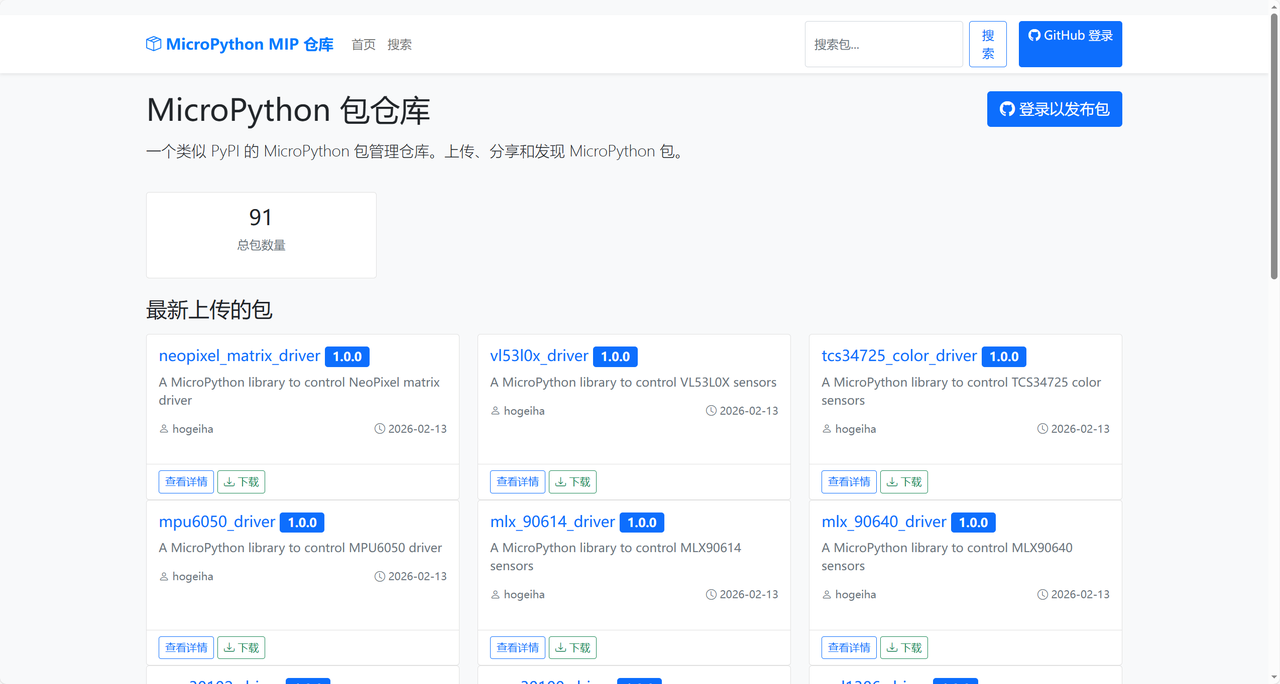
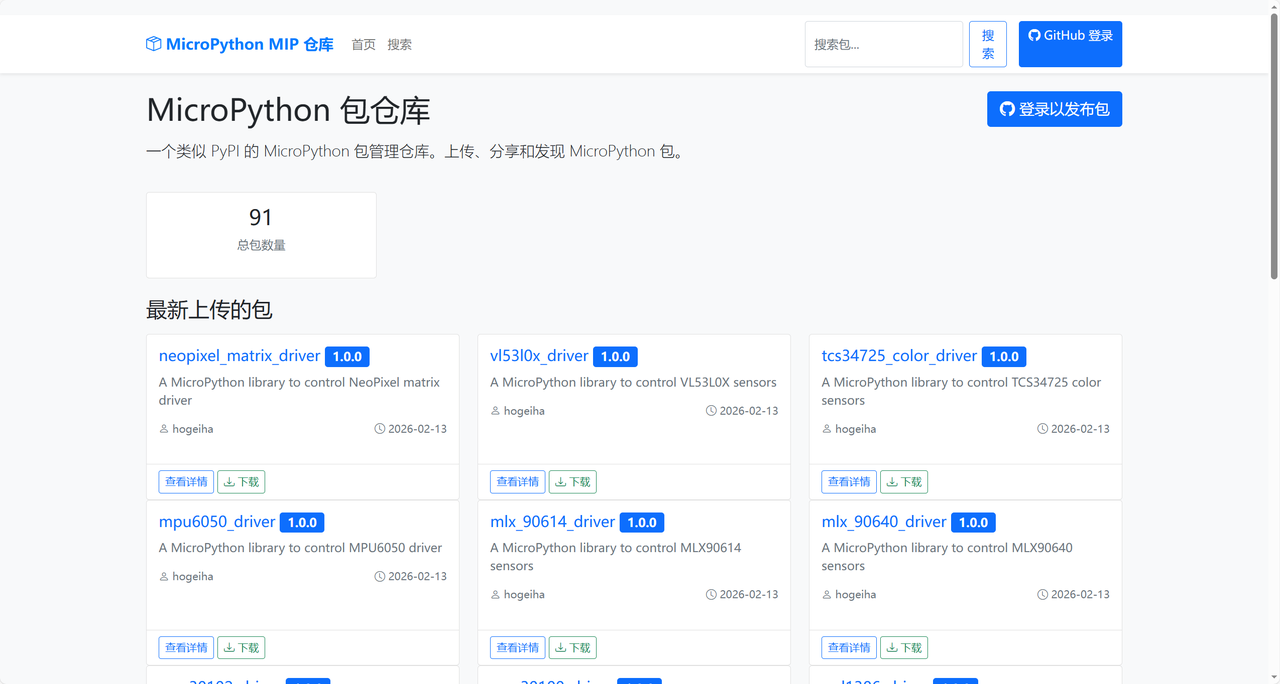
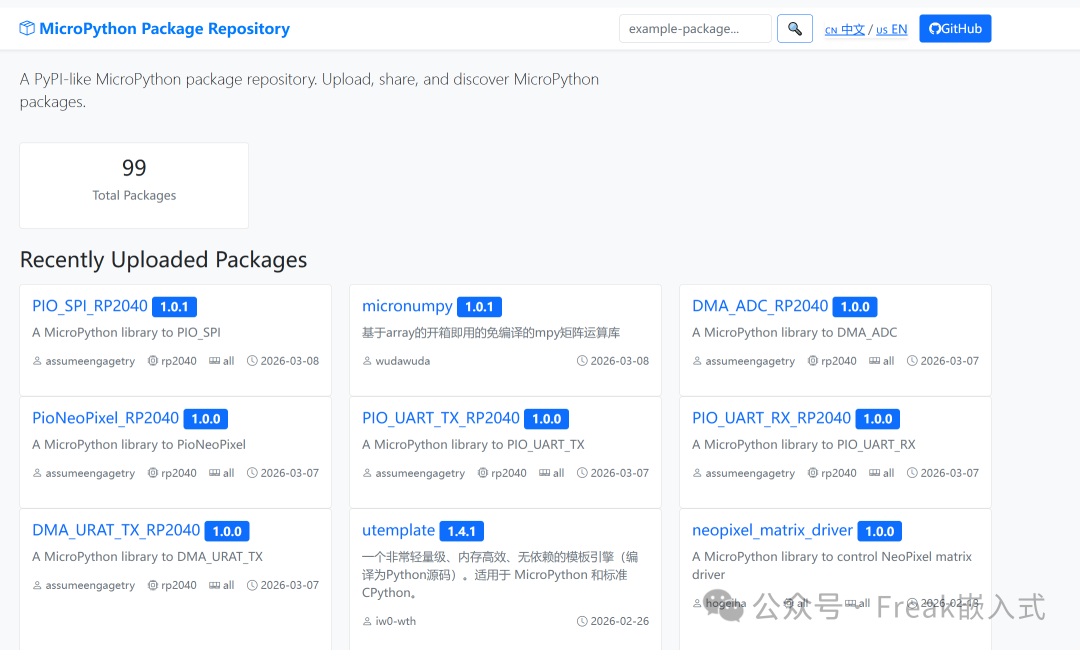
Accordingly, uPyPi (https://upypi.net/) emerged as the times require — it is a package management repository built specifically for MicroPython, just like "the PyPI for MicroPython", which allows developers to easily upload, share and discover driver packages, thoroughly solving the early problems in library management.
Core Issues of the Mim Platform:
Version management mechanism: It lacks the package version freezing function, and is deficient in basic capabilities such as version locking and dependency version constraints, making it impossible to guarantee the long-term availability of packages and dependency stability.
Uncontrollable dependency maintenance risks: The availability of packages fully depends on the maintenance status of the original developer. If the developer stops maintenance, upgrades the project or deletes the repository, the links of the already included packages will directly become invalid, triggering a cascading impact on downstream projects, and the platform has no fallback or migration mechanism.
Limited verification scope: Only the mip installability check is performed on the submitted package, which fails to cover core risk points such as version compatibility, long-term maintainability and API stability.
Core Issues of the Mim Platform:
Version management mechanism: It lacks the package version freezing function, and is deficient in basic capabilities such as version locking and dependency version constraints, making it impossible to guarantee the long-term availability of packages and dependency stability.
Uncontrollable dependency maintenance risks: The availability of packages fully depends on the maintenance status of the original developer. If the developer stops maintenance, upgrades the project or deletes the repository, the links of the already included packages will directly become invalid, triggering a cascading impact on downstream projects, and the platform has no fallback or migration mechanism.
Limited verification scope: only the mip installability of the submitted package is checked, while core risk points such as version compatibility, long-term maintainability, and API stability are not covered.
Core issues of the awesome-micropython project:
Serves only as an index collection with no verification capability: essentially a linked index list of drivers and libraries, with no validation processes for validity, compatibility or security established, thus unable to guarantee the actual usability of the included content.
Severe version compatibility lag: A large number of the included drivers are developed based on MicroPython v1.19, while MicroPython has now been iterated to v1.27 and above, with multiple changes in core APIs, which causes the old-version drivers to fail to run properly in the new-version environment.
Insufficient information transparency: Key information such as the maintenance status and compatible version range of the library is not marked, making it difficult for users to predict compatibility issues in advance during use, which may easily lead to problems such as code errors and function failures.
2. What benefits can uPyPi bring?
Using uPyPi to manage driver packages offers the following core advantages:
✅ One-click Installation: Users only need to run a single command to automatically download and install the package along with all its dependencies, no manual file copying required.
✅ Version controllable: Packages of a specific version can be designated for installation to avoid version conflicts.
✅ Automatic dependency management: The tool automatically resolves and downloads dependencies, eliminating the need for you to find the required files manually.
✅ Easy Sharing: Once uploaded to uPyPi, developers around the world can easily find and use your driver package.
✅ Easy to update: When there is an update for the package, users only need to re-run the installation command to get the latest version.
Simply put, the uPyPi platform is a "hub" for MicroPython driver packages, where we can search for, view, download and upload the driver packages we need.
The core features include:
PyPI-like package management system: supports the uploading, browsing, downloading and full lifecycle management of MicroPython packages, and adapts to the package management requirements of the MicroPython ecosystem.
Standardized metadata governance: It is mandatory for packages to be accompanied by a package. json file, with core metadata such as name and version uniformly defined to ensure the consistency and compatibility of packages.
Precise adaptation of hardware/firmware: Supports filtering adapted packages by hardware model (e. g. RP2040) and firmware environment, solving the adaptation difficulties in different hardware/version environments.
Multilingual and Visualized Management: Supports one-click switching between Chinese and English bilingual interfaces; the personal dashboard enables one-stop tracking and management of uploaded packages, with contribution data clearly displayed.
Other features include:
Intelligent cache strategy optimization: First, the basic performance is quickly improved through LRU cache, then the Linux PageCache solution is adopted with reference to the design idea of PostgreSQL to balance performance and system compatibility. Compared with similar platforms (such as mim without Performance optimization), the query/download response speed is significantly improved.
Batch Ultra-Fast Upload: Supports ZIP-format batch upload packages, with the upload speed increased to dozens of times the original rate, which solves the cumbersome and time-consuming problem of uploading single files, and is especially adapted to the batch release scenarios of a large number of drivers/libraries.
Precise and efficient retrieval: New APIs are supported and the search endpoint is optimized as a priority, delivering more accurate retrieval results, faster response, and better compatibility with IDE plugin extensions.
Lightweight Development Environment: A containerized solution and local development mode are newly added, and sandbox support is restored, enabling development without complex environment configuration; GitHub binding is only required during the development phase, and there is no mandatory platform binding after launch, lowering the threshold for development and debugging.
3. Quick Installation of Driver Package
If you are new to the MicroPython and uPyPi platform, don't worry! This guide will start from the most basic preparation steps and walk you through how to download and use driver packages from the uPyPi platform on Raspberry Pi Pico 2 (without network connectivity) and Pico 2 W (with network connectivity), taking the bmp280_driver barometric pressure and temperature sensor driver as an example. It will also briefly explain how to upload driver packages, for users who need to share their work.
3.1 Preparations for Absolute Beginners
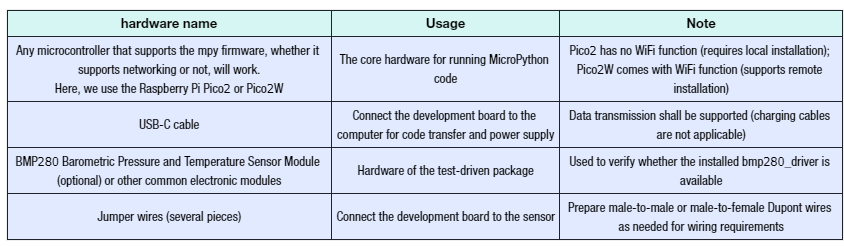
Before using uPyPi, you need to prepare the hardware and software, and complete the basic setup, all of which are indispensable.
Thonny is the most suitable MicroPython development tool for absolute beginners, supporting code writing, development board connection and file management.
Installation method: Just follow the system prompts to click next for installation (no need to modify the default settings).
Install the mpremote tool (on the computer side)
This is a tool for communication between a computer and a MicroPython development board, used to locally install driver packages (essential for microcontrollers that do not support network connectivity).
Open the "Command Prompt (CMD)" or "PowerShell" on your computer, enter the following command and press Enter:
pip install mpremote
If you see the prompt "Successfully installed mpremote", the installation is completed successfully.
3.2 Basic Setup of the Development Board (Burning MicroPython Firmware)
You need to first flash an mpy firmware to your MCU. Here we take Raspberry Pi Pico2 / Pico2W as an example: they do not come pre-installed with MicroPython firmware from the factory, so you have to flash the firmware first before using them.
Press and hold the BOOTSEL button on the development board, then connect the development board to your computer via a USB-C cable while holding the button, and finally release the button.
The computer will recognize a USB flash drive named "RPI-RP2".
Open your browser and download the corresponding firmware:
Copy the downloaded. uf2 firmware file and paste it into the "RPI-RP2" USB drive.
After the copying is completed, the development board will restart automatically, the USB flash drive will disappear, and the firmware flashing is finished at this point.
3.3 Open the uPyPi platform to search for packages and copy commands
The uPyPi platform serves as a "distribution hub" for MicroPython driver packages, where users can search for, view, and download the driver packages they need.
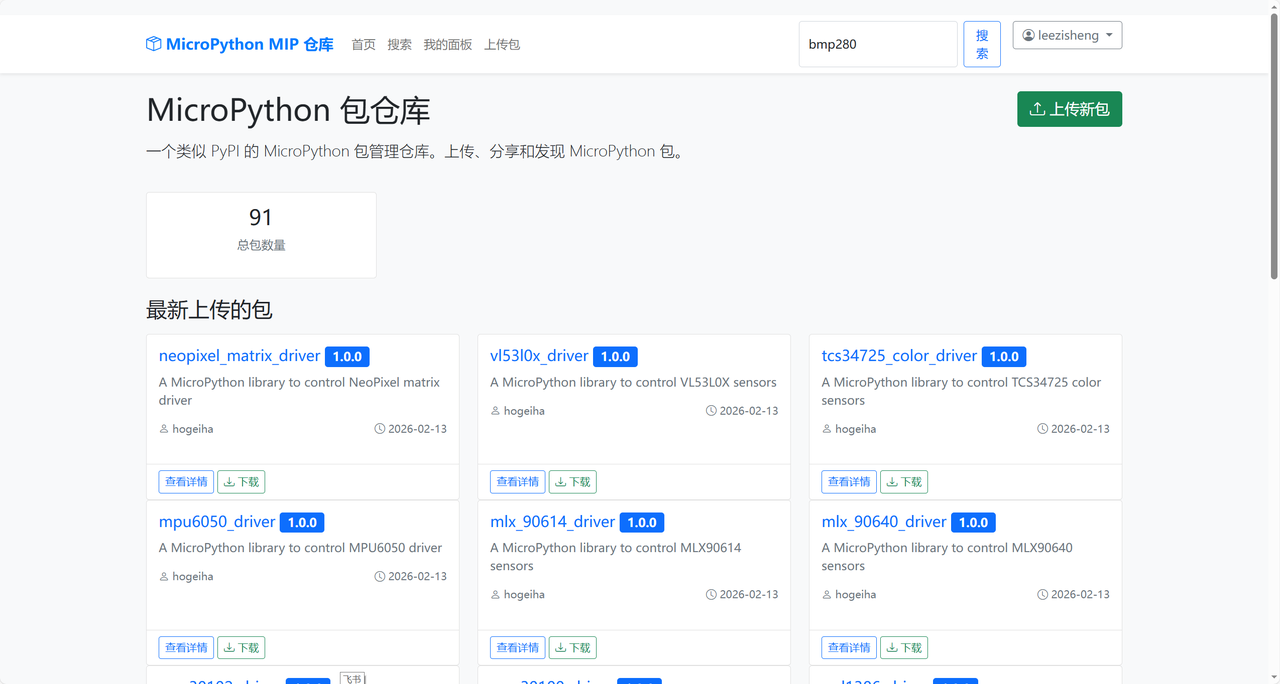
Open your browser and visit the official website of uPyPi: https://upypi.net/
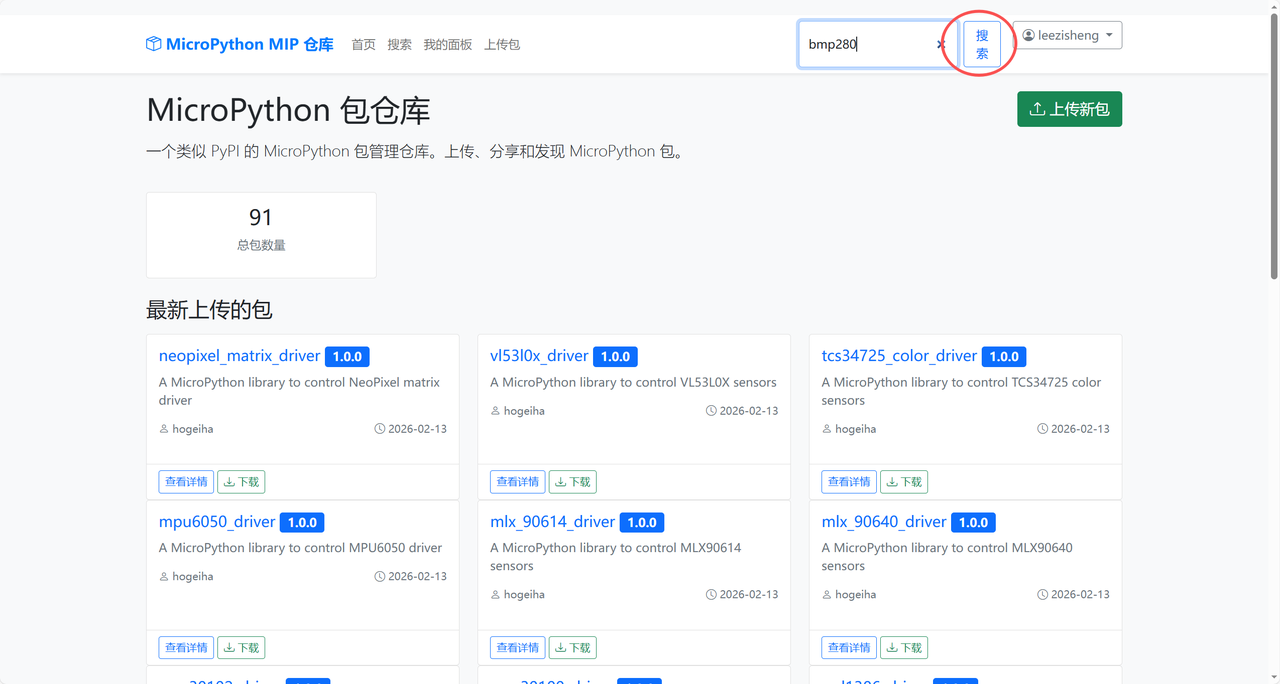
In the search box at the top of the page, enter bmp280 and click the "Search" button on the right:
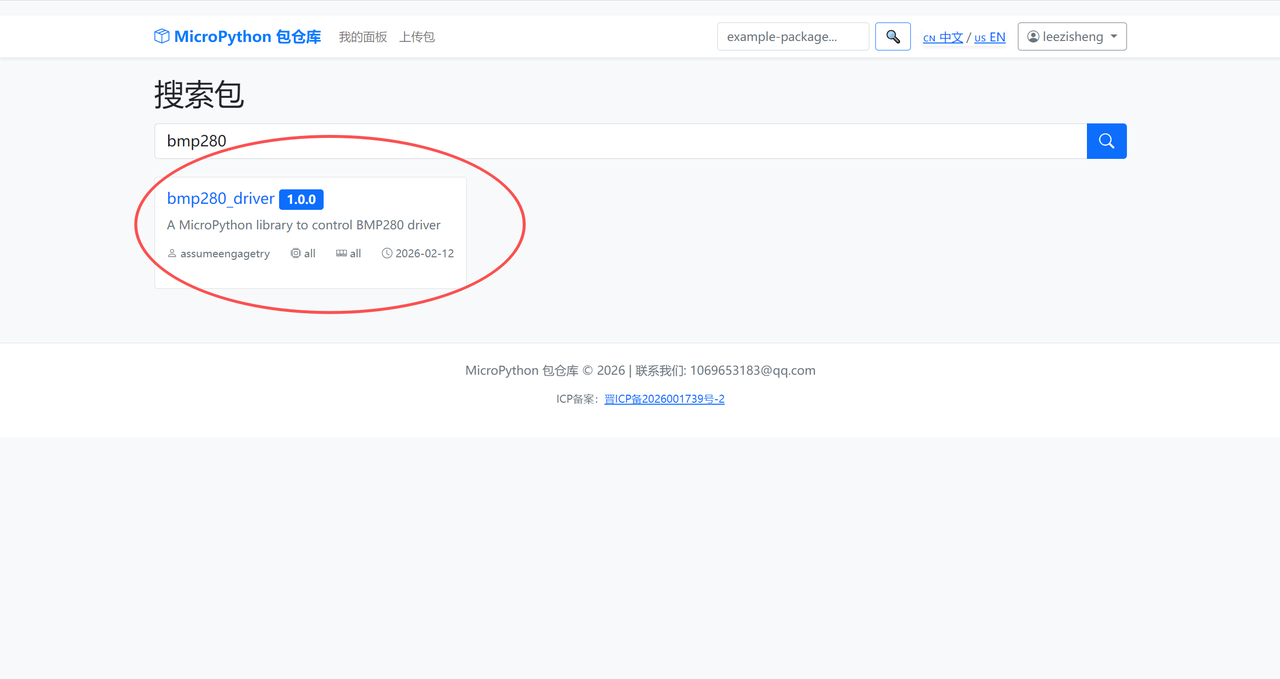
The search results will display matching driver packages (such as bmp280_driver 1.0.0), just click to proceed:
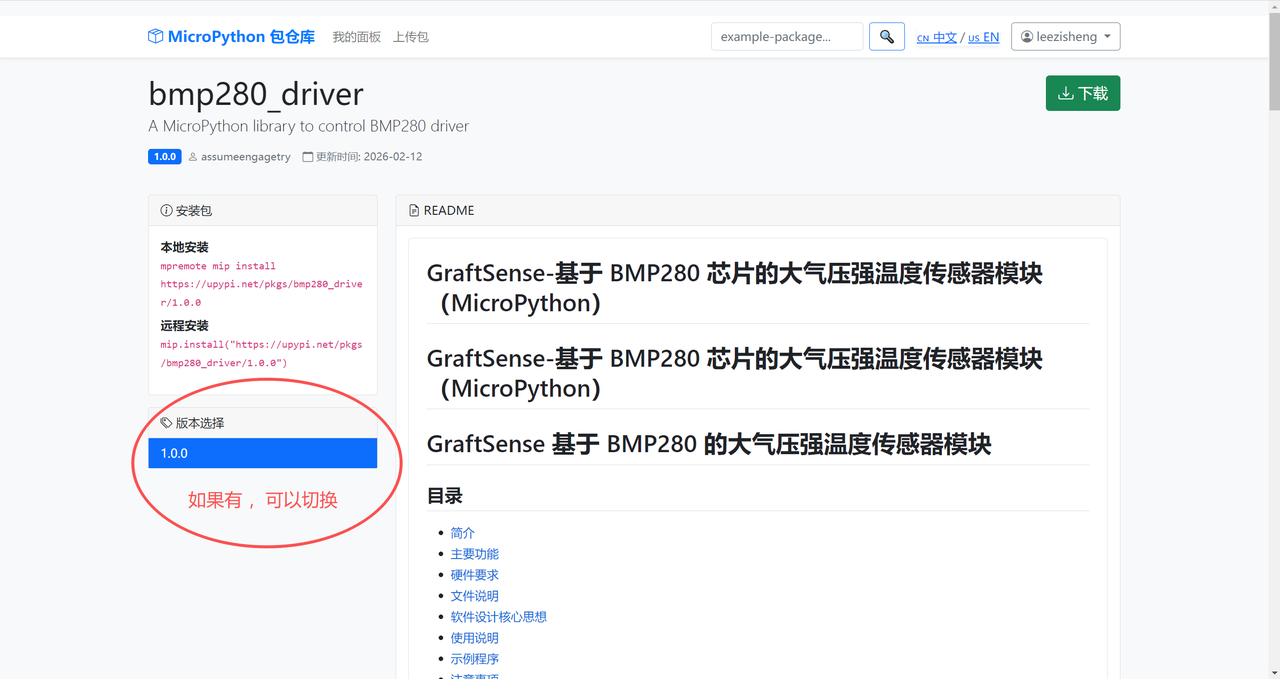
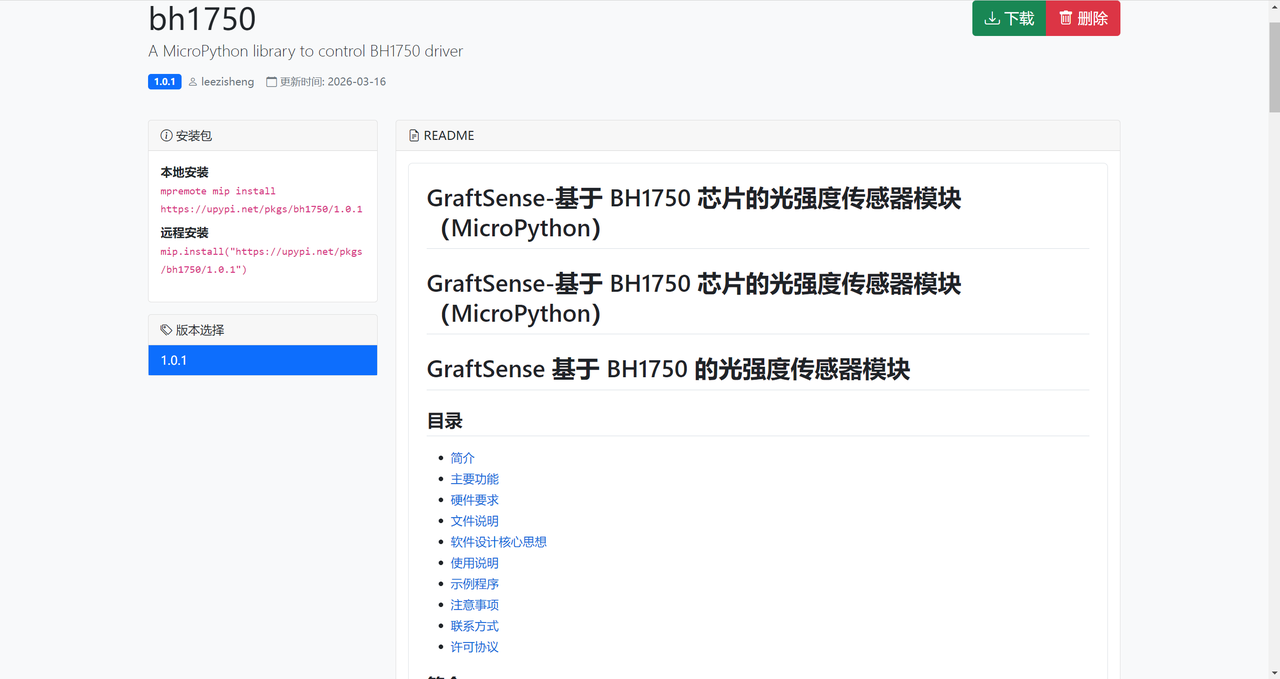
On the driver package details page, you can switch the driver package version on the left side of the page:
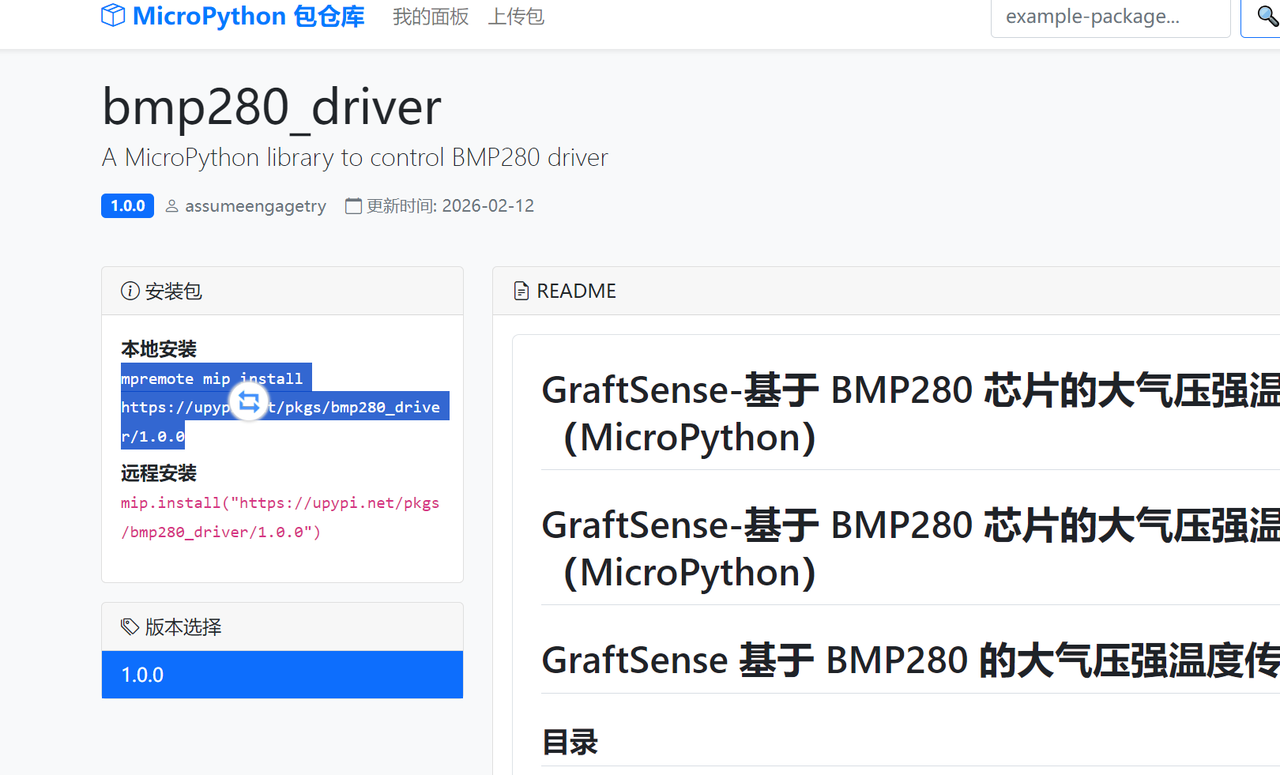
The core installation commands (local installation / remote installation) will be displayed on the left side of the page:
3.4 Download and Install the Driver Package
Depending on whether the development board has network access, it is divided into local installation (Pico2) and remote installation (Pico2W) two methods.
3.4.1 Local Installation (for development boards without WiFi)
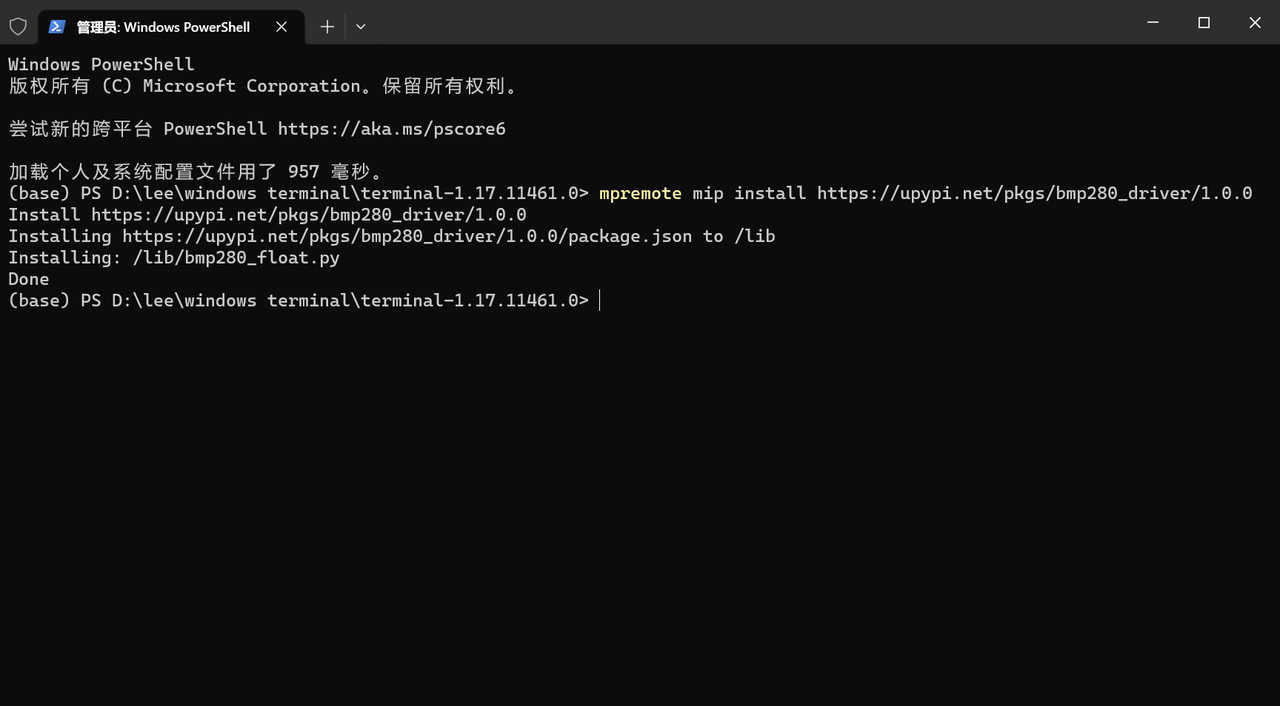
Connect the device to a computer via USB, then use the mpremote tool to install the driver package from uPyPi onto the development board.
Wait for the command to execute, and the installation is successful when the following content appears in the terminal:
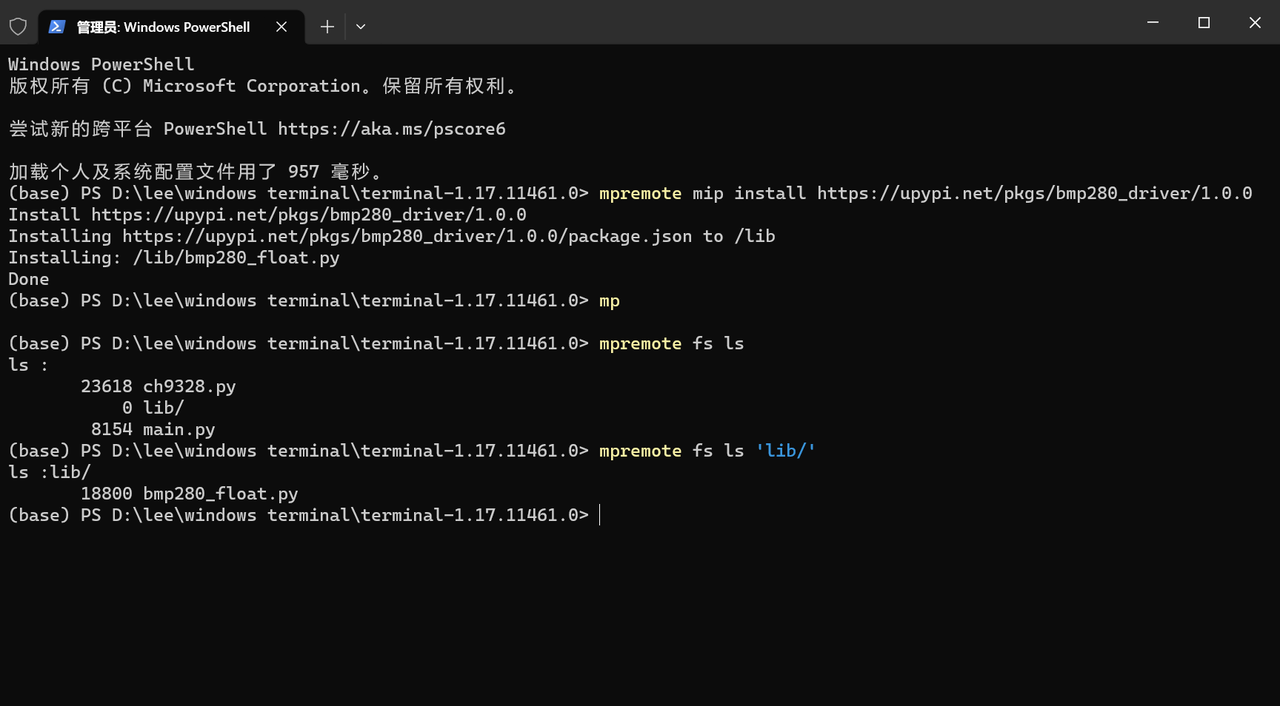
We can also use the following command to check the files on the board and confirm whether the download is successful:
# 查看根文件目录
mpremote fs ls
# 查看'lib/'文件夹下目录
mpremote fs ls 'lib/'
3.4.2 Remote Installation (for development boards with WiFi)
First connect the development board to WiFi, then install the driver package directly in the REPL terminal of the development board.
First, connect the Raspberry Pi Pico2W to your computer via a USB cable, and after Thonny automatically recognizes it, click the "Shell" panel at the bottom.
If the Shell panel displays >>>, it indicates that the MicroPython REPL interactive mode has been entered; if other content is displayed, press "Ctrl + D" to restart the development board, and then you will see >>>.
In the Shell panel, after the >>>, enter the following code line by line (replace with your WiFi name and password), and press Enter after each line:
import network
wlan = network.WLAN(network.STA_IF)
wlan.active(True)
wlan.connect("你的WiFi名称", "你的WiFi密码")
# 等待连接成功
import time
while not wlan.isconnected():
    print("Connecting to WIFI...")
    time.sleep(1)
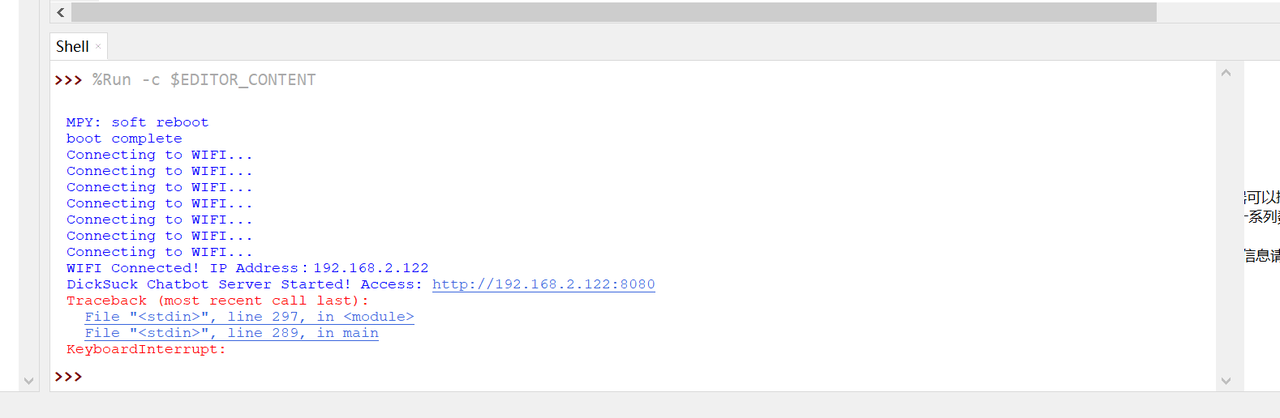
print("WIFI Connected! IP Address:", wlan.ifconfig()[0])
If "WIFI Connected! IP Address: 192.168. xx. xx" is displayed, it indicates that the WiFi connection is successful:
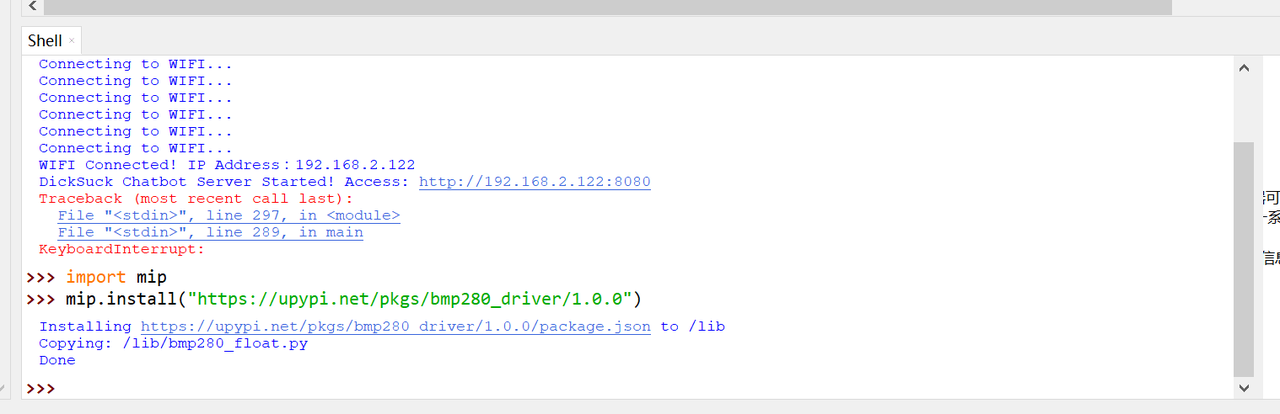
After the >>> in the Shell panel, enter the following complete installation command:
After the execution is completed, if the following content is displayed, the installation is successful:
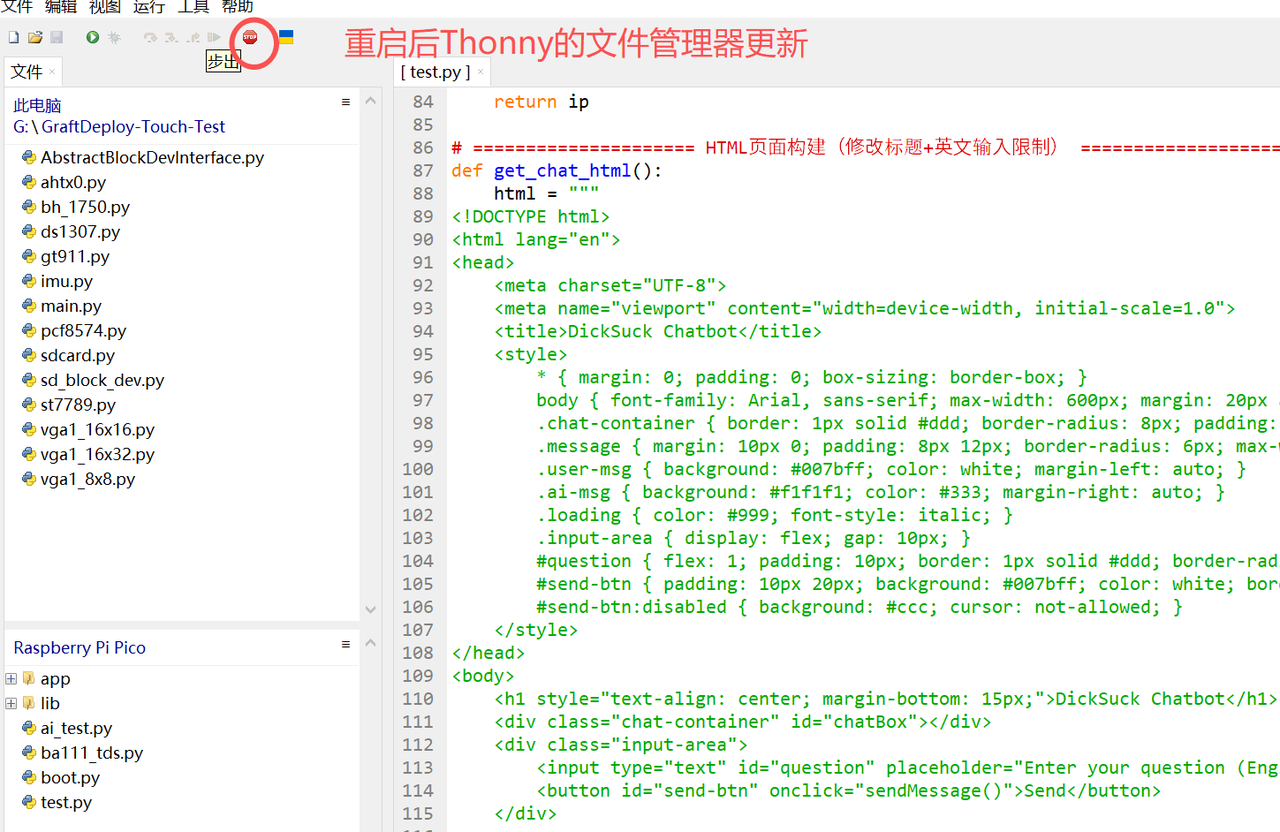
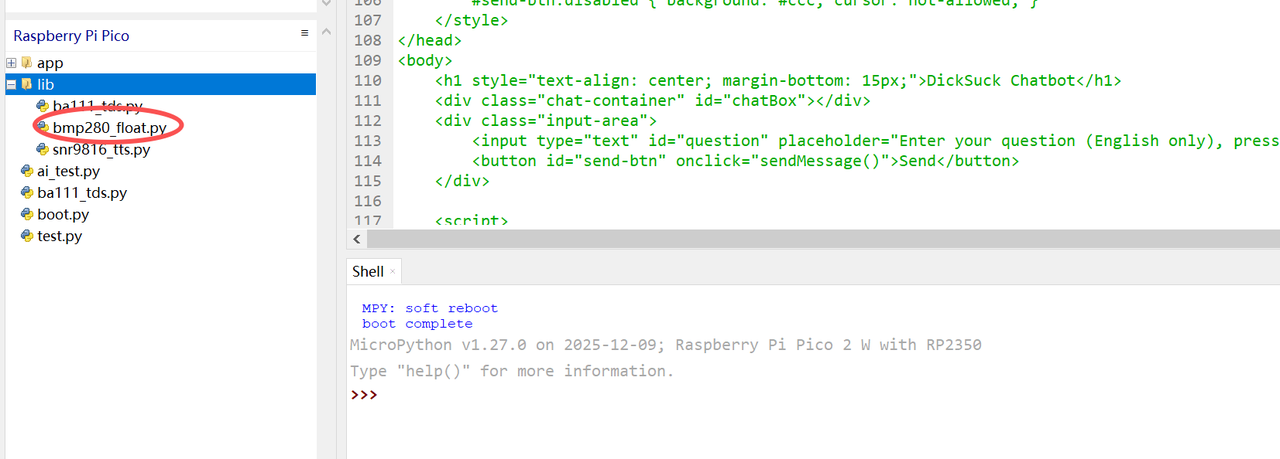
Click "Raspberry Pi Pico2" in the "Files" panel on the left, expand the "lib" folder, and if you can see the bmp280_float. py file, the installation is successful:
3.5 Use the installed driver package
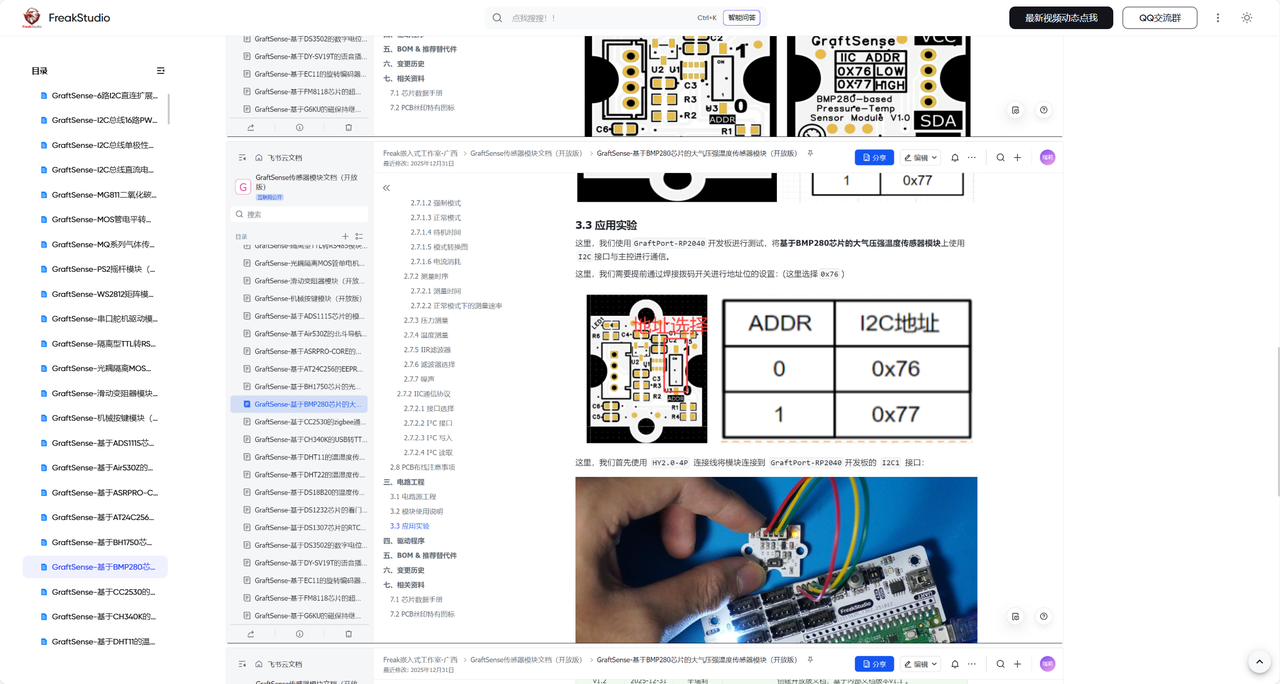
After the installation is complete, we use the BMP280 sensor to test whether the driver package works properly. You can refer to the cloud document below for this part:
4. Upload the driver package (Advanced: for users who want to share drivers)
If you have developed your own MicroPython driver and want to share it on uPyPi for others to use, you can follow the steps below (taking bmp280_driver as an example).
4.1 Prepare a driver package file that complies with the specifications
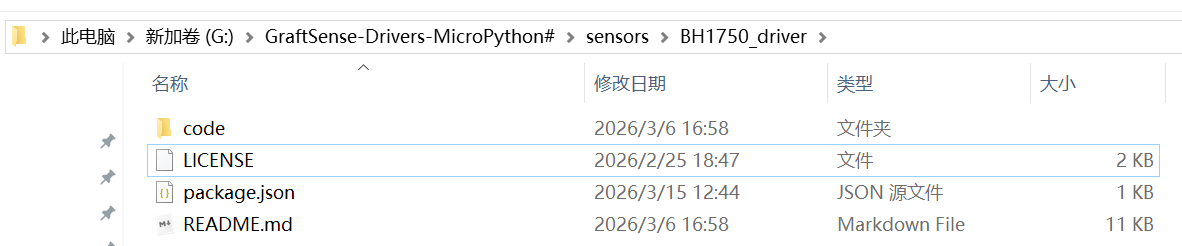
The file directory of the driver package must follow the structure below (refer to Figures 6-9), with no component missing:
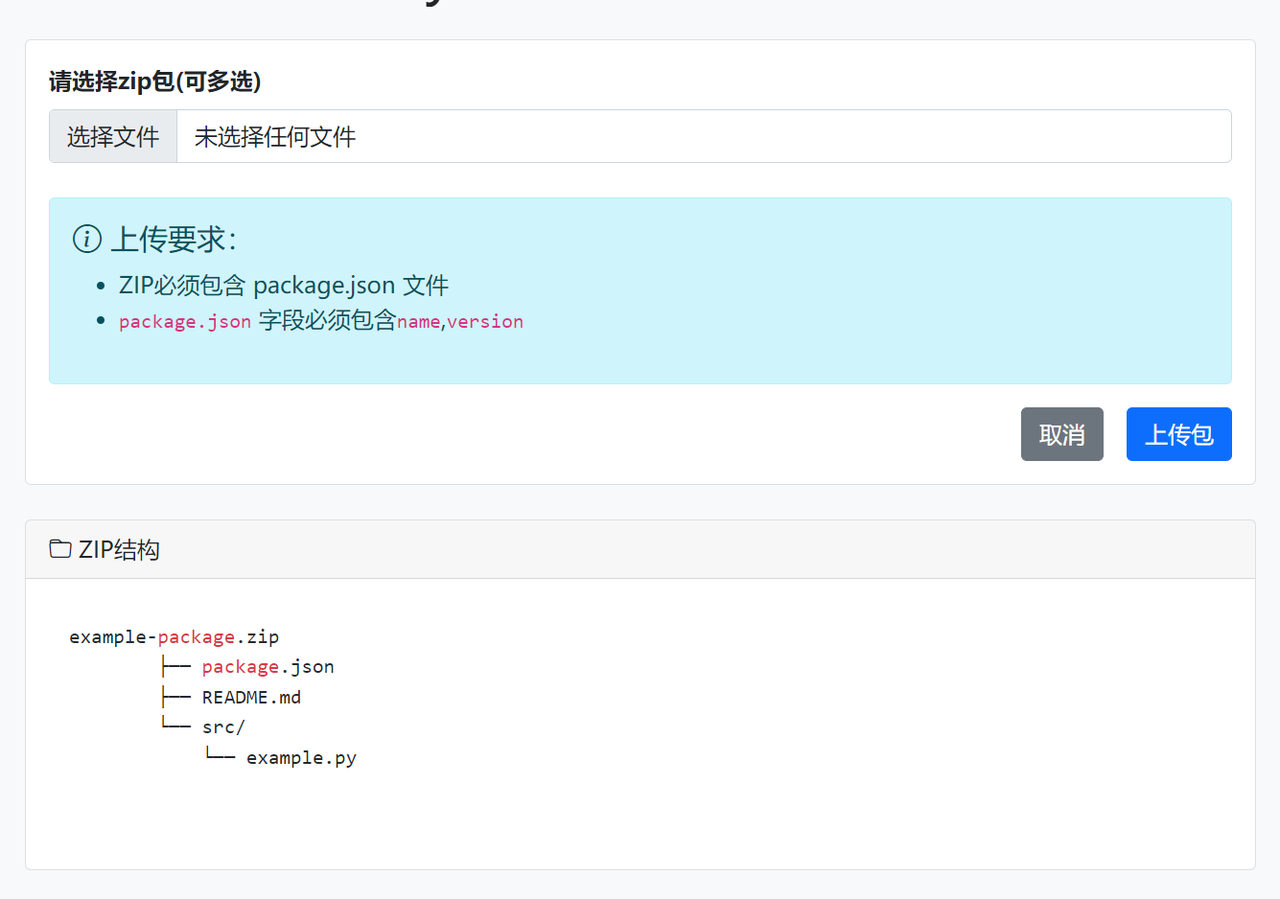
package. json is the core configuration of the driver package and must contain the following required fields; you can also add optional fields to enrich the information:
Ensure that the following files are included in the root directory of your project (no nested folders, place them directly in the root directory):
code/: Driver code folder
LICENSE: License file
package. json: package configuration file (must contain the name and version fields)
README. md: Package description document
⚠️ Key Requirement: No additional folders shall be nested inside the ZIP package, and all files must be placed directly in the root directory of the Compressed Packet (refer to the example structure: BH1750_driver. zip → directly contains code/, package. json, etc.).
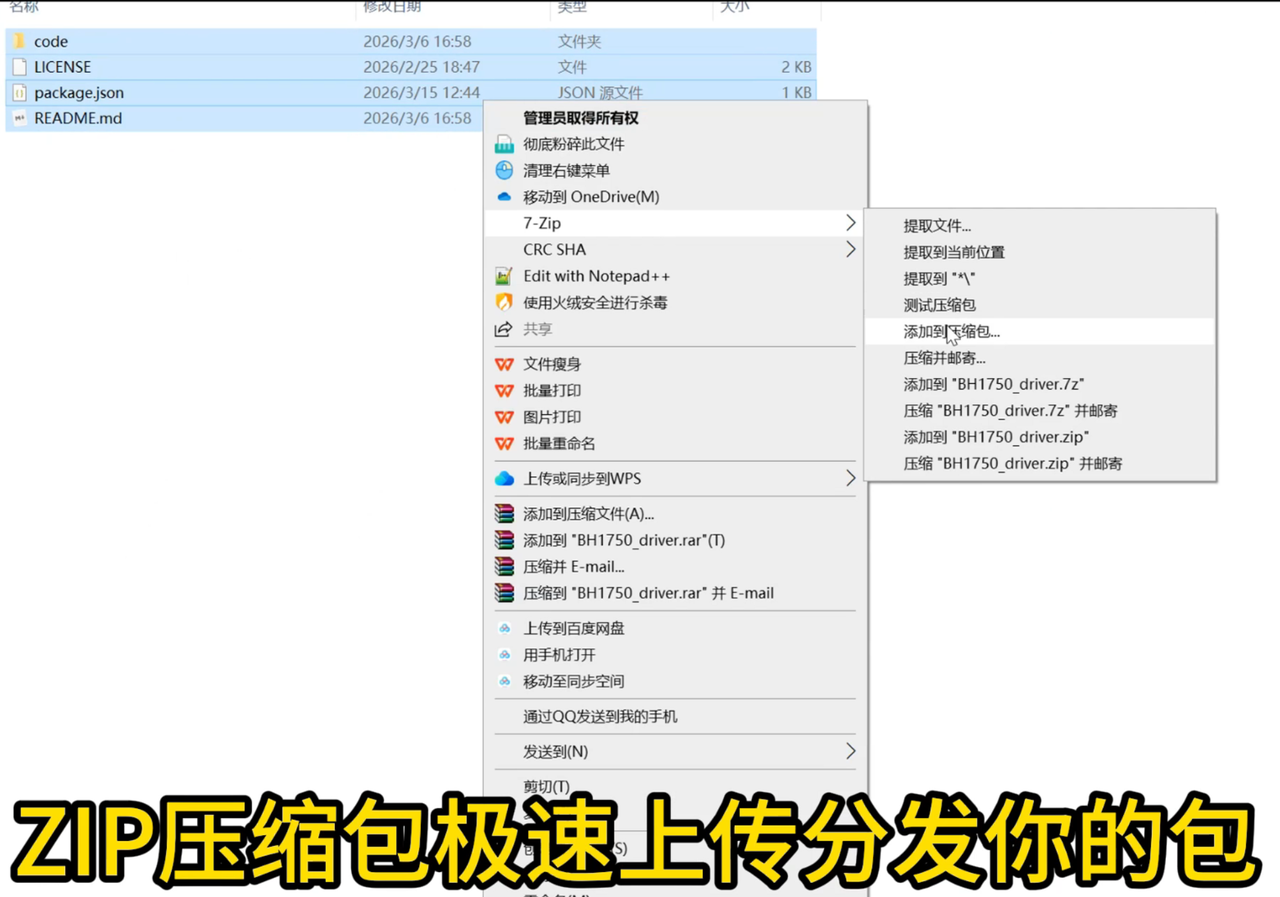
Next, package the library file into a ZIP Compressed Packet:
Select all files in the project root directory (code/, LICENSE, package. json, README. md).
Right-click → select "7-Zip" → "Add to Compressed Packet"(or directly select "Add to [package name]. zip").
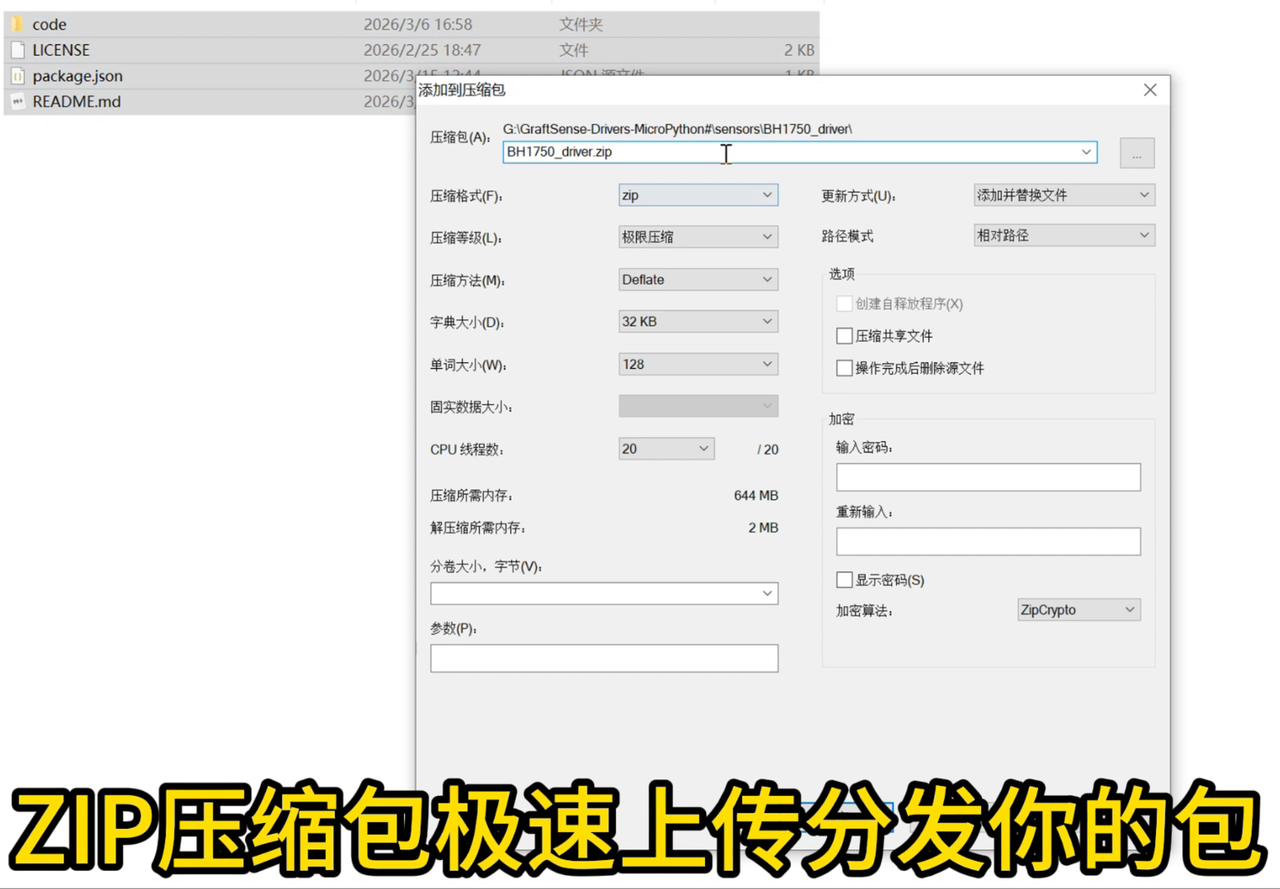
In the compression settings:
Compression Format Selection zip
It is recommended that the file name be consistent with the package name (e. g. BH1750_driver. zip)
Confirm that the path mode is set to "relative path" to avoid generating nested directories
After generating the ZIP package, check its internal structure: open the ZIP file to confirm that all files are directly located in the root directory without any extra folder nesting.
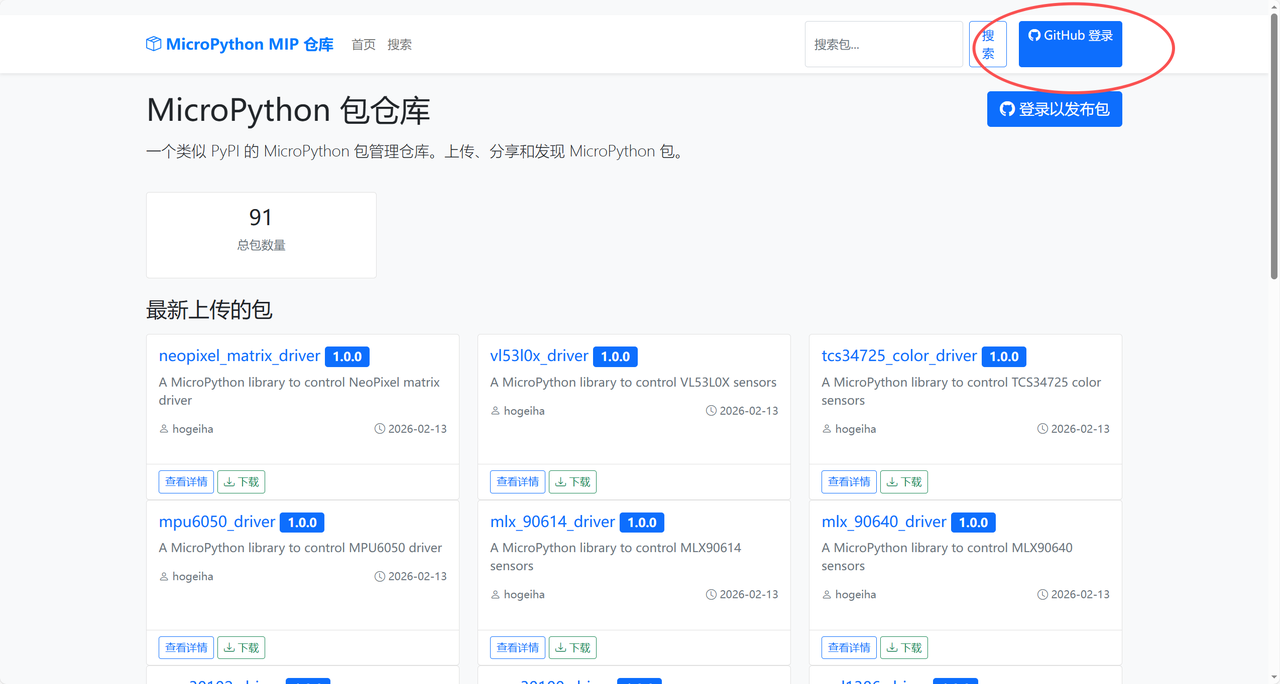
Visit the official uPyPi website, click the "Log in with GitHub" button in the top right corner, and log in with authorization via your GitHub account:
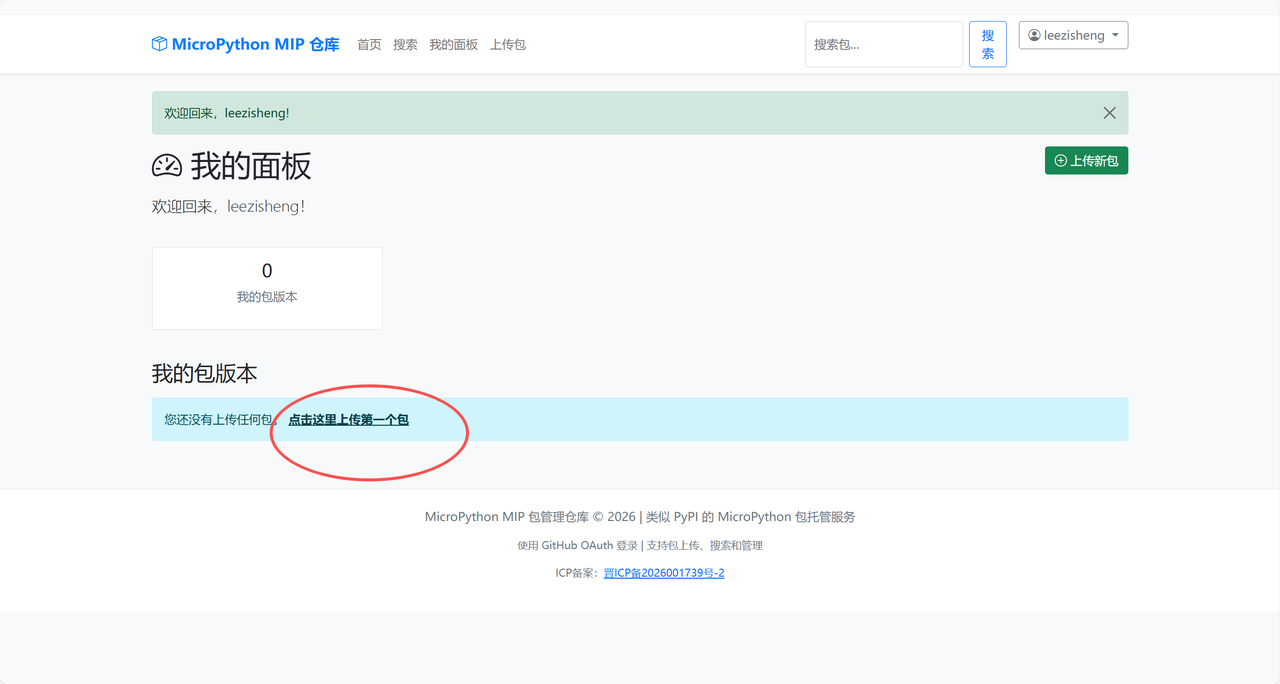
After logging in, click "My Panel" at the top, then click "Click here to upload your first package":
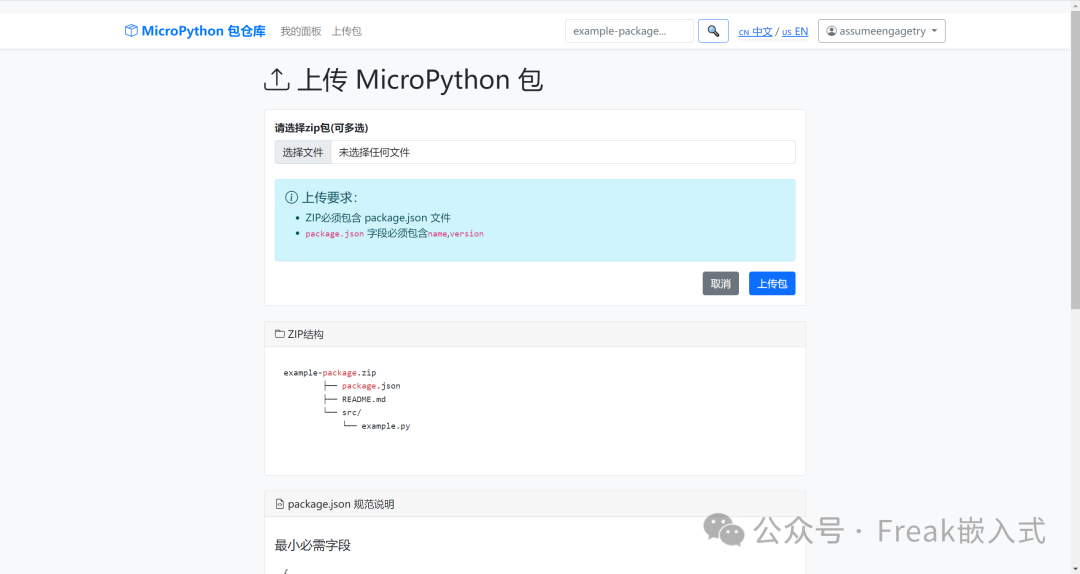
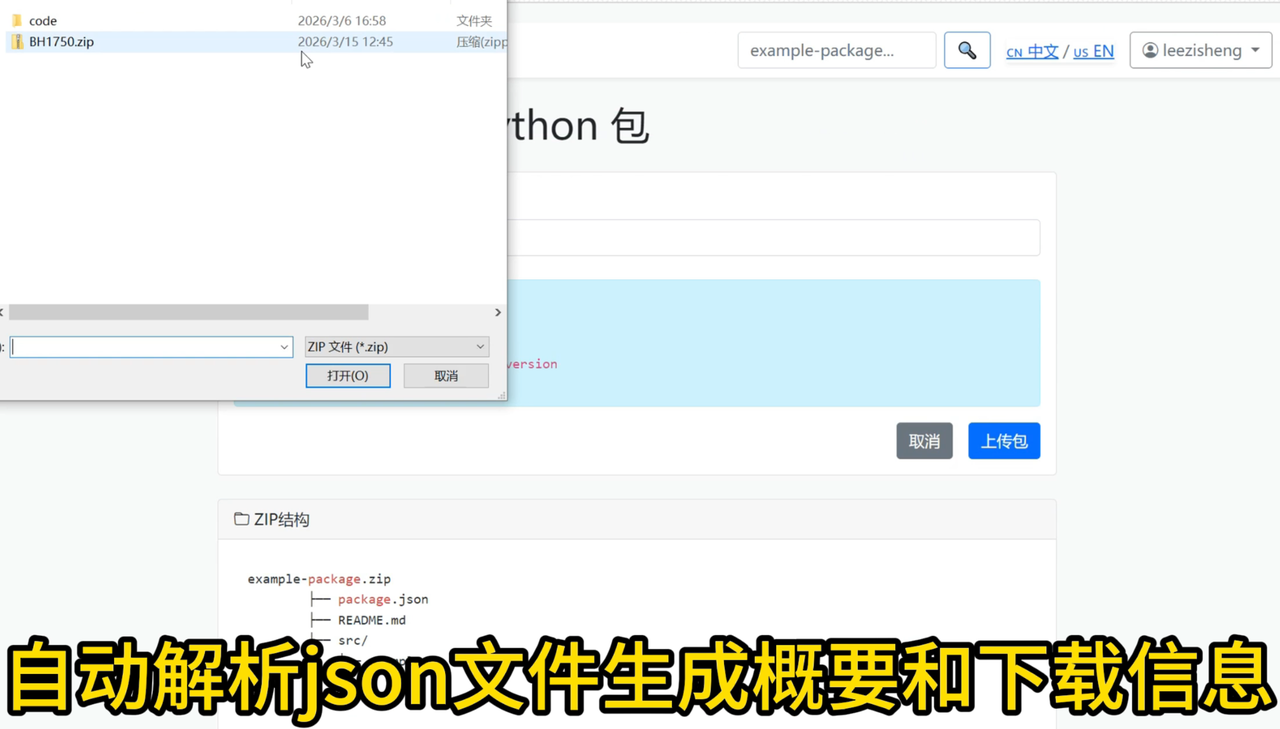
Go to the upload page, click "Select File", and select the ZIP package you just generated:
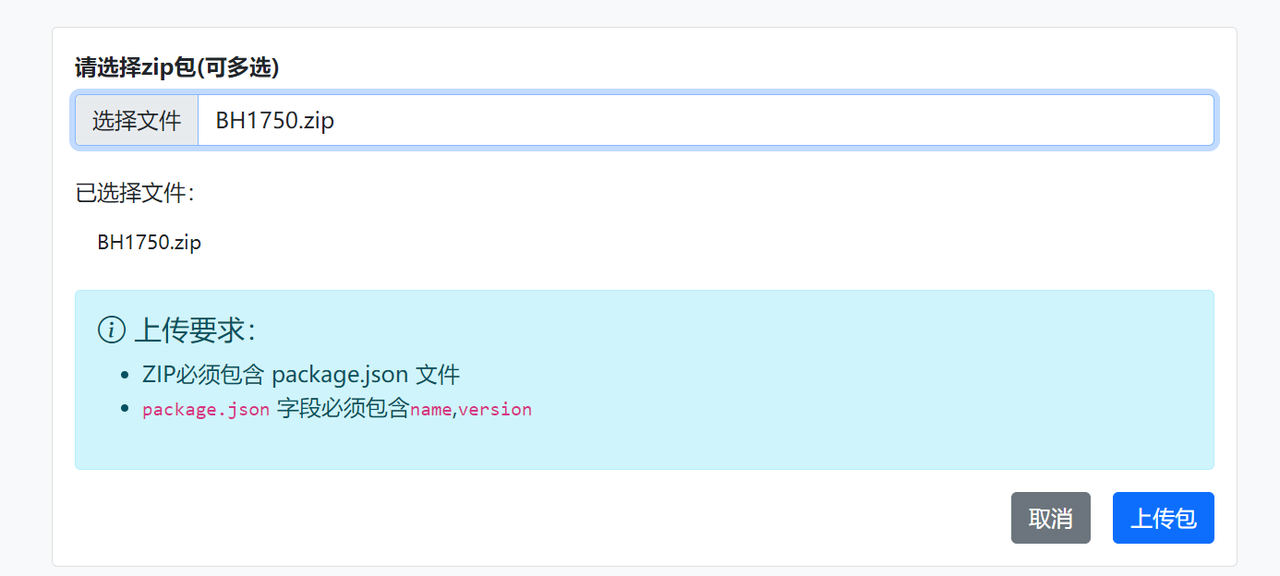
Make sure the folder contains the package. json file, then click the "Upload Package" button and wait for the upload to complete:
Once uploaded successfully, your driver package will be searchable on uPyPi, and other users can install it directly.
4.2.2 Github URL Upload
Submitting driver packages directly via the GitHub repository URL is a convenient upload method suitable for open-source projects, with the following operation steps:
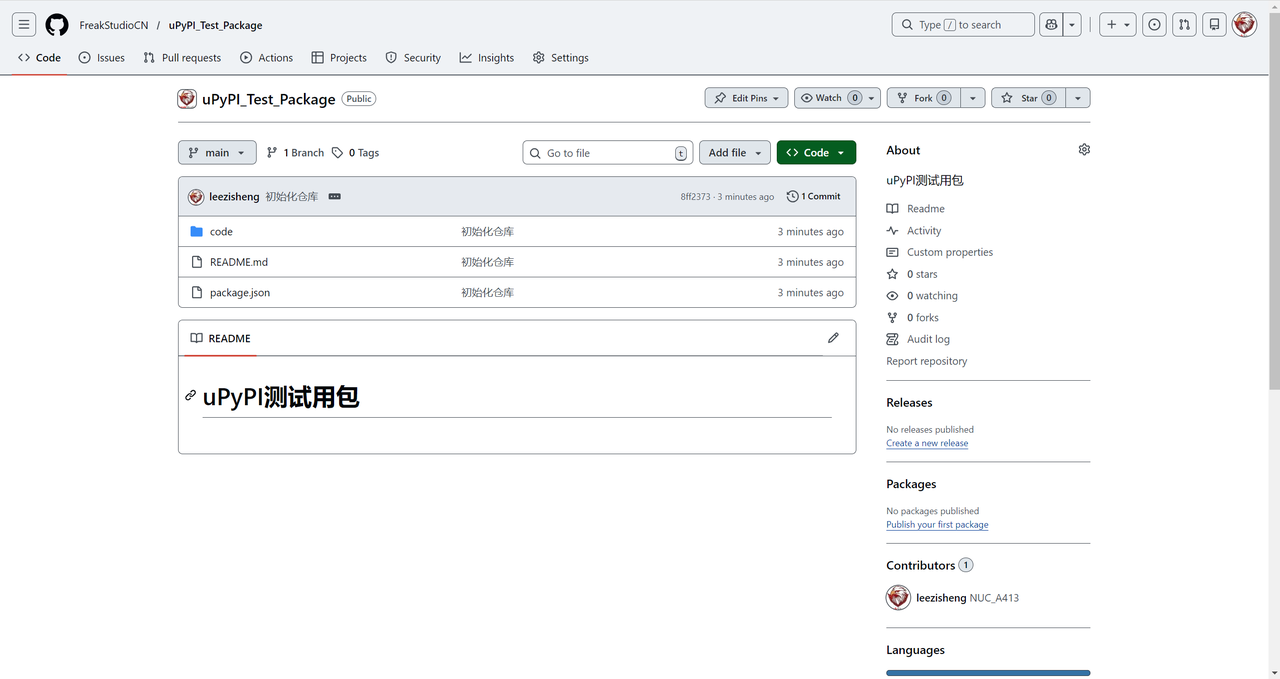
Ensure that the code of your driver package has been hosted in a GitHub repository and complies with the following specifications:
The target directory (the repository root directory or a subdirectory) must contain package. json file, and this file must define the name (package name) and version (version number) fields;
The total file size of the driver package shall not exceed 10 MiB;
The target directory does not contain symbolic links (soft links / hard links).
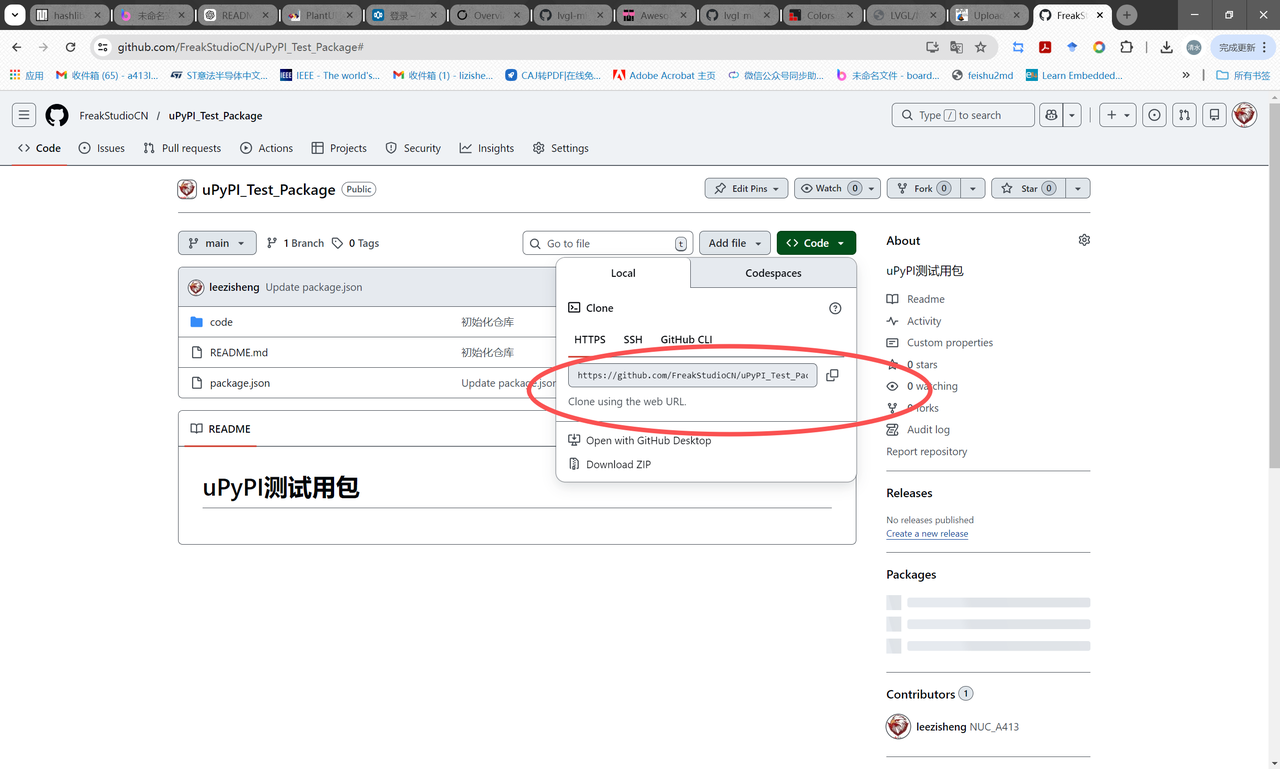
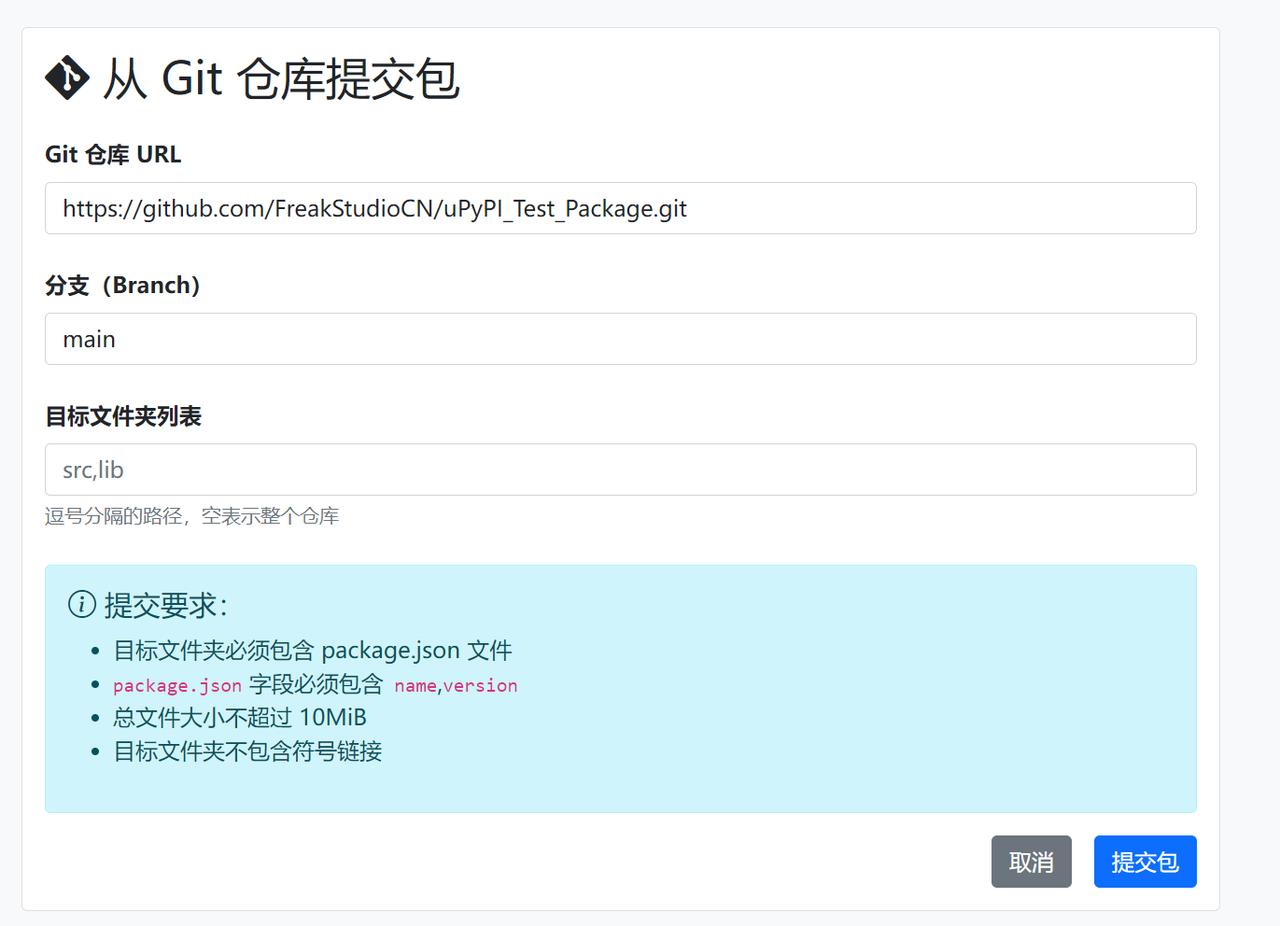
Go to your GitHub repository page, click the green "Code" button, and copy from the pop-up options the HTTPS-formatted repository URL (e. g., https://github.com/FreakStudioCN/uPyPI_Test_Package.git ).
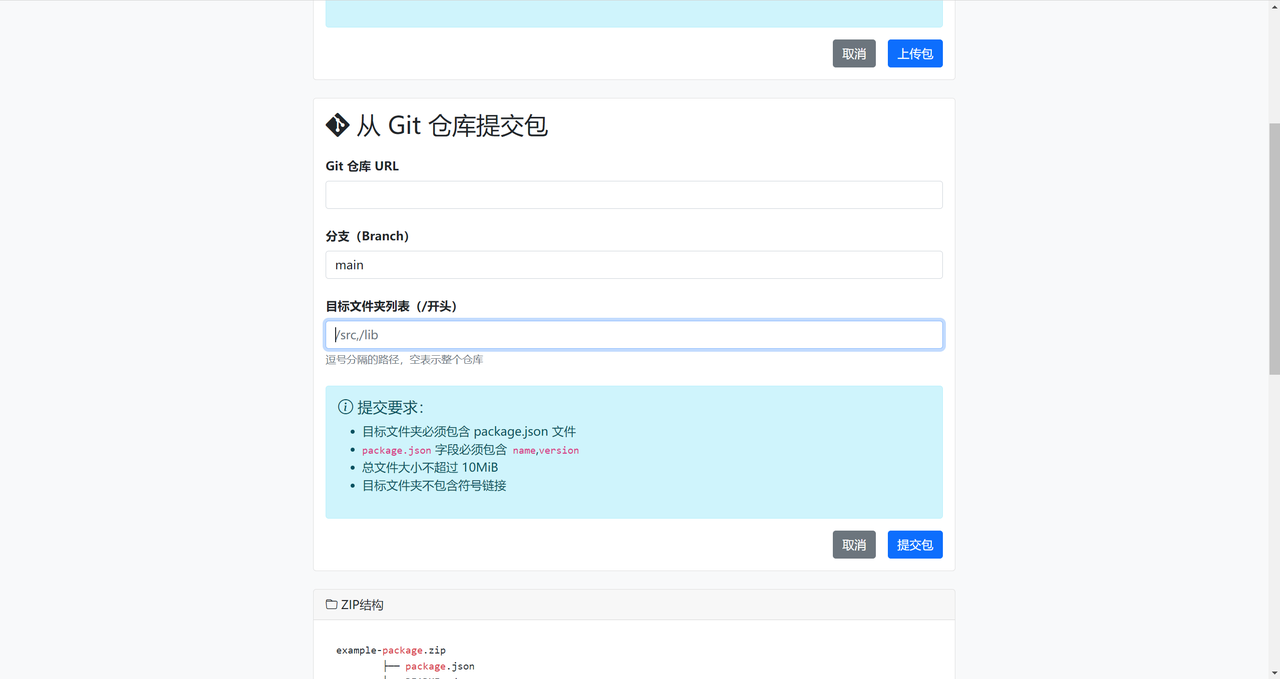
In the "Upload Driver Package" module of the uPyPi platform, navigate to the "GitHub URL Upload" interface, open the "Submit Package from Git Repository" form, and fill in the following information in sequence:
Git Repository URL: Paste the HTTPS address of the GitHub repository you just copied;
Branch: Enter the name of the branch from which code is to be pulled; the default entry is main (if the default branch of your repository is master, you need to modify it to the corresponding branch name);
Target folder list: Fill in the directory path where the driver package is located (multiple paths are separated by English commas). If left blank, it means pulling the entire repository; the example fills in src, lib, indicating that only the files under the two directories src and lib will be uploaded.
Read the "Submission Requirements" below the form carefully, and click the "Submit Package" button after confirming that your repository fully complies with the specifications.
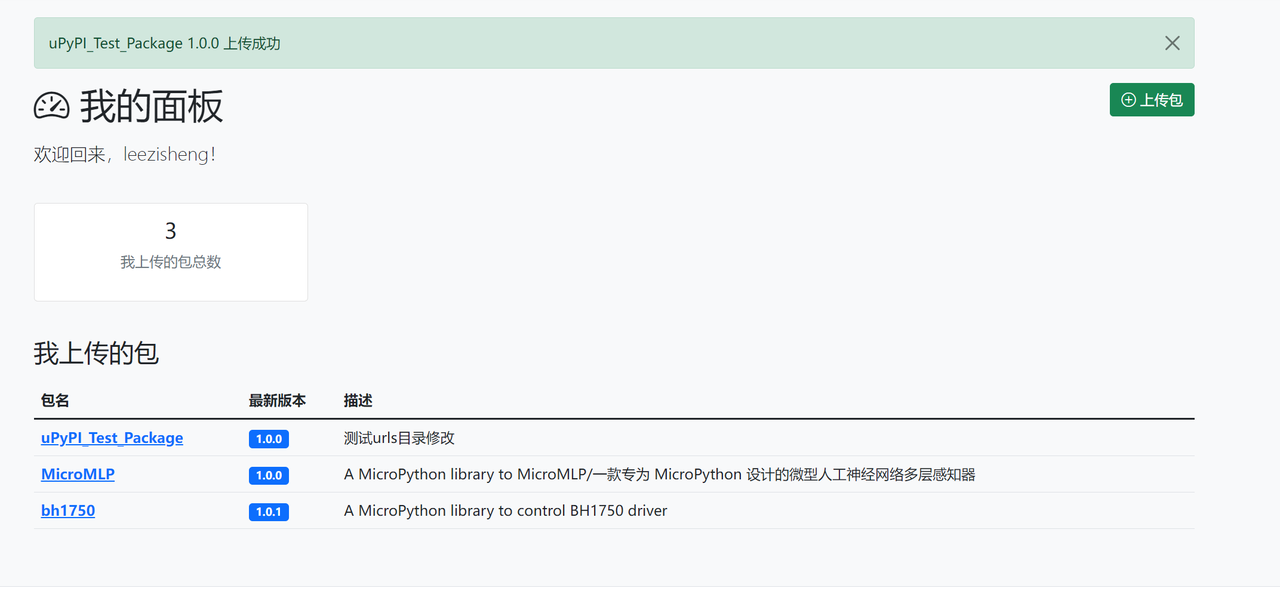
The platform will automatically pull the code of the specified directory from the GitHub repository to complete the parsing and publishing of the driver package:
If the submission is successful, the page will display the prompt "Upload Successful";
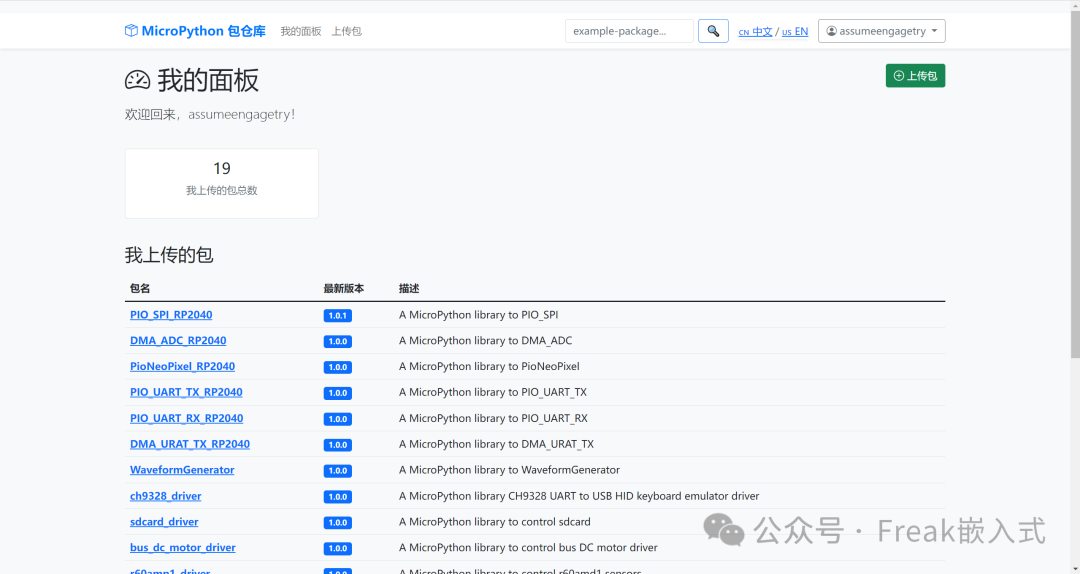
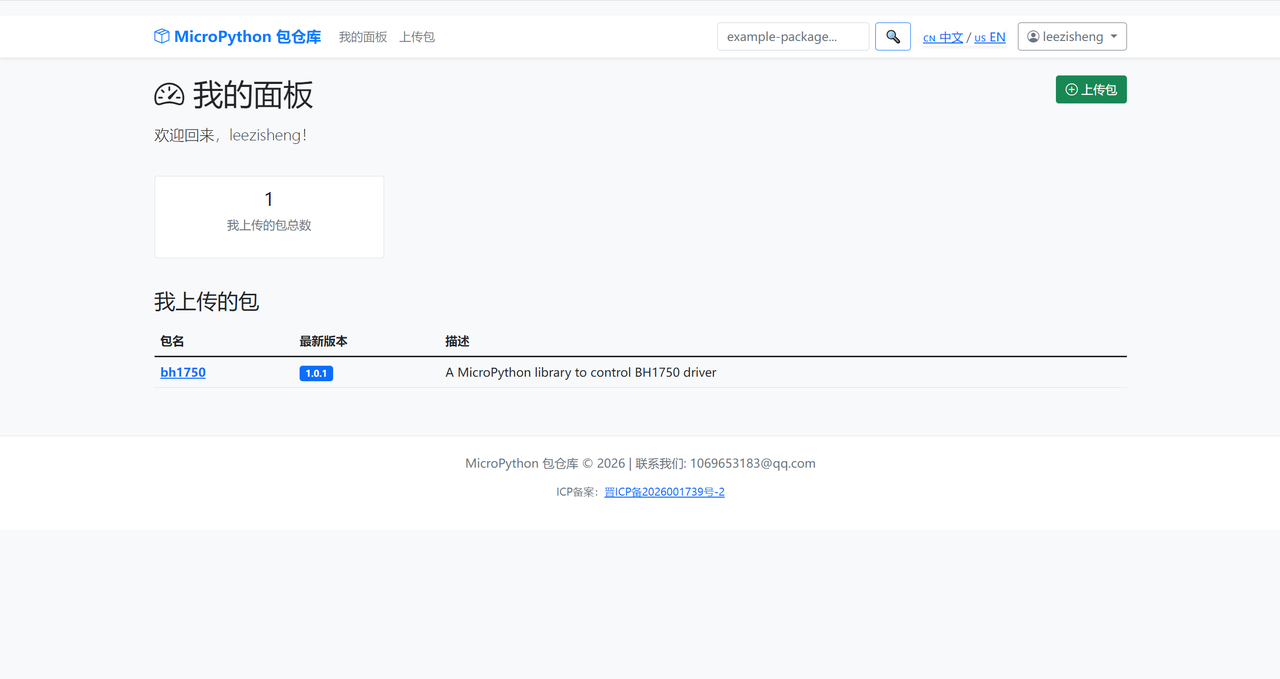
You can view the newly uploaded driver package in the list under "My Panel → My Uploaded Packages", and verify that information such as the package name and version number is correct;
Once the upload is complete, other uPyPi users can directly install and use your driver package by searching for the package name.
4.3 FAQ - Avoiding Version Conflicts and Duplicate Package Names
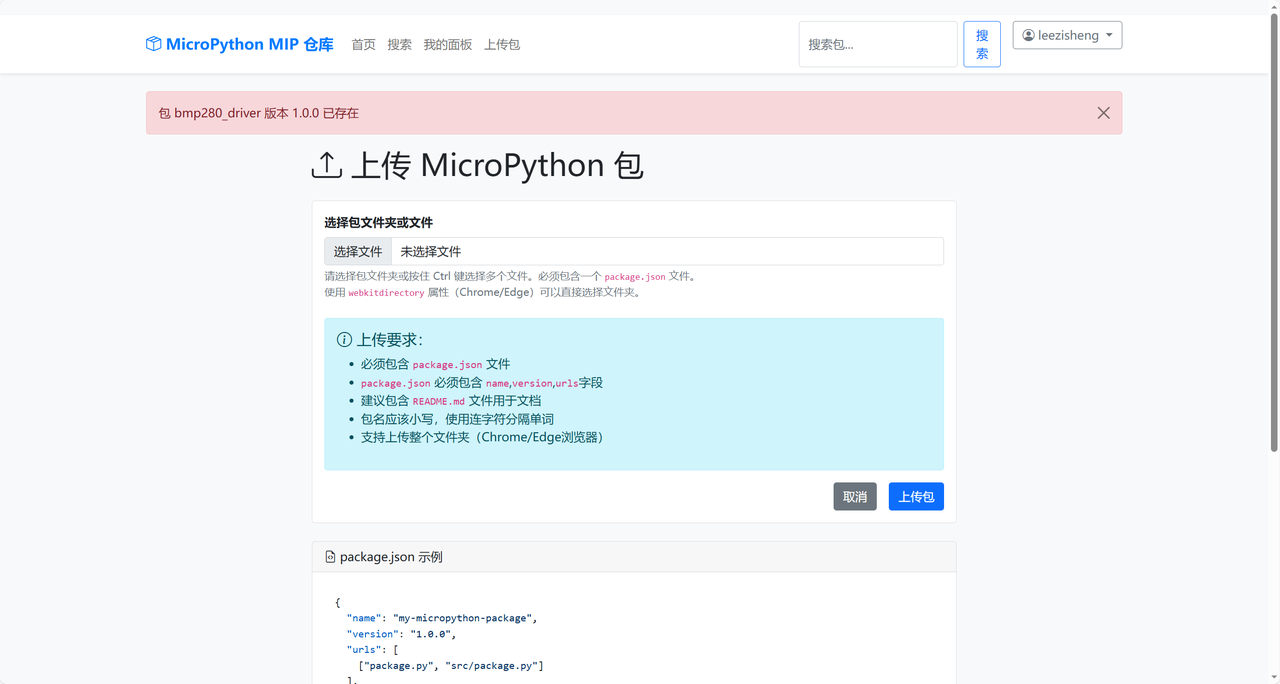
When uploading a driver package to uPyPi, you may encounter a prompt like the one shown in the image:"Package bmp280_driver version 1.0.0 already exists". This is because the uPyPi platform enforces strict package management rules to ensure that the version and name of each package are unique, making it convenient for users to install and use packages accurately.
uPyPi does not allow the same package name to be uploaded with an identical version number. This is just like the update log of a mobile app:
Every time you fix a minor bug or optimize code, you need to update the version number (for example, from 1.0.0 to 1.0.1).
If the version number remains unchanged, the platform will consider that you are re-uploading the same package and thus reject the operation.
The version number follows the "major. minor. patch" convention (Semantic Versioning) and must be incremented with each upload:
Revision number (third digit): for fixing minor bugs and optimizing code details, e. g. 1.0.0 → 1.0.1.
Minor version (second digit): adds new features and supports new hardware, for example, 1.0.1 → 1.1.0.
Major version (the first digit): for major overhauls that are incompatible with legacy code, e. g. 1.1.0 → 2.0.0.
If your package name is too generic (for example, sensor_driver), it will easily conflict with packages from other developers, causing confusion for users during installation. It is recommended to follow the rules below:
The package name shall be specific: it shall contain the hardware model or function, for example, bmp280_driver (clearly indicating it is the driver for the BMP280 sensor), rather than sensor_driver.
Formatting requirements: all in lowercase, use underscores _ to separate words, avoid spaces and special characters.
Pre-search verification: Enter the name of the package you want to use in the search box on the uPyPi homepage, and confirm there is no duplicate name before using it.
Steps to resolve the "Version already exists" prompt:
Open the package. json file of the driver package, and modify the version field to the new version number (e. g. 1.0.1).
Save the file and make sure that the file name and content remain unchanged.
Go back to the uPyPi upload page, reselect the driver package folder, and click "Upload Package".
If the prompt "Upload successful" appears, the version update is complete; if an error prompt still appears, check whether the package name is duplicated or whether the version number is indeed incremented.