Embedded 101: PyCharm MicroPython Setup in 37 Mins | Miniconda & Firmware Flashing
It guides configuring PyCharm for Pico MicroPython development with MicroPython plugins, code upload and REPL debugging.
COMPONENTS
PROJECT DESCRIPTION
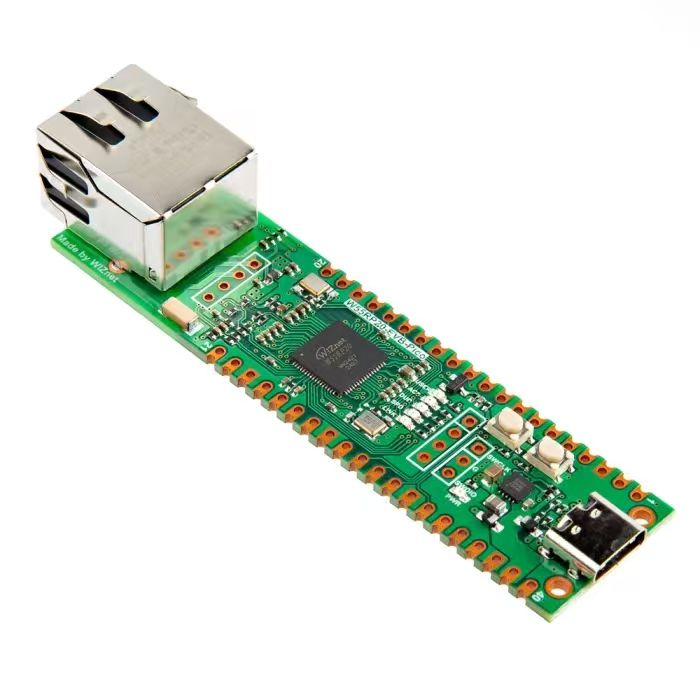
【Preliminary Note】The original hardware example in this article was written based on the RP2040. The actual hardware used in this hands-on demonstration features the W55RP20 as the main controller chip. The circuit logic and UF2 flashing operation principles are universally applicable, with only the main controller model differing. The original chip model mentioned in the circuit descriptions below is provided for reference purposes only.
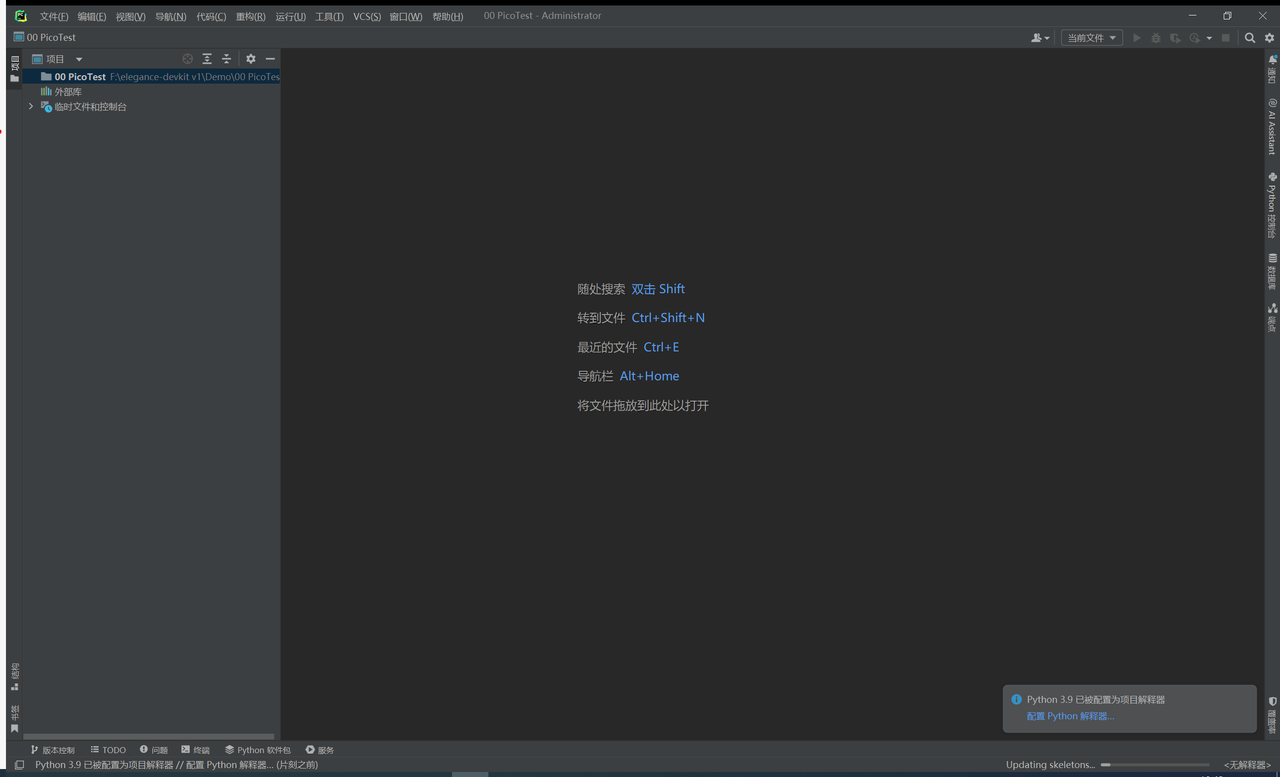
PyCharm
PyCharm is an extremely user-friendly Python IDE developed by JetBrains, which supports Windows, macOS and Linux operating systems. For each of these platforms, PyCharm offers two editions, namely Professional and Community, and users can choose the appropriate one according to their own needs:
Professional: Professional Edition (Professional Edition is recommended), which is feature-rich and a paid version
Community Edition: The community version only supports Python development. It is open-source and free, and is sufficient for learning purposes.
Here, the Community Edition is sufficient. For instructions on downloading and installing PyCharm as well as the Chinese localization plugin, please refer to the following link:
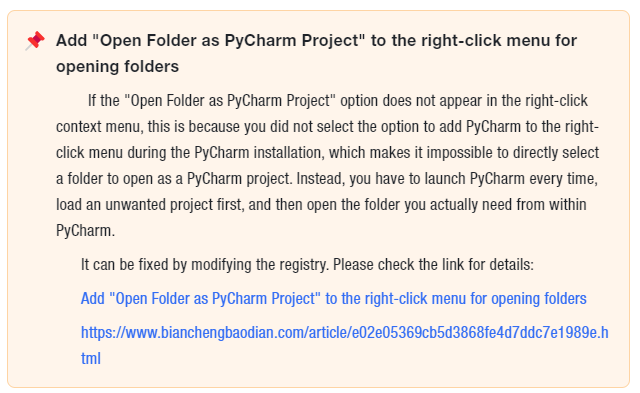
Right-click the mouse and select: Open Folder as PyCharm Project
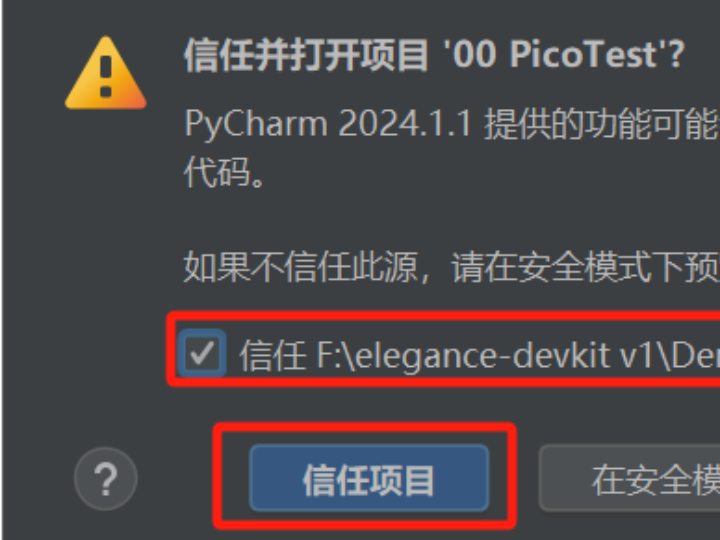
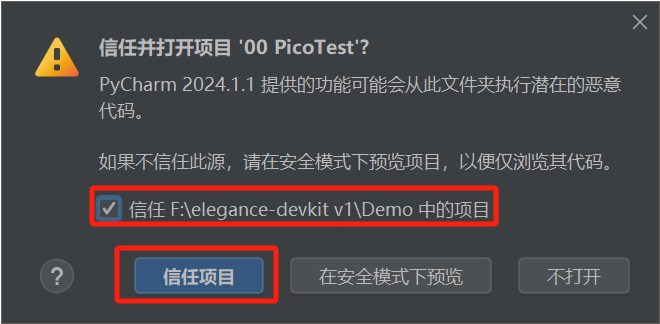
Figure 3.5 Trust Project Prompt Window
Figure 3.6 Shortcut Prompt on PyCharm Operation Interface
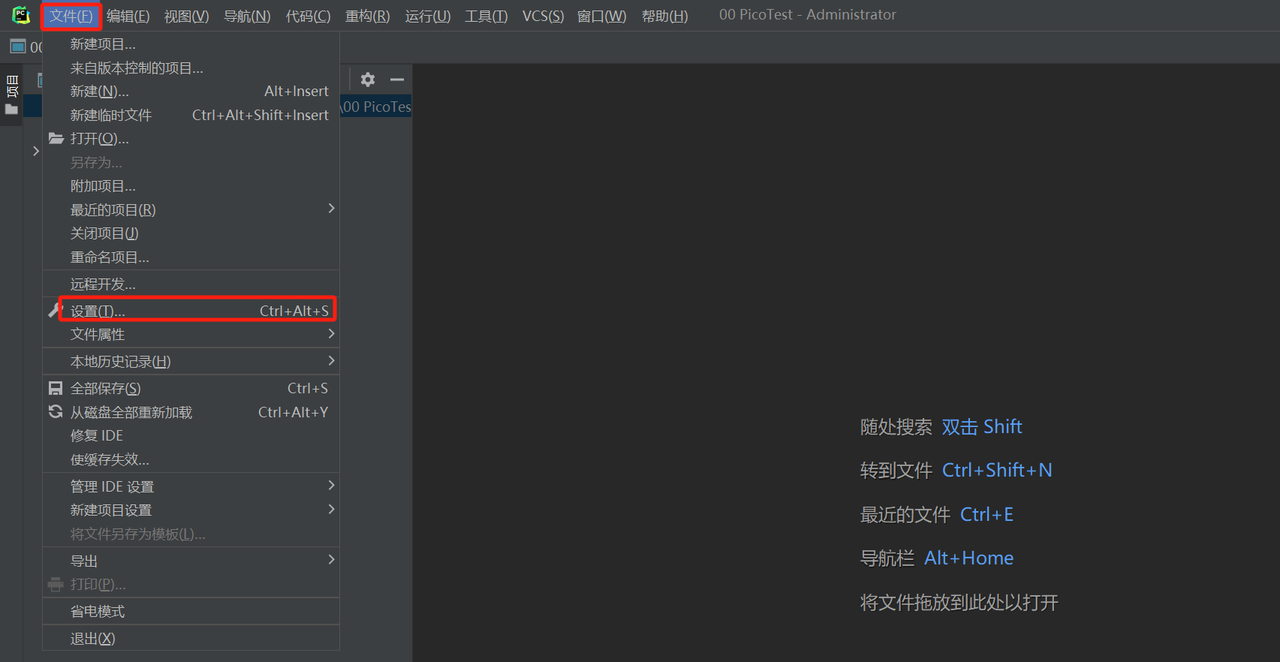
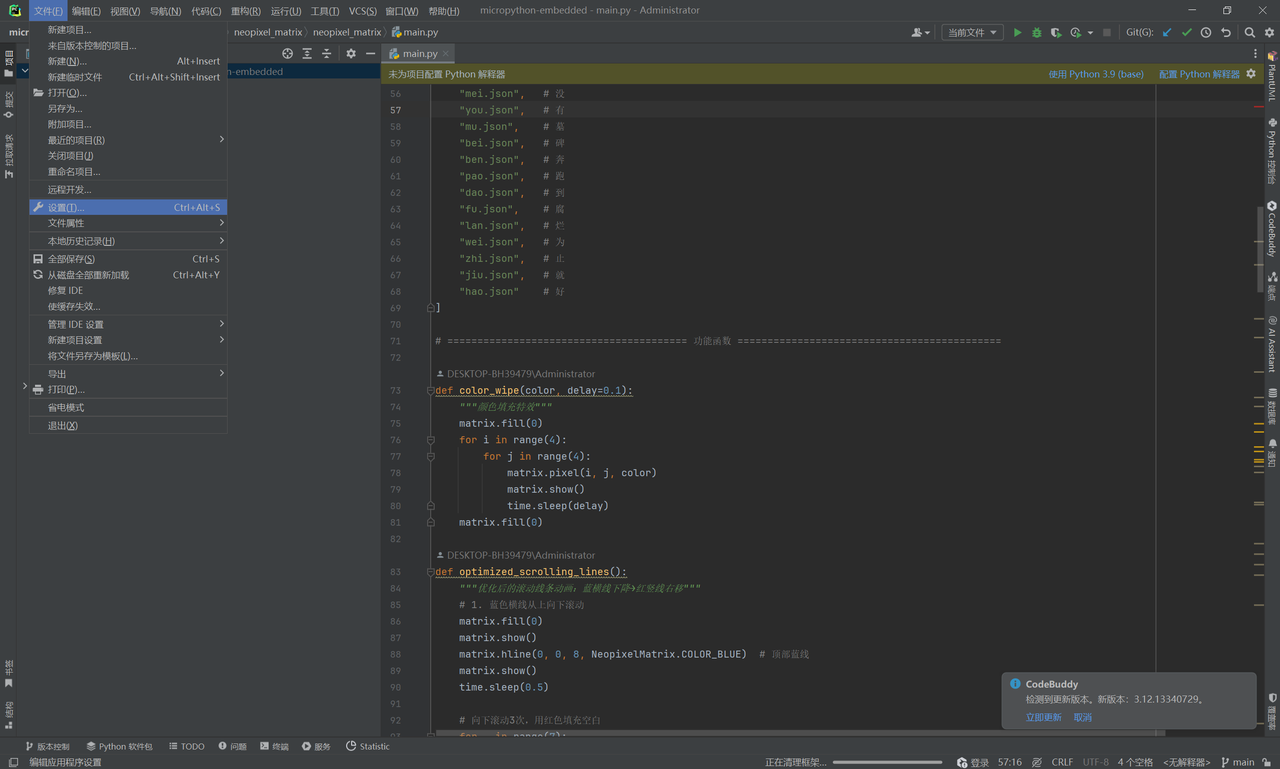
Click - File - Settings:
Figure 3.7 Shortcut Prompt for PyCharm Operation Interface
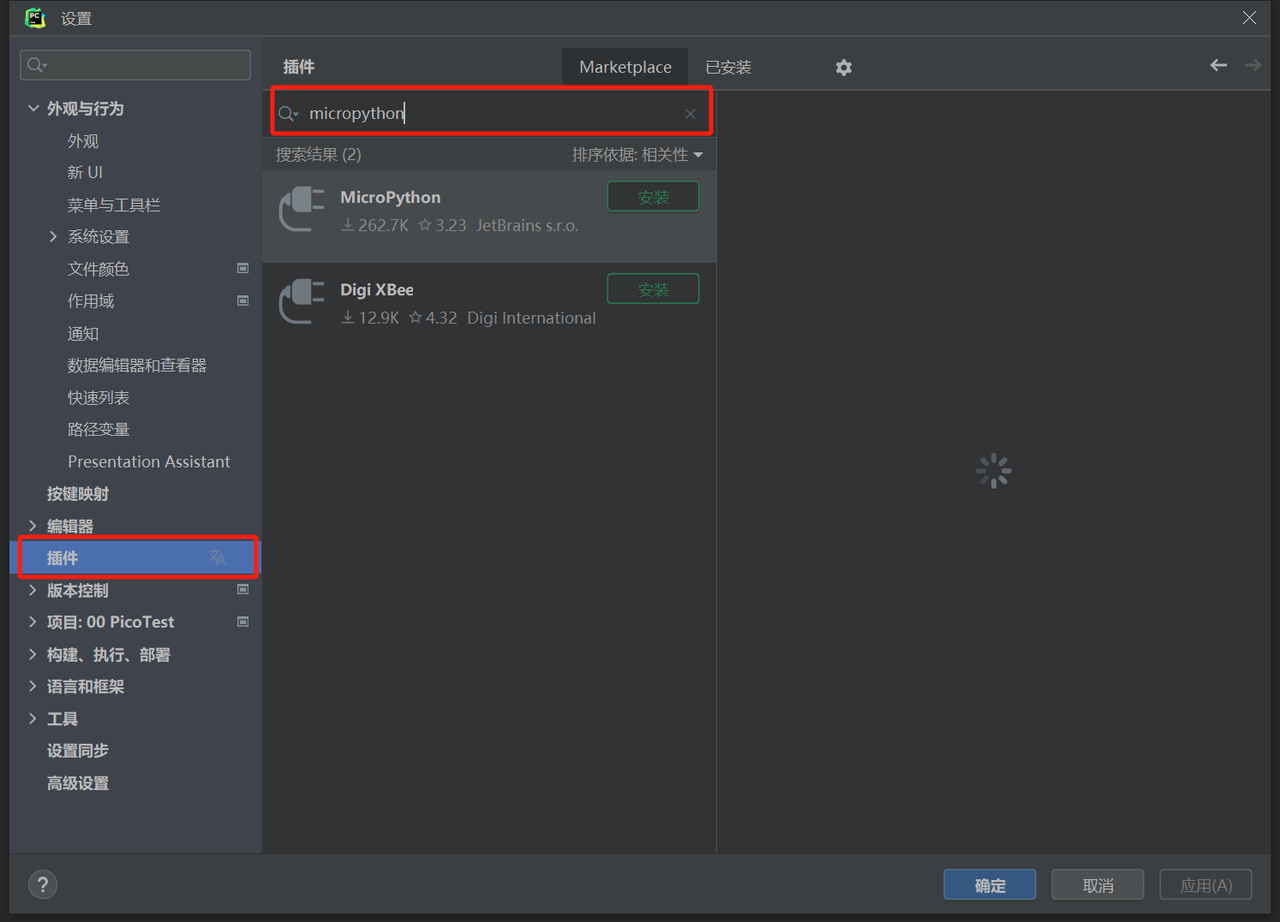
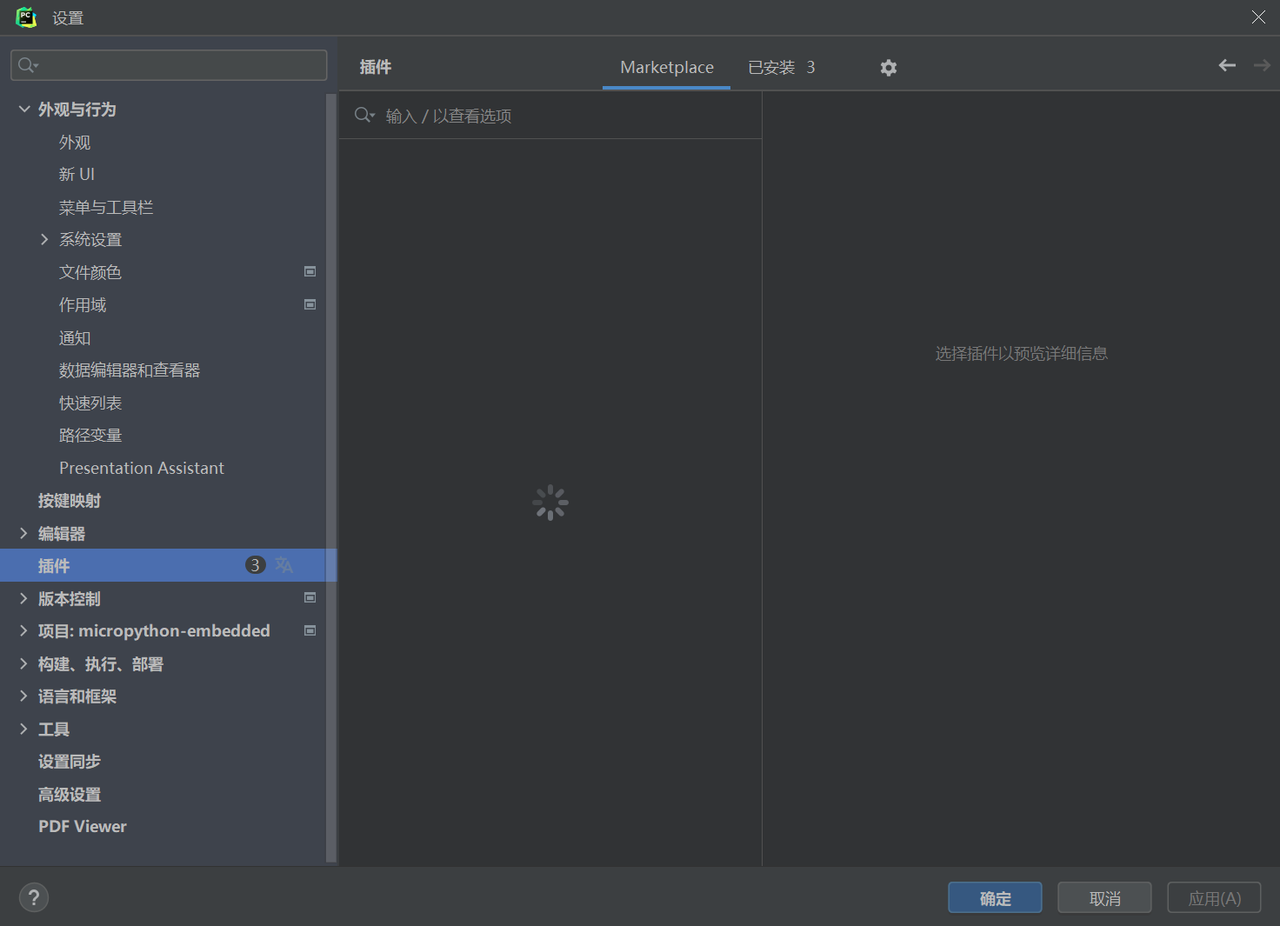
Click on the [Plugins] option, enter "micropython" in the "Search" input box; this plugin enables functions including code editing, program flashing, and REPL operation.
Figure 3.8 MicroPython Plugin Search and Installation Interface in PyCharm
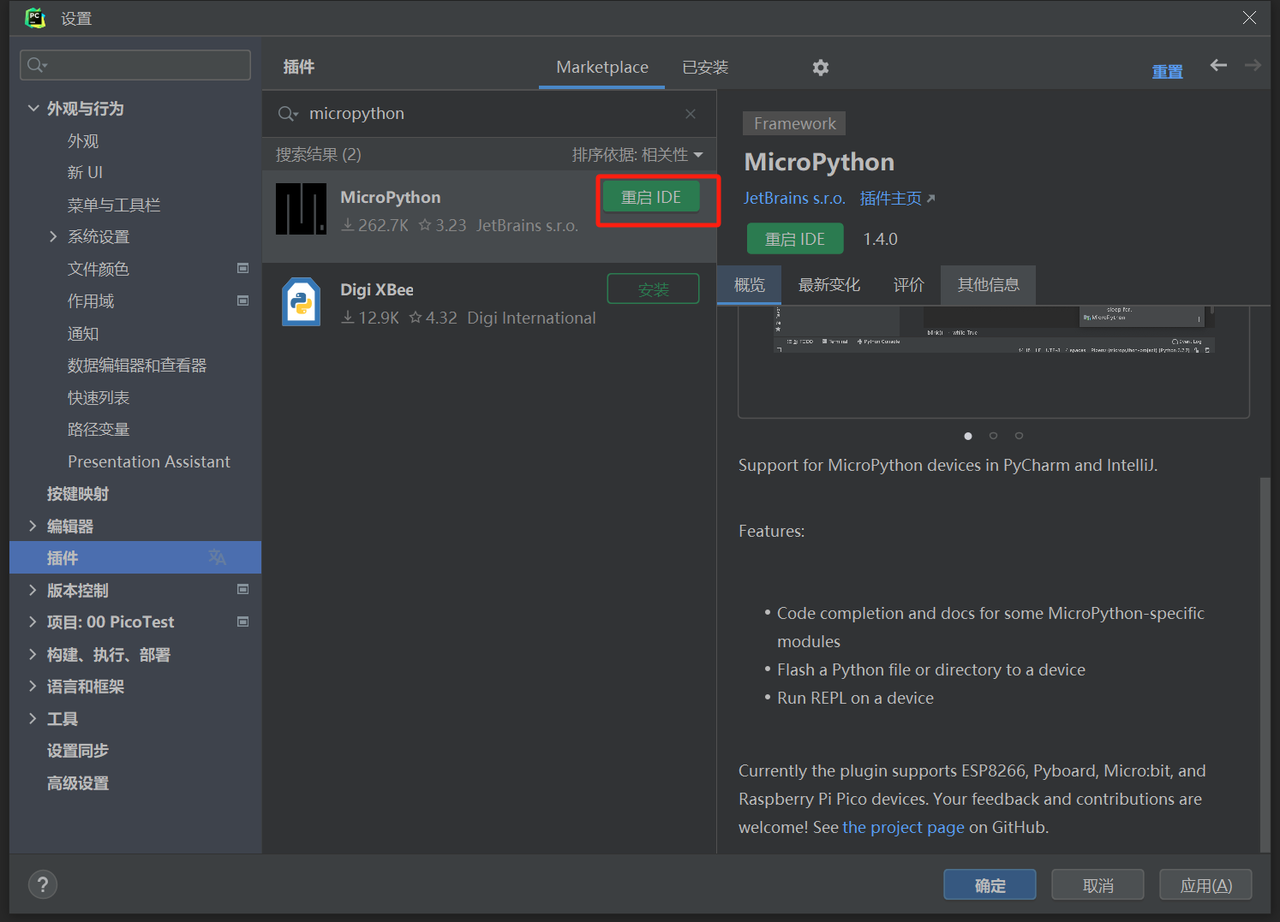
Click Install to install the plugin, and click - Restart IDE after the installation is complete:
Figure 3.9 Schematic diagram of IDE restart
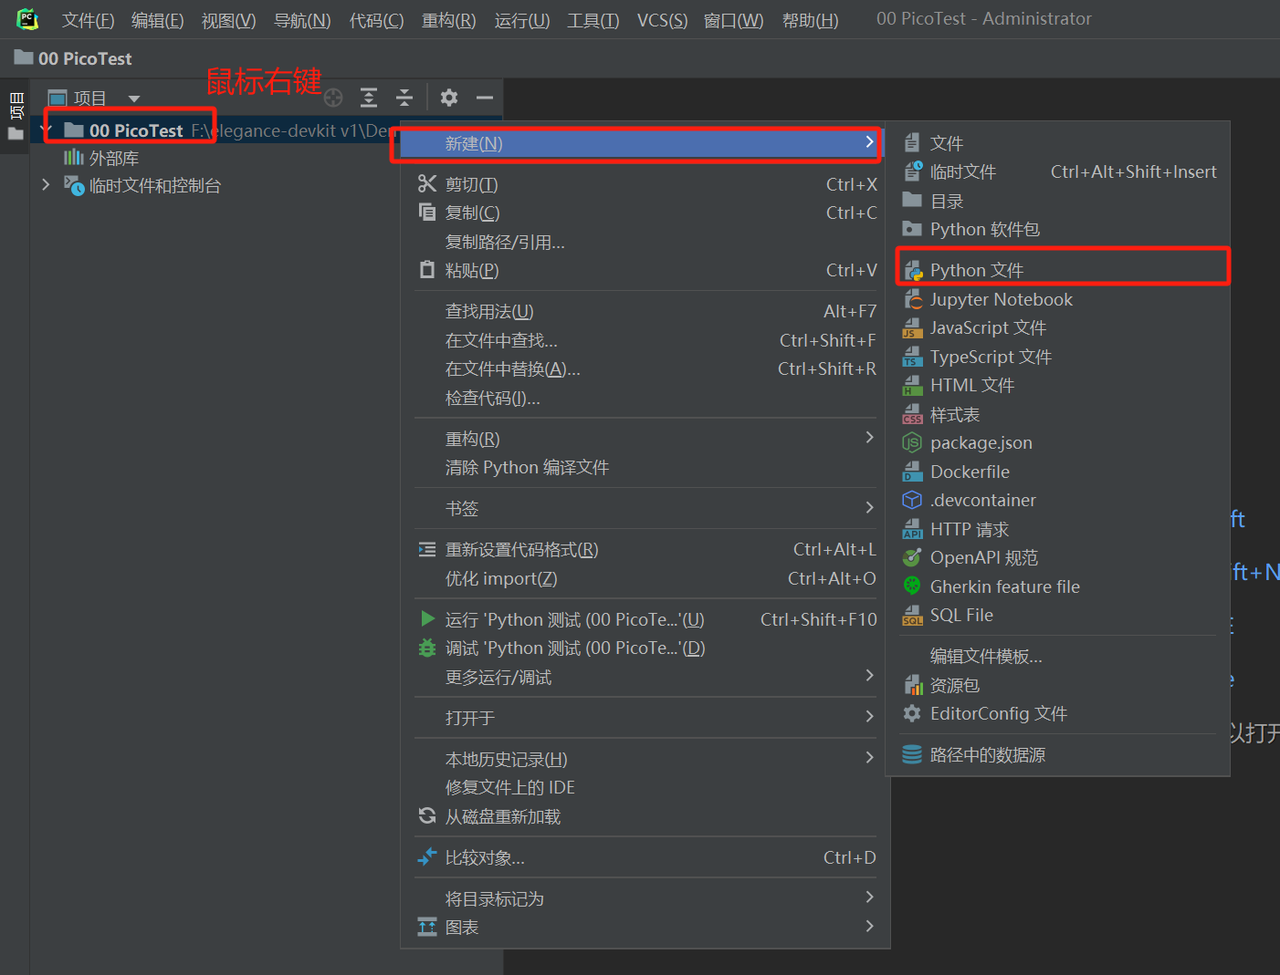
Right-click the folder, then select New > New Python File:
Figure 3.10 Screenshot of New Python File
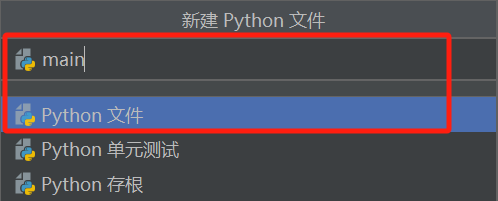
Create a new file named main. py:
Figure 3.11 Screenshot of main. py file
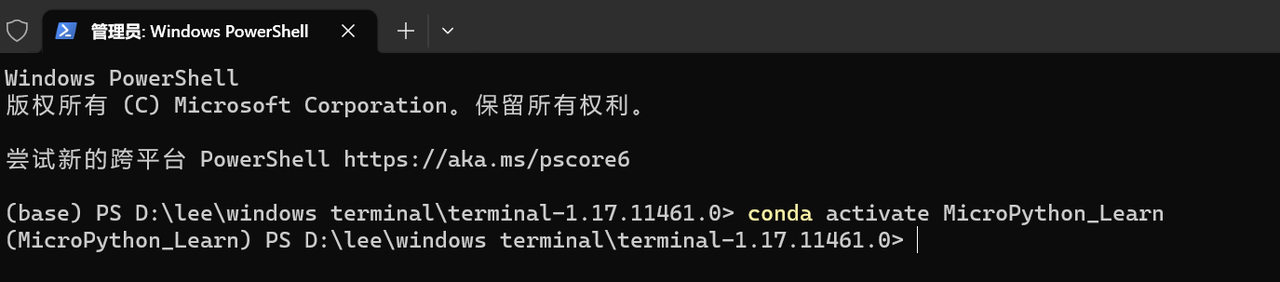
Here, we first use miniconda to create a new environment named MicroPython_Learn, and the Python version we use here is Python 3.12.3:
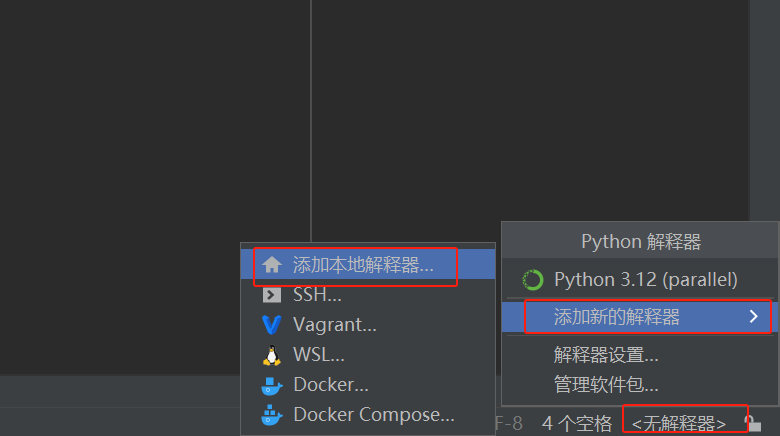
Figure 3.12 Python Interpreter Addition Operation
Next, let's go back to the PyCharm interface and click the button in the lower right corner to add the interpreter for our current project:
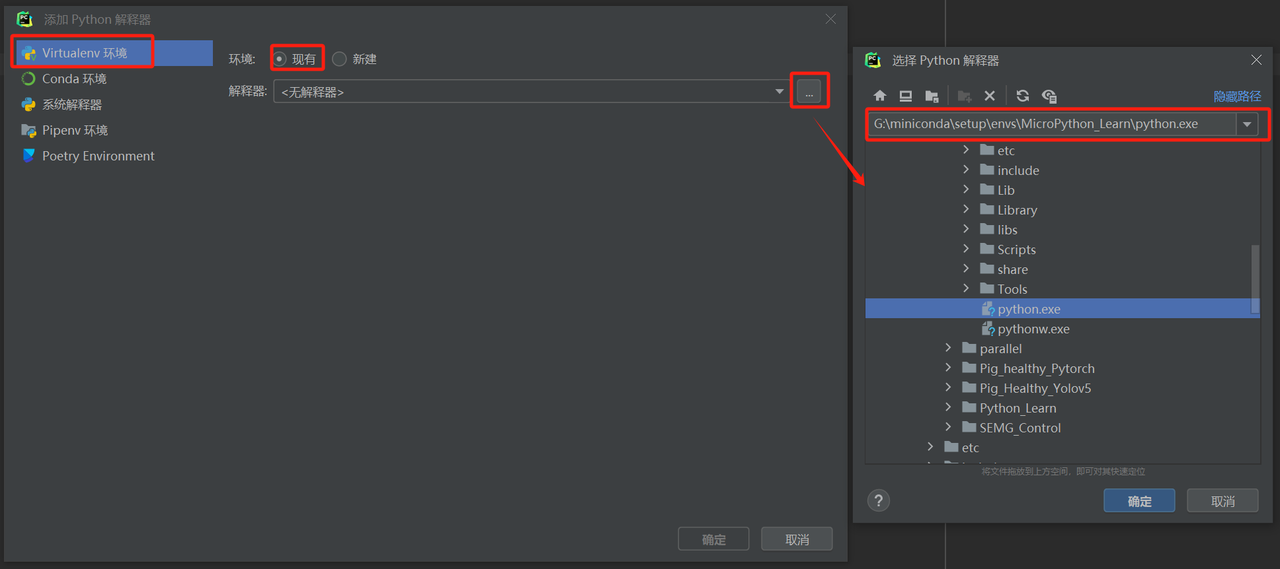
Select the virtual environment option, click the "Existing" option, click the three-dot button on the right side of the interpreter column, select the python. exe file in the virtual environment installation path, and click OK:
Figure 3.14 Parameter Configuration of MicroPython Device
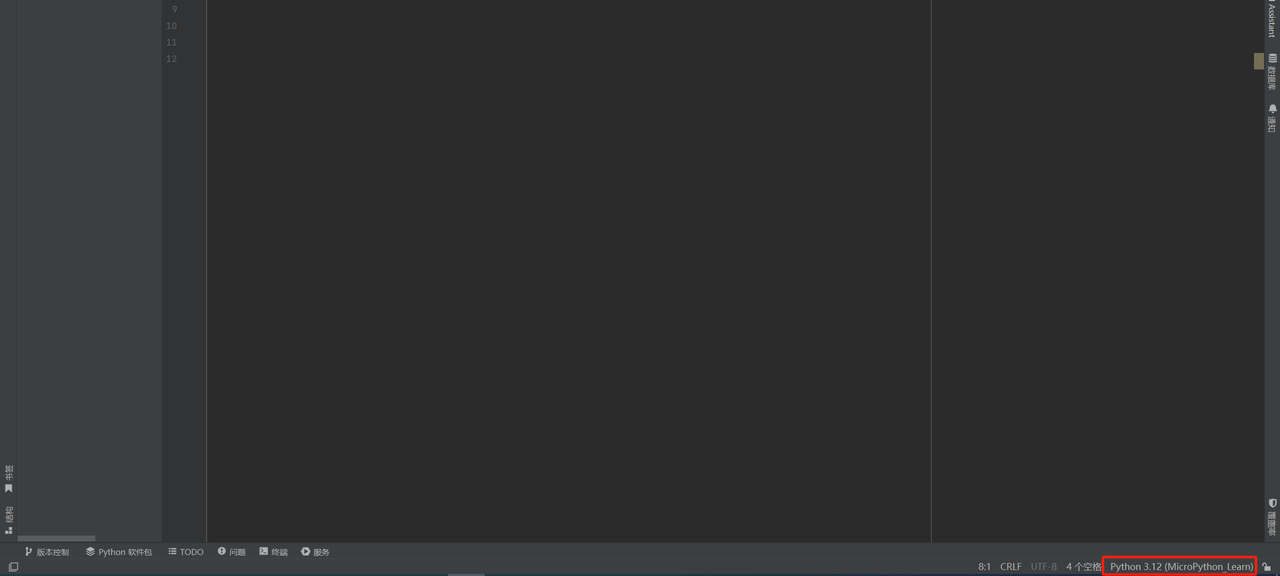
You can see that the name of the current virtual environment appears in the lower right corner of the IDE, indicating that the interpreter has been added successfully:
Figure 3.15 Development Tool Environment Initialization
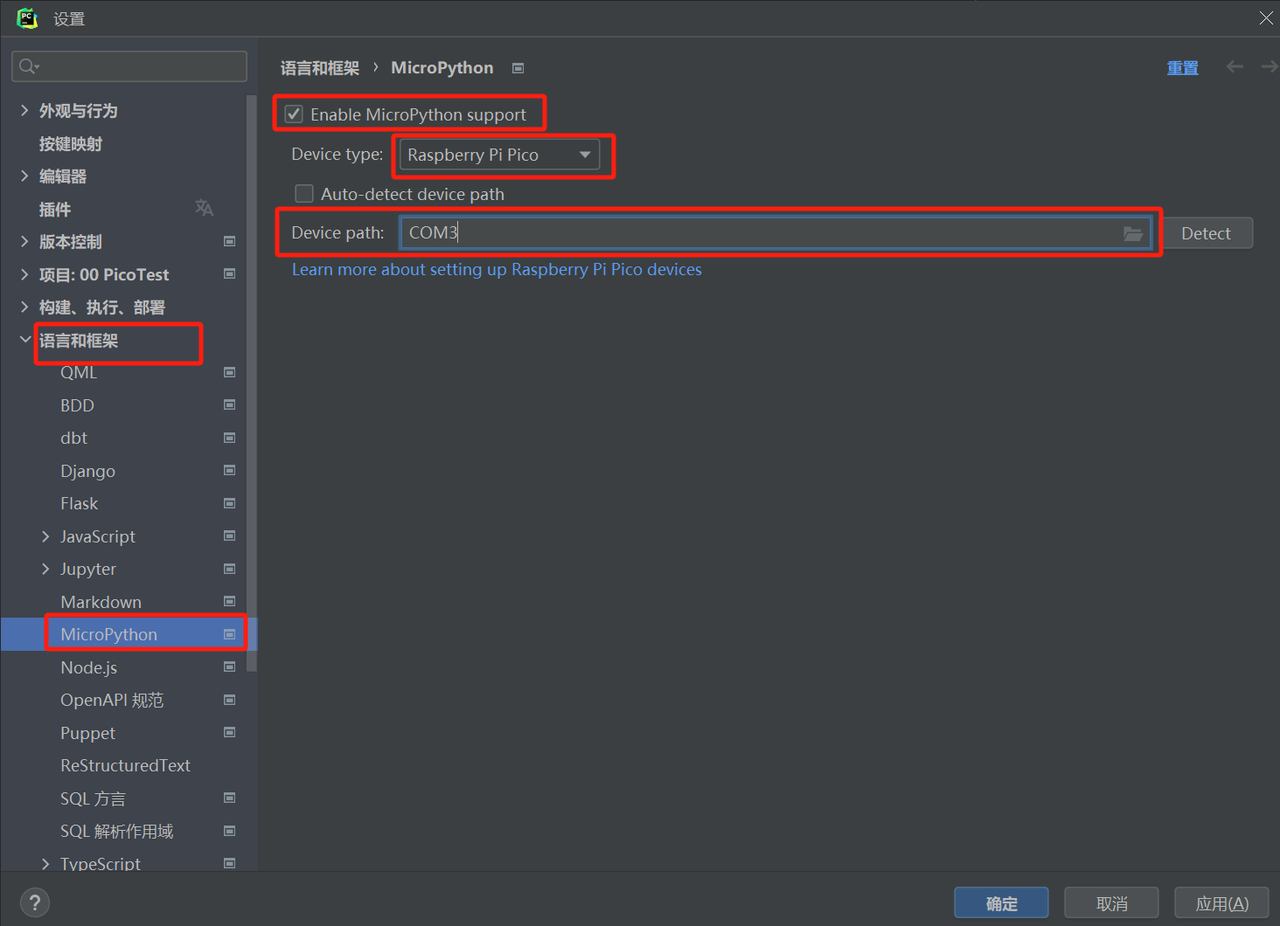
Next, click on "File" > "Settings" again, select "Languages & Frameworks" > "MicroPython", check the "Enable MicroPython support" option, choose Raspberry Pi Pico as the device type, and enter "COM3" in the device path field:
Figure 3.16 Plugin Configuration Instructions
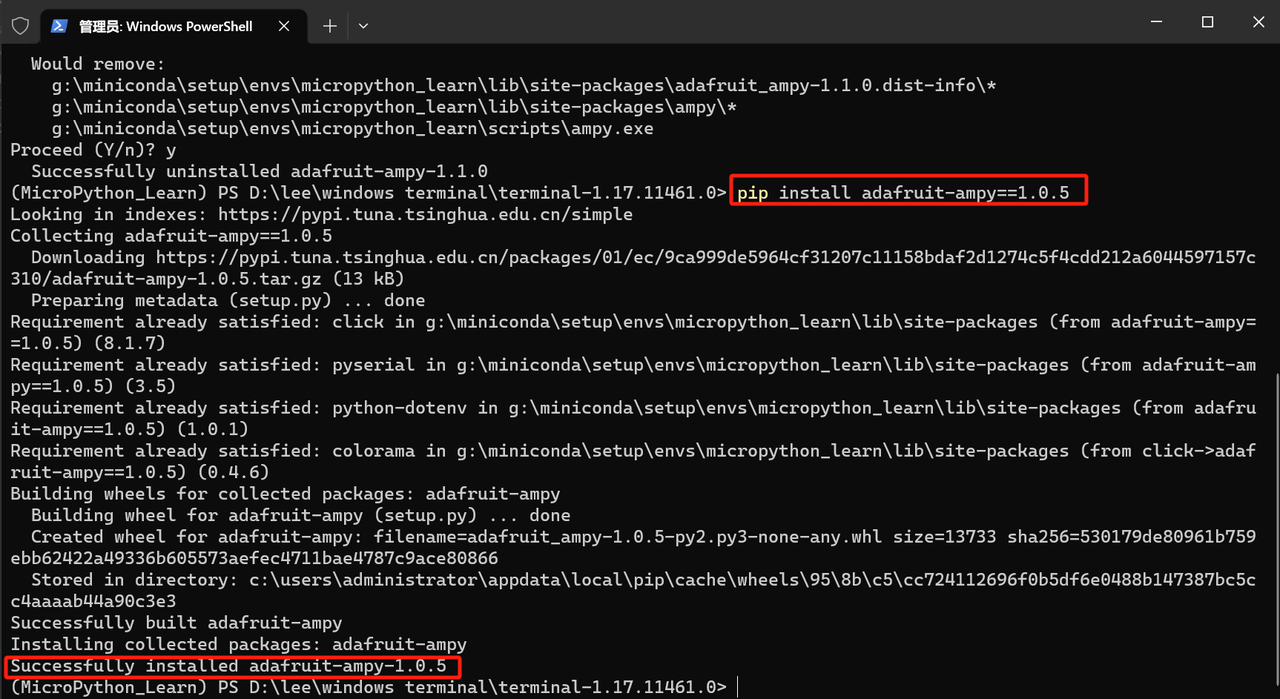
Next, we use the pip command in the command line to install the adafruit-ampy tool:
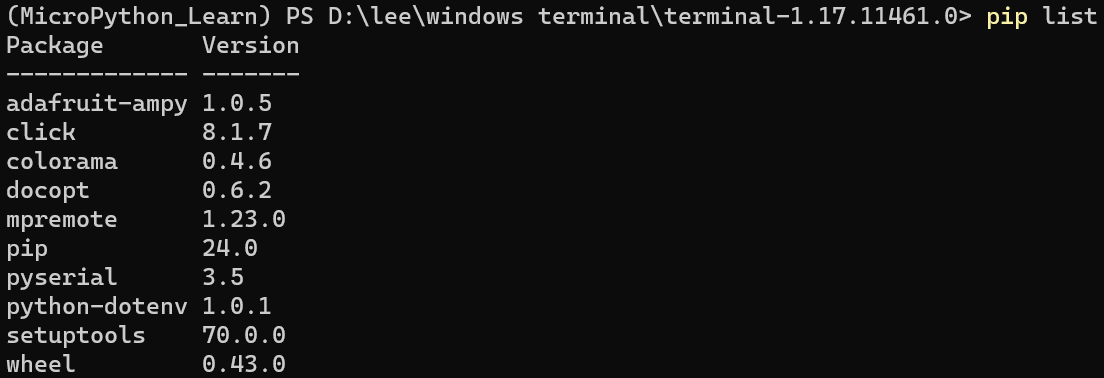
The libraries and corresponding library version information required for MicroPython development using PyCharm are as follows:
Figure 3.18 Check environment package versions via pip list
So far, we have completed the setup of the PyCharm IDE Raspberry Pi Pico MicroPython Development Environment. Next, let's test the process of flashing and running programs with PyCharm by copying the following code into main. py:
This code is located in the folder of the supporting materials: elegance-devkit v1\Demo\00 PicoTest.
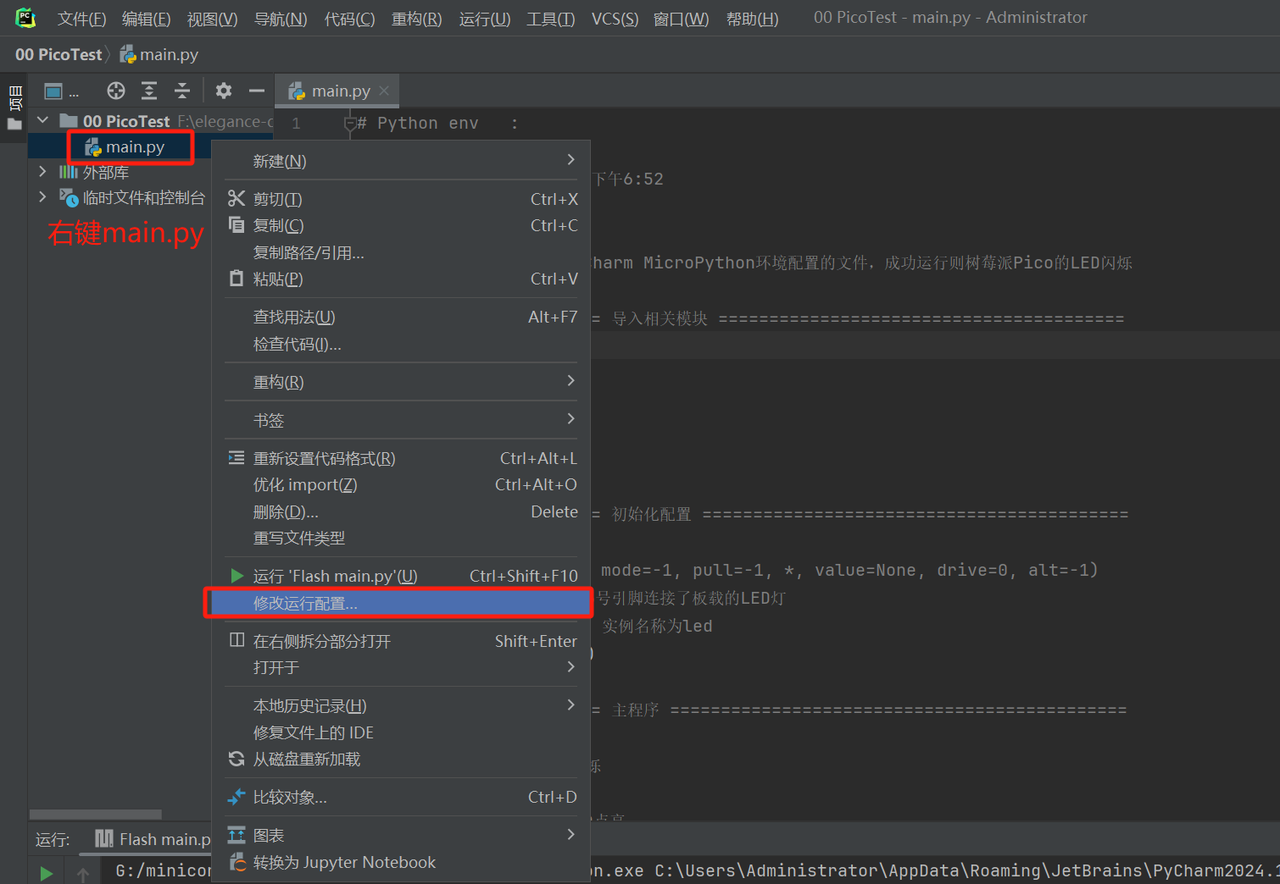
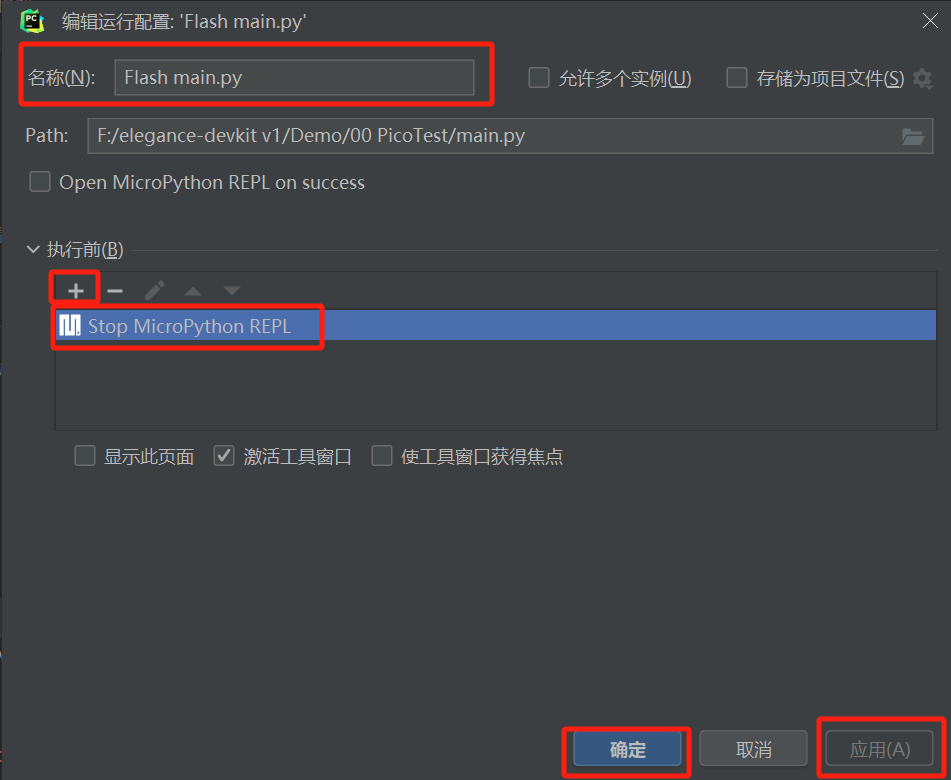
After that, we need to modify the run configuration of the main. py file. Right-click on [main. py] in the Project window to bring up a context menu, select [Modify Run Configuration…] from this menu to edit the run configuration, and the "Edit Run Configuration" dialog box will pop up.
Enter the Flash program file name in the "Name" edit box, here enter Flash main. py, click the Apply button, and then click the OK button.
Figure 3.19 MicroPython Project Run Configuration Selection
Figure 3.20 MicroPython Project Run Configuration Interface
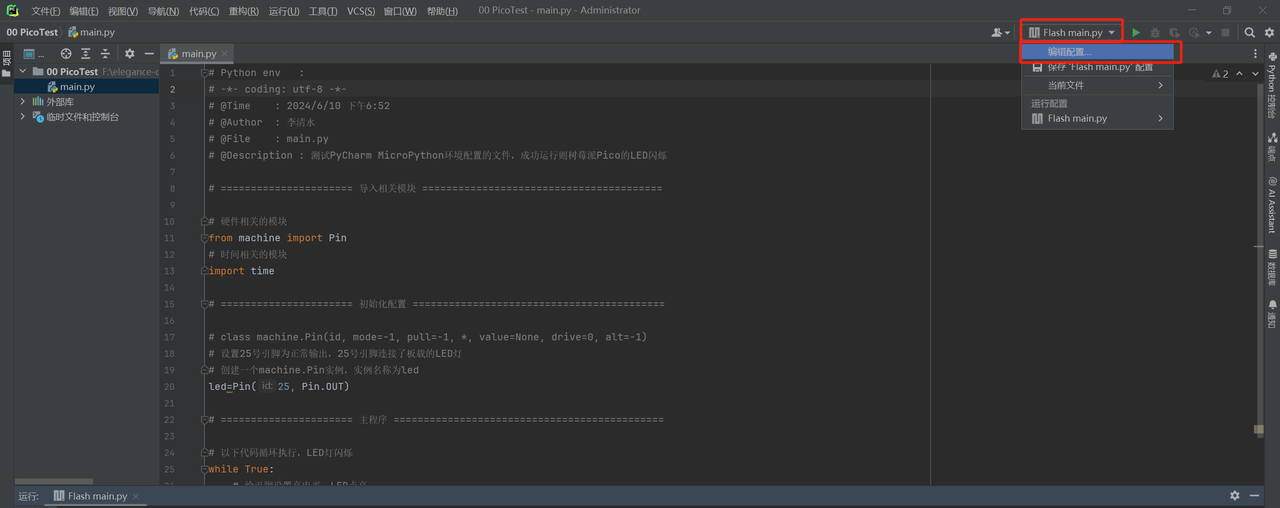
You can also edit the runtime configuration in the upper right corner:
Figure 3.21 Select Run Configuration
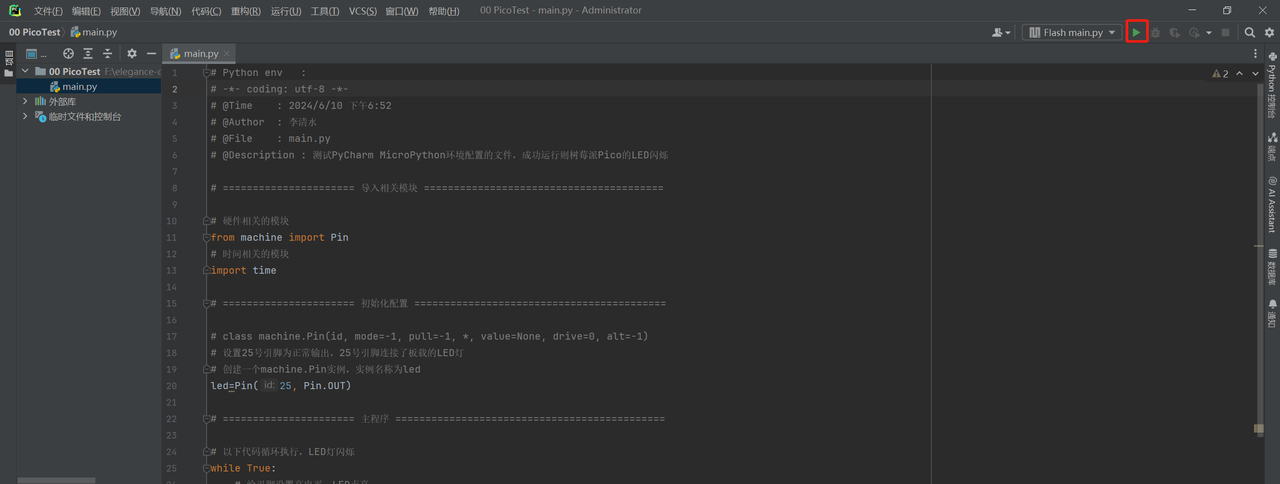
Click the green arrow in the upper right corner to start running the MicroPython program:
Figure 3.22 Click Run Configuration
In the "Run" terminal, you can view the download progress of the program:
Figure 3.23 Terminal Download Progress Chart
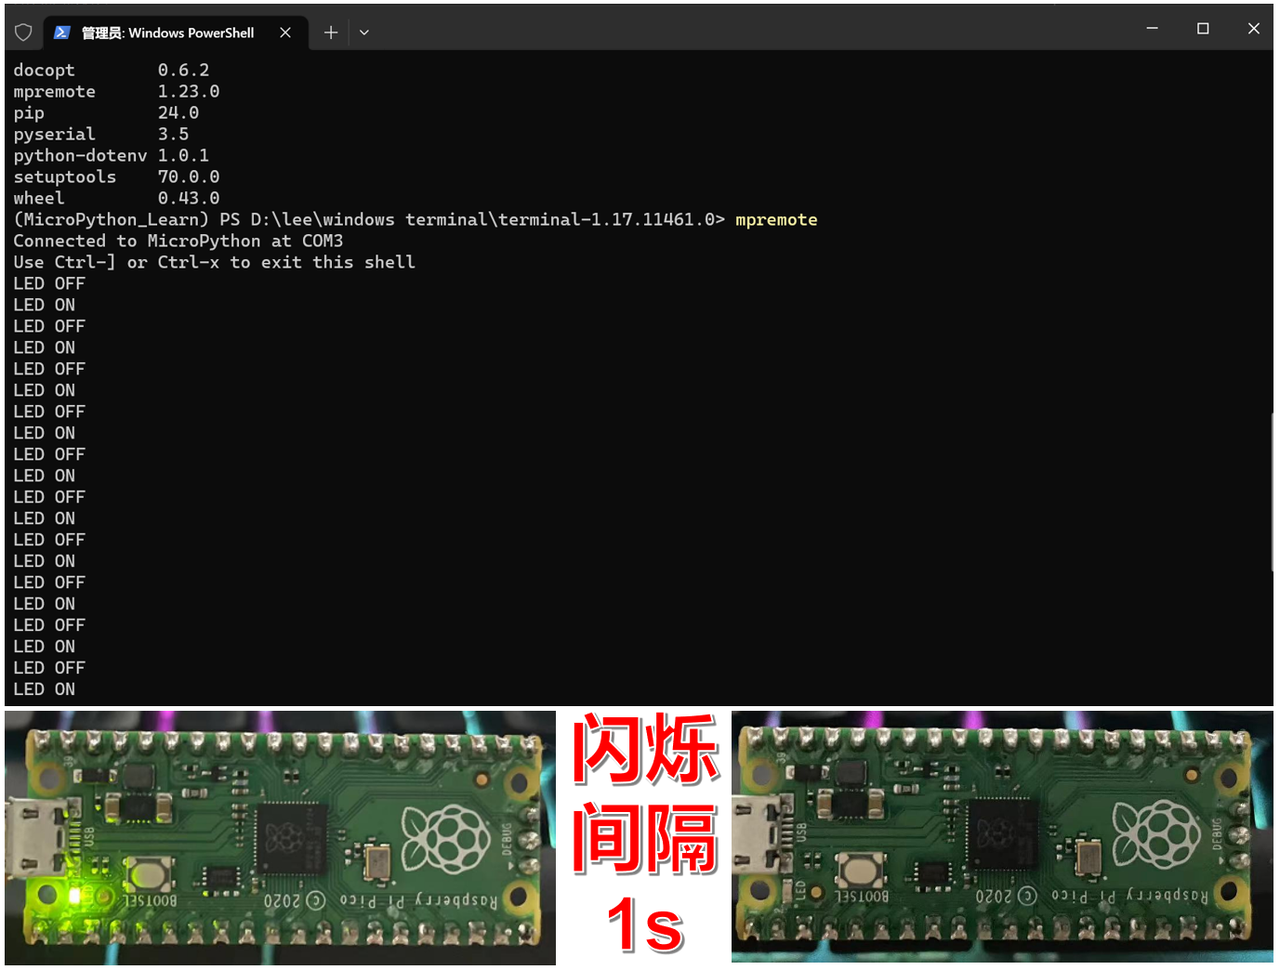
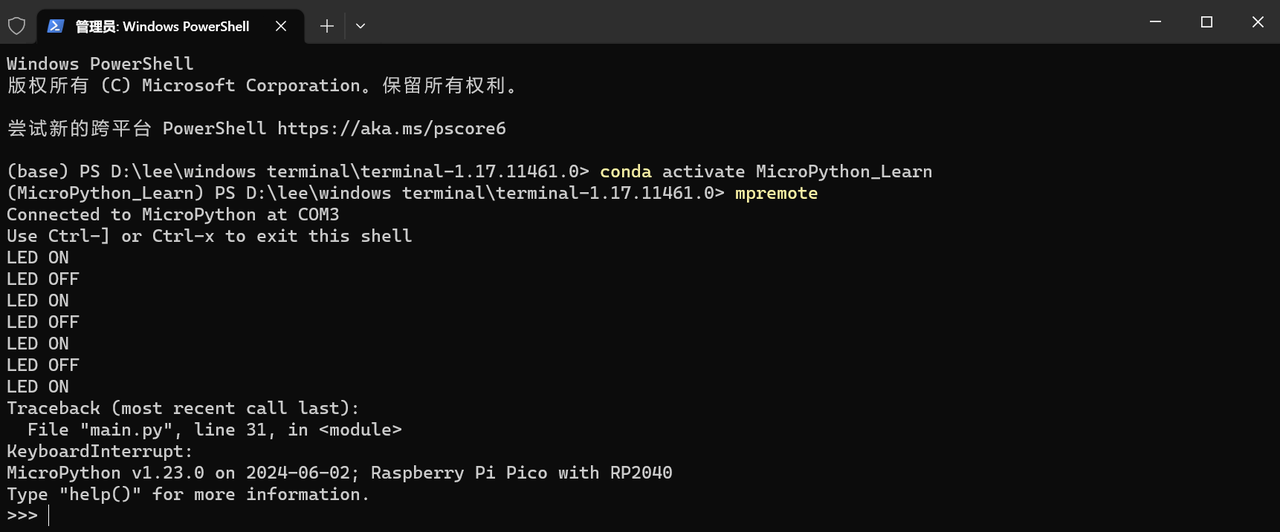
You can observe the green LED on the Pico development board blinking at an interval of 1 second. When you launch mpremote in the command line, you will see the debug messages from the code being continuously output:
Figure 3.24 Demonstration of MicroPython Controlling Raspberry Pi Pico LED Blinking
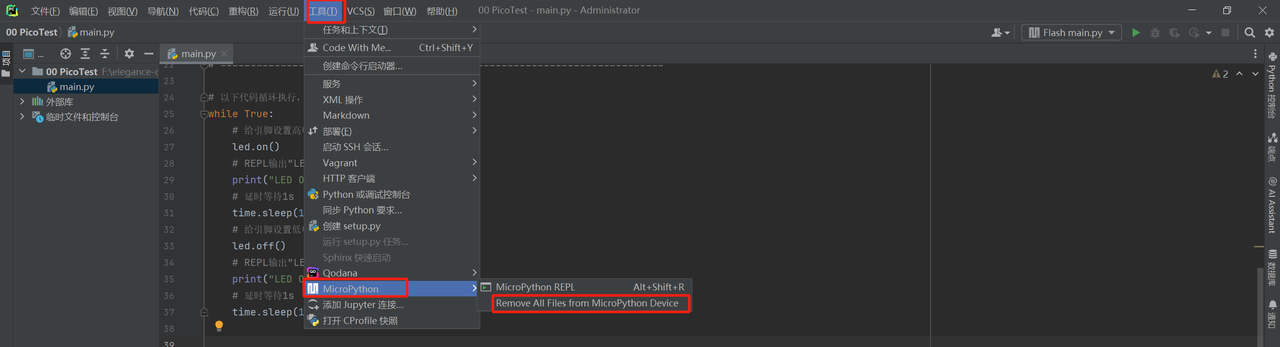
When we don't want the Raspberry Pi Pico development board to run this program, we can click "Remove All Files from MicroPython Device" under the MicroPython option in the tools menu of Pycharm IDE to remove the program flashed in the Pico:
Figure 3.25 File Management Operations for MicroPython Devices
Alternatively, after launching the mpremote remote connection tool in the command line, you can press the ctrl+ c key:
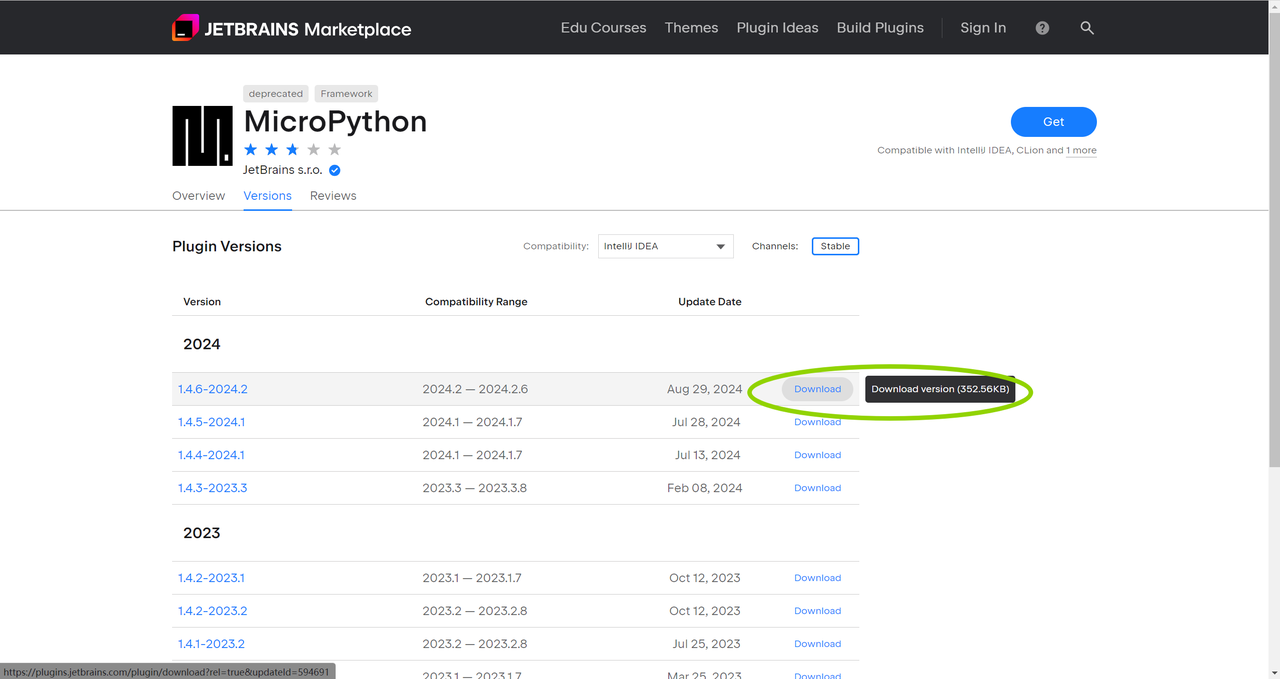
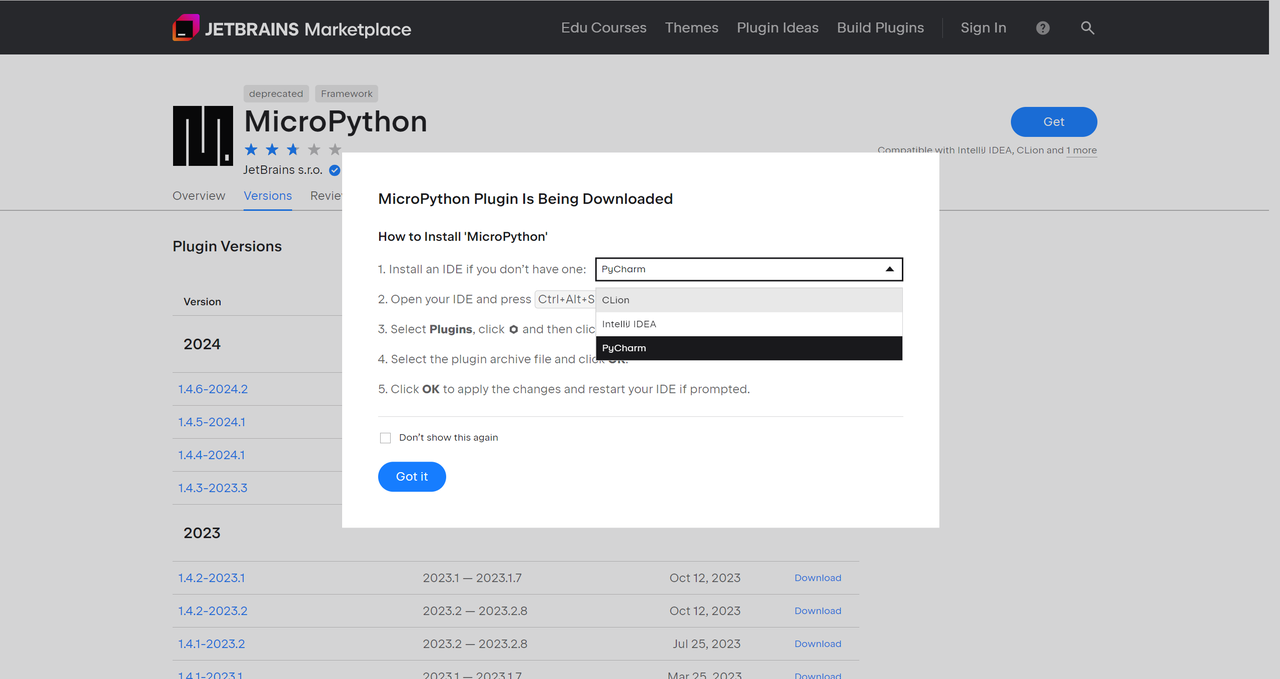
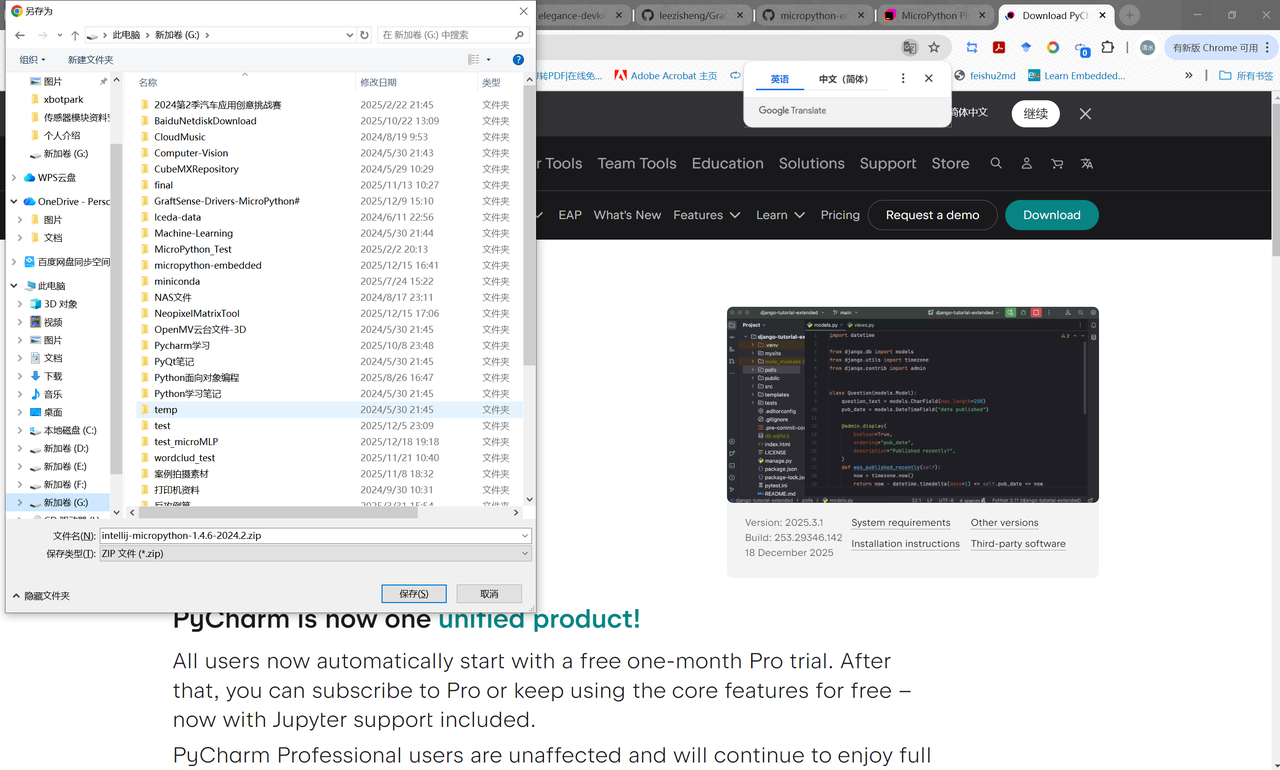
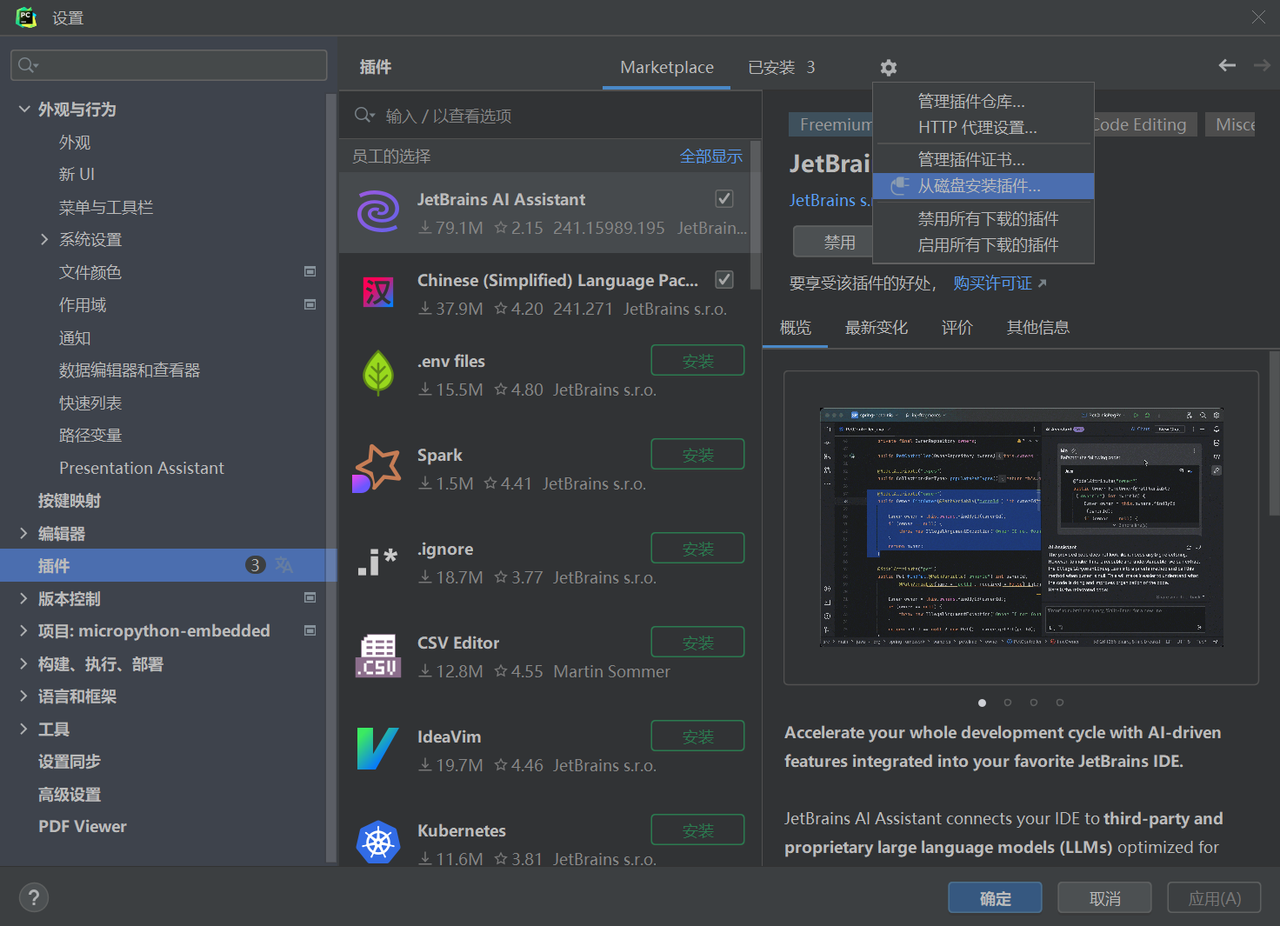
Locate the MicroPython plugin page on JetBrains Marketplace (as shown in Figure 1), select the plugin version compatible with your current PyCharm version (for example, 1.4.6-2024.2 in the figure corresponds to the PyCharm 2024.2 series), then click "Download" to download the plugin's ZIP Compressed Packet (save it to a local folder):
In PyCharm, click on "File" > "Settings" in the top menu bar (or press the shortcut key Ctrl+ Alt+ S):
Select "Plugins" in the left sidebar of the settings interface, click the gear icon in the upper right corner, and then select "Install Plugin from Disk" in the drop-down menu:
In the pop-up file selection window, locate the previously downloaded ZIP package of the MicroPython plugin, select it, and then click "OK":
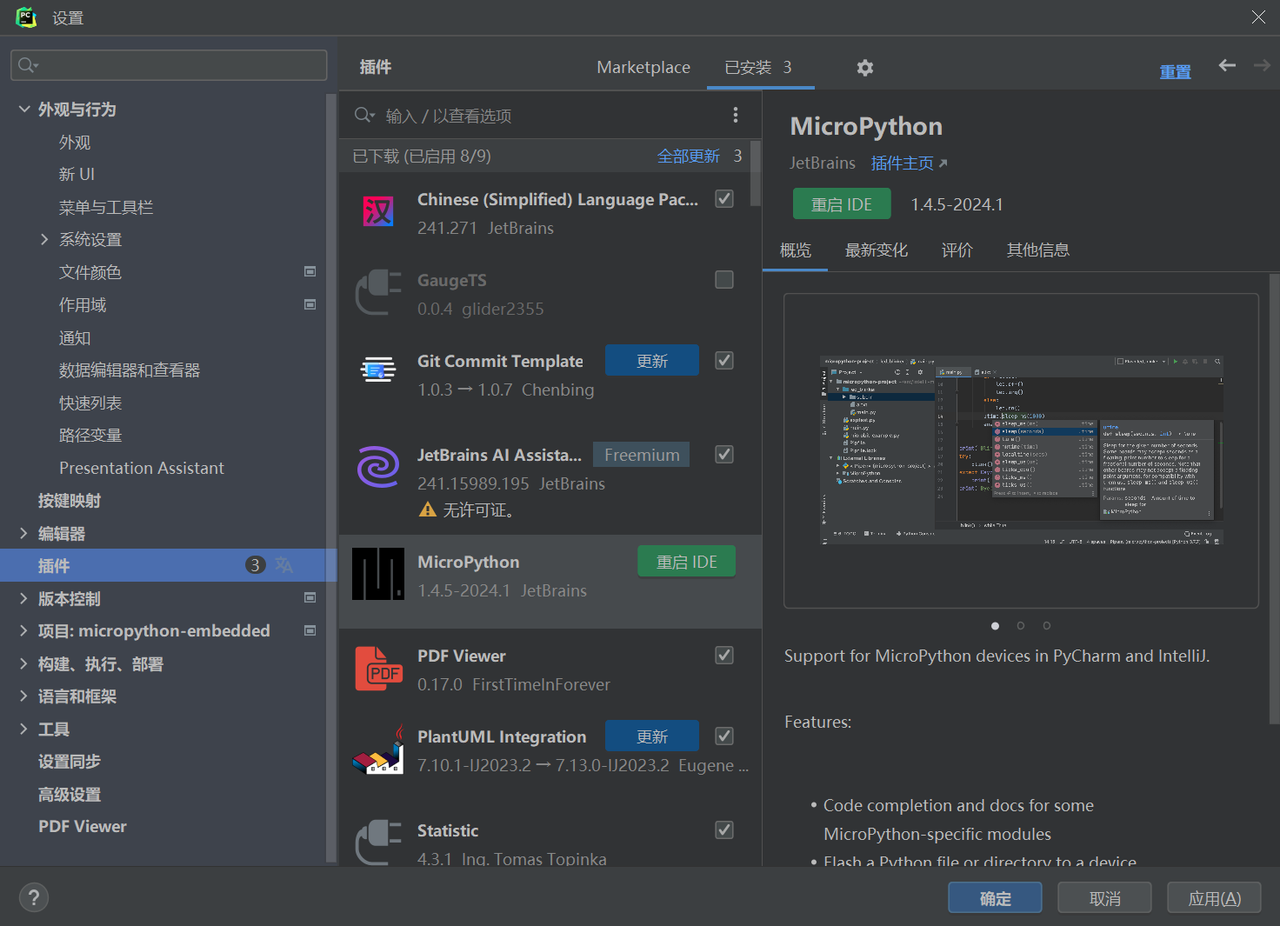
The plugin will be installed automatically. Once the installation is complete, a "Restart IDE" button will appear on the interface (as shown in Figure 8). Click this button to restart PyCharm, and the plugin will take effect.
2. MicroPython Tool Plugin
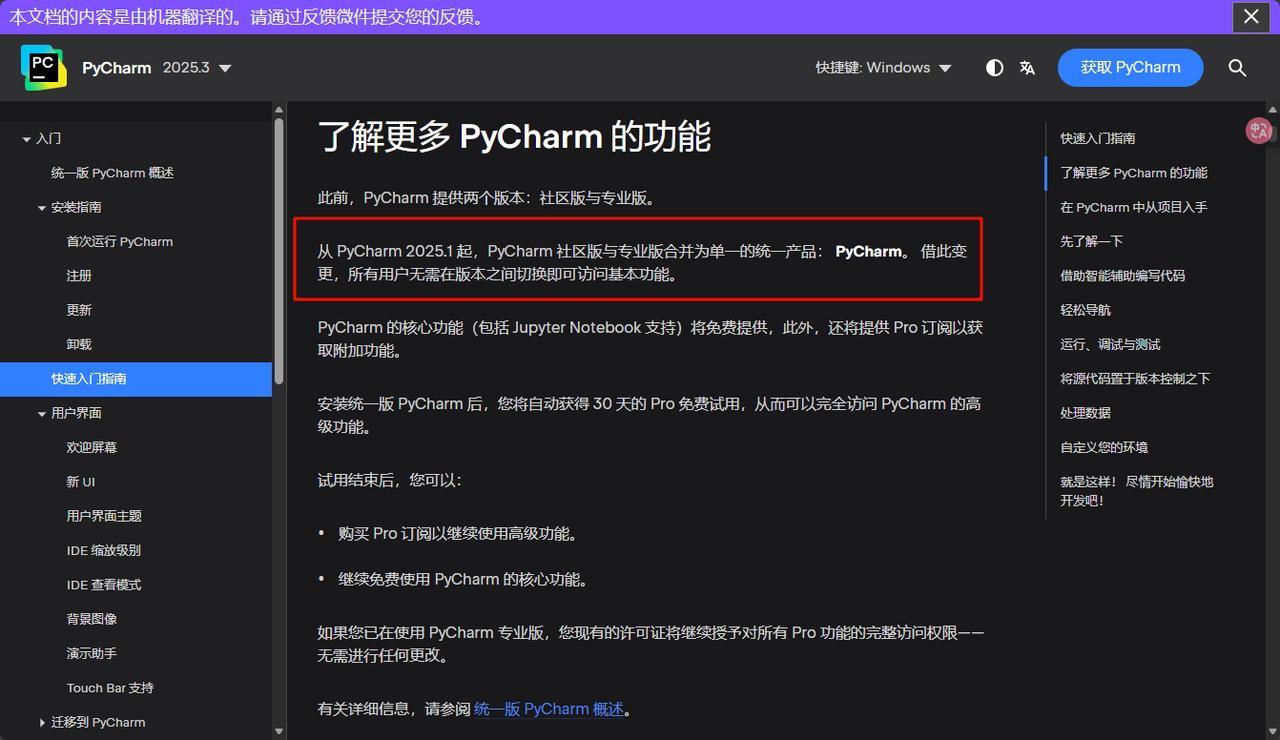
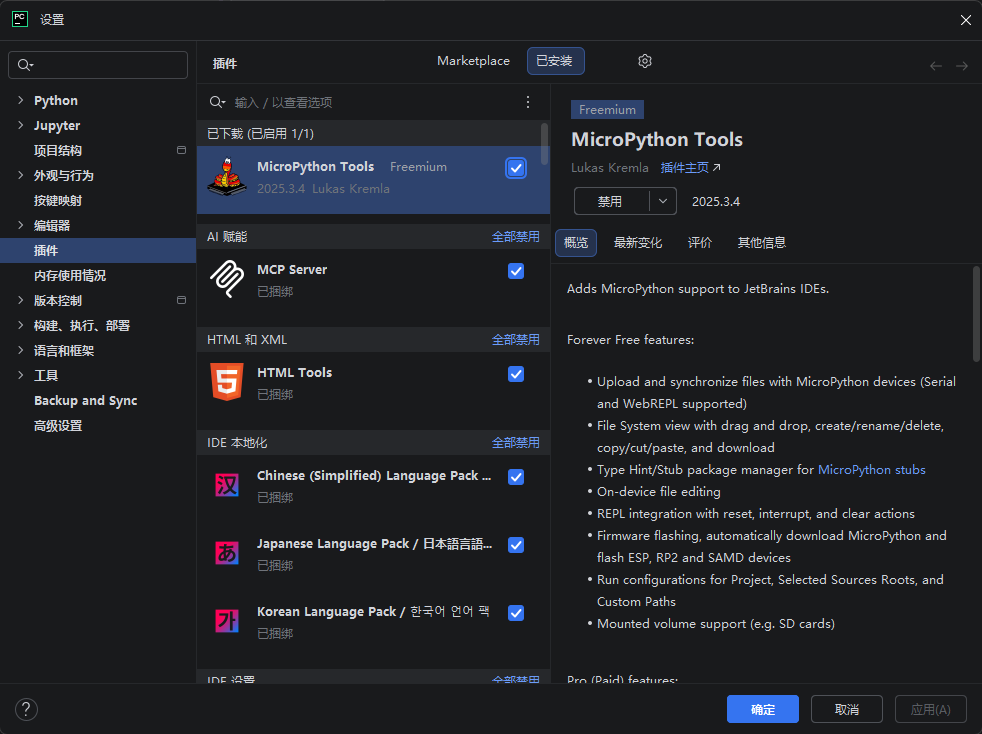
After PyCharm completed the integration of its Community Edition and Professional Edition in 2025, its plugin system underwent lightweight adjustments. The original MicroPython plugin was officially optimized and upgraded to MicroPython Tool (integrating the core functions of the original plugin + new features of PyCharm), becoming the officially recommended MicroPython development plugin adapted to the new version of PyCharm, with more unified functions and stronger compatibility:
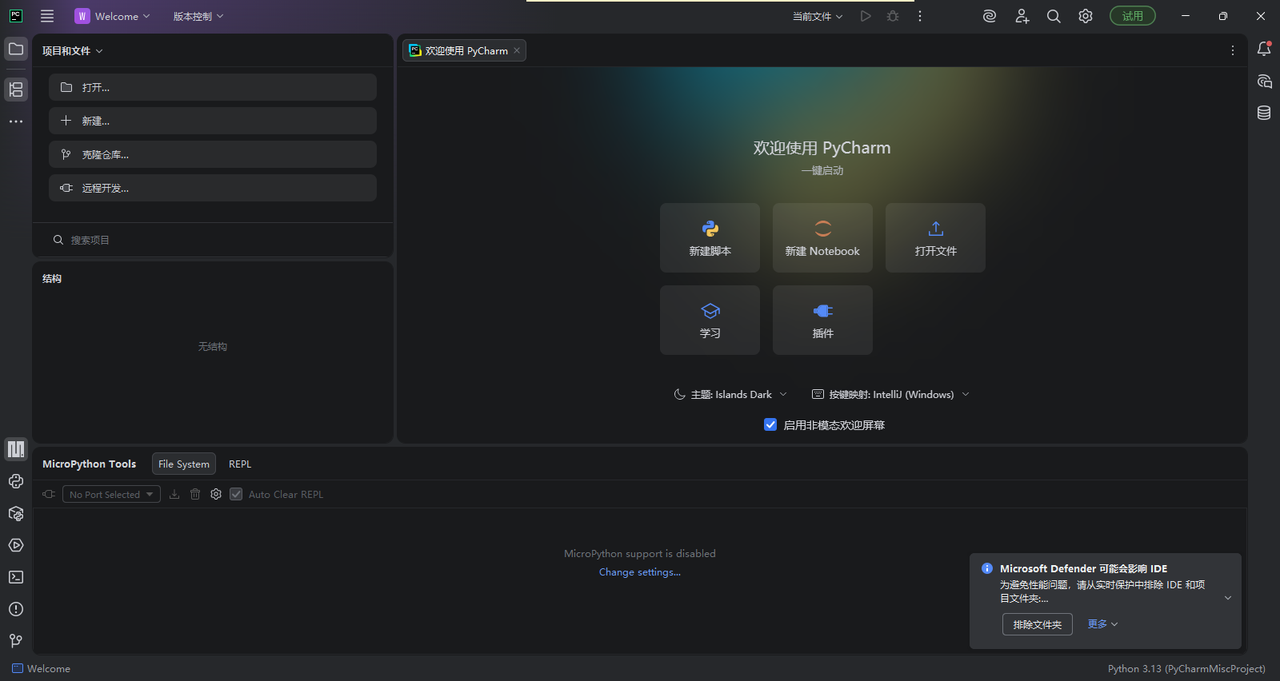
Enter the IDE:
Next, let's proceed with the plugin installation:
Open the integrated PyCharm, click on "File" in the top menu bar → "Settings"(shortcut key Ctrl+ Alt+ S);
Select "Plugins" in the left navigation bar, and you will be directed to PyCharm's Extension Marketplace;
Enter MicroPython Tool in the search box to find the corresponding plugin.
After installation, connect your MicroPython development board (such as ESP32/ESP8266/Raspberry Pi Pico/STM32) to the computer via a USB cable, open the plugin, and select the connection method in the pop-up configuration window:
Serial Port: Select the serial port corresponding to the development board (e. g. COM3), and set the baud rate (default is 115200, which is compatible with most development boards);
WebREPL: If the development board is connected to WiFi, enter the IP address, port (default 23), username and password (if any) of the development board.
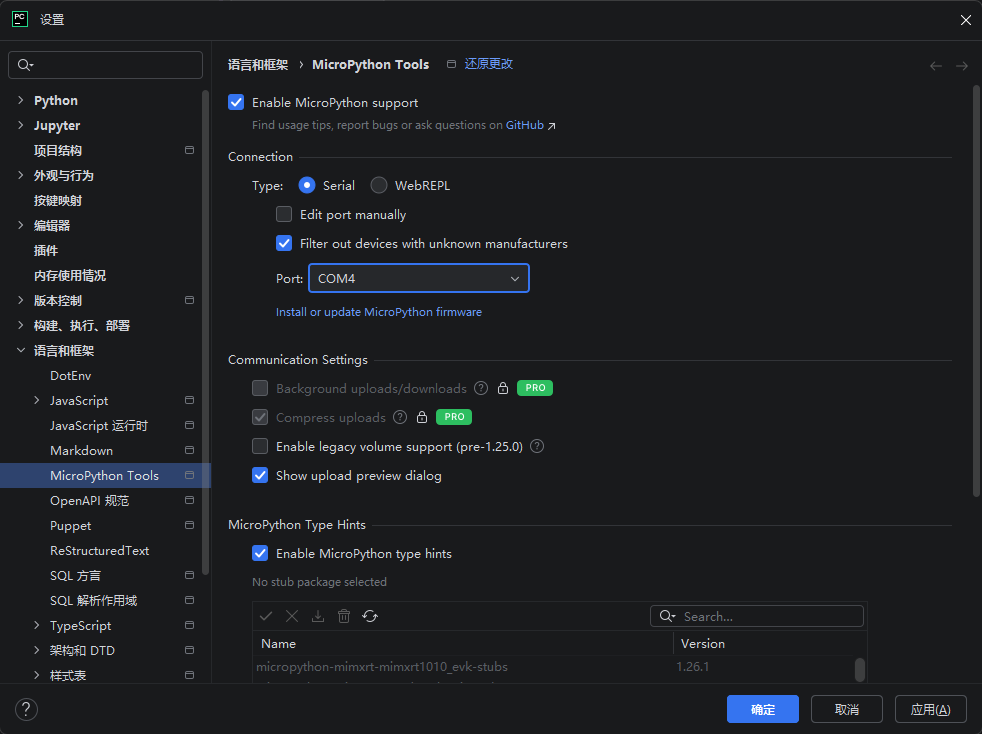
The functions of the other options in this MicroPython Tools settings interface are as follows (explained by section):
Top master switch: Enable MicroPython support. This is the master switch for MicroPython features. Once checked, PyCharm will enable all MicroPython-related functions (such as serial connection, code upload, REPL terminal, etc.); if left unchecked, the plugin will be effectively inactive.
Connection (Connection Settings Area)
Type:Serial / WebREPL
Serial: Select this option to connect the development board via a serial cable (the most common method, e. g. connecting ESP32/Pico via USB);
WebREPL: Select this option to connect via a wireless web interactive terminal (you need to enable the WebREPL function on the development board first, which is suitable for scenarios without a serial cable).
Edit port manually: When checked, you can manually enter the serial port number (by default, available ports are automatically identified; if the automatic identification is inaccurate, you can fill it in manually, for example, change COM4 to COM5).
Filter out devices with unknown manufacturers: Filter out devices marked as "unknown manufacturer" to prevent irrelevant serial port devices on the computer (such as the virtual serial ports of certain USB devices) from being misidentified as development boards, thus reducing interference.
Install or update MicroPython firmware: This is the entry for installing/updating the firmware of the development board. After clicking, you can flash the latest MicroPython system firmware into the development board.
Communication Settings (Communication Settings Area)
Options marked with PRO are features from the original Professional Edition (some features may require a subscription to unlock now that PyCharm has merged the editions):
Background uploads and downloads: When enabled, code uploads and downloads will run in the background without interfering with your concurrent coding work.
Compress uploads: When enabled, code files will be compressed before uploading, which can speed up the upload of large files.
Enable legacy volume support (pre-1.25.0): Compatible with the storage function of old MicroPython firmware versions prior to 1.25.0 (only check this option if the firmware of your development board is a very old version).
Show upload preview dialog: Before uploading the code, a file preview dialog will pop up to display the list of files to be uploaded. You can confirm the list before proceeding with the upload to avoid uploading the wrong files.
MicroPython Type Hints (Type Hints Area)
Enable MicroPython type hints: When enabled, PyCharm will provide MicroPython-specific code completion and syntax checking (for example, when writing machine. Pin, parameters will be automatically prompted).
No stub package selected + the stub packages below: A "stub package" is a file that stores type information for the MicroPython API. Selecting the corresponding stub package (such as the one in the screenshot microPython-mimxrt. .. stubs) will make code hints more accurate (adapted to the API of a specific development board).
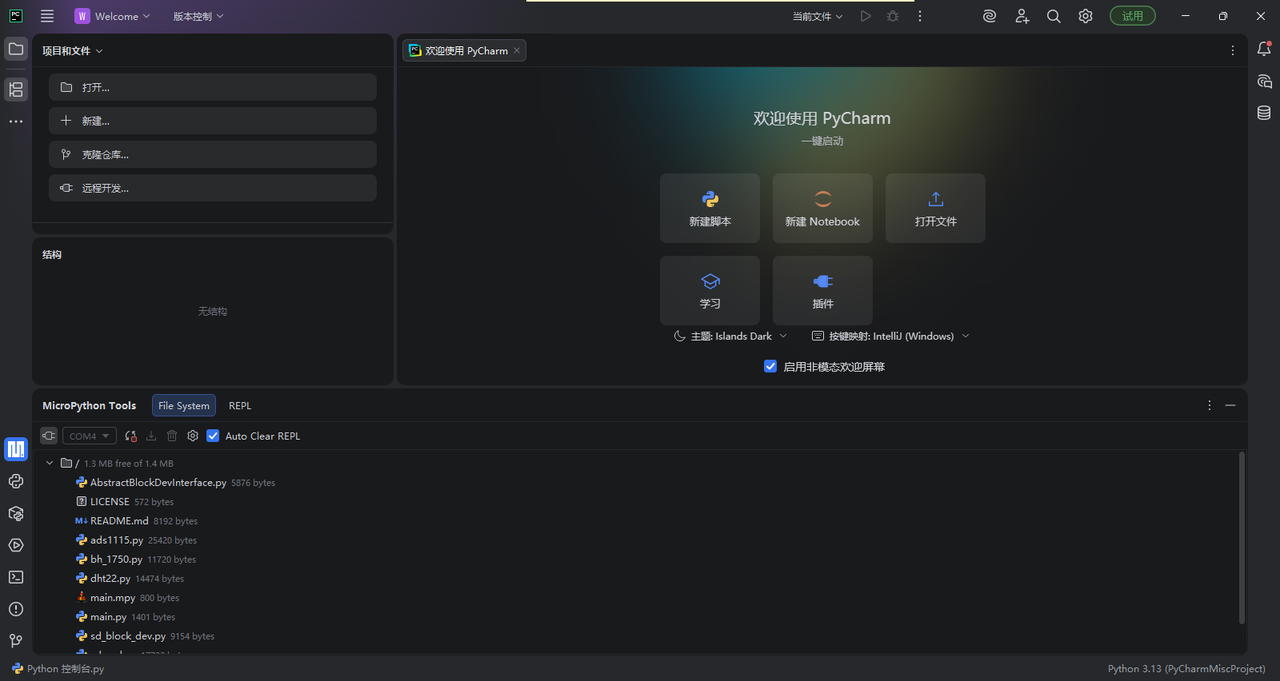
In the File System panel below, you will find the "management interface" for the internal files of the development board, which allows you to directly view and operate all files stored in the connected development board (for example, the main. py, dht22. py shown in the figure are the code files on the development board):
View Files: The panel will list all current files/folders (including size and name) of the development board, and the refresh button (circular arrow icon) can synchronize the latest file list;
Upload Files: Click the "Upload Icon"(usually an upward arrow) to transfer files/folders from your local PyCharm environment to the development board (for example, transfer the completed main. py to the development board for execution);
Download File: Select a specific file on the development board, then click the "download icon"(downward arrow) to save the file from the development board locally (e. g., to back up the code on the development board);
Delete Files :Select a file and click the "Trash Can Icon" to delete redundant files in the development board (Note: Deleting the wrong file will cause code loss, please operate with caution);
Other operations :Right-clicking on a file also allows you to perform basic file management tasks such as renaming and creating a new folder.
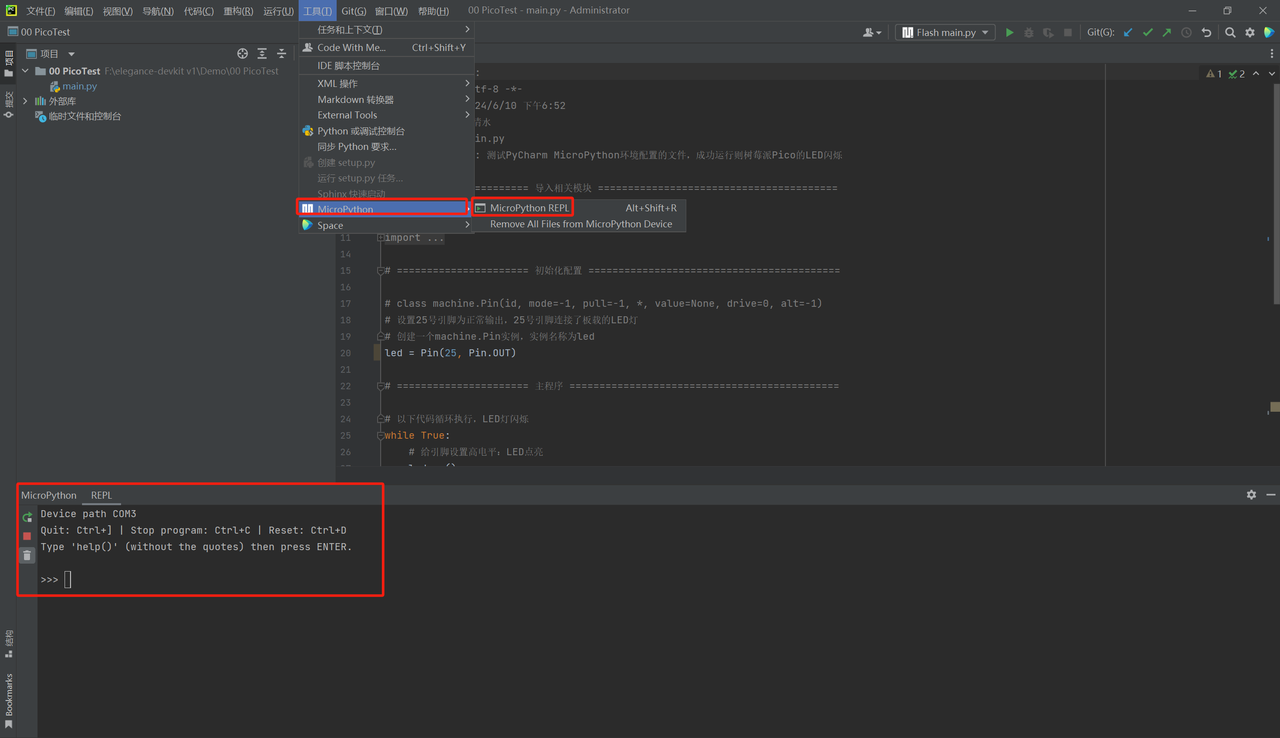
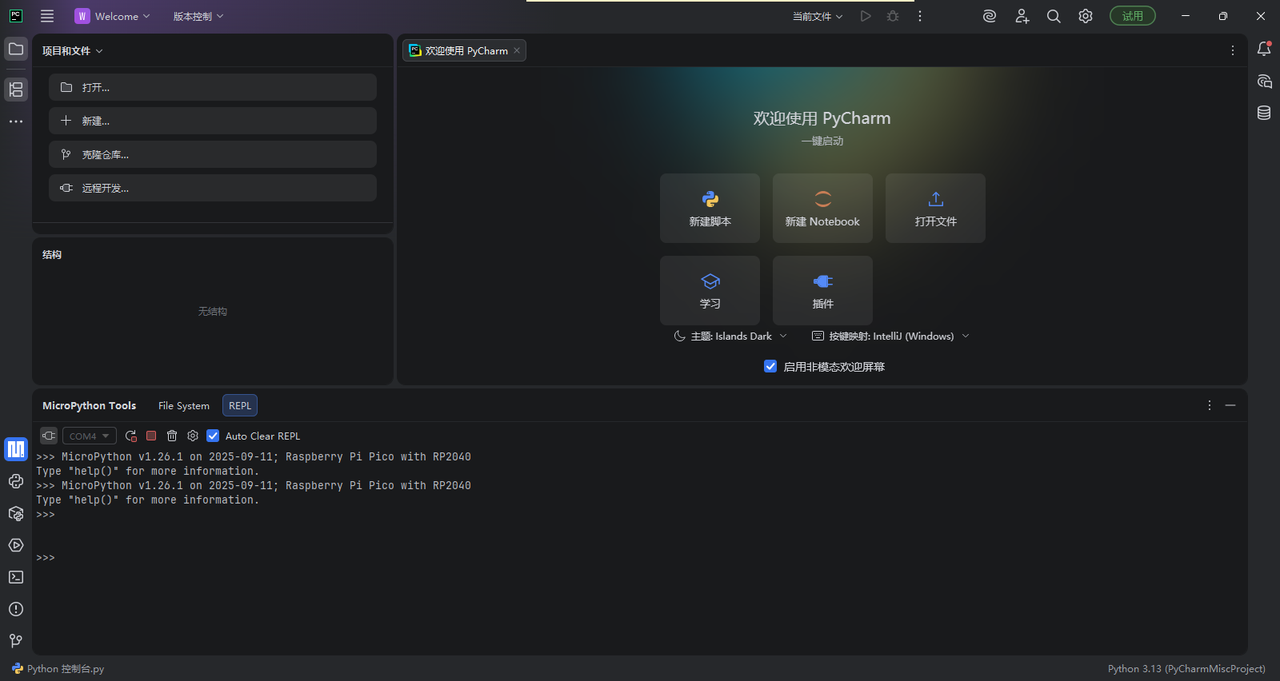
REPL is the "real-time command line" for the development board. Once the connection is established, it will display the MicroPython version of the development board (as shown in the figure MicroPython v1.26.1 on Raspberry Pi Pico), which allows you to directly input code and execute it immediately. It is a tool for quickly debugging hardware and testing code snippets.
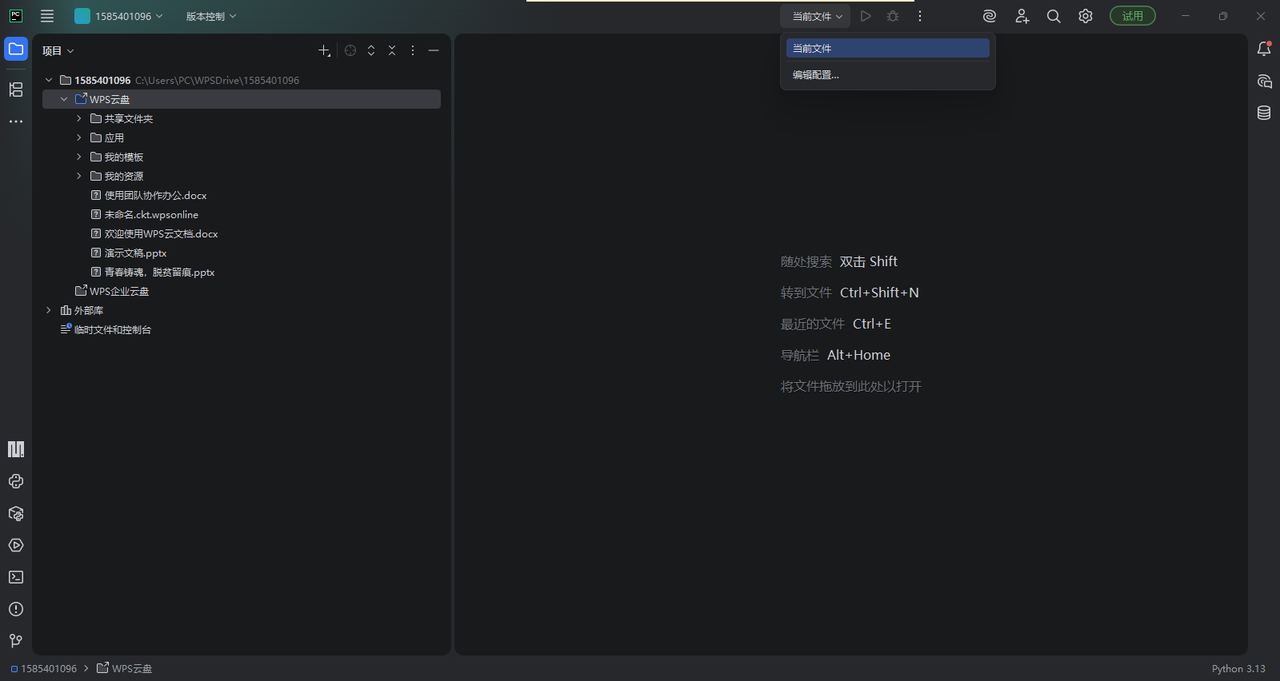
The "Current File" menu at the top serves as the entry to the "Run/Debug Configurations", and the core configuration for subsequent file flashing is initiated from here.
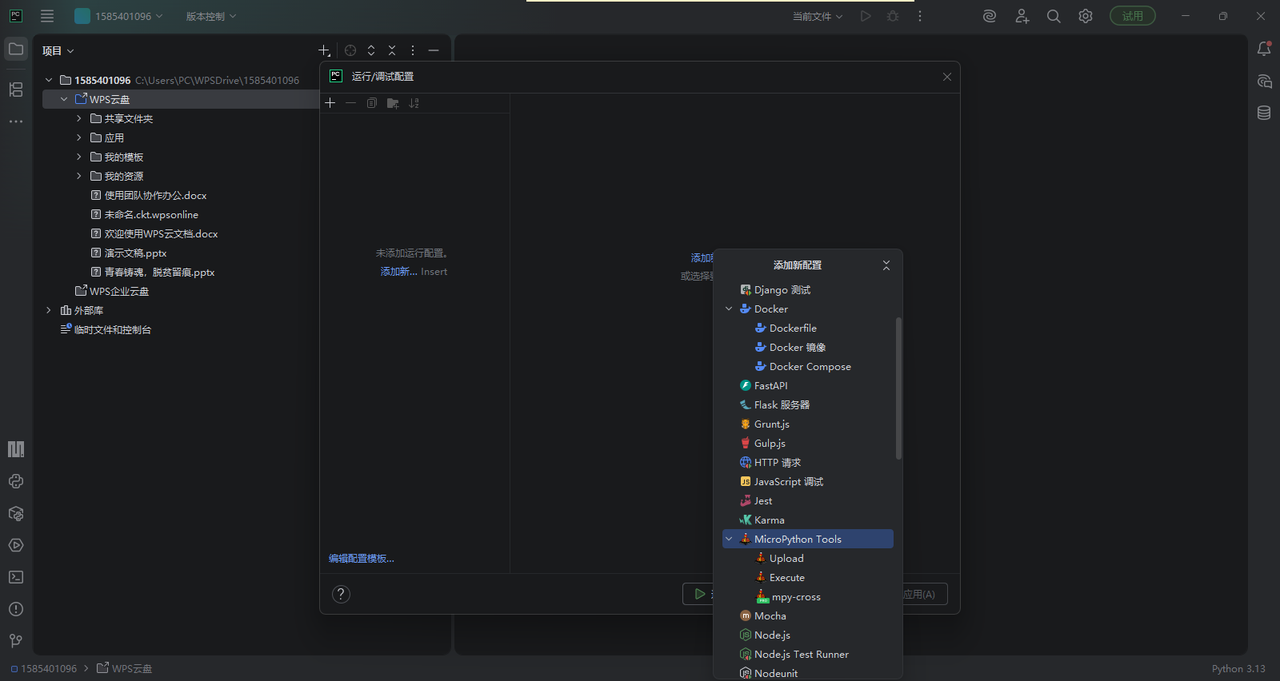
This is the creation interface for "Run/Debug Configurations", which is a prerequisite operation before file burning:
Click "Current File" at the top → select "Edit Configurations", and the "Run/Debug Configurations" window will pop up;
Click the "+(Add)" button in the upper left corner of the window → select "MicroPython Tools", and 3 function options will appear:
Upload: Flash (upload) files/projects to the development board (this is the "flashing" function you need);
Execute: After uploading the file, directly execute the file on the development board;
Compile: First compile the Python code into MicroPython bytecode (in. mpy format, which saves more development board space and runs faster), then upload it.
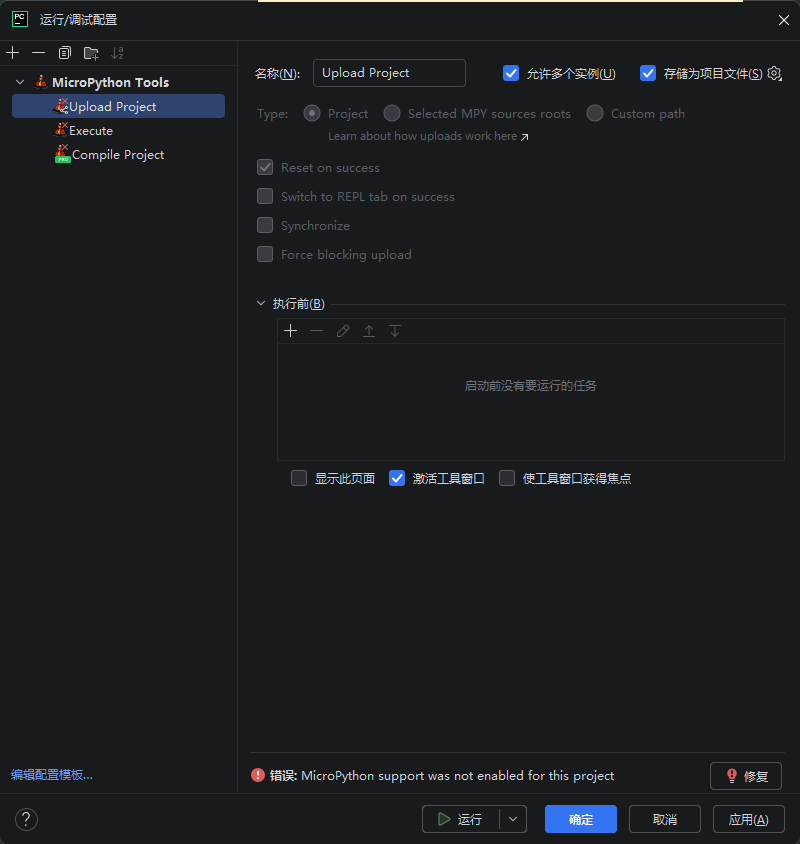
This is the core configuration interface for single-file / multi-file programming, and you can perform programming once the configuration is completed:
Select the programming range (Type option):
Project: Burn all files of the entire project (suitable for multi-file projects);
Selected MPY sources roots: Only flash the selected files/folders (suitable for single files or partial files);
Custom path: Customize the path of the file to be programmed.
Burning Auxiliary Options:
Reset on success: The development board will automatically restart after successful programming (to run the code immediately);
Switch to REPL tab on success: Automatically switch to the REPL terminal after the flashing is completed to facilitate immediate code debugging.
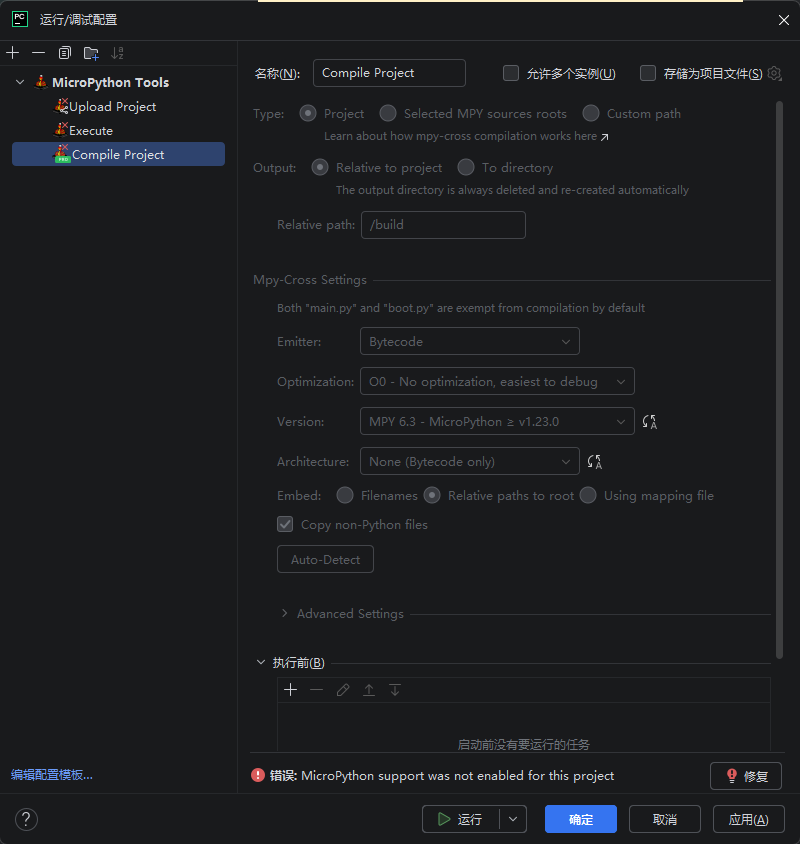
This is the configuration interface for "Compile Project"(it is not direct flashing, but an optimization step for flashing):
For Type, select Project to compile all files in the entire project (multi-file); select Selected MPY to compile only the part of files you specified;
The "MicroPython support was not enabled for this project" at the bottom is the critical error: you must first enable MicroPython support for the current project, otherwise you will not be able to configure flashing / compile.