Embedded 101: MicroPython Packages Installation & Common Pitfalls
It explains MicroPython mip package manager, micropython-lib, installation methods via network or mpremote, and frozen bytecode optimization.
COMPONENTS
PROJECT DESCRIPTION
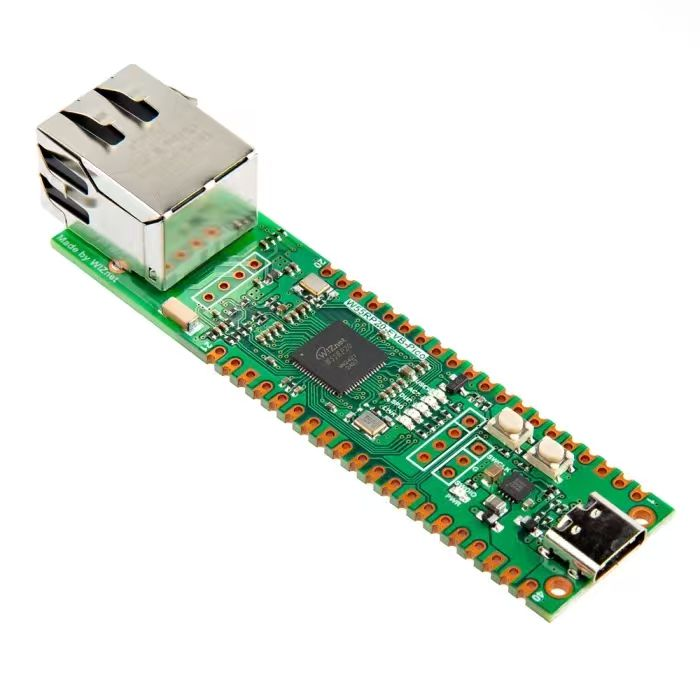
【Preliminary Note】The original hardware example in this article was written based on the RP2040. The actual hardware used in this hands-on demonstration features the W55RP20 as the main controller chip. The circuit logic and UF2 flashing operation principles are universally applicable, with only the main controller model differing. The original chip model mentioned in the circuit descriptions below is provided for reference purposes only.
mip (mip installs packages) is similar in concept to Python 's pip tool, but it does not use the PyPI index; by default, it uses micropython-lib as its index, while also supporting installation of packages from third-party sites (including GitHub and GitLab). When downloading from micropython-lib, mip will automatically fetch. mpy files.This module can install packages from micropython-lib and third-party sites (including GitHub).
1. Introduction to the micropython-lib Library Modules
micropython-lib is a community-driven library collection that contains numerous modules for MicroPython, which can be used to extend the functionality of MicroPython. This library collection includes a large number of standard library modules, third-party modules, as well as some specific MicroPython modules.
micropython-lib The address link is as follows:
https://github.com/micropython/micropython-lib
1.1 MicroPython Specific Modules
aioespnow: An asynchronous ESP-NOW library for MicroPython, used for wireless communication on ESP32 devices.
aiorepl: Provides support for asynchronous REPL (Read-Eval-Print Loop), enabling interactive programming in the MicroPython environment.
Bluetooth: The Bluetooth module of MicroPython, used for communicating with Bluetooth devices.
bundles: A collection of software packages and modules that include MicroPython.
drivers: Contains driver programs for communicating with hardware devices.
espflash: A tool for flash operations on ESP32 devices.
lora: A library for LoRa (Long Range) wireless communication, suitable for low-power, long-distance data transmission.
mip-cmdline: A MIP (MicroPython Package) tool for command-line operations.
mip: A package management tool for MicroPython, similar to pip but designed for the MicroPython environment.
net: A network module that provides network connection and operation functions.
senml: A library for processing SENML (Sensor Markup Language) data.
uaiohttpclient: An asynchronous HTTP Client for MicroPython, used to handle HTTP requests.
ucontextlib: A context management tool for MicroPython, providing functionality similar to contextlib in the Python standard library.
udnspkt: A tool for processing DNS data packets.
umqtt. robust: An MQTT Client library for MicroPython that supports the MQTT protocol and provides a robust connection mechanism.
umqtt. simple: A simple MQTT Client library for MicroPython, designed for basic MQTT functionalities.
upysh: A library that provides Unix-like shell command support.
urequests: An HTTP request library for MicroPython, similar to the requests module in Python.
urllib. urequest: A library for handling HTTP requests, similar to the urllib module in Python.
usb: A library that provides support for USB devices.
xmltok: A library for processing XML data.
1.2 Python Standard Library
aiohttp: Asynchronous HTTP Client/Server library for handling HTTP requests and responses.
cbor2: A library for processing data in the CBOR (Concise Binary Object Representation) format.
iperf3: A tool library for network bandwidth testing.
PyJWT: A library for generating and verifying JSON Web Tokens (JWT).
requests: An HTTP request library for Python, used to handle HTTP requests and responses.
1.3 Python Standard Library Modules
future: Allows the use of features and syntax from future versions in Python.
abc: Provides support for abstract base classes.
argparse: A library for parsing command-line arguments.
base64: A tool for performing Base64 encoding and decoding.
binascii: Provides functionality for converting between binary data and ASCII encoding.
bisect: A tool for handling insertion points in ordered sequences.
cmd: A tool for command-line interface processing.
collections-defaultdict: A utility that provides the defaultdict type, which belongs to Python's collections module.
collections: provides special data structures, such as namedtuple, deque, Counter and more.
contextlib: A module that provides utilities for context managers.
copy: A tool that provides object copying functionality.
curses. ascii: A utility that provides ASCII character processing functions, commonly used in terminal interfaces.
datetime: A tool that provides date and time processing functions.
errno: Provides definitions for error codes.
fnmatch: A tool that provides filename matching functionality.
functools: Provides tools for higher-order functions and operations on callable objects.
gzip: Provides support for compressed files in the GNU zip format.
hashlib-core: A utility that provides core hashing algorithm capabilities.
hashlib-sha224: A tool that provides support for the SHA-224 hash algorithm.
hashlib-sha256: A tool that provides support for the SHA-256 hash algorithm.
hashlib-sha384: A tool that provides support for the SHA-384 hash algorithm.
hashlib-sha512: A tool that provides support for the SHA-512 hash algorithm.
hashlib: A tool that provides hash algorithms such as SHA and MD5.
heapq: A tool that provides heap sort and priority queue functionality.
hmac: Provides the function of key-based Hash-based Message Authentication Code.
html: A tool for HTML encoding and decoding.
inspect: Provides utilities for inspecting objects.
io: Provides tools for handling streams, such as files, memory buffers, etc.
itertools: Provides high-performance iterator functions, such as combinations, permutations, etc.
keyword: Provides a list of Python keywords.
locale: A tool for Localization settings.
logging: A tool that provides logging functionality.
operator: A utility that provides operator functions.
os-path: Provides support for path operations, and is usually used as an alternative module to os. path.
os: A tool that provides operating system functions, such as file operations, process management, etc.
pickle: A tool that provides object serialization and deserialization capabilities.
pkg_resources: Provides access to Python packages and resources.
pkgutil: Provides utilities for Python packages and modules.
pprint: Provides a pretty-printing tool for outputting data structures in a formatted, readable manner.
quopri: A tool for quoted-printable encoding and decoding.
random: Provides utilities for generating random numbers.
shutil: Provides advanced utilities for file and directory operations.
ssl: Provides support for SSL/TLS for secure network communication.
stat: A tool for displaying file status and file permissions.
string: A tool that provides string processing capabilities.
struct: A tool that provides byte structure packing and unpacking capabilities.
tarfile-write: Provides write operation support for tar files.
tarfile: Provides support for reading and writing tar files.
tempfile: Provides the function of creating temporary files and directories.
textwrap: A tool that provides text line-wrapping and formatting capabilities.
threading: A module that provides tools for thread support.
time: A utility that provides time-related operations.
traceback: Provides tools for tracing exceptions and errors.
types: Provides definitions and operation functions for Python types.
unittest-discover: A tool that provides automatic test discovery, typically used for unit tests.
unittest: A tool that provides a unit test framework.
uu: A tool for uu encoding and decoding.
venv: A tool for creating virtual environments.
warnings: Provides the functionality to issue warnings.
zlib: A tool that provides data compression and decompression functions.
2. Install packages and modules remotely
2.1 Basic Methods for Installing mip
For MicroPython development boards with local network capabilities, mip is typically installed via the remote method (mpremote). The mpremote command-line tool provides a set of integrated utility functions that enable remote interaction and automation with MicroPython devices over a serial connection, and mpremote can be installed and used via pip.
By default, mip installs packages in the /lib directory. If you specify the target option, packages will be installed to the specified directory. Note that you need to add this directory to the sys. path variable (using sys. path. append ("third-party")), otherwise the import statement will fail to locate the package.
In addition to downloading packages from the micropython-lib index, mip can also install third-party libraries. The simplest way to do this is to download the file directly:
When installing files directly, the target parameter is still supported to set the target path, but mpy and version will be ignored. URLs can also start with github: or gitlab: as a simple way to point to content hosted on GitHub or GitLab:
Here, we demonstrate how to download a random number generation module. First, we need to connect the development board to the network. For specific setup and the required development board, please refer to the content in the Fengya One Board Tutorial - Ethernet (ETH) section.
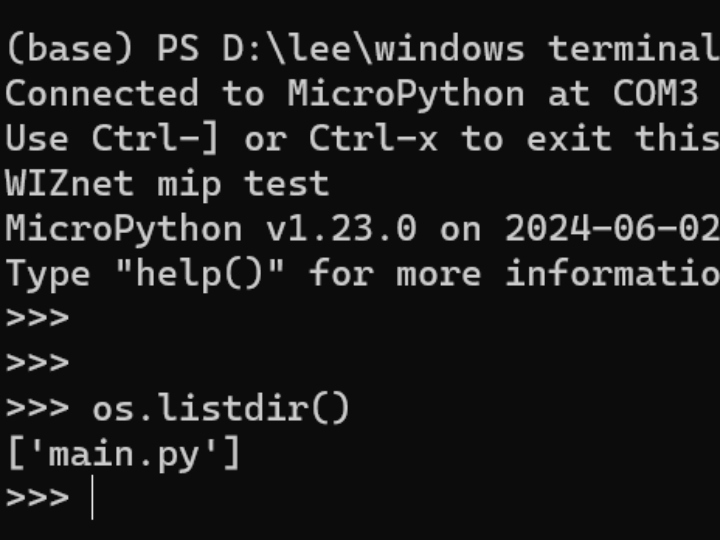
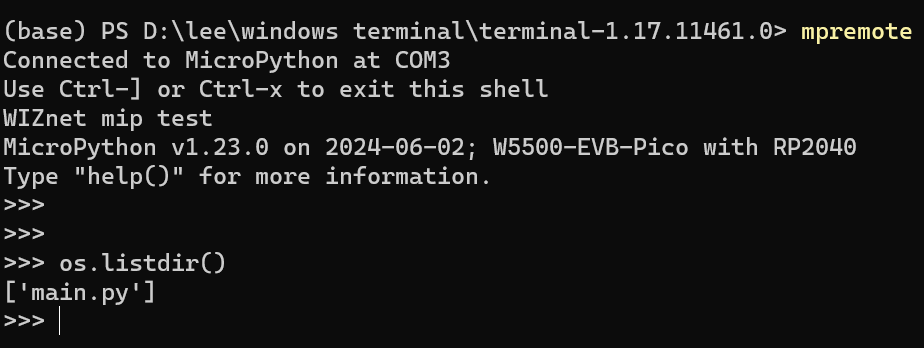
Burn the code and connect to Raspberry Pi Pico via the mpremote remote tool:
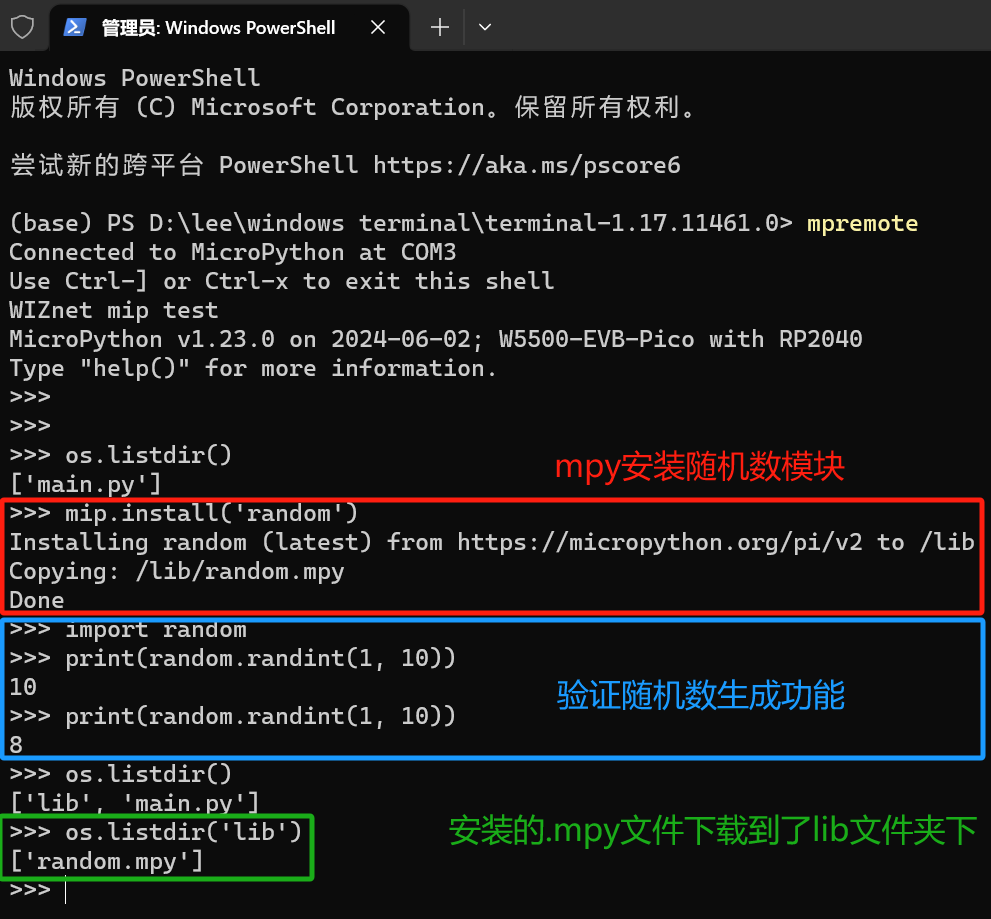
Here, we use os. listdir () to list all files and subdirectories in the root directory, and you can see that there is currently only the main. py file.
Then we use the mip. install ('random') command to install the random module, and mip mip will download and install the https://micropython.org/pi/v2) module from MicroPython's official package repository (random module.
After the installation of the random random number generation module is complete, three prompt messages will be generated as follows:
Installing random (latest) from https://micropython.org/pi/v2 to /lib
This is the output information during the installation process, indicating that the random module is being downloaded and installed from the specified URL
The installation target path is /lib, which is a standard library directory on MicroPython devices
Copying: /lib/random.mpy
This line of output indicates that the bytecode file random module random. mpy has been copied to the /lib directory
Done
This line of output indicates that random module has been successfully installed
Next, we import the just-installed random module, use the random module's randint () function to generate a random integer between 1 and 10 and print it out to test whether it works properly. We also use the os. listdir () function to list all files and directories in the current directory, and you can see that there is only one /lib directory, which contains only the random. mpy file — this is the random module we just installed.
We can also specify to install the source code version (. py file). First, we can use the os. remove ('/lib/random. mpy') command to delete the random. mpy file we just installed, then use the following command to install the source code version from micropython-lib:
Then, use the os. remove ('. /lib/random. mpy') statement to delete the previously installed random. mpy file to avoid import conflicts.
As you can see, we need to import the /lib directory random. py module located under it. At this point, we use the sys. path. append ('/lib') statement to add the /lib directory to Python's system path. This allows Python to include the /lib directory when searching for modules, so that we can directly use import random to import this module.
3. Install packages and modules manually
In addition to using mip for network-based installation, for MicroPython development boards that do not support local network functionality, you can also install packages manually via the mpremote tool, with the option to pull packages from GitHub or upload them from a local source. The mpremote tool not only incorporates the same features as mip, but also allows you to use it from a host PC to install packages to locally connected devices (e. g. via USB or UART):
You can also install packages (in. py or. mpy format) by manually copying files to the device: simply place the required modules into the folder containing the main. py file, then flash all the modules to the Raspberry Pi Pico.
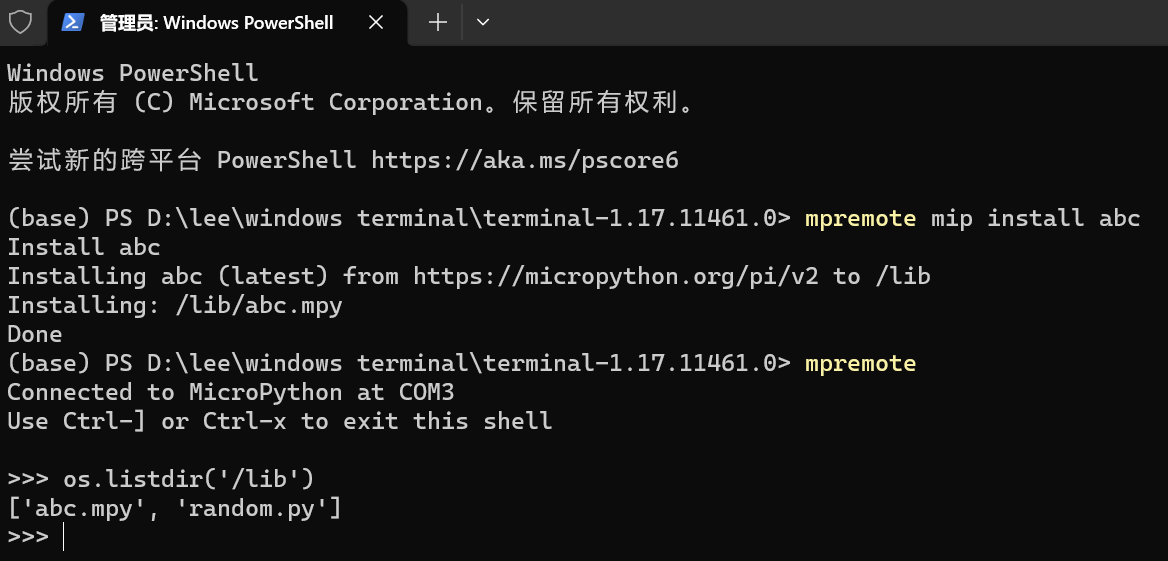
As you can see, we use the mpremote mip install abc command to download the abc abstract base class module to the Raspberry Pi Pico.
4. Cross-installation Packages and Freezing
For low-memory devices or large applications, it may be more advantageous to run bytecode from flash memory. This can be achieved by "freezing" the bytecode into the MicroPython firmware, which is then flashed onto the device. Runtime performance remains identical (though import speed is faster), yet this approach frees up a significant amount of RAM for program use.
Bytecode freezing is a process that addresses all the aforementioned issues:
The source code is precompiled into bytecode and stored as-is.
Bytecode is stored in ROM rather than RAM.
A freeze package does not require a file system.
Using frozen bytecode requires building an executable (firmware) from C source code for a given MicroPython port. Therefore, the process is as follows:
Set up the toolchain and build the port according to the instructions for the specific port. For example, for the ESP8266 port, refer to ports/esp8266/README. md and follow the instructions therein. Before proceeding to the next step, make sure you can build the port and successfully deploy the generated executable/firmware.
Build the MicroPython Unix port and ensure that it is in your PATH and that you can execute micropython.
Switch to the port directory (e. g. ports/esp8266/ESP8266).
Run. This step will clear all previous modules installed for freezing (therefore, you need to skip this step if you want to add additional modules instead of starting from scratch). Execute the command: make clean-frozen
Run to install the packages to be frozen. Execute the command: micropython -m upip install -p modules <packages>. ..