Wiznet makers

ruilixin6

Published August 03, 2026 ©

61 UCC

0 VAR

0 Contests

0 Followers

0 Following

5-Way Button Deep Dive: Pico Detection & MicroPython Code

This tutorial introduces 5-way joystick and implements multi-direction key detection with MicroPython GPIO interrupts.

COMPONENTS
PROJECT DESCRIPTION

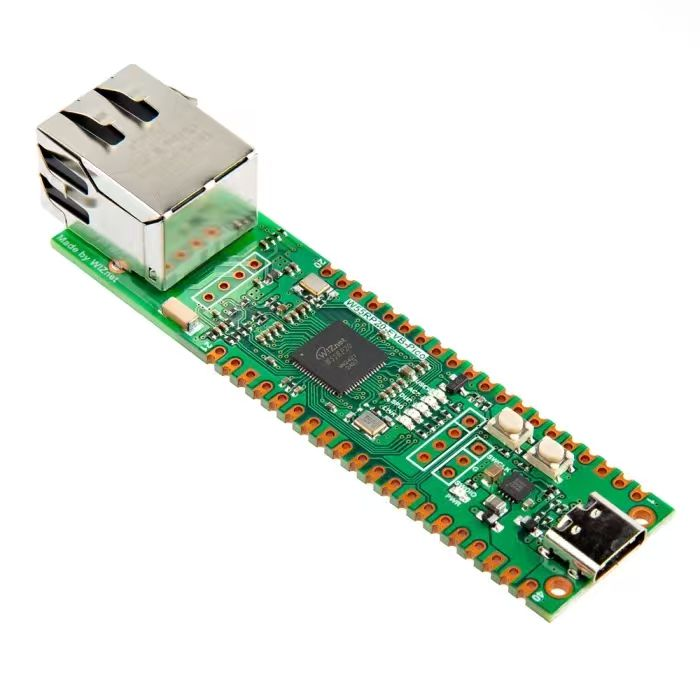
【Preliminary Note】The original hardware example in this article was written based on the RP2040. The actual hardware used in this hands-on demonstration features the W55RP20 as the main controller chip. The circuit logic and UF2 flashing operation principles are universally applicable, with only the main controller model differing. The original chip model mentioned in the circuit descriptions below is provided for reference purposes only.


1. Basic Knowledge of 5-Way Key

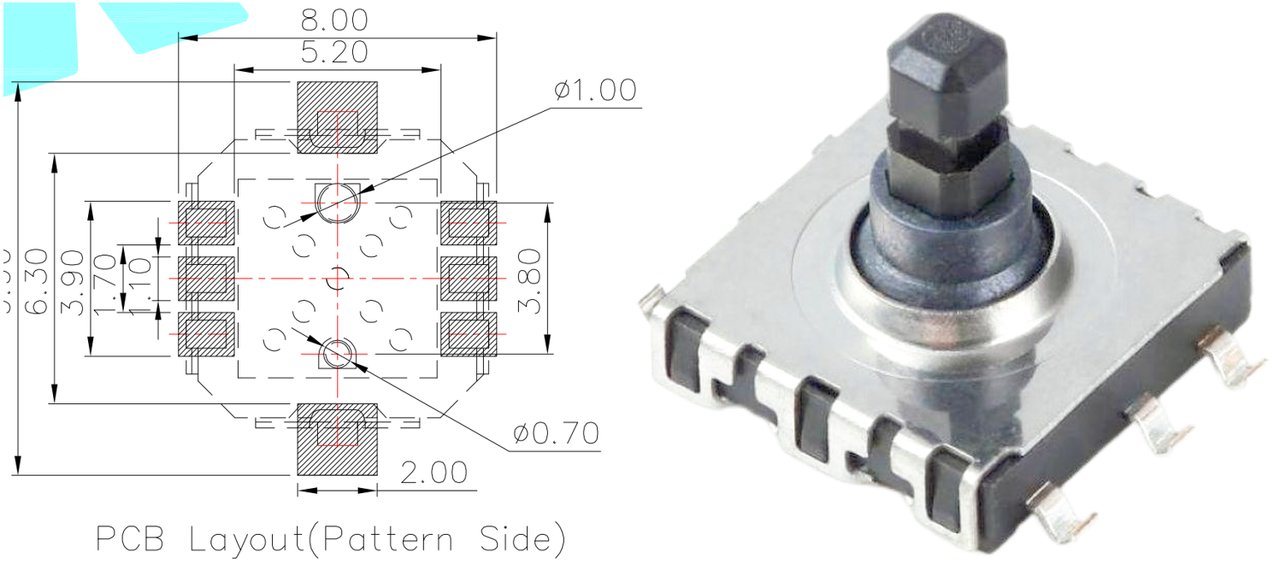
A five-way switch is a common input device typically used in the control interfaces of electronic products such as remote controls, game controllers and mobile devices. It contains five contacts inside: there is a common contact at the center, with a number of fixed contacts distributed around it. Its working principle is to realize the switching of multiple states through the connection between the movable contact reed and the common contact as well as the surrounding fixed contacts. When the operating lever is moved, the movable contact reed comes into contact with the corresponding contact, thus forming a circuit connection.
A five-way button resembles a single button, but it actually incorporates five distinct button states, allowing users to switch between multiple functions by pressing it in different directions. Here, we connect the common contact (COM terminal) of the five-way button to the + 5V power supply. When none of the buttons is pressed, the voltage measured at any of the buttons is 0V, as all contacts are in an open-circuit state with no current flowing; when any one of the buttons is pressed, the movable contact reed of that button will connect with the common contact to form a closed circuit, and at this point the measured voltage of the corresponding button will rise to the supply voltage (5V).

2. Application Experiment

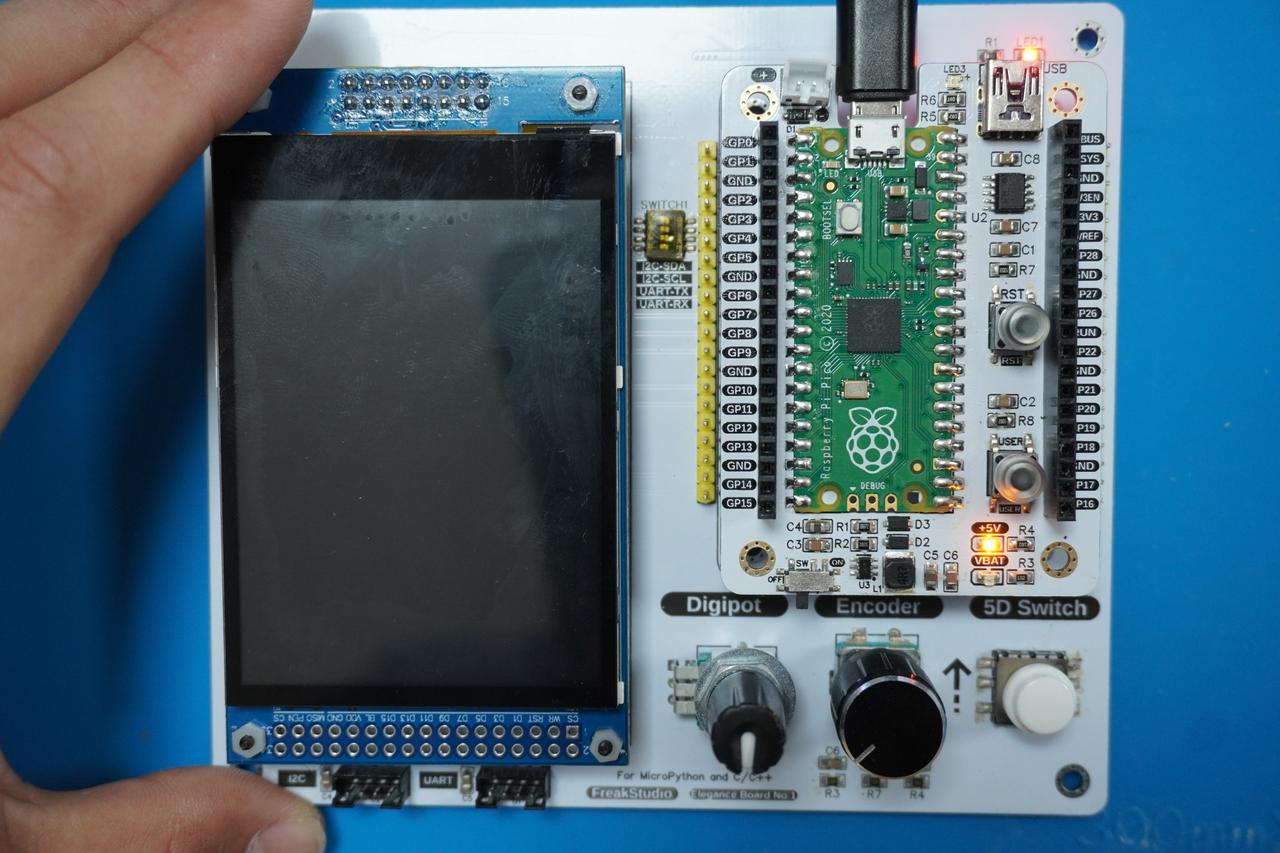
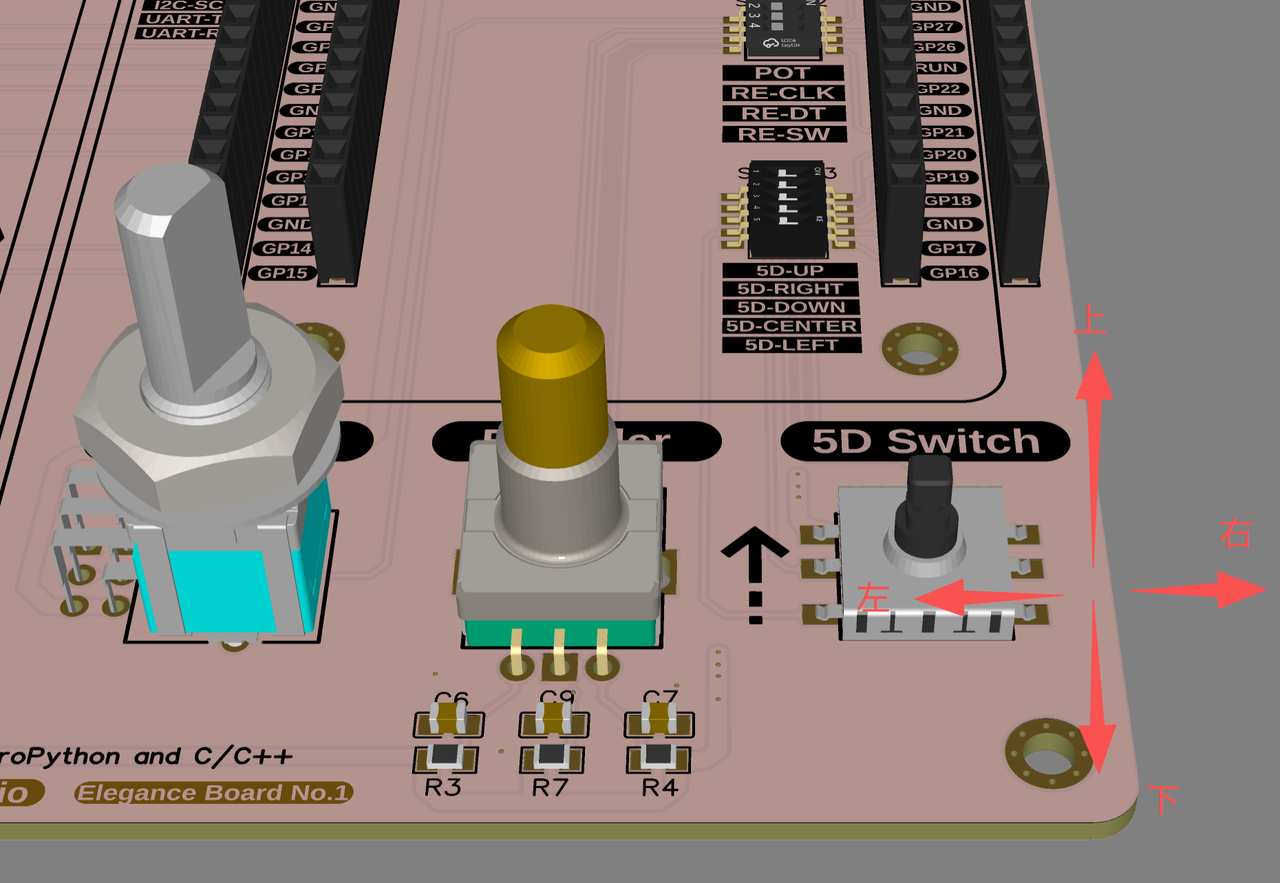
In the following program, we use the GPIO pins of the Raspberry Pi Pico to read and process the input status of a 5-way joystick (with 7 buttons), and print the relevant button information when a button is pressed. Here, we need to insert the Fengya No. 1 Board - Universal Compatible Expansion Board into the Fengya No. 1 Board - LCD Screen Human-Machine Interaction Board, and turn on all the options on the SWITCH3 DIP switch. The physical connection diagram is shown below:
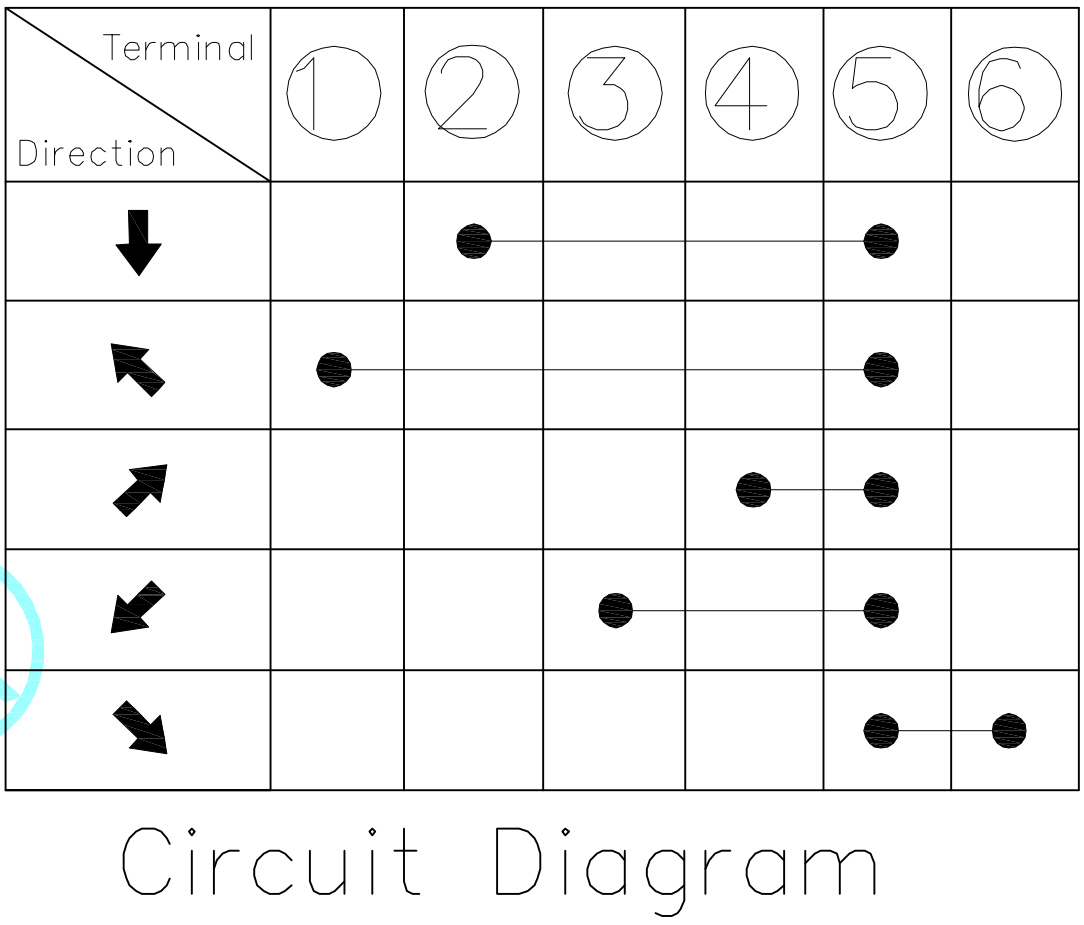
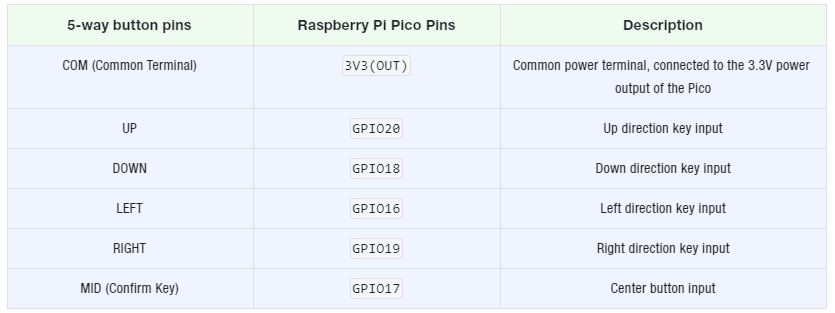
The connection status of the 5-way button is shown in the table below, in which the common terminal (COM terminal) of the 5-way button is connected to the + 3V3 power supply:
The sample code is as follows, located in the folder of the supporting materials: elegance-devkit v1\Demo\06 GPIO_5DJoystick:
# Python env   : MicroPython v1.23.0
# -*- coding: utf-8 -*-        
# @Time    : 2025/1/2 下午2:10   
# @Author  : 李清水            
# @File    : main.py       
# @Description : GPIO类实验,5D摇杆实验

# ======================================== 导入相关模块 =========================================

# 导入硬件相关模块
from machine import Pin
# 导入时间相关模块
import time

# ======================================== 全局变量 ============================================

# ======================================== 功能函数 ============================================

# ======================================== 自定义类 ============================================

# 自定义五向按键类
class DirectionalButton:
    """
    一个用于处理五向按键的类。

    该类封装了五向按键的功能,包括 UP、DOWN、LEFT、RIGHT、MID、SET 和 RST 按键的检测。
    每个按键通过配置对应的 GPIO 引脚来监听按键按下和释放事件。按键的状态会存储在 `button_state` 字典中。
    按键状态发生变化时,内部会触发中断处理函数来更新状态。提供的方法包括获取特定按键的状态、重置所有按键状态等。

    Attributes:
        up_pin (Pin): 用于 UP 按键的 GPIO 引脚对象,初始化时会设置为输入模式并启用下拉电阻。
        down_pin (Pin): 用于 DOWN 按键的 GPIO 引脚对象,初始化时会设置为输入模式并启用下拉电阻。
        left_pin (Pin): 用于 LEFT 按键的 GPIO 引脚对象,初始化时会设置为输入模式并启用下拉电阻。
        right_pin (Pin): 用于 RIGHT 按键的 GPIO 引脚对象,初始化时会设置为输入模式并启用下拉电阻。
        mid_pin (Pin): 用于 MID 按键的 GPIO 引脚对象,初始化时会设置为输入模式并启用下拉电阻。
        set_pin (Pin): 用于 SET 按键的 GPIO 引脚对象,初始化时会设置为输入模式并启用下拉电阻。
        rst_pin (Pin): 用于 RST 按键的 GPIO 引脚对象,初始化时会设置为输入模式并启用下拉电阻。
        button_state (dict): 按键状态字典,记录每个按键的当前状态。字典中键名为按键名,值为按键的状态(True 为按下,False 为未按下)。

    Methods:
        get_button_state(button): 获取指定按键的当前状态,返回 True 表示按下,False 表示未按下。
        reset_all(): 重置所有按键的状态,将所有按键标志设置为 False(未按下)。
        _handle_button(pin): 按键中断处理函数,根据按键的引脚设置按键的状态。
    """

    def __init__(self, up_pin: int, down_pin: int, left_pin: int, right_pin: int,
                 mid_pin: int, set_pin: int = None, rst_pin: int = None) -> None:
        """
        初始化五向按键类,配置所有按键的 GPIO 引脚并启用内置上拉电阻。

        Args:
            up_pin (int): UP 按键的 GPIO 引脚。
            down_pin (int): DOWN 按键的 GPIO 引脚。
            left_pin (int): LEFT 按键的 GPIO 引脚。
            right_pin (int): RIGHT 按键的 GPIO 引脚。
            mid_pin (int): MID 按键的 GPIO 引脚。
            set_pin (int): SET 按键的 GPIO 引脚。
            rst_pin (int): RST 按键的 GPIO 引脚。

        Returns:
            None
        """
        # 初始化各个方向的按键引脚,设置为输入模式,并启用下拉电阻
        self.up_pin     = Pin(up_pin, Pin.IN, Pin.PULL_DOWN)
        self.down_pin   = Pin(down_pin, Pin.IN, Pin.PULL_DOWN)
        self.left_pin   = Pin(left_pin, Pin.IN, Pin.PULL_DOWN)
        self.right_pin  = Pin(right_pin, Pin.IN, Pin.PULL_DOWN)
        self.mid_pin    = Pin(mid_pin, Pin.IN, Pin.PULL_DOWN)

        if set_pin is not None and rst_pin is not None:
            self.set_pin    = Pin(set_pin, Pin.IN, Pin.PULL_DOWN)
            self.rst_pin    = Pin(rst_pin, Pin.IN, Pin.PULL_DOWN)

        # 初始化按键状态字典,默认值为 False(未按下)
        self.button_state = {
            'UP': False,
            'DOWN': False,
            'LEFT': False,
            'RIGHT': False,
            'MID': False,
            'SET': False,
            'RST': False
        }

        # 为各个按键引脚设置中断处理函数
        self.up_pin.irq(trigger=Pin.IRQ_FALLING | Pin.IRQ_RISING, handler=self._handle_button)
        self.down_pin.irq(trigger=Pin.IRQ_FALLING | Pin.IRQ_RISING, handler=self._handle_button)
        self.left_pin.irq(trigger=Pin.IRQ_FALLING | Pin.IRQ_RISING, handler=self._handle_button)
        self.right_pin.irq(trigger=Pin.IRQ_FALLING | Pin.IRQ_RISING, handler=self._handle_button)
        self.mid_pin.irq(trigger=Pin.IRQ_FALLING | Pin.IRQ_RISING, handler=self._handle_button)

        if set_pin is not None and rst_pin is not None:
            self.set_pin.irq(trigger=Pin.IRQ_FALLING | Pin.IRQ_RISING, handler=self._handle_button)
            self.rst_pin.irq(trigger=Pin.IRQ_FALLING | Pin.IRQ_RISING, handler=self._handle_button)

    def _handle_button(self, pin: Pin) -> None:
        """
        按键中断处理函数,根据按键的引脚设置按键状态。

        每次按键按下或松开时,更新对应按键的状态。

        Args:
            pin (Pin): 触发中断的按键引脚。

        Returns:
            None
        """
        if pin == self.up_pin:
            self.button_state['UP'] = (pin.value() == 1)
        elif pin == self.down_pin:
            self.button_state['DOWN'] = (pin.value() == 1)
        elif pin == self.left_pin:
            self.button_state['LEFT'] = (pin.value() == 1)
        elif pin == self.right_pin:
            self.button_state['RIGHT'] = (pin.value() == 1)
        elif pin == self.mid_pin:
            self.button_state['MID'] = (pin.value() == 1)
        elif pin == self.set_pin:
            self.button_state['SET'] = (pin.value() == 1)
        elif pin == self.rst_pin:
            self.button_state['RST'] = (pin.value() == 1)

    def get_button_state(self, button: str) -> bool:
        """
        获取指定按键的当前状态。

        检查指定按键是否处于按下状态。

        Args:
            button (str): 要查询的按键,支持 'UP', 'DOWN', 'LEFT', 'RIGHT', 'MID', 'SET', 'RST'。

        Returns:
            bool: 返回指定按键的状态,True 表示按下,False 表示未按下。
        """
        return self.button_state.get(button, False)

    def reset_all(self) -> None:
        """
        重置所有按键的状态为未按下。

        用于在某些场景下需要清除所有按键状态时使用。

        Args:
            None

        Returns:
            None
        """
        for button in self.button_state:
            self.button_state[button] = False

# ======================================== 初始化配置 ==========================================

# 上电延时3s
time.sleep(3)
# 打印调试信息
print("FreakStudio : GPIO read 5D Joystick value")

# 创建五向按键对象,使用 GPIO 16 到 GPIO 20 连接按键
button = DirectionalButton(up_pin=20, down_pin=18, left_pin=16, right_pin=19, mid_pin=17)

# ========================================  主程序  ===========================================

# 主循环,读取按键状态并打印出来
while True:
    # 检查是否有按键被按下
    for button_name in ['UP', 'DOWN', 'LEFT', 'RIGHT', 'MID', 'SET', 'RST']:
        # 如果按键被按下,打印按键名称和状态
        if button.get_button_state(button_name):
            print(f"{button_name} button is pressed.")

    # 每隔 100 毫秒循环一次
    time.sleep(0.1)
The DirectionalButton class encapsulates the detection and status management of the 7 buttons (UP, DOWN, LEFT, RIGHT, MID, SET, RST) of the 5-way joystick. Each button corresponds to a GPIO pin, and the button status is detected in real time via interrupt mode, with the following methods:
Constructor __init__: This constructor function accepts seven pin parameters, which are respectively connected to the seven buttons (UP, DOWN, LEFT, RIGHT, MID, SET, RST) of the 5-way joystick. It uses Pin. IN to configure the pins as input mode, and enables the pull-down resistor via Pin. PULL_DOWN (since the state of the input pin is low level 0 when the button is not pressed, and becomes high level 1 when pressed).
Interrupt handling method _handle_button: This interrupt function will be triggered every time a key is pressed (IRQ_FALLING) or released (IRQ_RISING). The key status is updated by checking the pin level: when pressed, the GPIO pin is at high level (1), and when released, it is at low level (0). Each key has a corresponding status dictionary (button_state) that stores whether the key is pressed.
Get key state get_button_state: This function takes a key name (e. g. 'UP') and returns the current state of the key, where True indicates that the key is pressed and False indicates that the key is not pressed; it returns the state of the corresponding key via the dictionary's get () method.
Reset all key states reset_all: This function sets the state of all keys to False, which means resetting their states to "not pressed"; it iterates through all keys via a dictionary to reset their states.
In the main loop, we create an instance of the DirectionalButton class and pass the pin numbers to the corresponding button pins. Here, GPIO pins 16 to 22 of the Raspberry Pi Pico are used to connect the respective buttons of the joystick, and the program continuously checks the status of each button in the main loop;For each button, call the get_button_state () method to get its current state. If the button is pressed, print the relevant information (such as "UP button is pressed. "). After each loop iteration, use time. sleep (0.1) to add a 100-millisecond delay, so as to avoid reading the button state too frequently and reduce the CPU load.
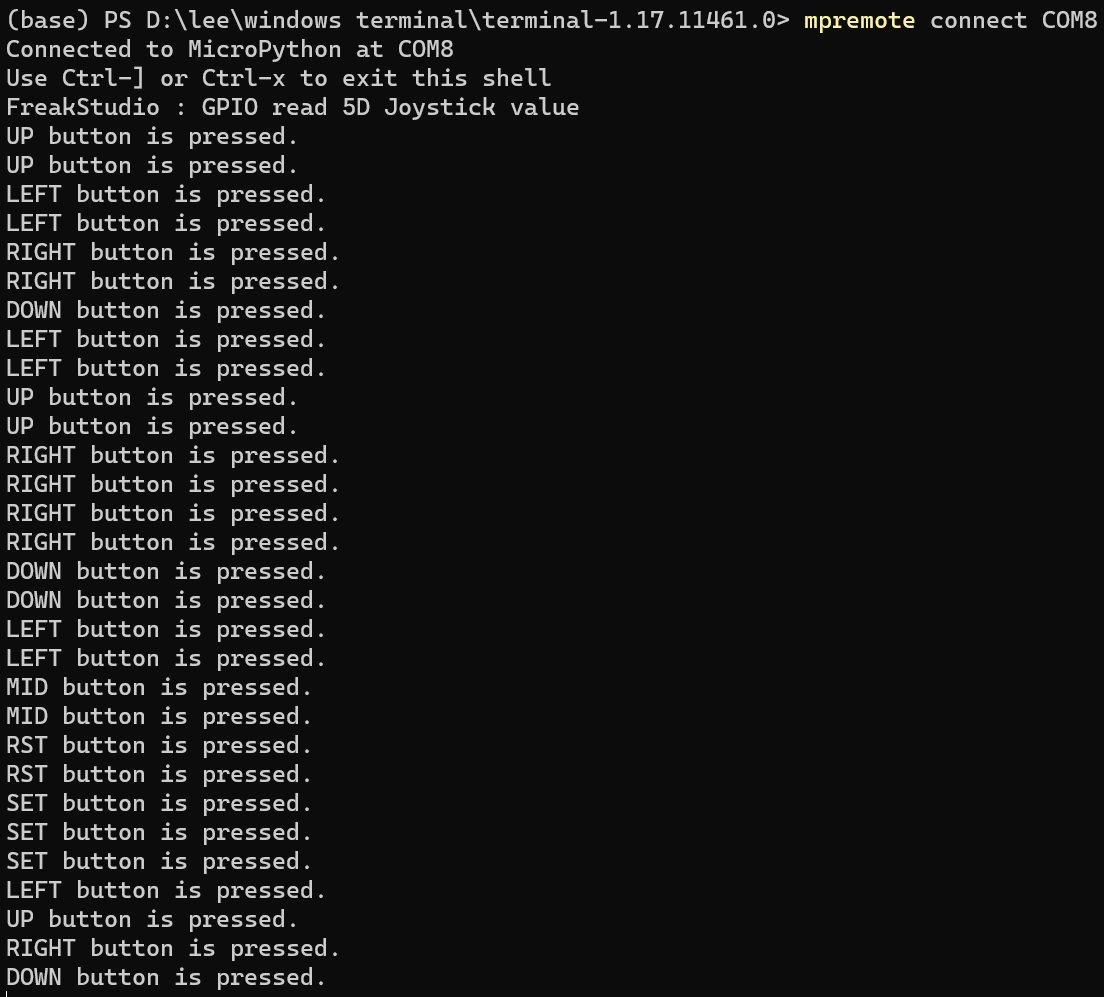
Burn the program, open the terminal, and the following content will be displayed:
It can be seen that when different keys are pressed, the status information of the corresponding key can be displayed.
Documents
Comments Write