
WiFi controlled display turntable
WiFi controlled display turntable

WIZnet - WizFi360-EVB-Pico
x 1
WizFi360-EVB-Pico

Arduino - Arduino IDE
x 1
Arduino IDE
Android - Android Studio
x 1
Android Studio
WIFI controlled display turntable.
Components
Hardware
- WIZnet - WizFi360-EVB-Pico (https://docs.wiznet.io/Product/Open-Source-Hardware/wizfi360-evb-pico)
- 17HS4023 Stepper Motor
- A4988 Stepper Motor driver
- WS2812 LED strip
- 128x64 OLED (SSD1306)
Software
- Arduino - Arduino IDE (https://www.arduino.cc/en/software)
- WizFi360_arduino_library (https://github.com/Wiznet/WizFi360_arduino_library)
- RPI_PICO_TimerInterrupt Library(https://github.com/khoih-prog/RPI_PICO_TimerInterrupt)
- ArtnetWifi (https://github.com/rstephan/ArtnetWifi)
- Android Studio (https://developer.android.com/studio)
Description
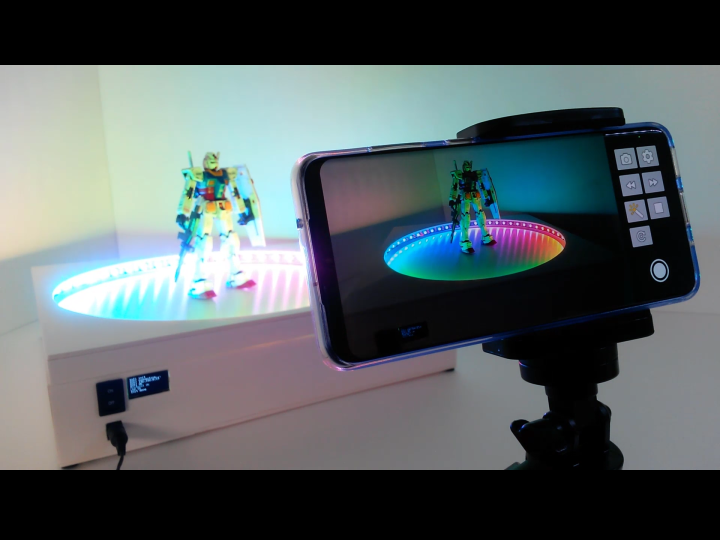
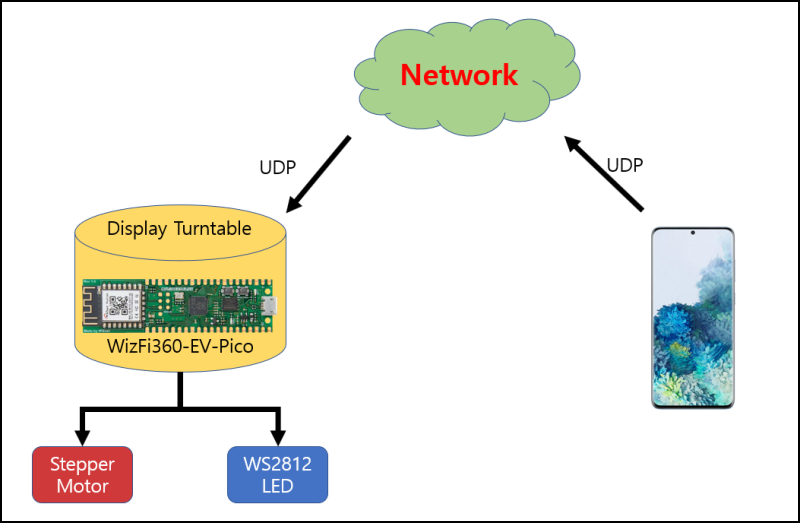
Sometimes, I thought that I need a display turntable when I upload some image or video on website. So, I decided to make a display turntable using WizFi360-EVB-Pico. You can see the whole communication flow below summary diagram. Dedicated android app send UDP control packet (With modified Art-Net protocol) to WizFi360-EVB-Pico board. after then Pico board handle stepper motor and leds.
Hardware
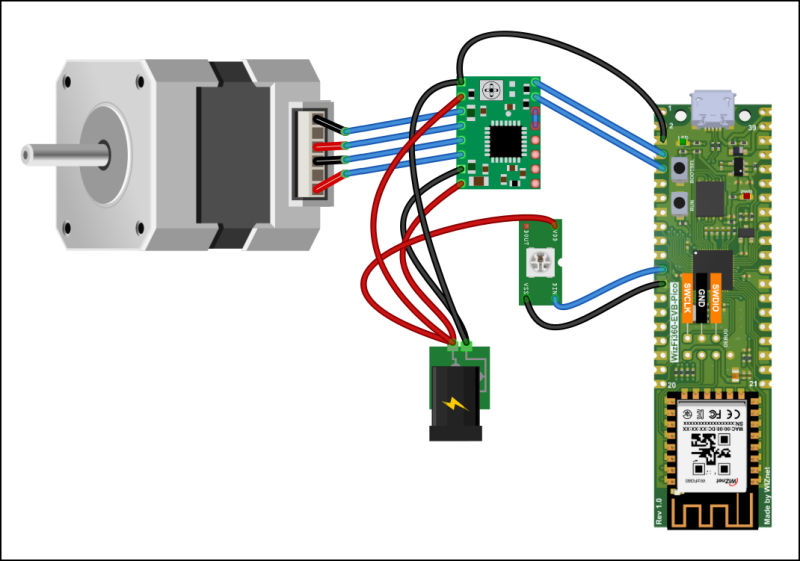
First, I connected the circuit as shown below and tested the functions. Works well.
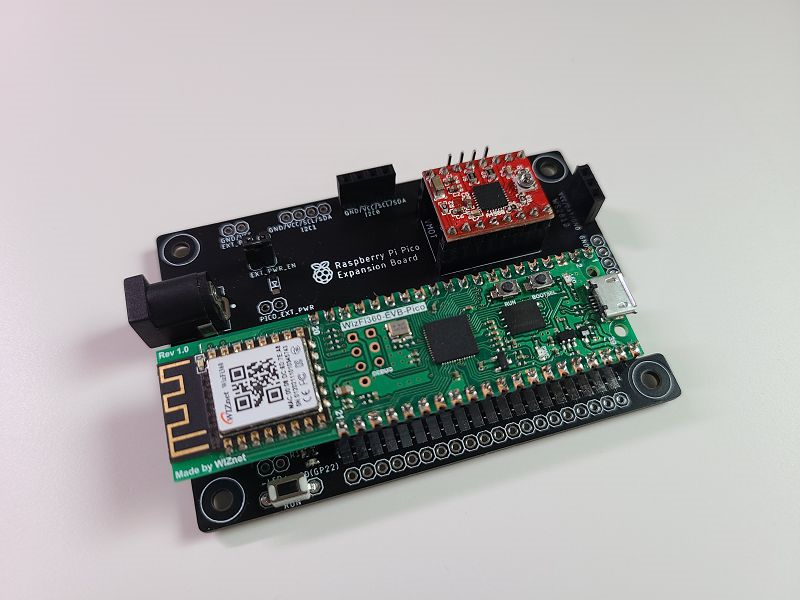
After then I decided to make an own PCB for using universal purpose.
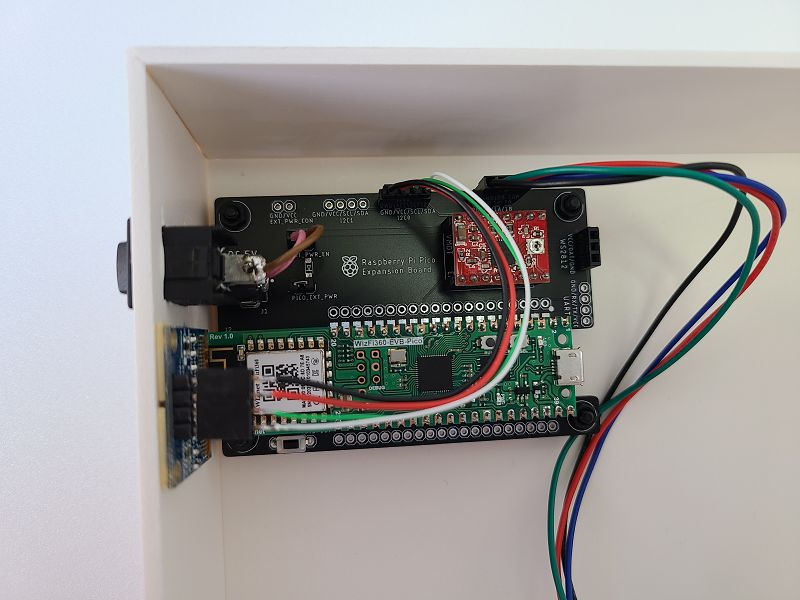
Below image is what I made. It can use SPI, I2C, UART, A4988 stepper motor driver and WS2812 LED interface
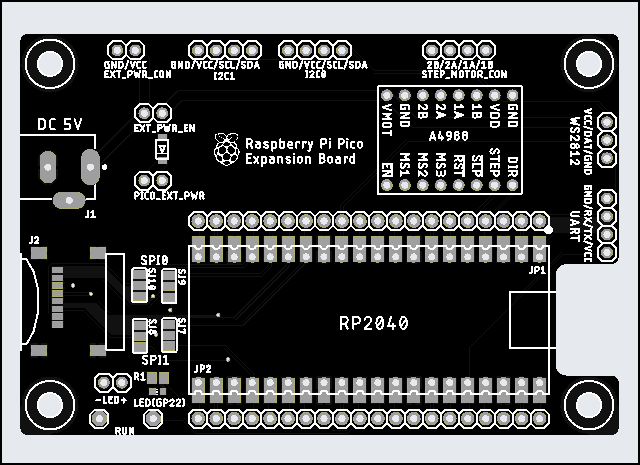
All components are placed like below.
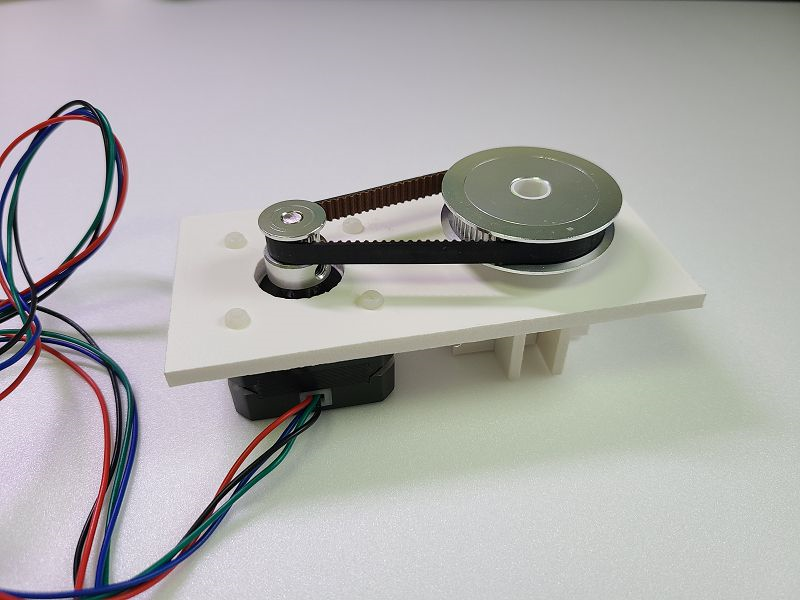
Used 17HS4023 Stepper Motor with belt pulley for motor mount.
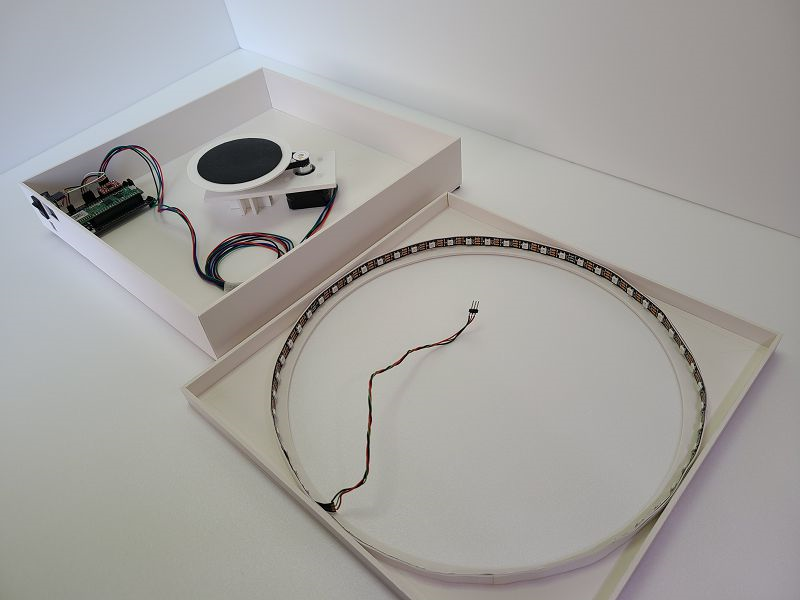
Used WS2812 LED strip
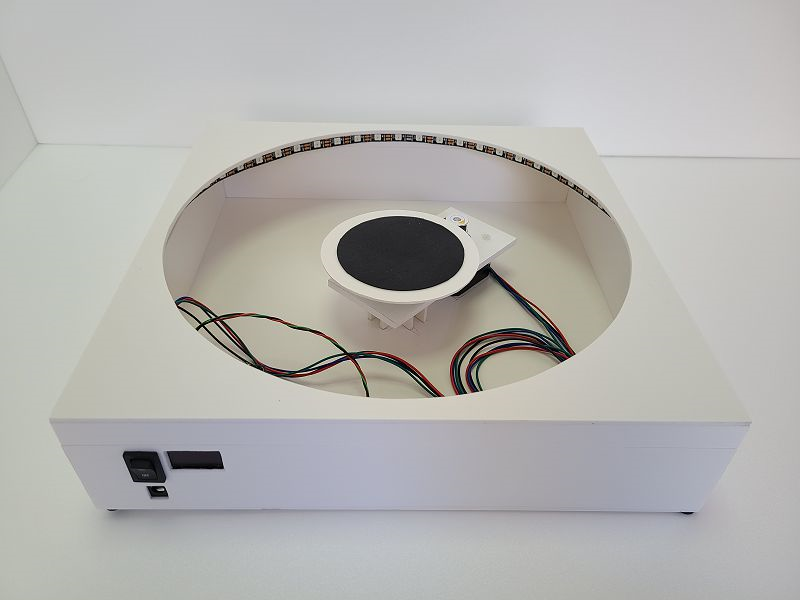
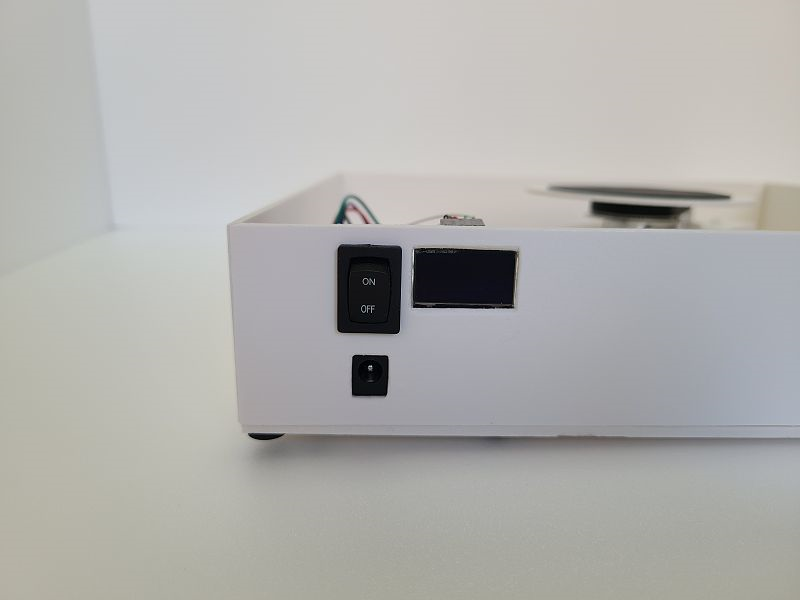
Placed power jack, power switch and OLED at front side. OLED shows log information such as IP while boot-up
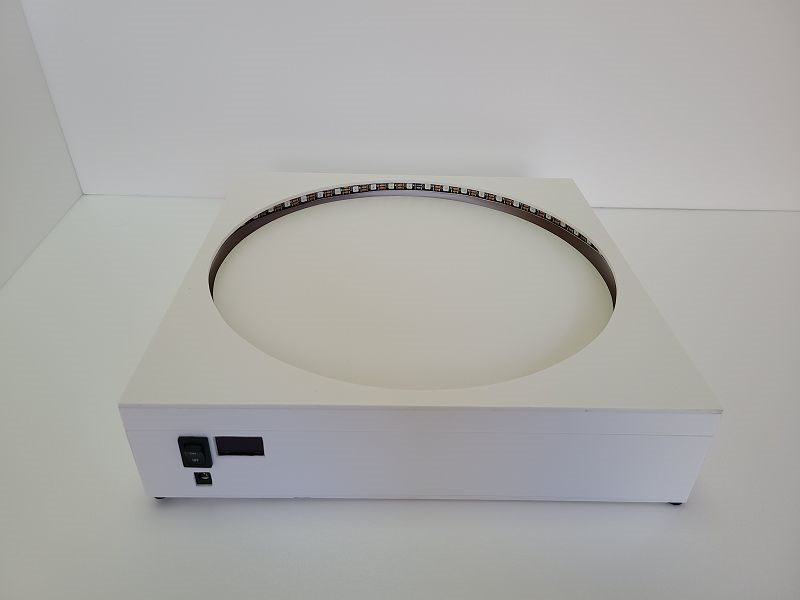
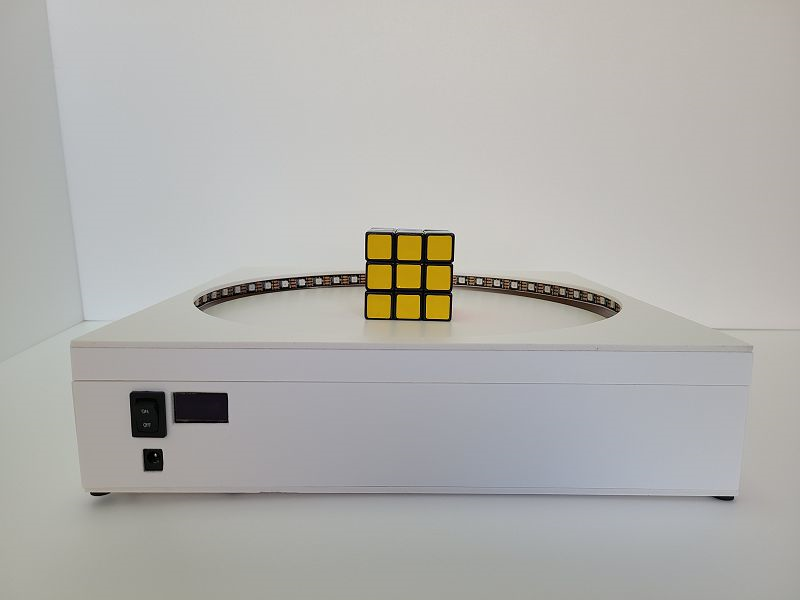
Assembled all parts. Below is my first DIY display turntable.
Software
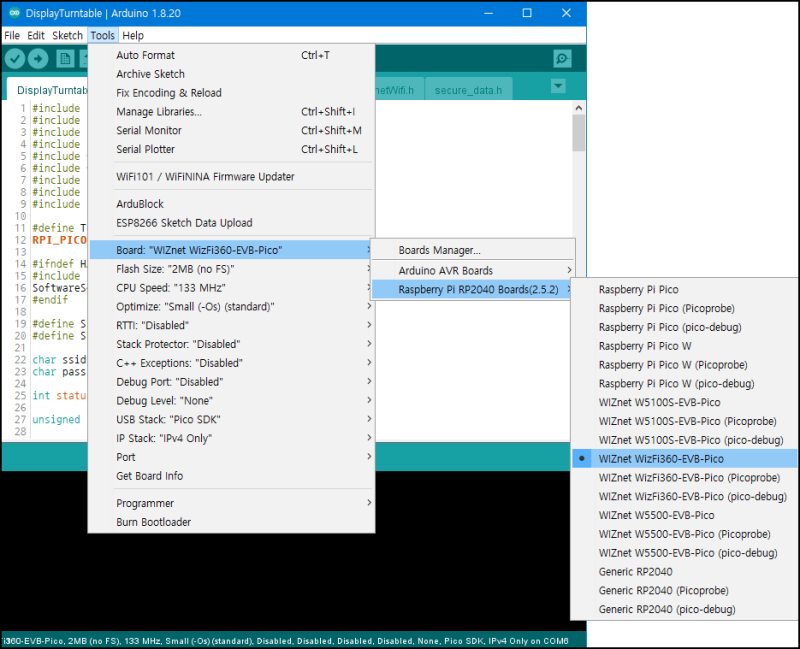
Developed on Arduino-IDE and I added below link to additional board manager urls in preferences.
https://github.com/earlephilhower/arduino-pico/releases/download/global/package_rp2040_index.jsonAfter then, select WizFi360-EVB-Pico board like below.
Network
All functions of display turntable can be controlled by WIFI. I used Arduino Ide with WizFi360_arduino_library. It can easily use WIFI interface on WizFi360-EVB-Pico. and Between mobile phone and WizFi360-EVB-Pico, used modified Art-Net protocol for motor and led control. Refer to ArtnetWifi (https://github.com/rstephan/ArtnetWifi) library.
Stepper Motor
I seperated motor and led control. In case of stepper motor, used RPI_PICO_TimerInterrrup library for handling A4988 stepper motor driver.
WS2812 LED
Used very well-known Adafruit_Neopixel library.
OLED (SSD1306)
Used SSD1306Ascii library to display log message.
Dedicated turntable controller application on Android mobile phone
I wrote an android application just for this display turntable like below.
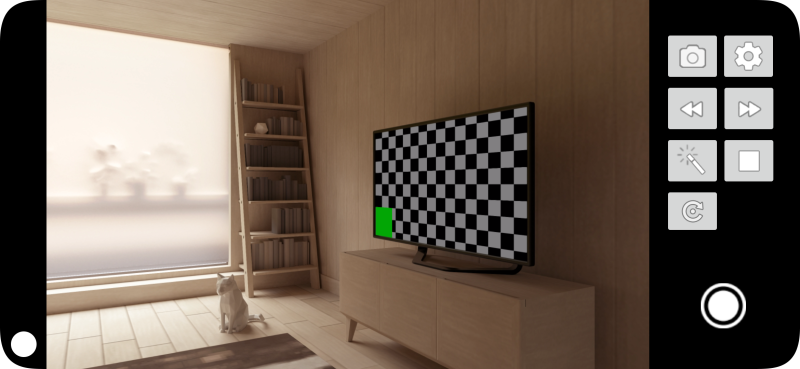
Function of each button
1. Camera or Camcorder Switch
2. Setting (Network and LED)
3. CCW rotation
4. CW rotation
5. Display LED effect
6. Stop rotation
7. Take a photo in every 90 deg
8. Image capture or Video record
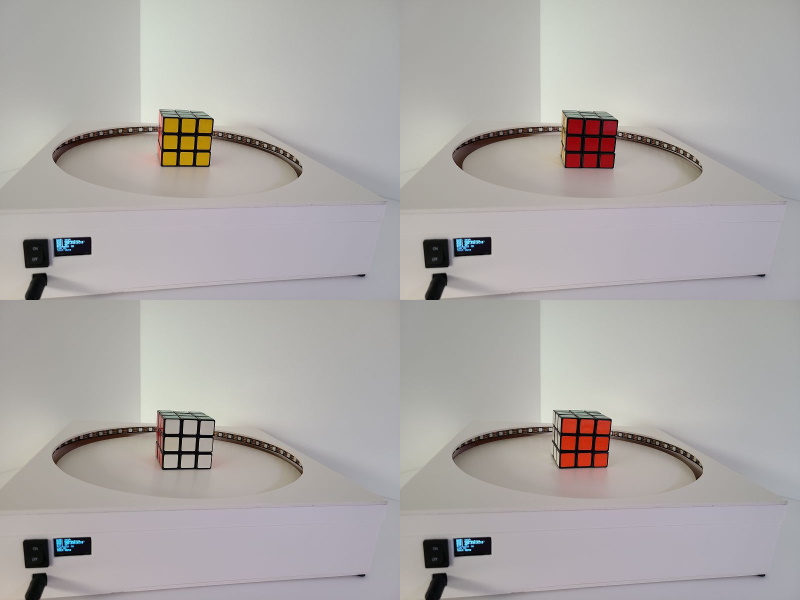
In case of 7th button, can be used like below.
Pressed 7th button, rotate turntable in every 90 degrees after then take a photo until reached 360 degrees. Therefore, take an each side of photos (front, left, right and back). Refer to below youtube video.
Youtube
-
Display turntable arduino source code
Arduino Source Code for display turntable

-
Display turntable PCB schematic
Display turntable PCB schematic
-
This project on Hackster.io
