
W55RP20-EVB-MKR MicroPython Tutorial (8):NTP Network Time Synchronization
This is the 8th tutorial in the WIZnet W55RP20 MicroPython series, written based on the latest official firmware.

This is the 8th tutorial in the WIZnet W55RP20 MicroPython series, written based on the latest official firmware. All code has been verified and can be flashed and run directly. Copyright Notice: This is an official WIZnet technical article. Please credit the source when reprinting.
Preface
In the previous tutorial, we completed DNS Domain Resolution development, enabling embedded devices to access public servers by domain name.
This tutorial focuses on the core technology for precise timekeeping in embedded devices — NTP Network Time Synchronization.
NTP (Network Time Protocol) is the universal time synchronization protocol in the IoT field, communicating via UDP port 123 by default. It allows devices to automatically obtain global standard UTC time, completely solving pain points such as local clock drift, power-off reset, and cumbersome manual calibration. It is especially suitable for log timestamping, scheduled tasks, and multi-device time-sequence synchronization in embedded Ethernet applications.
The W55RP20 integrates a hardware TCP/IP stack. Combined with the MicroPython development environment, stable NTP time synchronization can be achieved with just a few lines of code — no need to worry about underlying socket details; timezone conversion and periodic re-sync anti-drift are handled automatically.
After completing this tutorial, you will master:
Core NTP protocol principles and timestamp conversion mechanisms
Retrieving standard time via public NTP servers with W55RP20
Timezone calibration from UTC to Beijing Time (UTC+8)
Complete implementation of local timekeeping + periodic re-sync anti-drift
NTP request exception handling and common issue troubleshooting
Industrial-grade solutions for precise timekeeping in embedded devices
Tutorial Series Learning Path
This series contains 16 tutorials, progressing step by step from basic networking to industrial-grade applications:
Tutorial 1: Static IP Configuration & Network Basics
Tutorial 2: DHCP Auto-Networking & Network Diagnostics
Tutorial 3: TCP Client Communication
Tutorial 4: TCP Server Communication
Tutorial 5: UDP Unicast Data Communication
Tutorial 6: UDP Multicast/Broadcast Data Communication
Tutorial 7: DNS Domain Resolution
Tutorial 8: NTP Network Time Retrieval (this article)
Tutorial 9: HTTP Client Requests
Tutorial 10: HTTP Server Setup
Tutorial 11: HTTP Protocol & OneNET Cloud Data Upload
Tutorial 12: MQTT Protocol Basic Communication
Tutorial 13: MQTT Protocol with Alibaba Cloud
Tutorial 14: MQTT Protocol with OneNET Platform
Tutorial 15: MQTT Protocol with ThingSpeak Platform
Tutorial 16: Modbus Industrial Protocol Communication
Bookmark this series and follow along step by step. All code is synchronized to the official Gitee repository.
Table of Contents
1 NTP Protocol Core Principles
1.2 Timestamp Conversion Rules
3 Flashing W55RP20-EVB-MKR MicroPython Firmware
4 Hardware Connection & Development Environment Setup
4.2 Thonny Development Environment Configuration
6 Execution Results & Verification
7 One-Stop Troubleshooting Guide
8 WIZnet Hardware Stack Core Advantages Comparison
9 Typical Application Scenarios
11 Upcoming Tutorials & Resource Acquisition
1. NTP Protocol Core Principles
1.1 NTP Protocol Overview
NTP (Network Time Protocol) is the universal time synchronization protocol in the embedded and IoT fields, communicating via UDP port 123 by default. Devices send request packets to public NTP servers to obtain globally standardized UTC time, completely solving issues such as inaccurate local clocks and time drift.
NTP uses a hierarchical architecture (Stratum 0~15). Stratum 0 refers to atomic clocks, GPS, and other high-precision time sources; Stratum 1 servers are directly connected to Stratum 0 sources, and so on. Embedded devices typically connect to Stratum 1~3 public NTP servers, achieving millisecond-level synchronization accuracy that fully meets industrial IoT requirements.
1.2 Timestamp Conversion Rules
NTP Raw Timestamp: Starts from 1900-01-01 00:00:00 UTC, in seconds
Unix Standard Timestamp: Starts from 1970-01-01 00:00:00 UTC, in seconds
Fixed Offset: Converting NTP timestamps to Unix timestamps requires subtracting 2208988800 seconds (the total seconds between 1900-01-01 and 1970-01-01)
Formula: Unix_Timestamp = NTP_Timestamp - 2208988800
1.3 Timezone Notes
NTP servers return UTC (zero timezone) time by default. Beijing Time is UTC+8. The program must automatically add a 8-hour offset and directly output local standard time (i.e., Beijing_Time = UTC_Time + 8 hours).
1.4 NTP Workflow
The complete workflow for NTP time synchronization on W55RP20-EVB-MKR is as follows:
The board automatically obtains an IP via DHCP to complete network connection
Build a standard NTP request packet (48 bytes) and send it to the NTP server via UDP
The server returns a 48-byte standard time data packet
Parse the packet to extract the NTP timestamp and convert it to Unix time
The program calculates the timezone offset (+8 hours) and formats the output as YYYY-MM-DD HH:MM:SS
Local timekeeping runs in a loop, updating the display every second
Automatic NTP server re-sync every minute to suppress time drift
2. Prerequisites
2.1 Software Preparation
| Software | Version Requirement | Download Link | Description |
|---|---|---|---|
| Thonny | 4.0 or above | Thonny Official Download | Lightweight MicroPython IDE with code editing, flashing, and serial debugging — beginner-friendly |
| W55RP20-EVB-MKR MicroPython Firmware | Latest stable | WIZnet Official Firmware Download | Built specifically for W55RP20-EVB-MKR, with WIZnet hardware drivers and protocol stack integrated |
<a id="section2-2"></a>2.2 Hardware Preparation
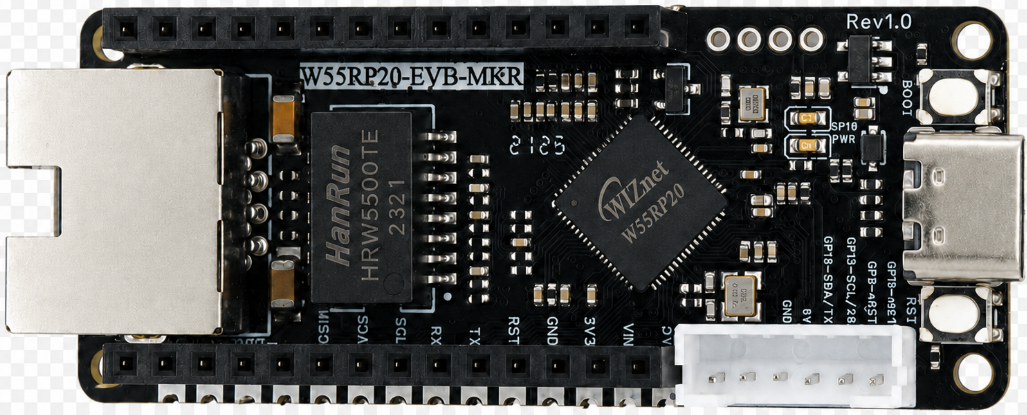
The following hardware is required:
W55RP20-EVB-MKR development board × 1
Micro USB cable (must support data transfer; charging-only cables will not work) × 1
Standard Ethernet cable × 1
Router/switch with DHCP enabled × 1
Tip: The W55RP20-EVB-MKR module has all Ethernet components integrated onboard — no additional soldering or jumper wires needed. Pair it with an RP2040 development board to quickly set up the development environment, greatly reducing wiring errors and hardware failure probability.
3. Flashing W55RP20-EVB-MKR MicroPython Firmware
The W55RP20-EVB-MKR module is fully compatible with the Raspberry Pi MKR UF2 firmware flashing method. The steps are as follows:
Press and hold the BOOTSEL button on the RP2040 development board
Connect the board to your computer using a Micro USB cable
Once the computer recognizes a USB drive named RPI-RP2, release the BOOTSEL button
Drag the downloaded .uf2 firmware file into the RPI-RP2 drive
The board will automatically reboot, completing the firmware flashing
Note: If the computer does not recognize the
RPI-RP2drive, try re-plugging the USB cable, switching to a data-capable USB cable, or changing the USB port (prefer USB 2.0 ports).
4. Hardware Connection & Development Environment Setup
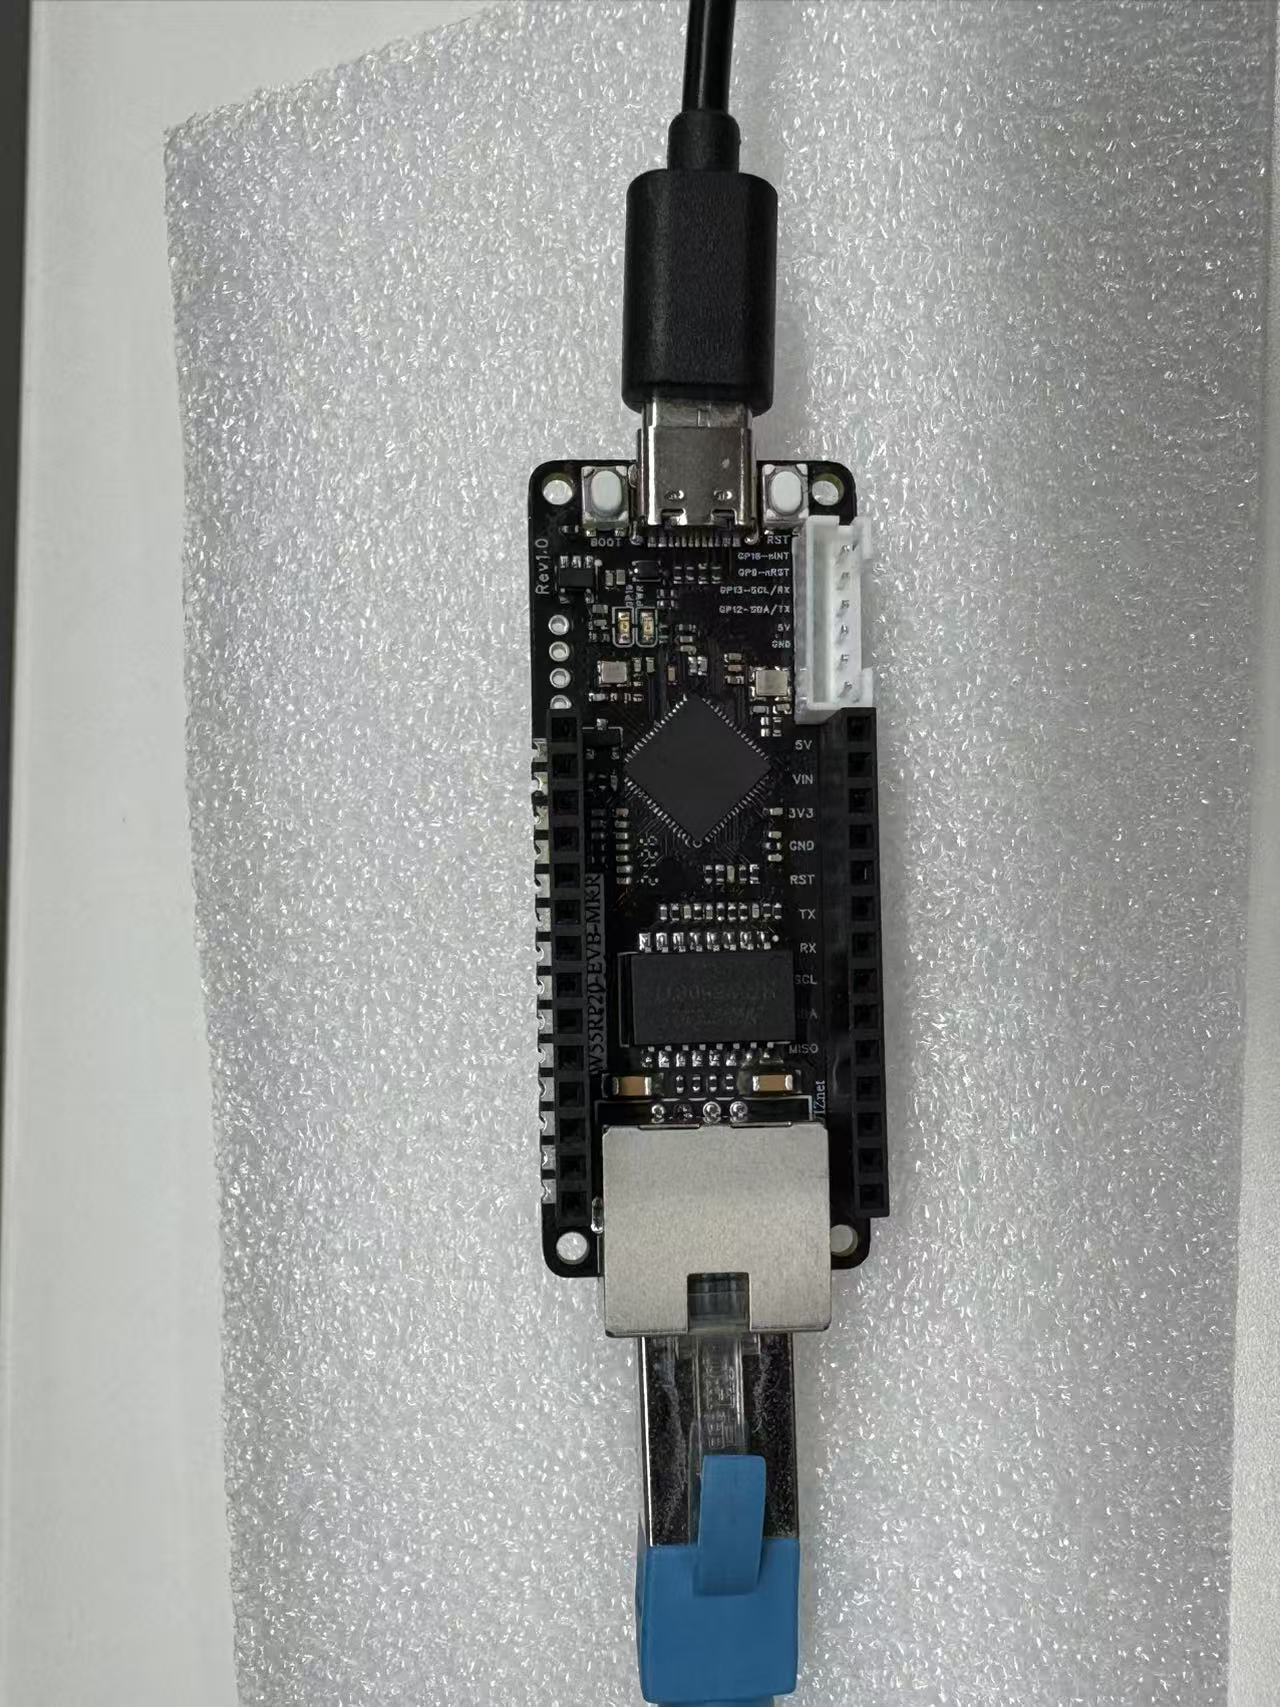
4.1 Hardware Connection
Connecting the W55RP20-EVB-MKR is extremely simple — only two steps:
Use a Micro USB cable to connect the RP2040 board to your computer (for power, code flashing, and serial debugging)
Use an Ethernet cable to connect the W55RP20-EVB-MKR module's Ethernet port to the router's LAN port
4.2 Thonny Development Environment Configuration
Open Thonny, click "Run" → "Configure Interpreter" in the top menu bar
Switch to the "Interpreter" tab
Select MicroPython (generic) from the "Interpreter" dropdown list
Select the COM port corresponding to W55RP20-EVB-MKR in the "Port" dropdown (usually displayed as Board CDC @ COMx)
Check "Restart interpreter before running code" and "Sync device's real-time clock"
Click "OK" to complete the configuration
If the board does not appear in the port list, try:
Re-plugging the USB cable
Switching to a data-capable USB cable
Closing other software occupying the serial port (serial monitor, Arduino IDE, etc.)
Re-flashing the MicroPython firmware
Installing the Raspberry Pi MKR USB driver
5. Core Code Walkthrough
The W55RP20-EVB-MKR module's MicroPython library has encapsulated all low-level details. Implementing NTP network time synchronization requires only a small amount of core code. Copy the following code directly into Thonny to flash and run.
5.1 Complete Code
from wiznet_init import wiznet
import usocket
import struct
import time
# Initialize network
nic = wiznet("W55RP20-EVB-Pico", dhcp=True)
print("IP:", nic.ifconfig()[0])
# NTP server (Alibaba Cloud stable IP)
NTP_IP = "120.25.115.20"
NTP_PORT = 123
# Seconds from 1900-01-01 to 1970-01-01
NTP_TO_UNIX_DELTA = 2208988800
def get_ntp_unix_time():
"""Get standard Unix timestamp (seconds since 1970-01-01)"""
try:
sock = usocket.socket(usocket.AF_INET, usocket.SOCK_DGRAM)
sock.settimeout(3)
msg = b'\x1b' + b'\x00' * 47
sock.sendto(msg, (NTP_IP, NTP_PORT))
data, addr = sock.recvfrom(48)
sock.close()
ntp_timestamp = struct.unpack("!I", data[40:44])[0]
return ntp_timestamp - NTP_TO_UNIX_DELTA
except Exception as e:
print("NTP sync failed:", e)
return None
def unix_to_datetime(ts):
"""
Convert Unix timestamp to (year, month, day, hour, minute, second)
Timezone: UTC+8 Beijing Time
"""
# Convert to Beijing Time
t = ts + 8 * 3600
# Calculate year first
year = 1970
days_in_year = 365
while True:
# Check leap year
is_leap = (year % 4 == 0 and year % 100 != 0) or (year % 400 == 0)
if is_leap:
days_in_year = 366
else:
days_in_year = 365
year_seconds = days_in_year * 86400
if t < year_seconds:
break
t -= year_seconds
year += 1
# Then calculate month
if is_leap:
month_days = [31,29,31,30,31,30,31,31,30,31,30,31]
else:
month_days = [31,28,31,30,31,30,31,31,30,31,30,31]
month = 1
for md in month_days:
month_seconds = md * 86400
if t < month_seconds:
day = t // 86400 + 1
t %= 86400
break
t -= month_seconds
month += 1
# Hour, minute, second
hour = t // 3600
t %= 3600
minute = t // 60
second = t % 60
return (year, month, day, hour, minute, second)
# First sync
print("Syncing NTP time...")
unix_ts = get_ntp_unix_time()
if not unix_ts:
print("First sync failed, exiting program")
exit()
print("Sync successful!")
last_sync_ts = unix_ts
last_sync_micros = time.time()
# Update every second, re-sync NTP every minute
while True:
elapsed = int(time.time() - last_sync_micros)
current_ts = last_sync_ts + elapsed
dt = unix_to_datetime(current_ts)
print(f"{dt[0]}-{dt[1]:02d}-{dt[2]:02d} {dt[3]:02d}:{dt[4]:02d}:{dt[5]:02d}")
# Re-sync every minute to prevent drift
if elapsed >= 60:
print("Re-syncing NTP...")
new_ts = get_ntp_unix_time()
if new_ts:
last_sync_ts = new_ts
last_sync_micros = time.time()
print("Re-sync successful!")
time.sleep(1)
5.2 Key Steps Explained
Network Initialization: The wiznet_init module quickly completes hardware initialization and DHCP auto-networking, printing the IP address for debugging
NTP Server Configuration: Configures Alibaba Cloud's high-availability NTP server IP (120.25.115.20) for stable synchronization; can be replaced with other public NTP servers (e.g., ntp.aliyun.com, pool.ntp.org)
NTP Request Construction: Builds a 48-byte standard NTP request packet (first byte 0x1B), sends it to the server via UDP Socket; built-in 3-second timeout and exception handling prevent the program from freezing during network fluctuations
Timestamp Conversion: Extracts the NTP timestamp from bytes 40~43 of the server's 48-byte response, subtracts the fixed 1900-1970 offset of 2208988800 to obtain a standard Unix timestamp
Timezone Calibration: Adds 8 hours (8 × 3600 seconds) to the Unix timestamp for Beijing Time conversion; uses leap year detection and per-month day calculation to output standard "YYYY-MM-DD HH:MM:SS" format
Local Timekeeping: After the first successful sync, local timekeeping runs second-by-second based on time.time(), ensuring continued timekeeping even when the network is disconnected
Periodic Re-sync: Actively reconnects to the NTP server every minute to correct time drift; the sync interval can be customized (modify the value in elapsed >= 60)
6. Execution Results & Verification
Copy the code into Thonny, click Run (or press F5), and the serial output will be:
IP Address: ('192.168.1.123', '255.255.255.0', '192.168.1.1', '202.96.134.33')
IP: 192.168.1.123
Syncing NTP time...
Sync successful!
2026-04-30 10:45:49
2026-04-30 10:45:50
2026-04-30 10:45:51
The device is properly networked and time synchronization is successful, with per-second automatic refresh and precise timing. You can observe that NTP re-sync is automatically triggered every minute, effectively suppressing time drift.
Notes:
The first sync may take 1~3 seconds (depending on network latency); subsequent local timekeeping has virtually no delay
If the year displays as 1970 or the time is significantly off, NTP synchronization was unsuccessful — refer to Chapter 7 for troubleshooting
7. One-Stop Troubleshooting Guide
| Issue | Troubleshooting Steps |
|---|---|
| NTP sync timeout / sync failure | 1. Check the Ethernet cable connection and confirm the board can access the external network 2. The router may be blocking UDP port 123 — try switching to a mobile hotspot for testing 3. Switch to another public NTP server address (e.g., ntp.aliyun.com, pool.ntp.org) 4. Check whether the NTP server IP in the code is reachable (ping it from your computer) |
| Time is off by 8 hours | 1. Check whether the unix_to_datetime function correctly executes t = ts + 8 * 3600 (UTC+8 timezone compensation) 2. Verify that the NTP_TO_UNIX_DELTA constant value is 2208988800 3. If the timezone is not UTC+8, change 8 * 3600 to the corresponding timezone offset in seconds |
| Time drift increases over time | 1. This is normal (local crystal oscillator drift); this program's automatic per-minute re-sync effectively suppresses it 2. You can adjust the sync interval (change 60 in elapsed >= 60 to a smaller value, e.g., 30 seconds) 3. For high-precision scenarios, a sync interval of 10~30 seconds is recommended |
| Thonny cannot detect the board | 1. Re-plug the USB cable 2. Install the MKR serial driver 3. Close software occupying the serial port (serial monitor, Arduino IDE, etc.) 4. Re-flash the MicroPython firmware |
8. WIZnet Hardware Stack Core Advantages Comparison
To help you better understand the value of W5500 hardware TCP/IP stack chips in NTP time synchronization and network communication, we compare two mainstream embedded Ethernet solutions:
| Comparison Dimension | W5500 Hardware Stack Solution | External PHY Chip Solution |
|---|---|---|
| BOM Cost | Medium (MCU + network module, no extra components needed) | Medium-High (MCU + PHY chip + peripheral components) |
| PCB Area | Small (High module integration; only module mounting space needed) | Large (Chip, routing area, and peripheral circuits required) |
| Development Difficulty | Low (MicroPython firmware encapsulates low-level details; NTP sync with minimal code) | Medium-High (Protocol stack debugging, low-level driver development needed; high R&D capability required) |
| Network Stability | Very High (WIZnet has specialized in hardware TCP/IP stacks for 25 years; strong anti-interference; stable NTP sync) | Variable (Depends on developer proficiency with protocol stacks and network development) |
| CPU Resource Usage | 0% (Protocol stack fully handled by hardware; zero MCU resource consumption) | 50%+ (Protocol stack runs on MCU, consuming significant CPU and memory) |
| Hardware Socket Count | W5500 8 independent hardware sockets, supporting concurrent multi-connection | Depends on MCU capability; theoretically supports multiple channels |
| Network Throughput | W5500 up to 15 Mbps; fast NTP request/response | Depends on MCU capability; generally lower than hardware stack solutions |
| Interface Ease of Use | SPI interface, simple wiring, compatible with most MCUs, supports high-speed communication | Requires MCU with MII/RMII dedicated interfaces; limited compatibility |
| Deployment Difficulty | Low (Mature MicroPython firmware; application-layer protocols have library support; flexible deployment) | High (Application-layer protocols require manual porting of open-source libraries; high debugging cost) |
W55RP20-EVB-MKR development board already includes an onboard Ethernet interface, making it ideal for rapid Ethernet functionality verification.
For the NTP time synchronization example, the advantages of W55RP20-EVB-MKR are: no additional Ethernet module connections needed, no complex low-level driver configuration required; NTP time synchronization can be achieved with just a few lines of MicroPython example code, and the hardware protocol stack consumes zero MCU resources, making time synchronization more stable and reliable.
9. Typical Application Scenarios
The W55RP20-EVB-MKR module, combining the rapid development advantages of MicroPython with the stability of WIZnet's hardware protocol stack, is ideal for the following NTP time-synchronization-based embedded and IoT application scenarios:
IoT device log timestamping: Add precise time markers to device operation logs and sensor data records
Industrial sensor scheduled collection & reporting: Automatically collect sensor data and report to the cloud on a scheduled basis (every minute / every hour / every day)
Smart home device scheduled control: Automate scenarios such as scheduled light on/off, scheduled temperature adjustment, and scheduled irrigation
Multi-device networking unified time reference: In multi-device collaborative work, ensure all devices use a unified time reference to avoid timing disorder
Embedded education & NTP protocol experimentation: Suitable for beginners learning NTP protocol principles, UDP communication mechanisms, timestamp conversion, and related concepts
Low-cost precise timekeeping without RTC hardware: No additional RTC chip or battery required; achieve low-cost precise timekeeping through software NTP synchronization
10. Summary
Starting from the principles of the NTP network time protocol, this article systematically introduced how to implement precise network time synchronization using the W55RP20-EVB-MKR development board. With the WIZnet hardware TCP/IP stack, NTP time retrieval, timezone calibration, and periodic re-synchronization can be accomplished with just a small amount of MicroPython code, laying a solid foundation for subsequent scheduled tasks, logging, and other applications.
Key takeaways from this article:
NTP Protocol Principles: Understood the NTP time synchronization mechanism via UDP port 123, mastered the NTP-to-Unix timestamp conversion formula (Unix = NTP - 2208988800), and the UTC+8 timezone calibration method
Development Environment Setup: Completed W55RP20-EVB-MKR firmware flashing and Thonny IDE configuration
NTP Time Sync Code Implementation: Encapsulated the get_ntp_unix_time function for NTP requests and parsing, and the unix_to_datetime function for leap year detection, per-month day calculation, and Beijing Time output
Local Timekeeping & Anti-Drift: After the first successful sync, local per-second timekeeping based on time.time(); automatic NTP server re-sync every minute effectively suppresses crystal oscillator drift
Exception Handling: Built-in 3-second timeout and try-except exception catching ensure the program does not freeze during network fluctuations
Troubleshooting: Summarized troubleshooting methods for four major categories: NTP sync timeout, timezone offset, clock drift, and device detection
Solution Comparison: Compared W5500 hardware stack vs. external PHY chip solutions; W55RP20's 8 hardware sockets and 0% CPU usage stand out significantly in scenarios requiring continuous network communication
After mastering the NTP time synchronization techniques in this tutorial, your embedded devices will have a precise time reference, providing reliable support for scheduled task execution, log timestamping, and multi-device time-sequence synchronization. The next tutorial will cover HTTP Client requests, laying the groundwork for device cloud connectivity and data exchange.
11. Upcoming Tutorials & Resource Acquisition
11.1 Upcoming Tutorials
The next tutorial will cover HTTP Client Requests with W55RP20-EVB-MKR MicroPython, taking you through:
HTTP protocol principles and request structure
MicroPython implementation of GET/POST requests
Webpage data retrieval and JSON data parsing
Laying the foundation for device cloud connectivity and network data exchange
11.2 Resources
Complete code for this article: WIZnet Pico MicroPython Example Project
W55RP20 chip datasheet: WIZnet Official Resources Page
If this article was helpful, likes, bookmarks, and follows are appreciated — your support is our motivation to keep creating!
If you have any questions, feel free to leave a comment below, and we will reply promptly.