
W5100S-EVB-PICO + ThingsCloud
W5100S-EVB-PICO + ThingsCloud

WIZnet - W5100S-EVB-Pico
x 1

adafruit - DHT22 temperature-humidity sensor
x 1
Story
This is an application for me to learn how to communicate with an IOT platform.
In my point of view, I think this IOT platform is not that hard to use and it has some good features to allow me to remotely control the modules easily.
Since I had some good experience on using circuitpython and W5100S-EVB-PICO, I used it to communicate with a Chinese IOT platform called ThingsCloud.
This is a Chinese IOT platform that I found from a Chinese Blog.
It includes different kind of communication methods to communicate with IOT platforms
For this applicaiton, I used MQTT to communicate ThingsCloud.
To know more about this IOT platform, please refer to the link below.
Struture:

The above image is the connection diagram that I made for this IOT application.
As you could see, this application is very simple.
The purpose for doing in this way is to show how easy to monitor devices using ThingsCloud.
Thus, I just added ONE INPUT and ONE OUTPUT module for showing the most basic setup for communicatiing with ThingsCloud
INPUT data to ThingsCloud:
DHT22 - This is the most simple and basic module for uploading temperature and humidity. Adafruit has a good library and example code for me to easily upload those information to the platform.
OUTPUT data from ThingsCloud:
LED module - For easily to show the control the device through ThingsCloud, the best way is turning ON or OFF a LED light.
ThingsCloud - Setup a IOT platform:
SInce this is a IOT platform from China, I think I need to show how to setup a IOT platform in ThingsCloud.
ThingsCloud is a Online IOT platform that does not require to install anything to your PC and it has free version for testing this platform.
It also has webpage and mobile APP for communicating with W5100S-EVB-PICO remotely.
Step 1: Create an Account - It just required to provide your email address and password will be fine.
After email confirmation, it could create an account in this platform.

Step 2: Create a device
For creating a device, it is a very simple progress to create a device. It just require the following simple steps.
a) Select the server - it will have oversea servers (for paid version)
b) Create a Project - This is allowing user to combine all their devices in one project
c) Create a device - The specific device for this project.

After going to the project, go to "device -> all device -> create new device (blue button on the right)

Step 3: Find the connection details to communicate with ThingsCloud.
After the device has been created, you could go to the connection section to collect all the details.

After you had enter to the device section, please select the connection tab that I had highlighted.
The AccessToken will be the username for your MQTT login.
The ProjectKey will be the password for your MQTT login.
From the MQTT section, it showed the login address and the port number to communicate with ThingsCloud.
By having these information, I could easily to login to this IOT platform.
If you wanted to know more about the login method, you could go to this video link made by ThingsCloud.
Programming - Main code
After having these information, I just need to pull all those information to my codes.
WIZnet and adafruit has created a lot of different kinds of codes for me to communicate with MQTT server in a simple way. (link)
By using the MQTT codes, I just added the information to my secret file and login to the ThingsCloud MQTT server.
Codes:
mqtt_client = MQTT.MQTT(
    broker="gz-3-mqtt.iot-api.com",
    username=secrets["thingscloud_user"], #AccessToken
    password=secrets["thingscloud_pass"], #ProjectKey
    client_id=secrets["thingscloud_id"], #Random name to pass the codes
    is_ssl=False,                        #Not in SSL (Port 1883)
)

# Connect to ThingsCloud
print("Attempting to connect to %s" % mqtt_client.broker)
mqtt_client.connect()
After the connection setup has been created, I just need to find the correct channels to publish and subscribe.
Codes:
mqtt_attributes = "attributes" #Publish channels to ThingsCloud
mqtt_push = "attributes/push" #Subscribe channels to receive data from ThingsCloud

#Subscribe the receive data channel
print("Subscribing to %s" % mqtt_push)
mqtt_client.subscribe(mqtt_push)

#Using loop function in the while loop to collect data from ThingsCloud
mqtt_client.loop()

#Publish data to publish channel (Inside While Loop)
print("Publishing to %s" % mqtt_attributes)
mqtt_client.publish(mqtt_attributes, data)
For making this application to be more understandable and presentable, I added codes to allow W5100S-EVB-PICO to upload temperature and humidity data to ThingsCloud. I even added codes from the message function (MQTT received data) to control my LED module.
For the communication with ThingsCloud, it required to handle in JSON format. Thus, I had setup my codes in to communicate with the platform in JSON format.
Codes:
#Message function Setup
def message(client, topic, message):
    # Method callled when a client's subscribed feed has a new value.
    print("New message on topic {0}: {1}".format(topic, message))
    if message.find('"relay"') > 0: #find relay - The name for the switch
        if message.find("true") > 0: #find true - It means turn ON LED
            LED_light.value = 1
        elif message.find("false") > 0: #find false - It means turn OFF LED
            LED_light.value = 0

# Setup the callback methods above - Required for MQTT communication in circuitpython
mqtt_client.on_message = message

#Subscribe the receive data channel
print("Subscribing to %s" % mqtt_push)
mqtt_client.subscribe(mqtt_push)

while True:
    mqtt_client.loop()
    try:
        # Print the values to the serial port
        temperature_c = dhtDevice.temperature #collect temperature from DHT22

        humidity = dhtDevice.humidity #collect humidity from DHT22
        data = '{'+'"temperature": {},"humidity": {}'.format(temperature_c,humidity)+'}'    #Set into correct JSON format before sending to ThingsCloud

        #Send the values to ThingsCloud
        print("Publishing to %s" % mqtt_attributes)
        mqtt_client.publish(mqtt_attributes, data)

        time.sleep(0.5)
    except RuntimeError as error:
        # Errors happen fairly often, DHT's are hard to read, just keep going
        print(error.args[0])
        time.sleep(2.0)
        continue
    except Exception as error:
        dhtDevice.exit()
        raise error
Display on Mobile APP
There are few more steps to make those information to display on the mobile app.
1. Install thingsx app. It has IOS and android version. (Details)
2. Platform settings. Create a device type and connect the device to this type for fully control
3. Add variables that has the same name with the name I uploaded to the platform
4. Set the Mobile APP page display
1. Installing thingsX app:
Thingsx APP is the mobile phone app for this IOT platform. After intsalling the app, you just required to provide some login details.
a) Create a user APP - This is for managing the user to use specfic for this project. Please select thingsX and give a name to this user APP.
Location: Application -> User application -> create a new user application (blue Button)

Select ThingsX:

Create a name and create this application

After the User application has created, you will have your first login information: AppID.

To create a user account, please go to application -> user accounts -> create a new user account (Blue button)

Provide username and password to create an account.

Finally, you could login into ThingsX APP.

Logged In page

2. Platform settings - Create a device type
Creating a device type is trying to connect the platform with the mobile app.
For creating this device type, I need to go to device -> device type -> create a new device type (blue button)

After that, I put it my name and use select Ethernet for this communication with the device

After the device type is created, I need to add the communcated device to this device type.

3. Add variables to device type
For allowing the data from device to device type, please make sure the variables are the same for both sections.


The variables has set into upload and download sections from device type section.
Upload (Orange) -> Temperature and Humidity
Download (Blue) -> Relay ( Controlling the LED light)
4. Mobile Appplication display setup
For this section, I need to go to device type -> Application settings -> Edit device display

After I get into the setup page, I could add any widget into the page and it will display on the Mobile APP.

For this section, you could follow the example video that I learn from ThingsCloud.
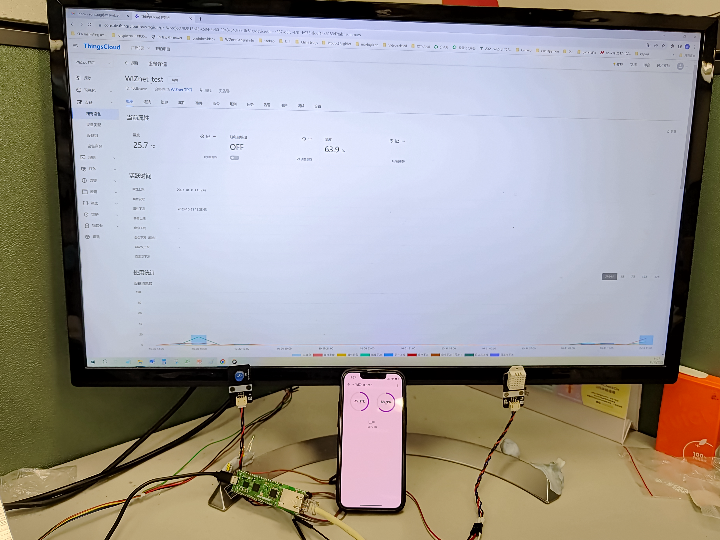
YouTube Results:
This is the Demo Video that I made for this application.
It showed how my application has reacted with ThingsCloud with W5100S-EVB-PICO.
Thank you for reading. :)
-
Codes
