Part 12: W55RP20-EVB-MKR MicroPython Hands-on (12): MQTT Protocol Basic Communication Verification
This article is Part 12 of the WIZnet W55RP20 chip MicroPython tutorial series. It is written based on the latest official firmware;
COMPONENTS
PROJECT DESCRIPTION
Part 12: W55RP20-EVB-MKR MicroPython Hands-on (12): MQTT Protocol Basic Communication Verification
This article is Part 12 of the WIZnet W55RP20 chip MicroPython tutorial series. It is written based on the latest official firmware; all code has been verified in practice and can be flashed and run directly.Copyright Notice: This article is an original technical article from WIZnet. Please indicate the source when reposting.
In the previous hands-on tutorial, we completed the HTTP protocol and OneNET platform data upload to the cloud using the W55RP20 chip.This article focuses on the core IoT communication protocol — MQTT. MQTT is the most mainstream lightweight communication protocol in IoT, adopting the Publish/Subscribe (Pub/Sub) model. It has low bandwidth usage, low power consumption, and supports reconnection after disconnection, making it very suitable for embedded Ethernet devices to connect to the cloud and communicate between devices. The W55RP20 integrates a hardware TCP/IP protocol stack, and with the MicroPythonumqtt library, stable MQTT communication can be achieved in just a few lines of code without worrying about underlying Socket details.
After learning this article, you will master:
Core principles of the MQTT protocol and the publish/subscribe mechanism
Connecting W55RP20 to local/public MQTT servers
Implementing message publishing, subscribing, and callback handling
Industrial-grade stability mechanisms such as heartbeat keep-alive and disconnection reconnection
Setting up a local MQTT test environment
Three major pain points of traditional embedded MQTT development, solved by W55RP20 in one click:
Complex protocol stack debugging: Software TCP/IP protocol stacks require manual porting and debugging, occupy MCU resources, and are prone to lag and memory overflow. The W55RP20 has a built-in hardware TCP/IP protocol stack; network layer processing is entirely completed by hardware, without occupying CPU resources, and requires no protocol stack debugging.
Tedious hardware wiring: External network modules require manual soldering and debugging interface timing, making it easy for beginners to make mistakes. The W55RP20 has an onboard Ethernet interface, requiring no additional external modules, plug-and-play, greatly simplifying wiring operations.
High entry barrier: Details such as MQTT client connection and heartbeat keep-alive need to be manually written, with long debugging cycles. This article provides complete code that can be run directly, with clear comments, and with 10-minute step-by-step operations, beginners can quickly see results. Relying on MicroPython's compilation-free feature, code modifications take effect immediately, and debugging provides real-time feedback, quickly giving a sense of achievement.
Core objectives of this lesson:
· Complete hardware connection of W55RP20 with PC and development environment configuration
· Understand core principles of the MQTT protocol and its minimalist workflow
· Flash MQTT client code to achieve connection with a public MQTT server
· Complete topic subscription, message publishing, and loopback communication testing
· Master quick troubleshooting methods for common faults
Tutorial Series Learning Path
This column consists of 16 articles, progressively covering the full W55RP20-EVB-MKR module MicroPython development workflow:
Part 1: Static IP Configuration and Network Basics
Part 2: DHCP Auto-Networking and Network Diagnostics
Part 3: TCP Client Communication
Part 4: TCP Server Communication
Part 5: UDP Unicast Data Communication
Part 6: UDP Multicast/Broadcast Data Communication
Part 7: DNS Domain Name Resolution
Part 8: NTP Time Retrieval from Network
Part 9: HTTP Client Requests
Part 10: HTTP Server Setup
Part 11: HTTP Protocol and OneNET Platform Data Upload
Part 12: MQTT Protocol Basic Communication Verification (This article)
Part 13: MQTT Protocol and Alibaba Cloud Platform Integration
Part 14: MQTT Protocol and OneNET Platform Integration
Part 15: MQTT Protocol and ThingSpeak Platform Integration
Part 16: Modbus Industrial Protocol Communication
It is recommended to bookmark this column and follow the tutorials step by step. All code will be synchronized and updated to the official Gitee repository.
Specially written for the W55RP20-EVB-MKR module, with WIZnet hardware driver and protocol stack integrated
1.2 Hardware Preparation
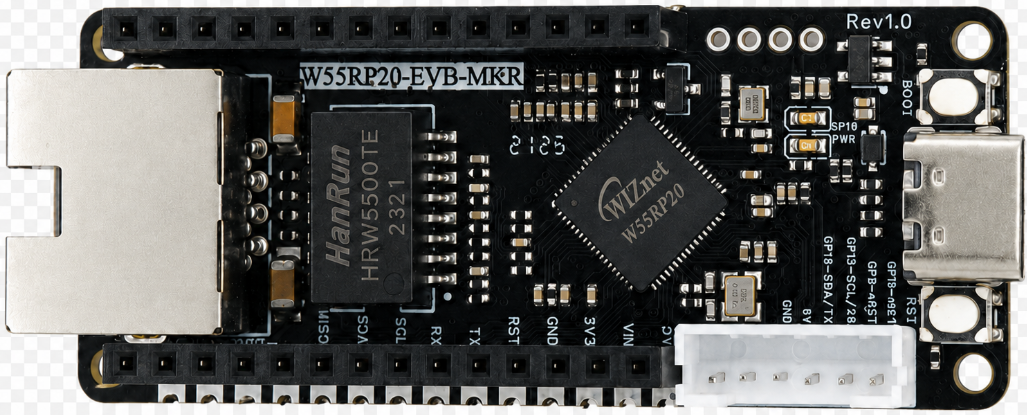
W55RP20-EVB-MKR × 1
Micro USB data cable (must support data transmission, cannot use a charging-only cable) × 1
Standard Ethernet cable × 1
Router / switch with DHCP enabled × 1 (used to obtain network parameters and implement DNS resolution)
The W55RP20-EVB-MKR module has integrated Ethernet-related components, requiring no additional soldering or fly-wiring. Combined with the RP2040 development board, it can quickly set up a development environment, greatly reducing the probability of wiring errors and hardware failures.
2. Flashing the W55RP20-EVB-MKR Exclusive MicroPython Firmware
The W55RP20-EVB-MKR module is fully compatible with the Raspberry Pi MKR UF2 firmware flashing method. The operation is simple, requiring no additional programmer, and beginners can quickly get started:
Press and hold the BOOTSEL button on the RP2040 development board;
Use a Micro USB data cable to connect the development board to the PC;
After the PC recognizes a USB drive named RPI-RP2, release the BOOTSEL button;
Drag and drop the downloaded W5500_RP2040_firmware.uf2 firmware file into the USB drive;
The development board will restart automatically, and firmware flashing is complete.
Note: If the PC does not recognize the RPI-RP2 USB drive, try replacing the USB data cable, re-plugging the development board, or changing the PC USB port (preferably use a USB 2.0 port).
3. Hardware Connection and Development Environment Configuration
3.1 Hardware Connection
The W55RP20-EVB-MKR module connection is divided into two steps, respectively achieving power/debug and Ethernet connection. The operation is simple, requiring no complex wiring:
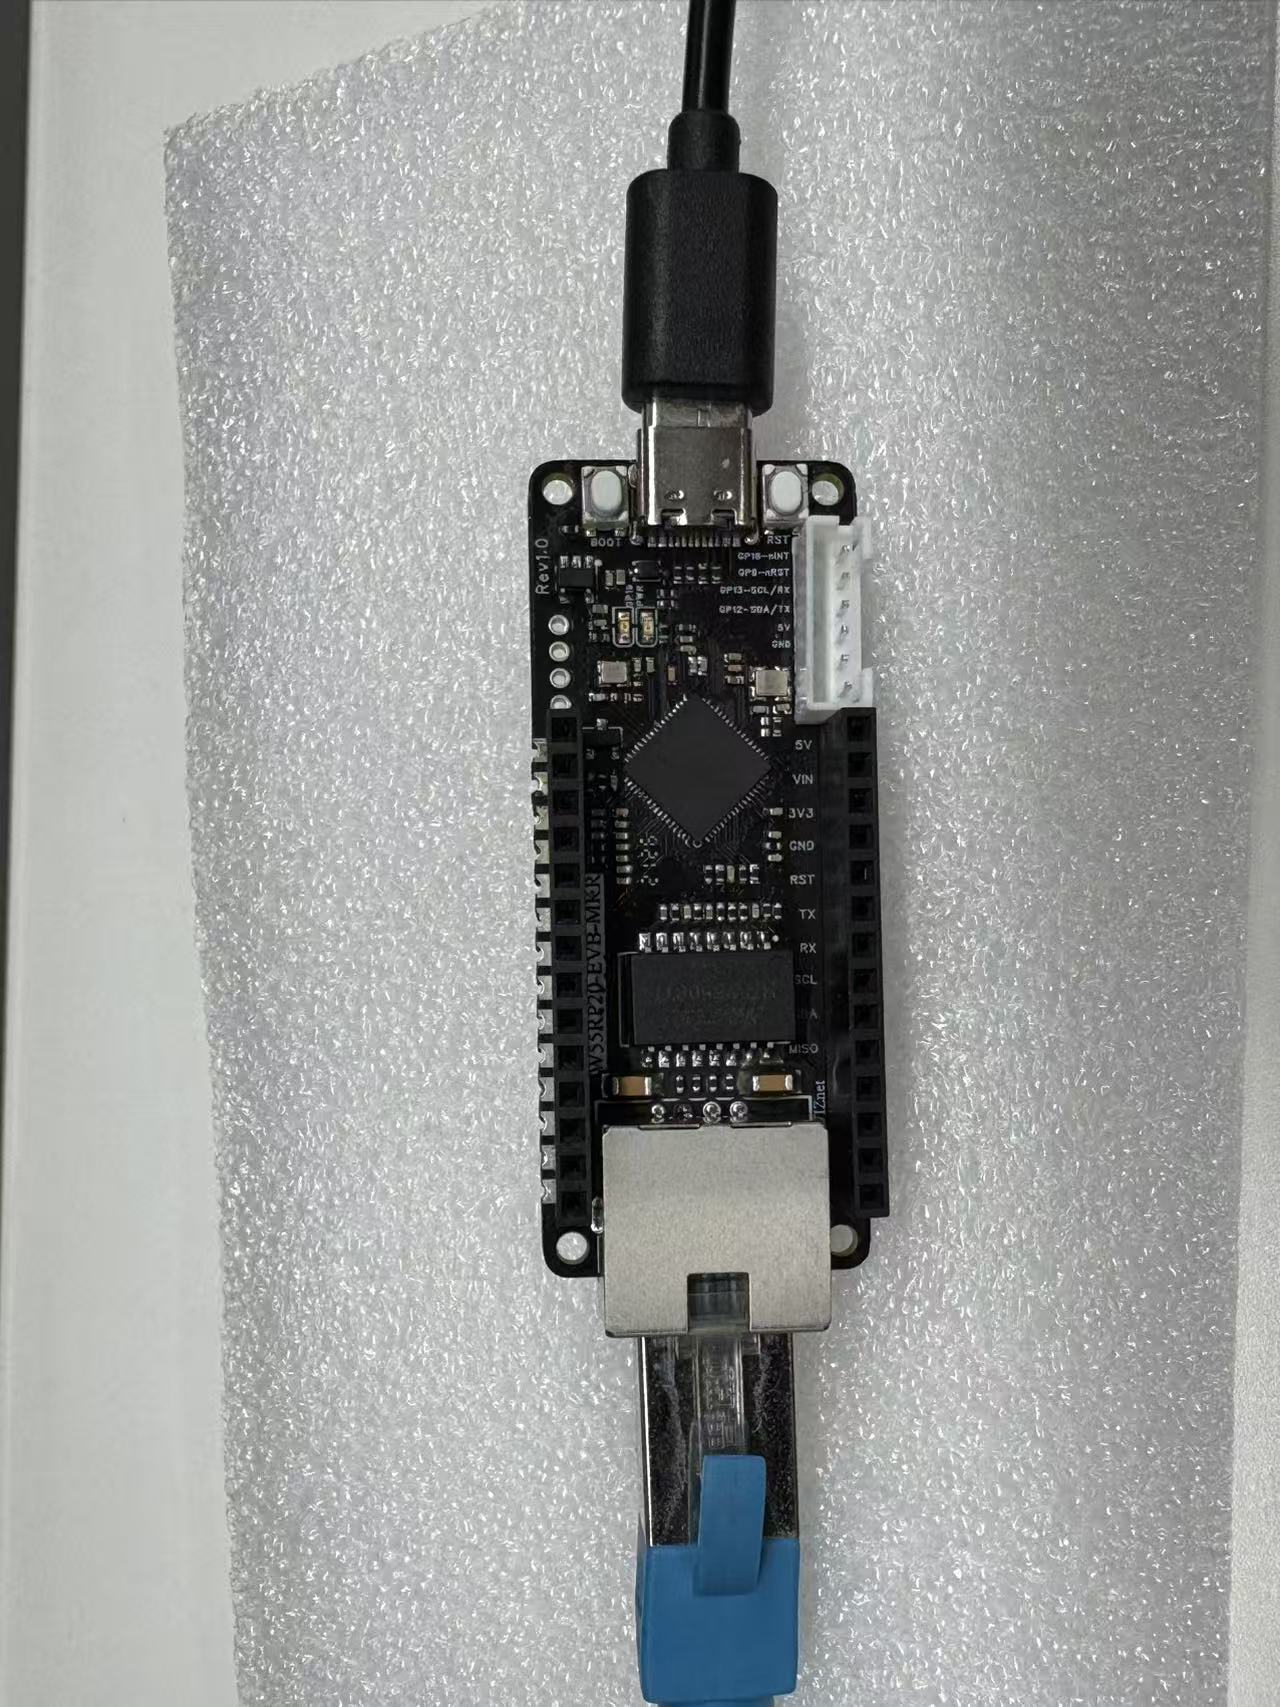
3.1.1 Basic Connection (Power + Debug)
Use a Micro USB data cable to connect the RP2040 development board to the PC, for development board power supply, code flashing, and serial debugging.
3.1.2 Ethernet Connection
Use an Ethernet cable to connect the W55RP20-EVB-MKR module's Ethernet interface to the router's LAN port (or directly connect to the PC's network port; in this case, the PC IP needs to be manually configured to be in the same subnet as the development board).
3.1.3 Module and Development Board Wiring
If using a separate module and development board, connect according to the following pin correspondence (SPI communication):
3.2 Thonny Development Environment Configuration
Open the Thonny software and configure the development environment according to the following steps to ensure that code can be flashed and run normally:
Click the top menu bar "Run" → "Configure Interpreter";
Switch to the "Interpreter" tab;
Select MicroPython (Generic) from the "Interpreter" dropdown list;
Select the serial port corresponding to the development board from the "Port" dropdown list (usually displayed as Board CDC @ COMx);
Check "Restart interpreter before running code" and "Synchronize device's real-time clock";
Click "OK" to complete the configuration.
If the development board does not appear in the port list, try:
Re-plugging the USB data cable;
Replacing the USB data cable with one that supports data transmission;
Closing other software occupying the serial port (such as serial assistants, Arduino IDE, etc.);
Re-flashing the MicroPython firmware;
Installing the Raspberry Pi Pico USB driver.
4. MQTT Protocol Minimalist Analysis
MQTT is a lightweight IoT message transmission protocol based on the publish/subscribe model. It is suitable for embedded devices with limited hardware resources and network environments with limited bandwidth. It is widely used in IoT, smart hardware, industrial control, and other scenarios. Its core advantages are being lightweight, efficient, reliable, and easy to implement. The minimum control message requires only two data bytes, the message header is streamlined, and network bandwidth can be optimized.
Minimalist workflow (4 steps):
The client (W55RP20) connects to the MQTT server (this article uses a free public server, no registration required);
The client subscribes to a specified topic (such as /W55RP20/sub) to receive messages;
The client (or other devices) publishes messages to the specified topic;
All clients subscribed to this topic can receive and process the message.
This article's hands-on practice uses the free public MQTT server (broker-cn.emqx.io, port 1883), which requires no registration and can be used by connecting directly, further saving time and helping you complete the hands-on practice in 10 minutes.
5. Core Code Copying and Flashing
5.1 Dependency Library Description
The core dependency is the umqttsimple.py library, used to implement basic MQTT client functions such as connection, subscription, and publishing. This library is a commonly used lightweight MQTT library in the MicroPython ecosystem, with a small size and strong adaptability, requiring no additional modifications. It can be saved directly to the W55RP20 for use. It can be downloaded from the MicroPython official repository or by directly copying the complete code provided in this article.
5.2 Complete Code and Flashing Process
Required development environmentThonnyIf you must compile MicroPython, you must use a Linux or Unix environment.Step 1: Copy the program into Thonny, then select the environment as Raspberry Pi Pico.
Step 2: Save the umqttsimple.py library file to the development board.
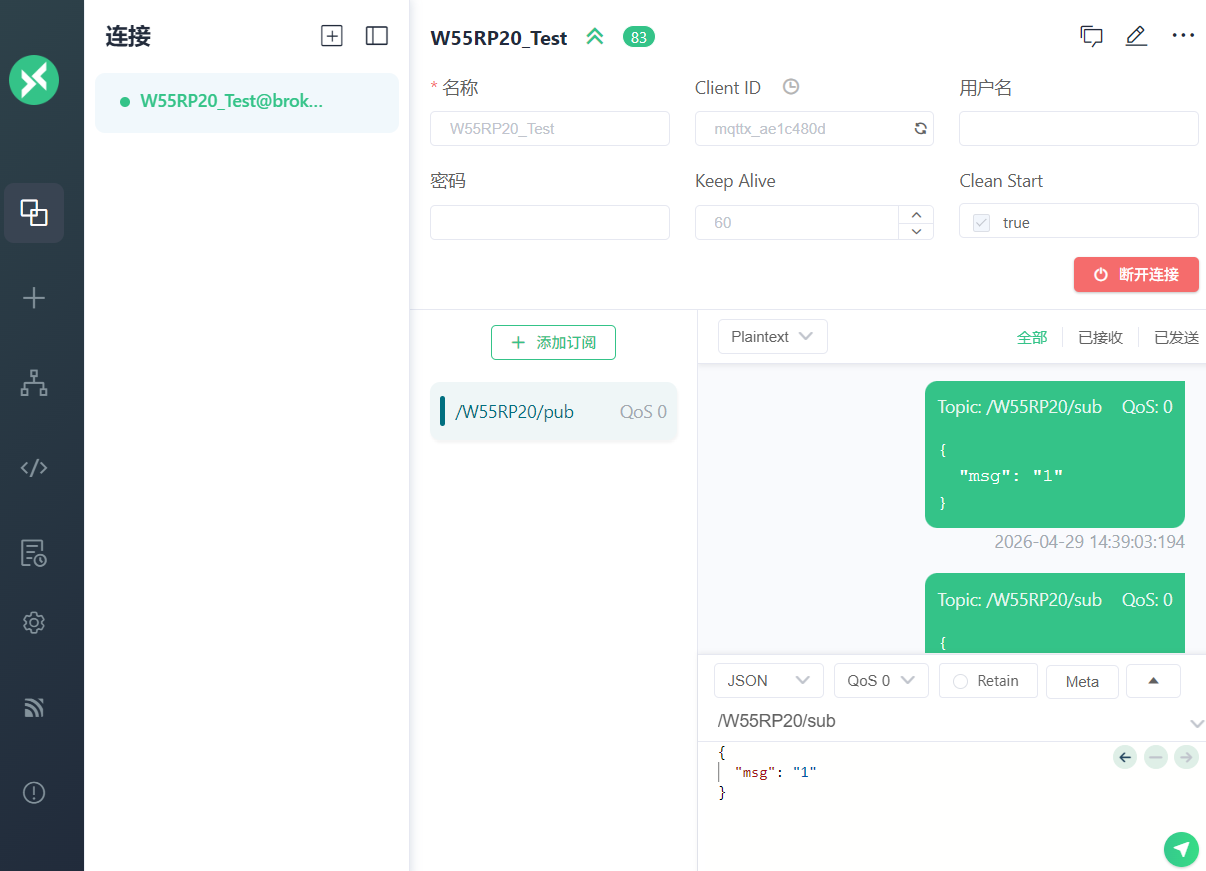
Step 3: Run the program, and open MQTTX, connect to the same server, then subscribe to the topic as the development board's publish topic, and the publish topic as the development board's subscribe topic. See the figure below.
Step 4: Send a message in MQTTX and observe the loopback test effect.
Note: Because MicroPython's print function has stdout buffering enabled, content may not be printed immediately.
6. Running Results and MQTT Communication Verification
6.1 Serial Output Results
Click the Run button in Thonny (or press F5), and the Shell window will output the following content, indicating successful network initialization and MQTT connection:
Note: If "Waiting for the network to connect....." is printed, this is normal; wait 1-3 seconds to obtain the IP. If the IP cannot be obtained for a long time, refer to the "Common Issue Troubleshooting" section.
MPY: soft reboot W55RP20 chip MQTT example Waiting for the network to connect... Waiting for the network to connect... Waiting for the network to connect... Waiting for the network to connect... MAC Address: 02:90:86:88:4d:56 IP Address: 192.168.1.118 IP : 192.168.1.118 Subnet Mask: 255.255.255.0 Gateway : 192.168.1.1 DNS : 202.96.134.33 Connected to broker.emqx.io MQTT Broker subscribed to /W55RP20/sub
6.2 MQTT Loopback Communication Verification
Use the MQTTX tool for testing. The steps are as follows (if you don't know how, follow the figures below):
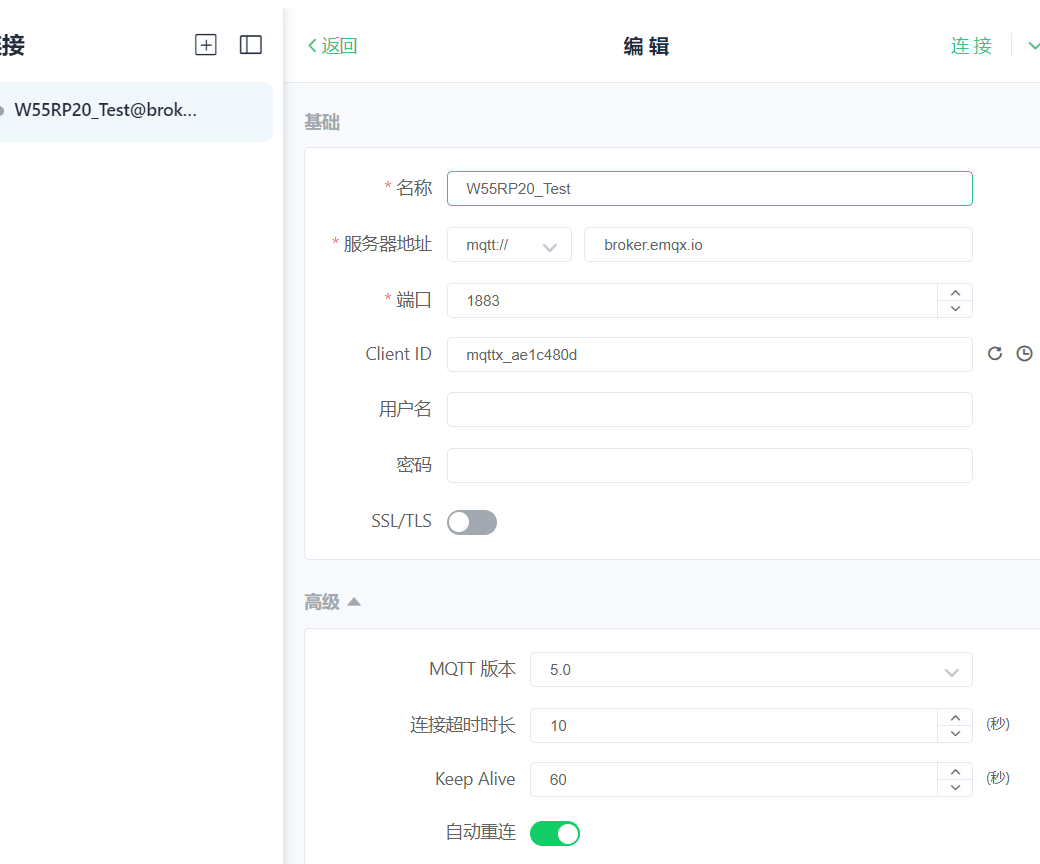
Open MQTTX, click the "+" button to create a new connection:
Name: Custom (e.g., W55RP20 Test)
Server: broker-cn.emqx.io
Port: 1883
Other parameters are default; click "Connect";
Subscribe to W55RP20's publish topic: /W55RP20/pub; you can customize it
Send a message to W55RP20's subscribe topic: /W55RP20/sub (e.g., "W55RP20 MQTT Test"); you can customize it
Observe the feedback in two places:
Thonny Shell window: Prints the received message and the "Message loopback successful" prompt;
MQTTX tool: Receives the message loopback-published by W55RP20 (consistent with the sent message).
At this point, the W55RP20 MQTT communication hands-on practice is complete
1. Replace with a USB data cable that supports data transmission2. Re-plug the development board and close other software occupying the serial port (such as serial assistants)
2. Cannot obtain IP address, keeps printing "Waiting for network to connect..."
1. Check if the Ethernet cable is firmly plugged in2. Check if the router has DHCP enabled3. Check if the Ethernet cable is connected to the router's LAN port (not the WAN port), and restart the router and development board
3. MQTT connection fails, triggering reconnection
Confirm the network is connected, the MQTT server address and port are correct (the public server used in this article requires no registration), and the umqttsimple.py library is saved correctly.
4. Message received but cannot loopback-publish
1. Confirm that the publish topic and subscribe topic in the code are configured correctly2. The MQTT connection is not disconnected3. Restart the development board and re-run the code
5. No serial output or garbled output
1. Confirm that the Thonny interpreter and port configuration are correct2. The firmware is the exclusive firmware for W55RP203. Re-flash the firmware
8. W55RP20 Core Advantage Comparison
To give you a more intuitive understanding of the value of W55RP20, we compare the three mainstream embedded Ethernet solutions currently available:
Extremely High (WIZnet has focused on hardware TCP/IP protocol stack for 25 years)
Variable (high requirements for R&D personnel, familiarity with protocol stack and network development needed for stable debugging)
Variable (depends on R&D company capability level)
CPU Resource Usage
0% (protocol stack network processing completely completed by hardware)
50% and above (protocol stack fully runs on MCU, occupying related resources)
0%
Hardware Socket Count
8 independent hardware Sockets
Depends on MCU capability, theoretically supports multi-channel expansion
Generally single-channel transparent transmission
Network Throughput
Up to 15Mbps
Depends on MCU capability
Approx. 3-5Mbps
Interface Usability
Single-chip integration
Requires MCU with MII/RMII and other interfaces
TTL interface
Deployment Difficulty
Low (mature MicroPython firmware, most application layer protocols have library files, can be flexibly added and deployed)
High (application layer protocols require manual porting of open-source library adaptation)
Depends on module integration; functions without integration require self-packaging and unpacking
9. Typical Application Scenarios
The W55RP20 chip integrates Ethernet functionality, and combined with its industrial-grade stability, it is very suitable for the following application scenarios:
Industrial Data Acquisition Gateway: Simplifies on-site deployment and achieves stable upload of sensor data
Remote Monitoring Terminal: Used for remote monitoring of equipment status in factories, machine rooms, substations, and other environments
Serial-to-Ethernet Device: Quickly upgrades traditional RS232/RS485 serial devices to Ethernet devices
Smart Building Node: Used for network control of lighting, air conditioning, access control, and other building devices
Industrial PLC Expansion Module: Adds Ethernet communication capability to PLCs, enabling remote programming and data acquisition
10. Summary
This article detailed the complete process of implementing MQTT protocol communication using MicroPython on the W55RP20-EVB-MKR development board. From firmware flashing, hardware connection, and development environment configuration, to the implementation and flashing of core code, and then to running result verification and common issue troubleshooting, we completed the setup of MQTT basic communication step by step.
Through the study of this article, you should have mastered:
How to flash the exclusive MicroPython firmware for W55RP20-EVB-MKR
The basic working principles of the MQTT protocol (publish/subscribe model, QoS levels, etc.)
The core code logic for implementing an MQTT client using the umqtt.simple library
Verifying communication success through serial output and MQTT loopback testing
Troubleshooting ideas for common connection issues
With its built-in Ethernet MAC+PHY high-integration design, the W55RP20 chip demonstrates significant advantages in the industrial IoT field. Whether as a data acquisition gateway, remote monitoring terminal, or serial-to-Ethernet device, it can achieve stable and reliable Ethernet communication at a very low cost.