
Chapter 2: How to Install KEIL5 and Create a New Project for W55MH32
Chapter 2: How to Install KEIL5 and Create a New Project for W55MH32
hapter 2: How to Install KEIL5 and Create a New Project
1 Warm Reminder
1.The installation path should not contain Chinese characters. It must be an English path.
2.The installation directory should not conflict with the KEIL for the 51 microcontroller or KEIL4. The directories of the three should be separated.
3.The installation of KEIL5 has one more step compared to KEIL4. The MCU library must be added, otherwise it cannot be used.
4.If there are inexplicable errors during use, first search for solutions on Baidu. Don't panic.
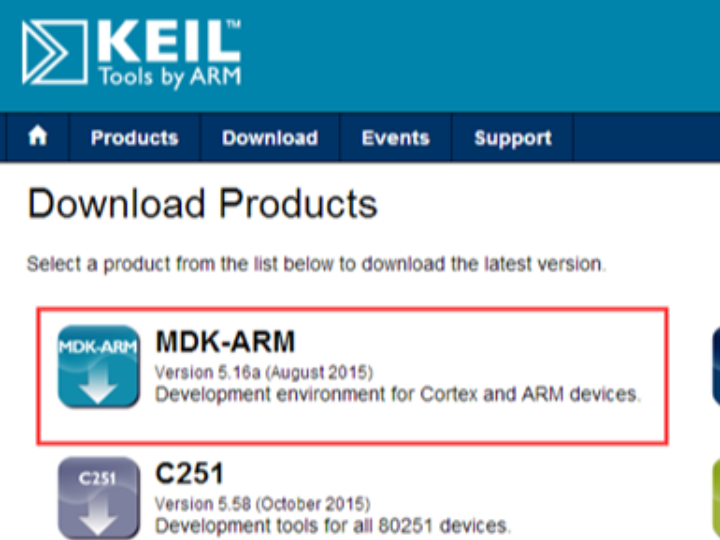
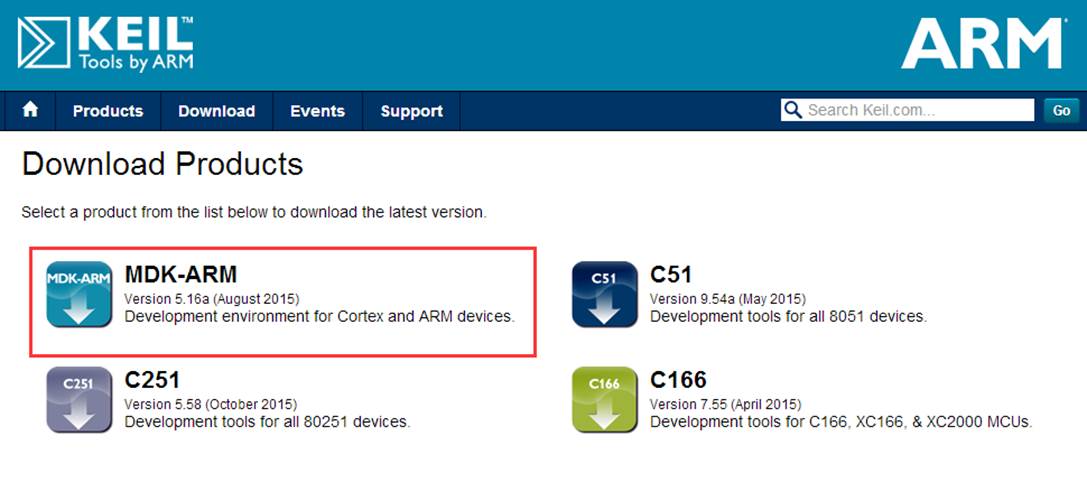
2 Obtain the KEIL5 installation package
Go to the KEIL official website to download at: Keil Product Downloads. It is recommended to use the latest version or a version close to the latest one.
3 Start Installing KEIL5
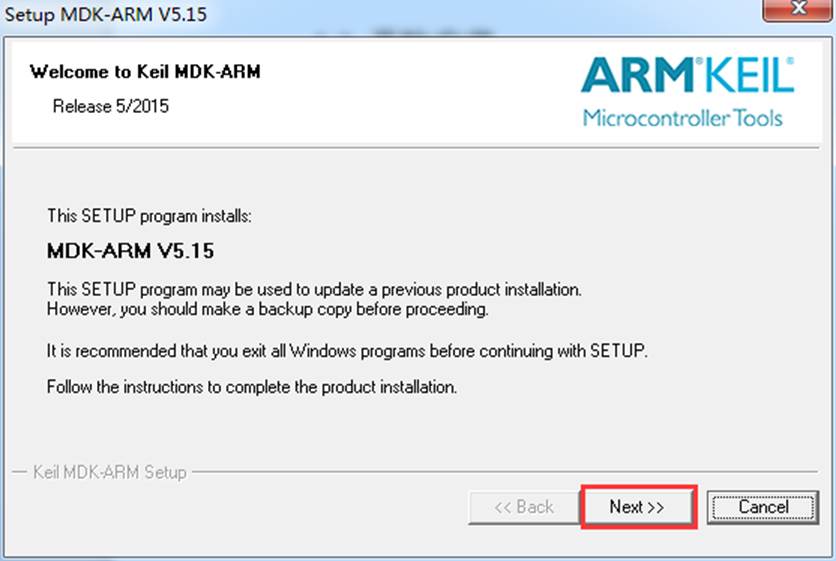
Double-click the KEIL5 installation package to start the installation. Next:
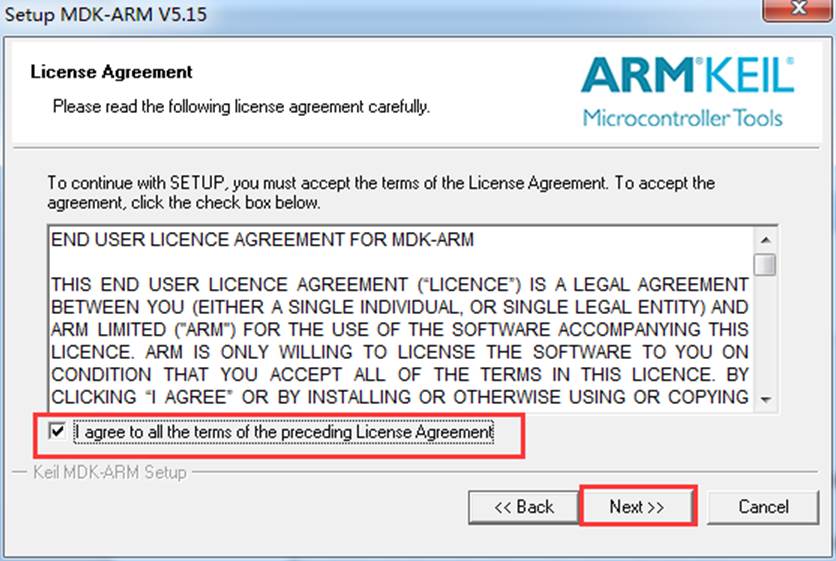
Check "I agree to all the terms of the preceding License Agreement" and then click "Next":
Select the installation path. The path cannot contain Chinese characters. Next:
Note: There might be various chip packages for future use that will be installed under the Pack directory, which could take up a lot of space. It is recommended that users with limited free space on the C drive directly edit the path in the box and change C to D (or any other drive, just change the first
character, and be careful not to delete the wrong symbols).

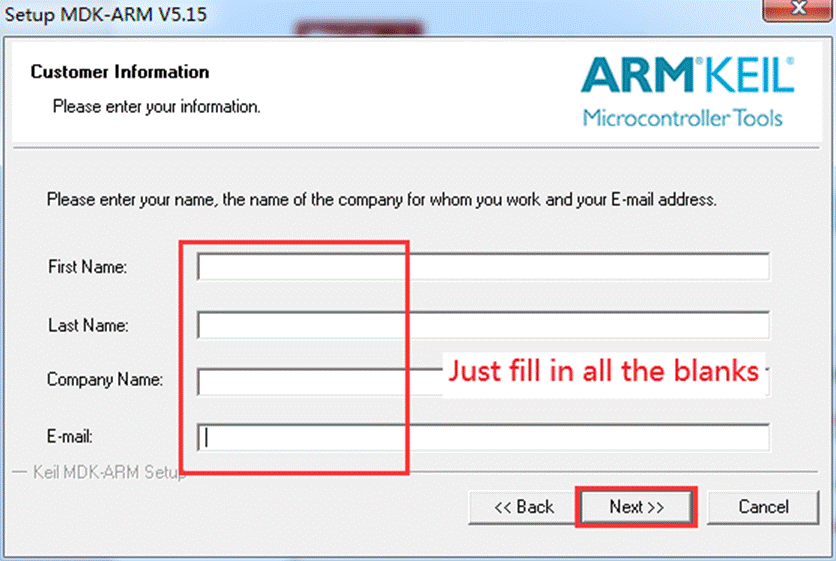
Fill in the user information. Just fill in all the blanks (using the space key on the keyboard). Next:
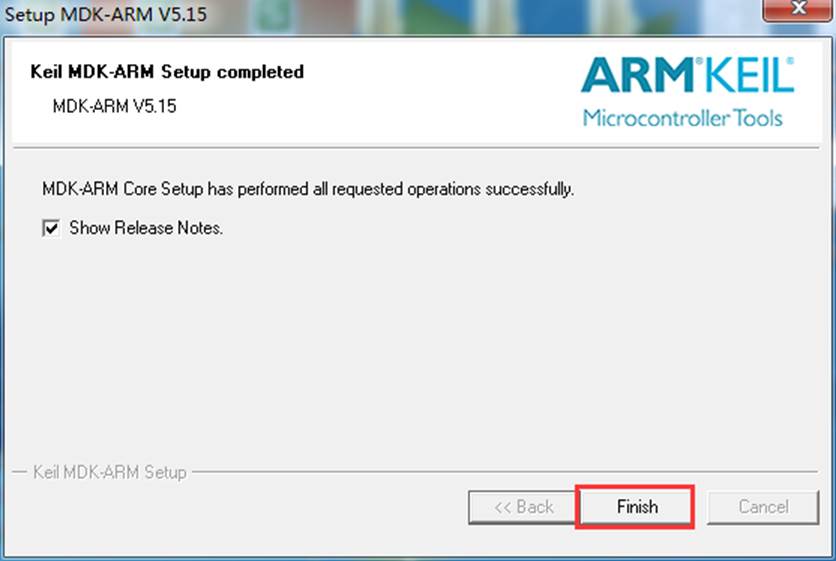
Finish,Installation completed:
4 Install the W55MH32 Pack Package
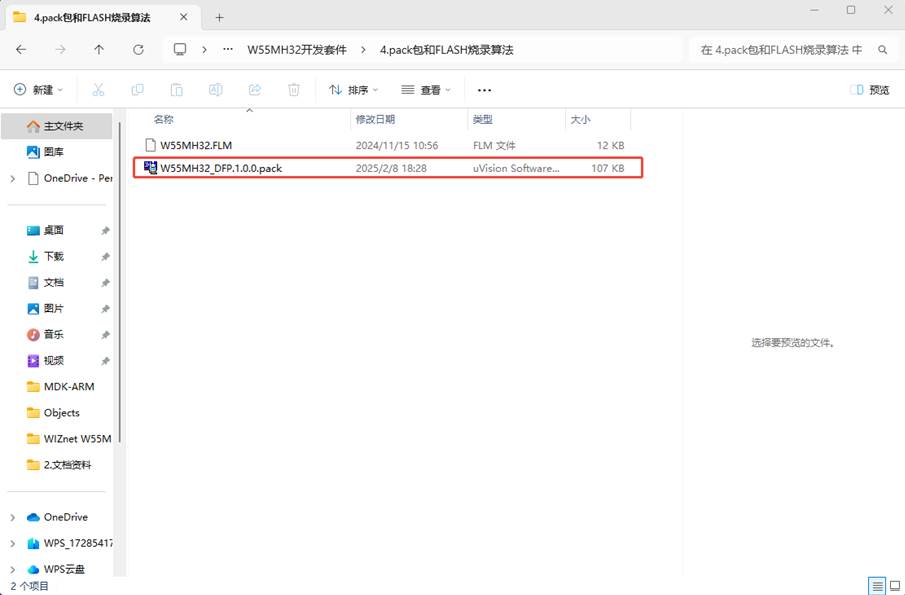
Open the "4.pack" folder and the "FLASH Burn Algorithm" folder in the W55MH32 development kit folder. Double - click the "W55MH32_DFP.1.0.0.pack" package to install it.
5 Open the example project.
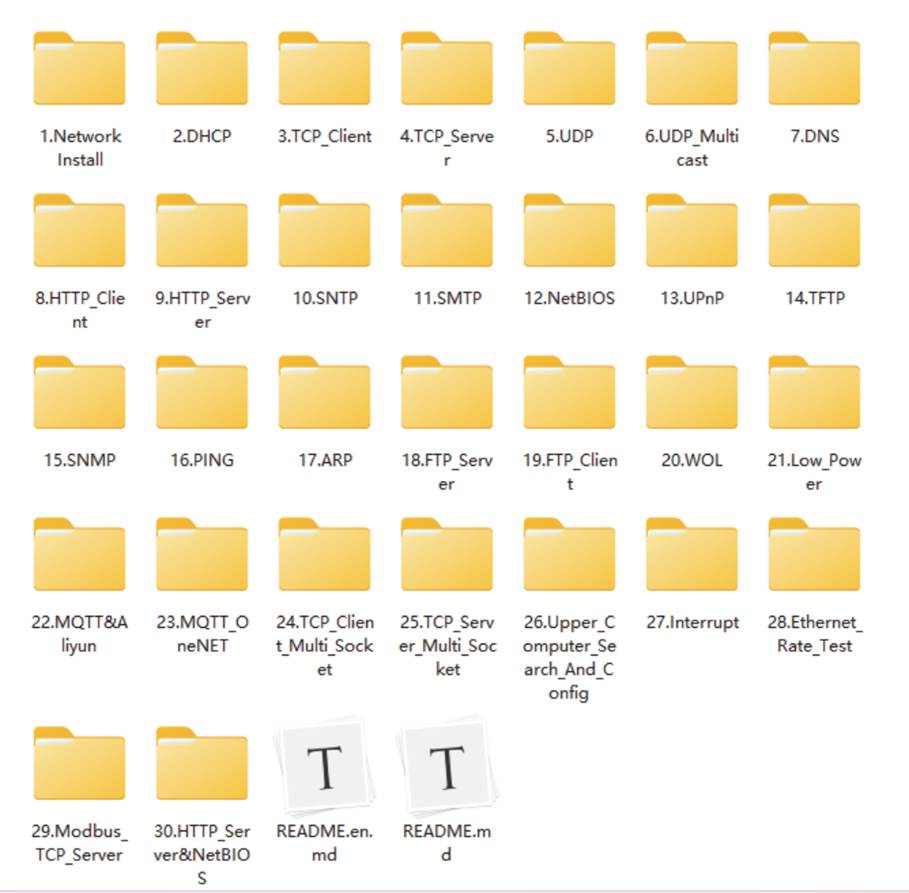
Open the SDK\ModuleDemo folder in the data package. It contains most of the peripheral examples as well as the TOE engine examples.
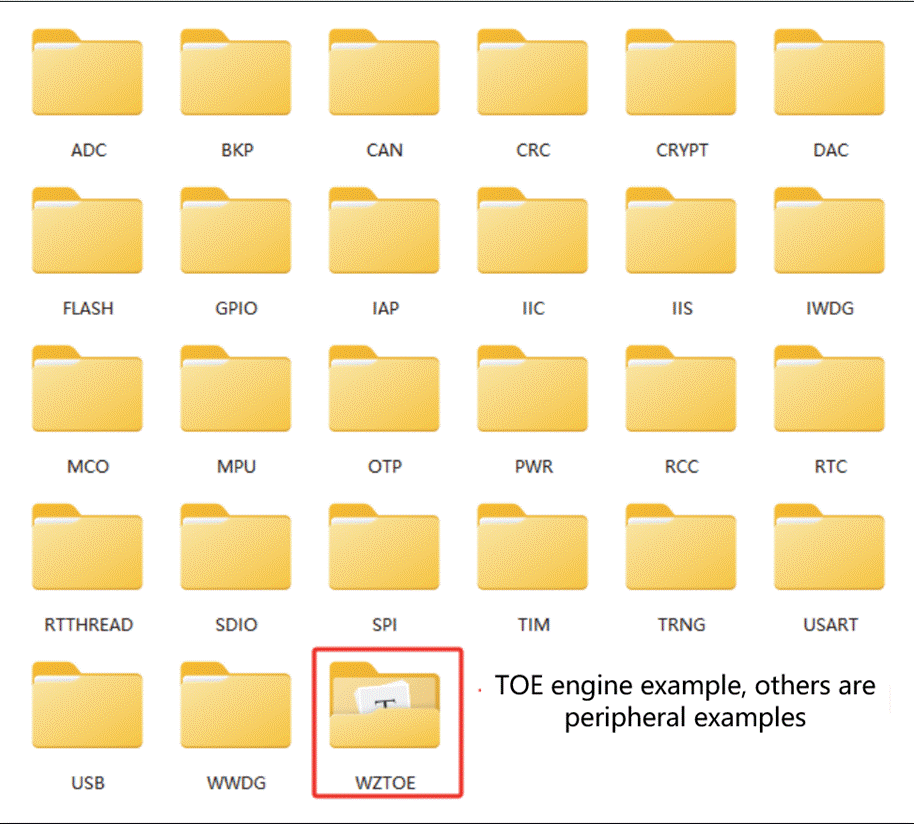
Among them, the TOE engine examples include applications of various network protocols.
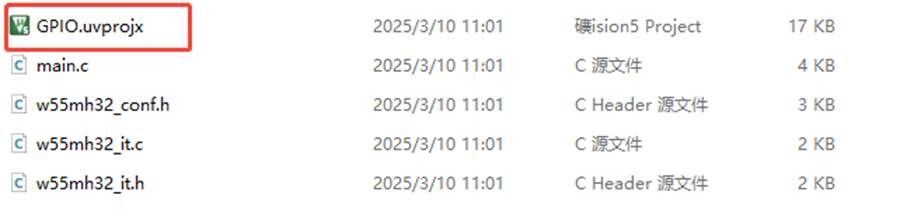
When opening a project file in KEIL5, mainly look for the file with the.uvprojx suffix. For most of the previous example routines, you can directly find the.uvprojx file and open it. Starting from the routine of the firmware library version in the newly created project, the project is opened in the form of a project template. At this time, the.uvprojx file is mainly stored in the Project folder. Find it and double-click to open it.
Let's briefly familiarize ourselves with the main window interface of KEIL5:
- Menu Bar:Includes items such as File, Edit, View, Project, and Help.
- Toolbar:Features shortcut buttons for common tools. Some frequently used tools will be highlighted below.
- Project Window:Primarily displays project contents, including file groups, source files, and header files.
- Editing Window:The area where you write code.
- Editing Window:Provides feedback on compilation and programming information.
- Status Bar:Shows status information such as cursor position (row and column), character encoding, and keyboard NUM lock status.

Three types of frequently used tool shortcut buttons:
1. Shortcut buttons for simulation: They are used during simulation and have the function of marking breakpoints.
English name | keyboard shortcuts |
Start/Stop Debug Session | Ctrl + F5 |
Insert/Remove Breakpoint | F9 |
Enable/Disable Breakpoint | Ctrl + F9 |
Disable All Breakpoints | -- |
Kill All Breakpoints | Ctrl + Shift + F9 |
2. Compilation-related shortcut buttons: Used to compile and download code.
English name | keyboard shortcuts |
Translate | Ctrl + F7 |
Build | F7 |
Rebuild | - |
Batch Build | - |
Stop Build | - |
Download | F8 |
- The Project Target Options, also known as the magic wand, is used for configuring the project target, such as selecting the chip device, setting the C/C++ options, configuring the simulation, and so on.
6 New construction project
Next, I will work with all of you to build a new project step by step.
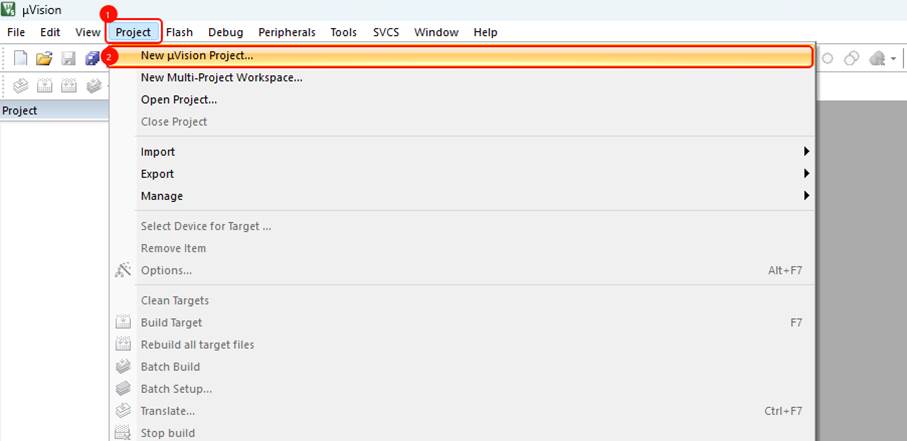
First, we will click Project -> New μVision Project... :
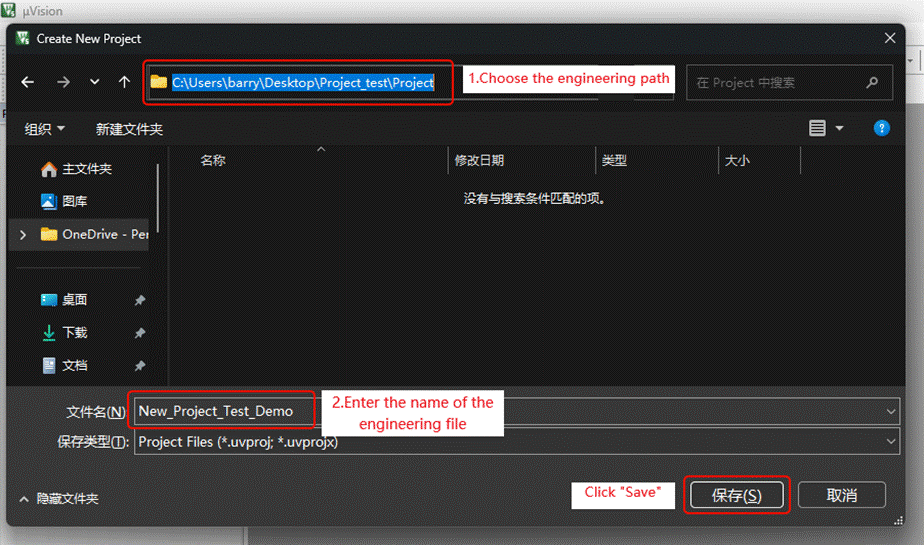
Then create a new folder to store the project files (note that the path should not contain any Chinese characters)-> Enter the name of the project file -> Click Save:
After saving, a window named "Select Device for Target 'Target 1'..." will pop up. Click on WIZnet -> W55M3 Series, then select the W55MH32L chip, and finally click OK.
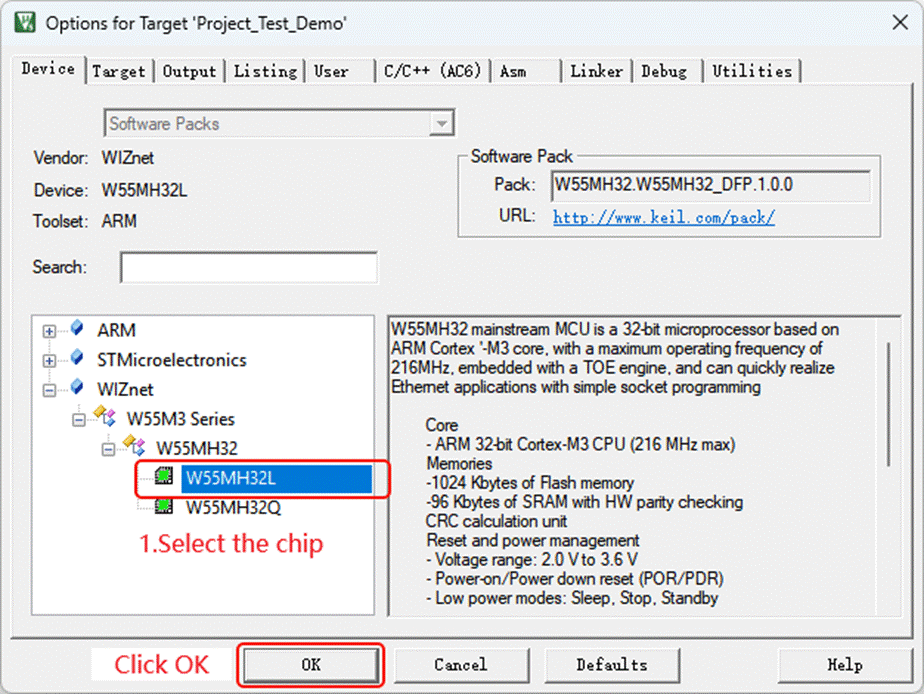
Note: If the chip is not displayed, it means the pack package is not installed. Just find it in the development kit and install it.
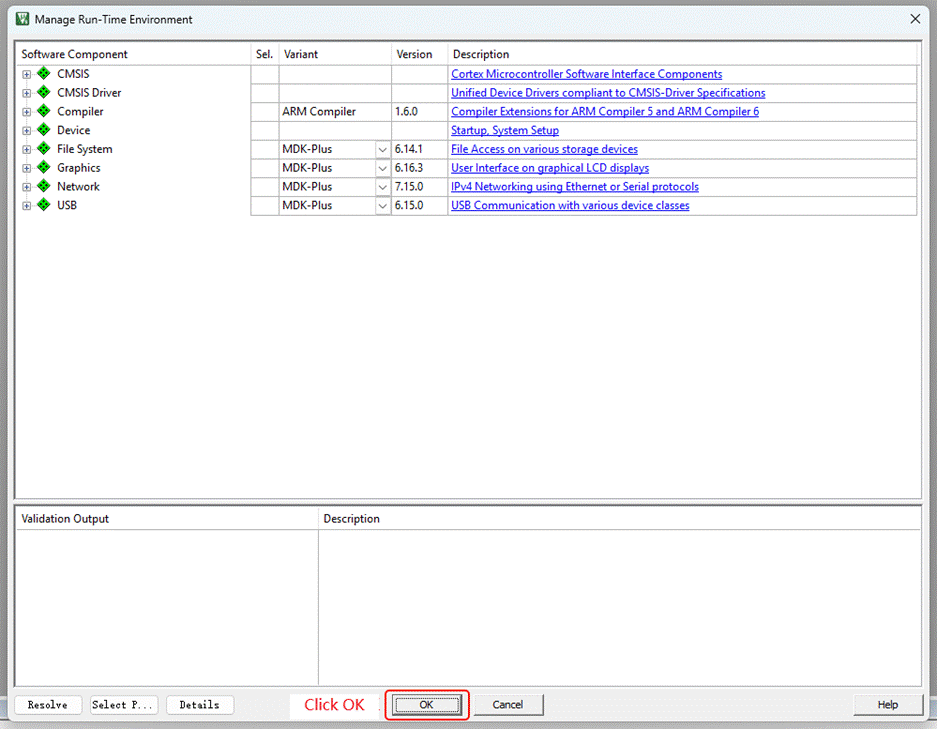
Continue to click OK:
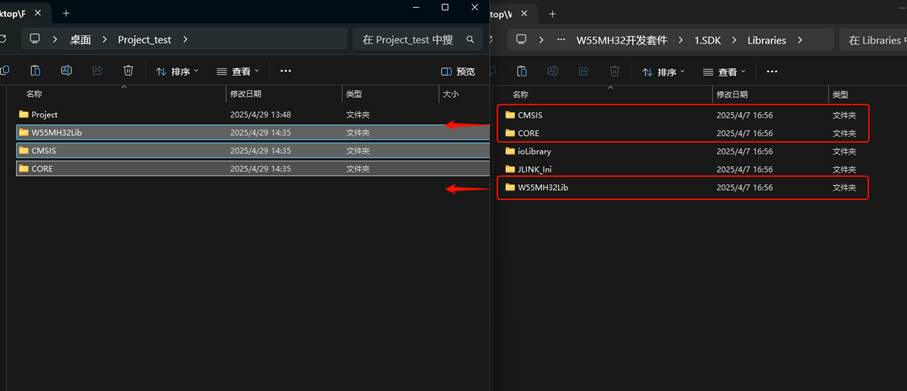
Copy and paste the startup files, kernel files and library files in the 1.SDK/Libraries folder of the development kit into the newly created project directory:
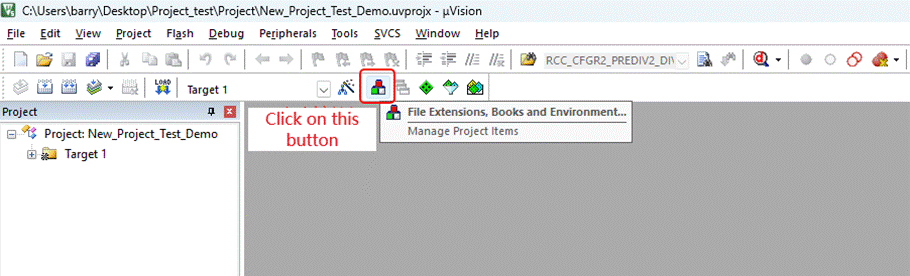
Click on the triangular button (Manage Project Items):
In this window, we can add or delete projects, folders and files, and also rename them. Files can be added as needed. If you are not sure about the function of a file or find it troublesome to add files repeatedly later, you can add all of them at once.
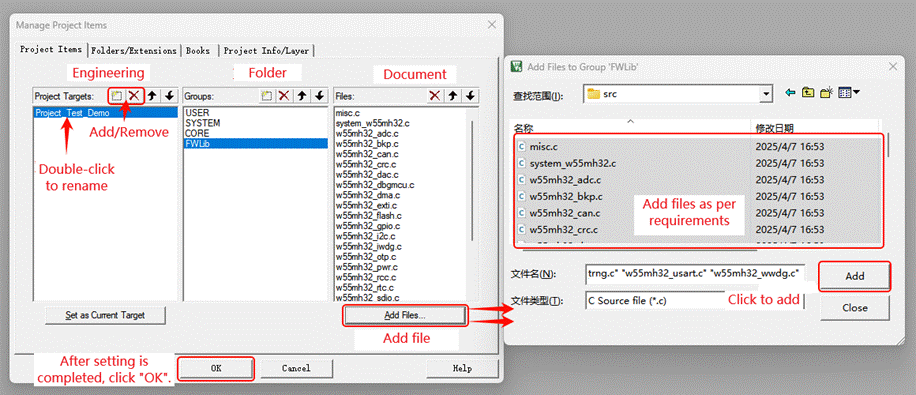
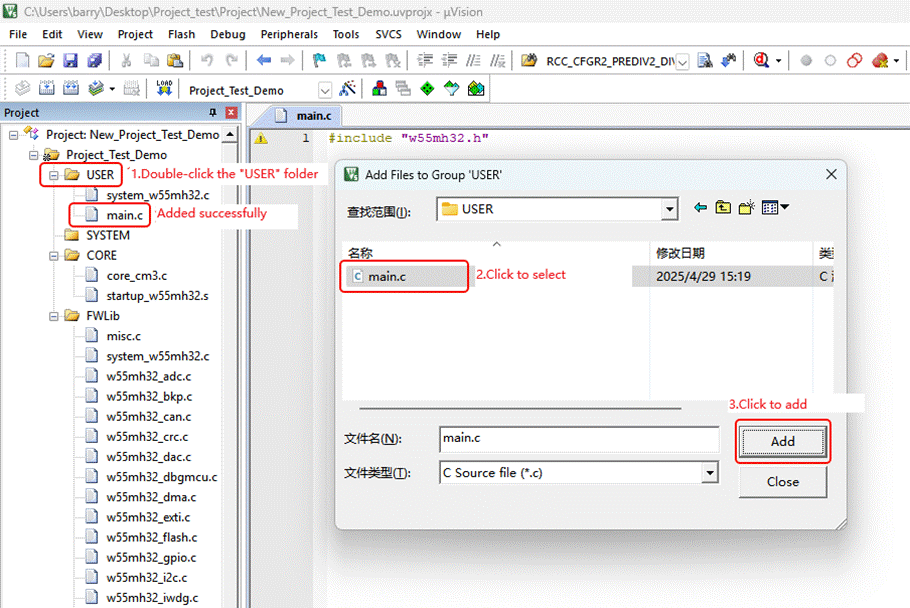
New file -> Input " #include "w55mh32.h" " in this file to add the header file > Click the save button at the top left corner -> Create a USER folder and double-click to open it -> Input the file name and file type as "main.c" -> Click save:

Double-click on the "USER" folder -> Locate "main.c" and click to select it -> Click "Add" to add the file:
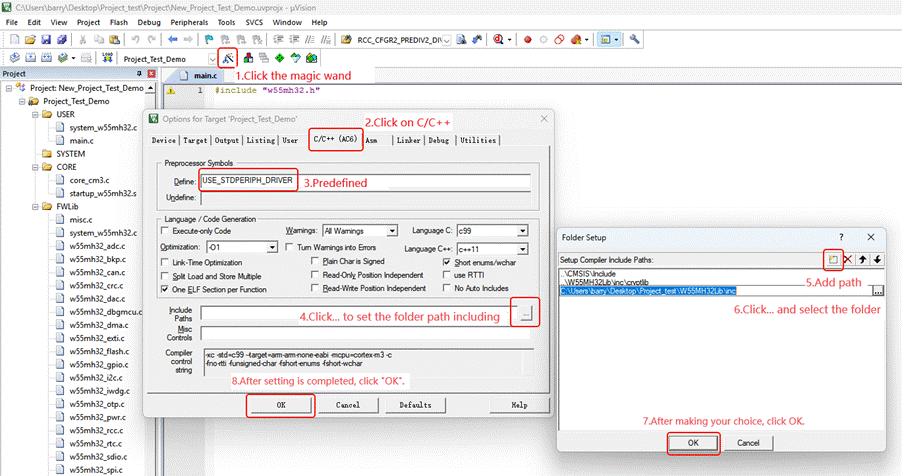
Click the magic wand -> Click C/C++ -> Enter "USE_STDPERIPH_DRIVER" as the pre-defined value in Define -> Click the "... " button on the right side of Include Paths to set the folder path inclusion -> Add the path -> Click the "... " button on the right side of the path to preview and select the folder -> Click OK -> Click OK:
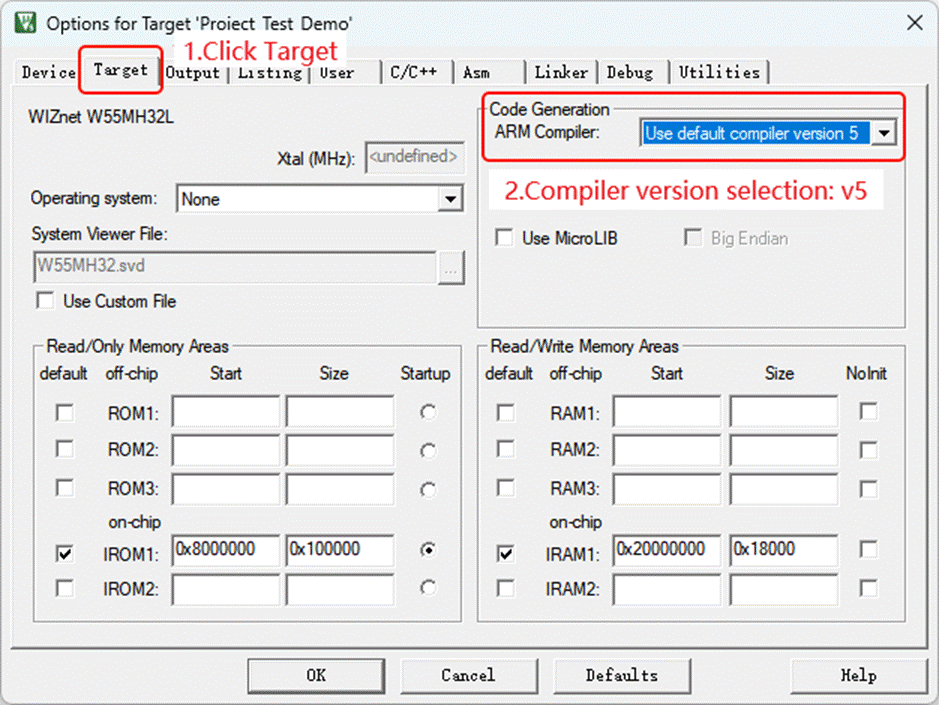
Click the Magic Wand again -> Click Target -> Select Compiler Version as V5:
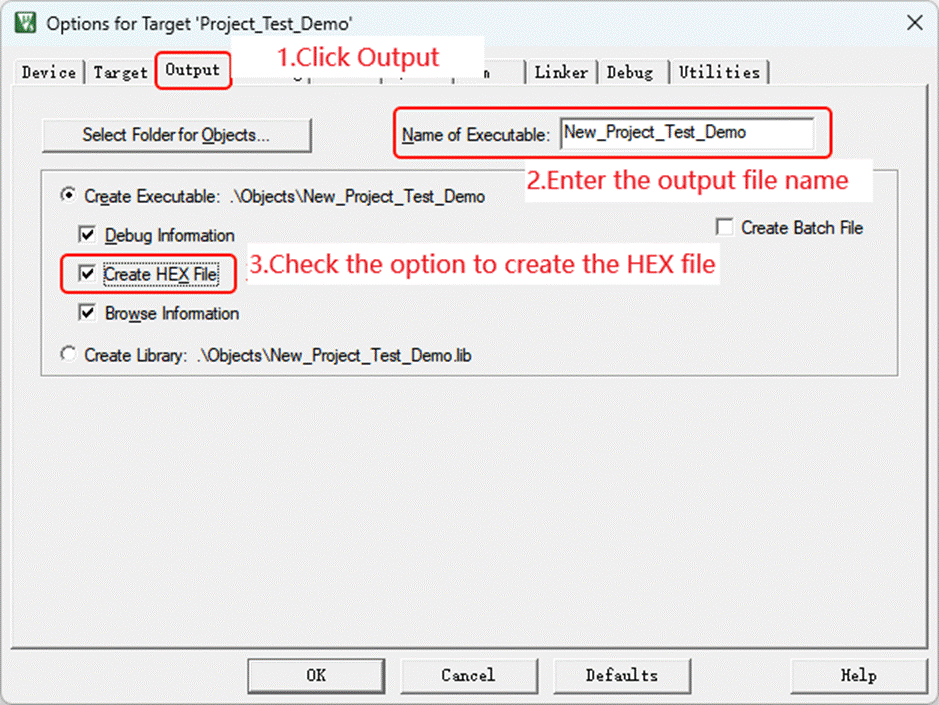
Click on "Output" -> Enter the name of the output file -> Check "Create HEX file"
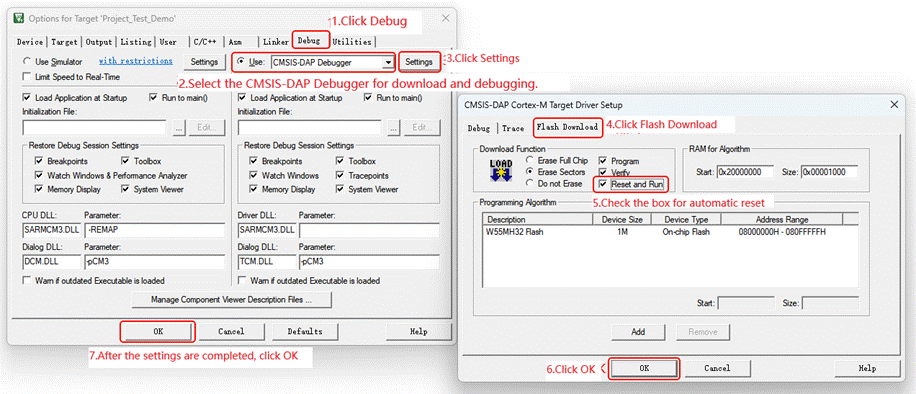
Click Debug -> Select CMSIS-DAP Debugger as the download and debugging method -> Click Settings -> Click Flash Download -> Check the box for Automatic Reset -> Click OK -> Click OK:
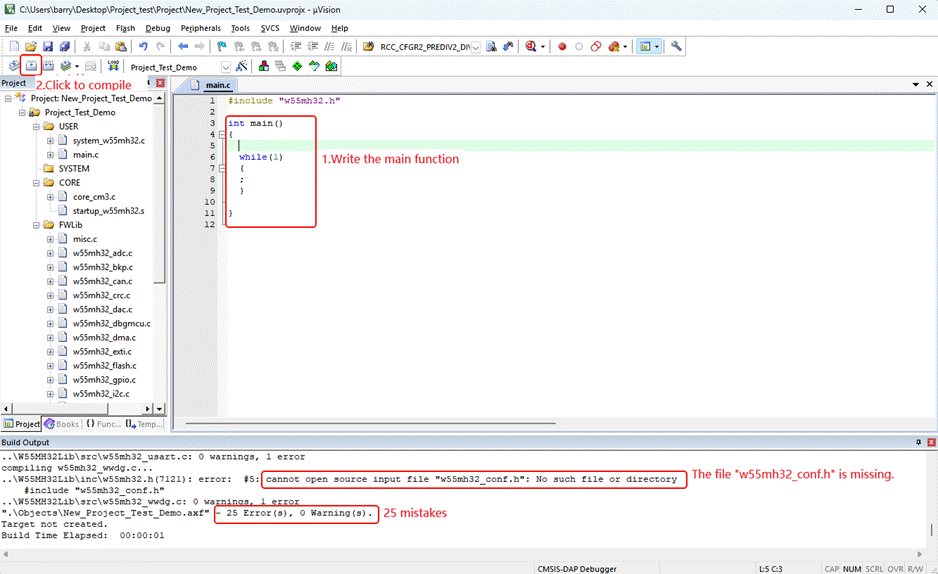
In the main.c file, write the main function. After clicking on "Compile", 25 errors are found and it prompts that the "w55mh32_conf.h" file is missing:
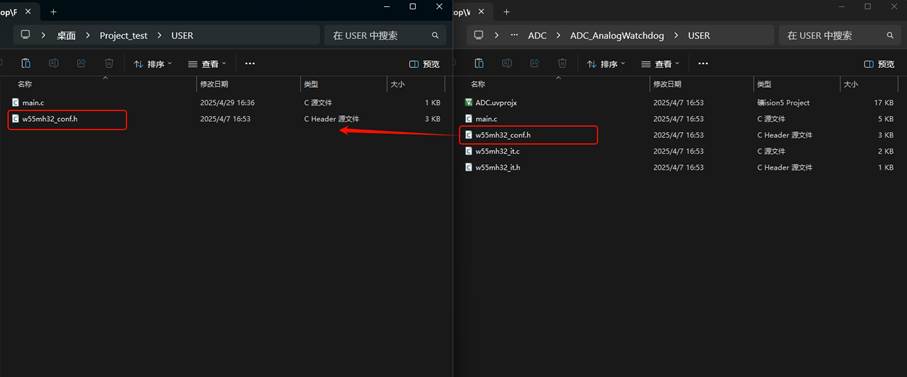
w55mh32_conf.h is the user configuration file, and we can find it within the routine. Open the ModuleDemo folder under the 1.SDK folder, and randomly select a routine. Then, in the USER folder, copy and paste the w55mh32_conf.h file into the USER folder of our newly created project:
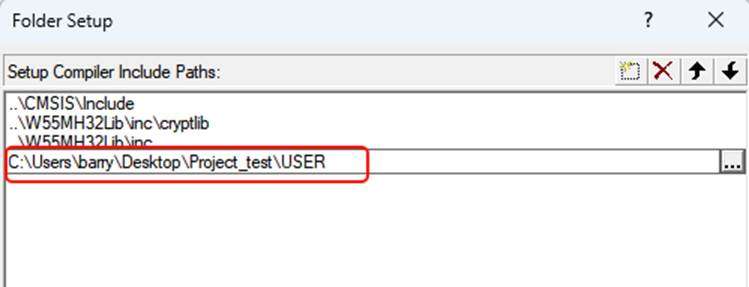
Also include the Include path of the USER file:
Click "Compile" again, and there are 0 errors and 0 warnings.
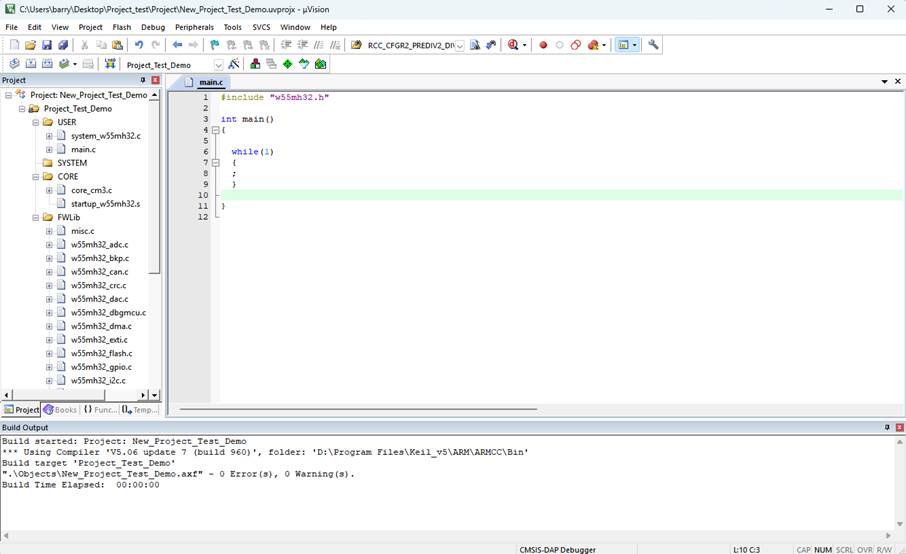
In this way, we successfully created a new project.
WIZnet is a fabless semiconductor company founded in 1998. Its products include the Internet processor iMCU™, which utilizes TOE (TCP/IP Offload Engine) technology and is based on a unique patented fully hardwired TCP/IP. The iMCU™ is designed for embedded Internet devices in various applications.
WIZnet has more than 70 distributors globally and has offices in Hong Kong, South Korea, and the United States, providing technical support and product marketing services.
The regions managed by the Hong Kong office include Australia, India, Turkey, and Asia (excluding South Korea and Japan).