
Boost Your Day with Helpful Emails: W5100S-EVB-Pico and ChatGPT API in Action
This post covers how to send emails using ChatGPT API and SendGrid with the W5100S-EVB-Pico board.

WIZnet - W5100S-EVB-Pico
x 1
Introduction
Prerequisites
OpenAI account
- API key
SendGrid account
Windows PC
W5100S-EVB-Pico with Micropython
Step 1: Using chatGPT API using Python in PC Environment
The first step is to use the chatGPT API in the PC environment. There are two ways to do this: using the library or using requests. The library method requires installation of the Python package, while the requests method requires sending HTTP requests to the API endpoint.
Using the Library:
To use the chatGPT API using the library, you will first need to install the package. This can be done using pip by running the following command in your terminal:
pip install openaiAfter installing the package, you can import the package in your Python code and authenticate your API key using the following code:
import openai
openai.api_key = "YOUR_API_KEY"
I asked ChatGPT how to use the ChatGPT API with Python and received a sample code, but it provided the text-based model code, not the latest model (gpt-3.5-turbo).
Seeing that the same code is given even if requested again, it seems that gpt-3.5-turbo was recently released, so the information has not been learned yet.
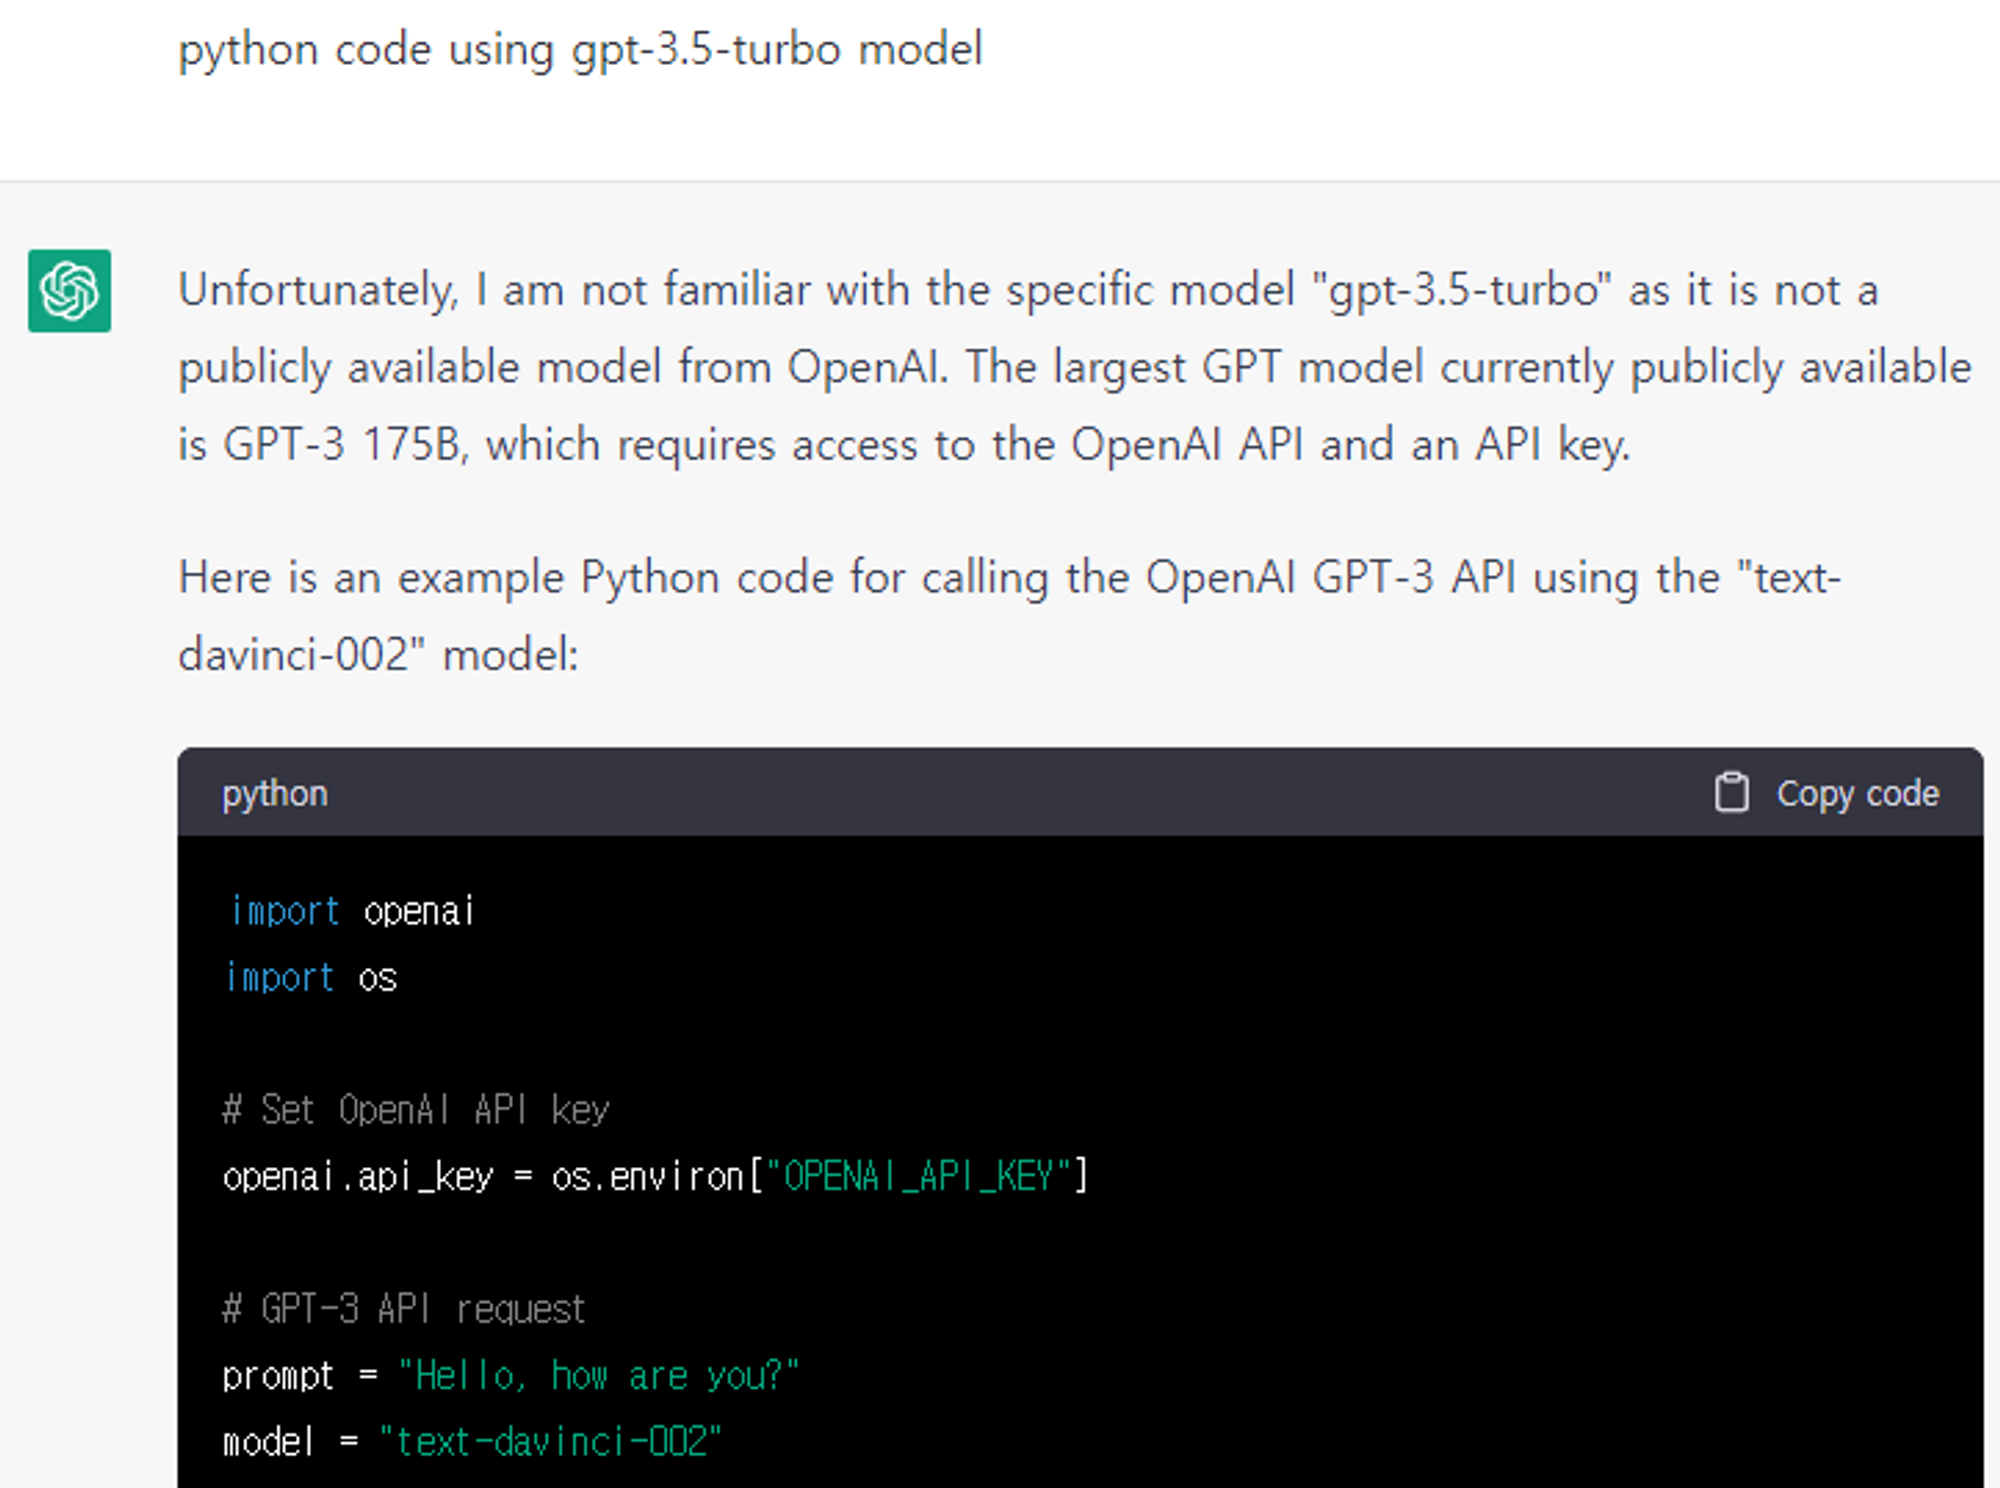

However, it is well explained in the official documentation, so you can proceed by referring to the guide documentation.
I tested it by changing the sample code as follows. To use environment variables, we used the dotenv package.
import openai
import os
import dotenv
dotenv.load_dotenv()

openai.api_key = os.environ.get('OPEN_API_KEY')
msg = "Hello, how are you?"

response = openai.ChatCompletion.create(
    model="gpt-3.5-turbo",
    messages=[{"role": "user", "content": msg}]
)

print(response)
print(response.choices[0].message.content)
Step 2: Using the chatGPT API using Micropython in the W5100S-EVB-Pico board environment using urequests
Once you have successfully used the chatGPT API in the PC environment, the next step is to use it in the Micropython environment on the W5100S-EVB-Pico board. To do this, we will use the urequests library to send HTTP requests to the chatGPT API endpoint.
Likewise, how to use the ChatGPT API is kindly explained in OpenAI's official documentation.
API testing in PC environment
import requests
import json
import os
import dotenv
dotenv.load_dotenv()
api_key = os.environ.get('OPEN_API_KEY')
url = "https://api.openai.com/v1/chat/completions"
msg = "Hello, how are you?"
headers = {"Authorization": f"Bearer {api_key}", "Content-Type": "application/json"}
data = {
"model": "gpt-3.5-turbo",
"messages": [{"role": "user", "content": msg}]
}
response = requests.post(url, headers=headers, data=json.dumps(data))
print(response)
if response.status_code == 200:
response_data = json.loads(response.text)
body = response_data["choices"][0]["message"]["content"]
print(body)
else:
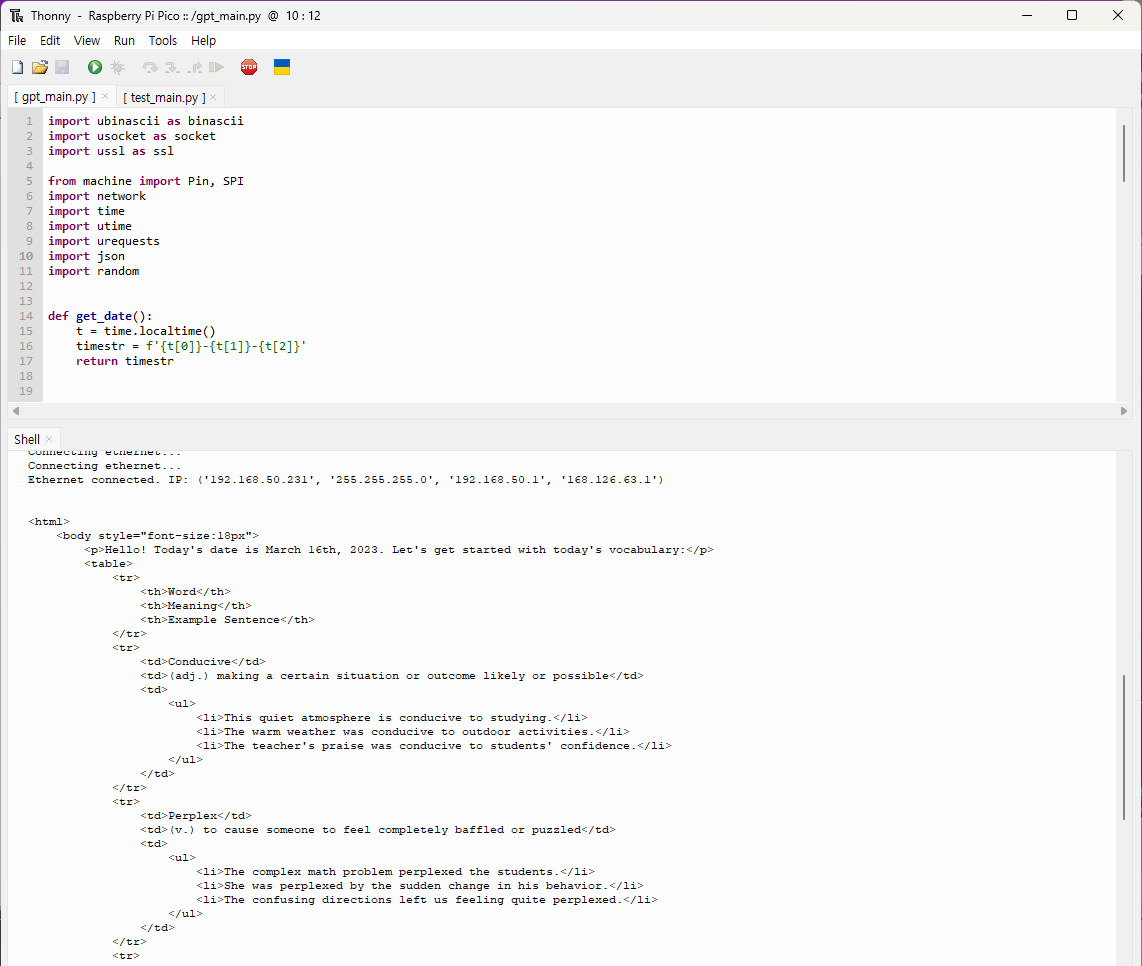
print("Error:", response.text)Implementation and execution in W5100S-EVB-Pico board environment
Next, a code using the same function was written in Micropython in the W5100S-EVB-Pico environment. The difference is:
- Using ethernet initialization code for W5100S
- Using urequests (install with upip)
- Secrets: hard coded it without using dotenv. It will be supplemented later.
from machine import Pin, SPI
import network
import utime
import urequests
import json

# W5x00 init
def init_ethernet():
    spi = SPI(0, 2_000_000, mosi=Pin(19), miso=Pin(16), sck=Pin(18))
    nic = network.WIZNET5K(spi, Pin(17), Pin(20))   # spi, cs, reset pin
    # Using DHCP
    nic.active(True)
    while not nic.isconnected():
        utime.sleep(1)
        # print(nic.regs())
        print('Connecting ethernet...')

    print(f'Ethernet connected. IP: {nic.ifconfig()}')


def gpt_main():
    init_ethernet()

    api_key = "<API_KEY>"
    url = "https://api.openai.com/v1/chat/completions"
    msg = "Hello, how are you?"

    headers = {"Authorization": f"Bearer {api_key}", "Content-Type": "application/json"}
    data = {
        "model": "gpt-3.5-turbo",
        "messages": [{"role": "user", "content": msg}]
    }

    response = urequests.post(url, headers=headers, data=json.dumps(data))

    if response.status_code == 200:
        response_data = json.loads(response.text)
        # print('response_data:', response_data)
        body = response_data["choices"][0]["message"]["content"]
        print(body)
    else:
        print("Error:", response.text)


gpt_main()
Step 3: Send Email using SendGrid with requests
After generating the message content using the ChatGPT API, the next step is to send the message to the user's email. For this purpose, we can use SendGrid, which is a popular email service provider that offers a RESTful API for sending emails. To use SendGrid API in Python, we can use the requests library, which allows us to make HTTP requests easily.
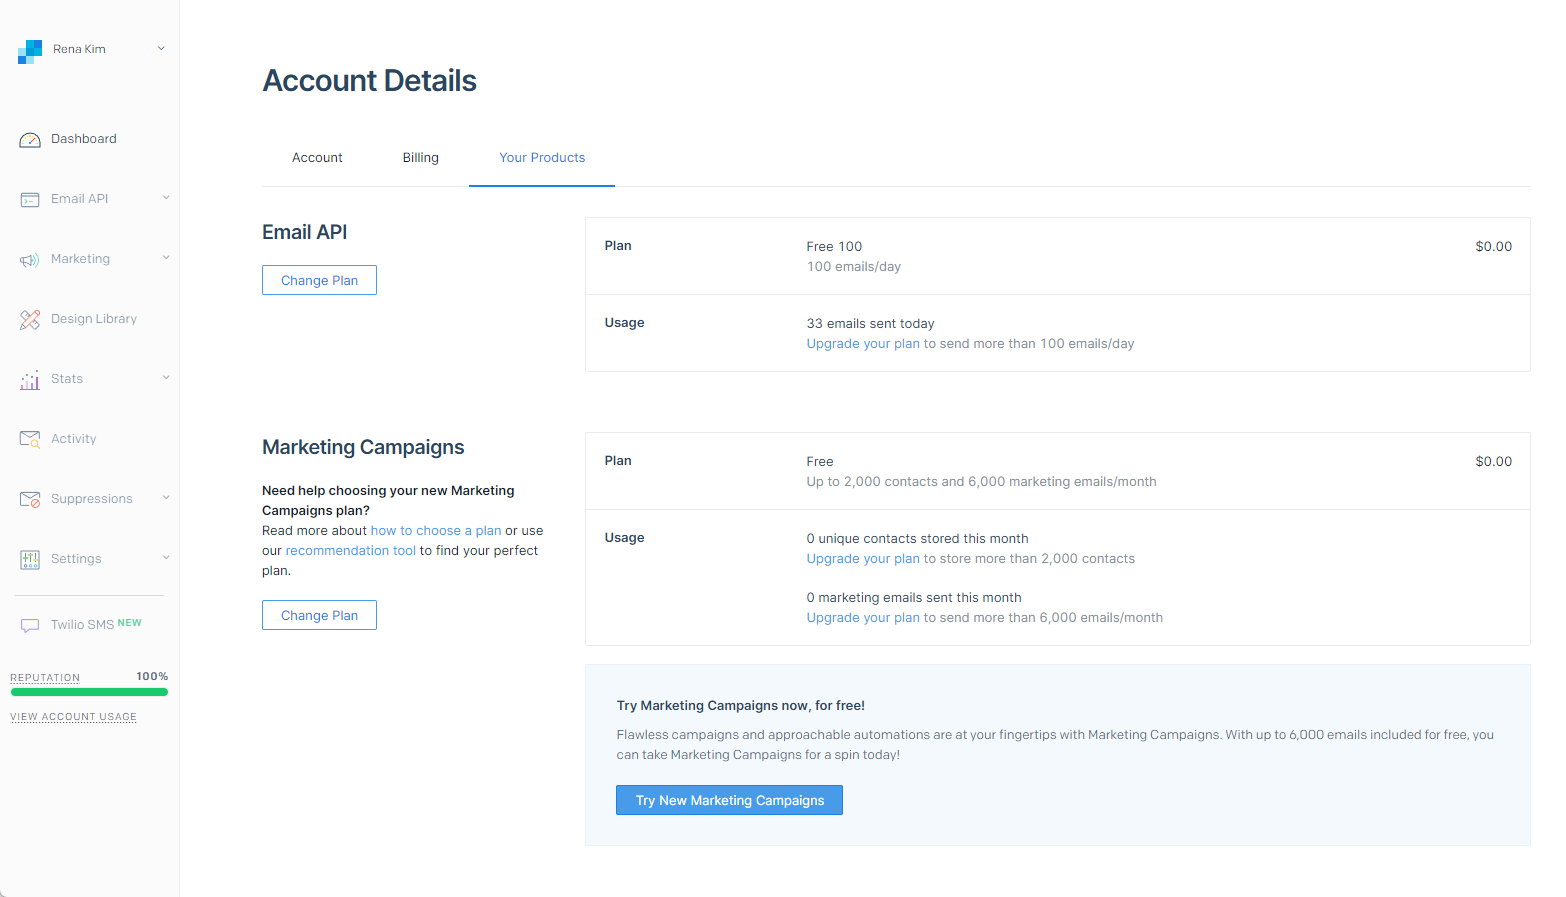
To get started with SendGrid API, we need to create an account on their website and obtain an API key. We can then use this API key to authenticate our requests to SendGrid API.
You can send 100 emails per day for free with your Sendgrid free account.

Once we have obtained the API key, we can create a Python script to send the email. We need to provide the recipient email address, subject, and message content in the request body. We also need to set the "Authorization" header to include our API key.
The following is a Python code snippet on how to use the SendGrid API suggested by ChatGPT as an HTTP request method.
import requests

sg_api_key = "YOUR_SENDGRID_API_KEY"
sg_url = "https://api.sendgrid.com/v3/mail/send"

# Recipient email address
to_email = "recipient@example.com"

# Email subject
subject = "Your daily dose of inspiration"

# Message content
message = "Hello, this is your daily dose of inspiration. Keep going and never give up!"

# Create request body
data = {
    "personalizations": [{
        "to": [{"email": to_email}],
        "subject": subject
    }],
    "from": {"email": "sender@example.com"},
    "content": [{
        "type": "text/plain",
        "value": message
    }]
}

# Create request headers with API key
headers = {
    "Authorization": f"Bearer {sg_api_key}",
    "Content-Type": "application/json"
}

# Send email using SendGrid API
response = requests.post(sg_url, headers=headers, json=data)

if response.status_code == 202:
    print("Email sent successfully!")
else:
    print(f"Error sending email: {response.text}")
This script sends a plain text email to the recipient email address with the provided subject and message content. If the email is sent successfully, the script prints a success message. Otherwise, it prints an error message with the response text.
Step 4: Writing and Testing Application Prompts
Next, the code written in Steps 2 and 3 was merged to send the response received from ChatGPT by e-mail.
Request the ChatGPT API and add the received response to the body of the SendGrid API.
This part took some time, because the content displayed through ChatGPT Web and the shape of the body sent by e-mail are different.
Considering the form to be shown in the mail regardless of the content, several tests were needed, and a part requesting in HTML form was added to the prompt.
The parts marked with ... are omitted because they are the same code as the previous step.
# ...

def gpt_main():
    init_ethernet()
    # ...

    if response.status_code == 200:
        response_data = json.loads(response.text)
        body = response_data["choices"][0]["message"]["content"]
        # ...

        headers = {"Authorization": f"Bearer {sg_api_key}", "Content-Type": "application/json"}
        resp = urequests.post(sendgrid_endpoint, headers=headers, data=json.dumps(data).encode('utf-8'))
        # ...

gpt_main()
The following is applied to the prompt.
Using Unsplash
I wanted to put an image in the mail, so I used the Unsplash URL within the prompt. If you enter a keyword, you can get a random image for it.
For related information, refer to the article on ChatGPTers site.
Convert text to HTML
By adding the following phrase to the end of the prompt, I made it possible to send the code converted to HTML when sending an e-mail.
Finally, convert the text (written in markdown) to html format. Apply a style that makes the font size 18px.
It looks a little nicer than sending it as plain text. Some more testing is needed.
Final Step: Compose and send emails with GhatGPT API at specific times
Finally, I set the mail to be sent at a specific time each day using the time information.
# ...
while True:
    # Get the current time
    current_hour = time.localtime()[3]
    current_minute = time.localtime()[4]

    # Check if it's time to send the messag
    if current_hour == 9 and current_minute == 0:
        gpt_main(morning_subject, morning_msg)
    elif current_minute == 10:
        gpt_main(english_subject, english_msg)

    print(f'Current Time: {get_current_time()}')
    time.sleep(60)
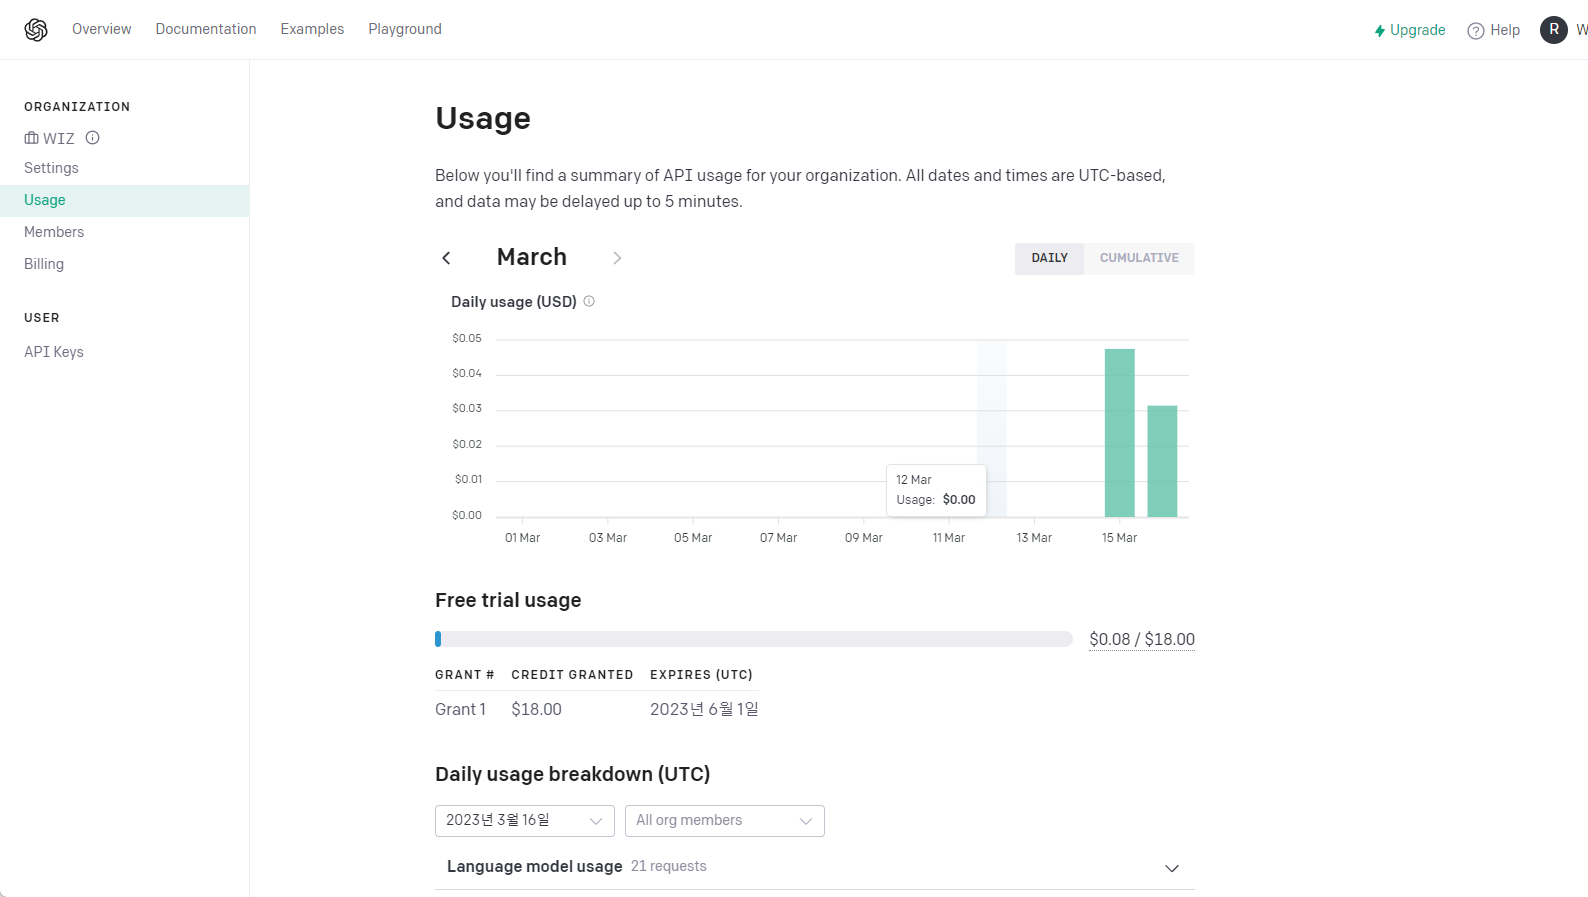
Check OpenAI API Usage
In the OpenAI account setting screen, I checked how much free credits I used.
I've sent in quite a few requests and haven't spent a dollar yet. I can only use it until June 1, so I'll have to diligently test it in my free time.
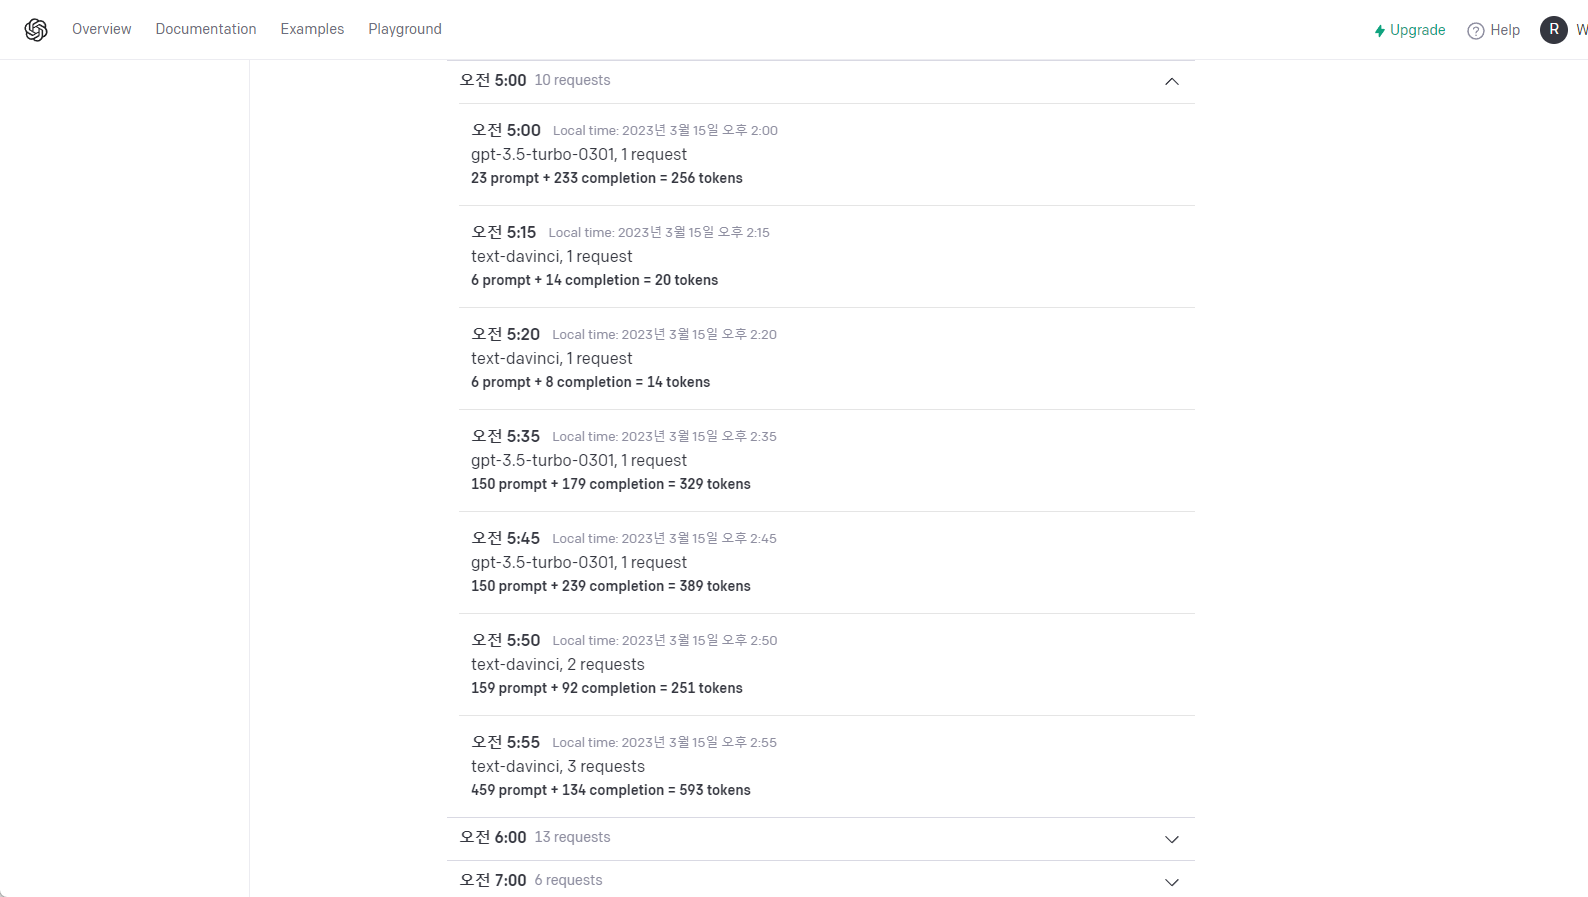
 You can see the details of how many tokens I used with which API as follows. It seems to be updated every 10 minutes.

Conclusion
After trying several prompts, I got the following output and the function is:
- Use of ChatGPT API and SendGrid API using Micropython in W5100S-EVB-Pico board environment
- Using 2 prompts
- English words
- Words that give strength
- Set one to run every day at 9:00 AM and the other every hour
- Using 2 prompts
Each email is received as follows.
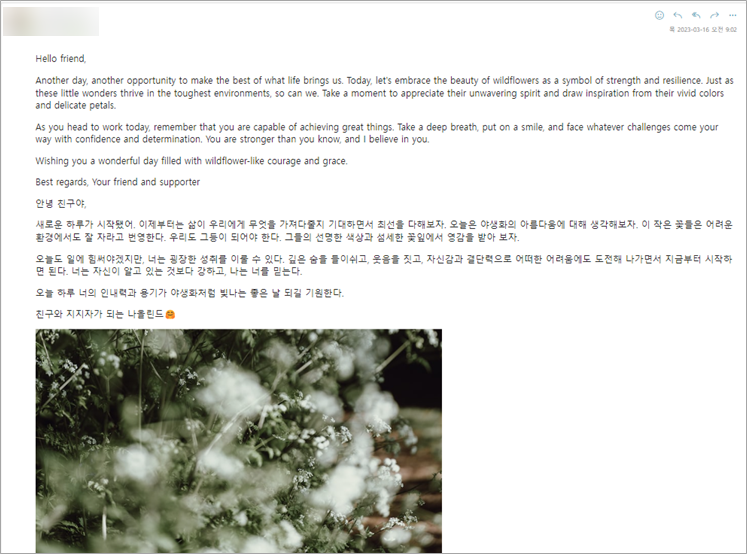
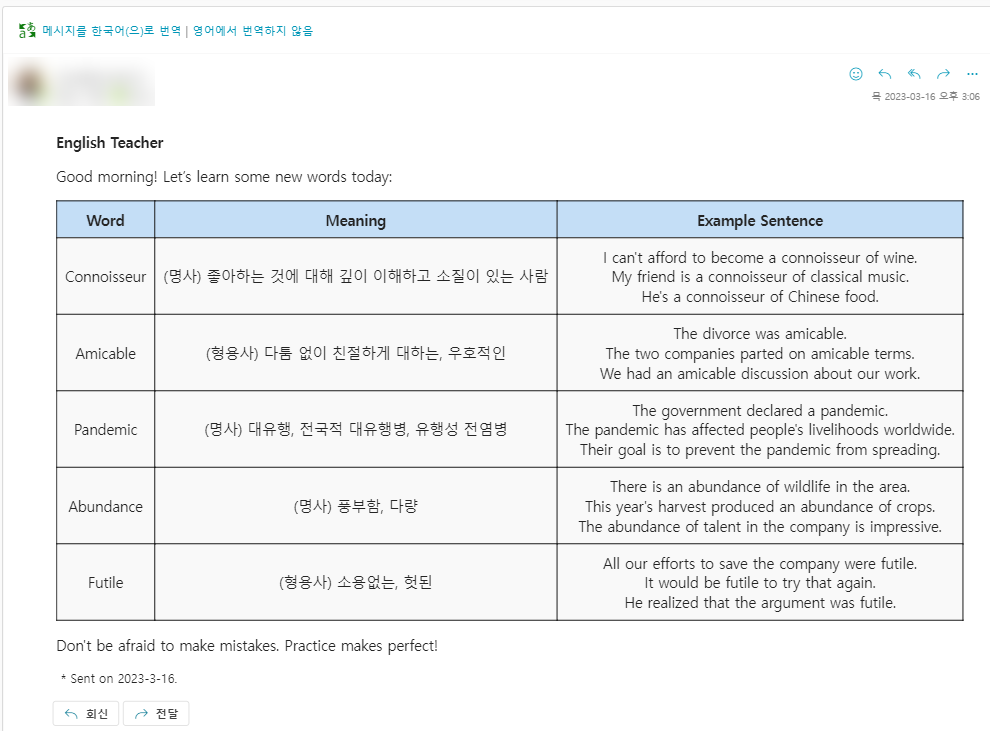

Certainly, the results vary depending on how you ask and ask questions, so you need to have a good sense of this and a lot of attempts.
And once you get used to it, I think you'll be able to try a lot of fun things.
I don't know what to do with the next step yet, but I'm still interested in trying to use it.
This is what I thought of as the next step.
- Create prompts to get more useful output
- In addition to email, use other platforms such as Slack or Notion
- Using other OpenAI API models such as images
Reference
- WIZnet W5100S-EVB-Pico board: https://www.wiznet.io/product-item/w5100s-evb-pico/
- OpenAI GPT: https://platform.openai.com/docs/introduction
- SendGrid: https://sendgrid.com/
- Micropython: https://micropython.org/