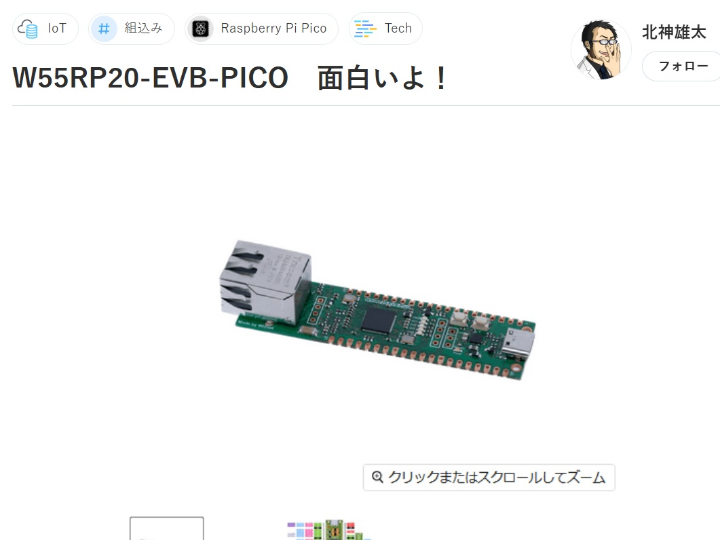
W55RP20-EVB-PICO 面白いよ!
Beginner-friendly Arduino guide for W55RP20-EVB-PICO: step-by-step setup, BOOT+RUN flow, and first Blink upload—curated from a Japanese tutorial.

Overview
This tutorial introduces how to get started with the W55RP20-EVB-Pico, a development board built on W55RP20, which integrates Raspberry Pi RP2040 and WIZnet W5500 into a single SiP.
It walks through adding the Boards Manager URL, selecting the correct board and port, entering BOOT+RUN manual bootloader mode, and uploading the Blink sketch—covering exactly the points where beginners often struggle.
Original Language & Author
The original article was published in Japanese on Zenn (Nov 16, 2024).
The author, Yuta Kitagami (@nonNoise), is the co-founder of ArtifactNoise, LLC and an inventor who frequently writes about embedded systems and IoT. By providing the tutorial in Japanese, he ensures accessibility for Japanese makers—using local UI terms and linking to domestic distributors such as Switch Science.
This curation presents the same reproducible steps in English, making the content useful for a global audience.
Key Highlights
Boards Manager URL
Add the following JSON URL in Arduino IDE > Preferences > Additional Boards Manager URLs:
Core Selection
The Mbed-based RP2040 core is deprecated; install the User (Philhower) version instead.
Manual BOOT Mode
Press and hold BOOT, then press and release RUN to mount the board as a USB mass storage device.
If skipped, the log may show “No drive to deploy.”


Board & Port Selection
Choose “WIZnet W55RP20-EVB-PICO” in Tools > Board, select the correct USB port, then upload the Blink example.
Next Steps
With RP2040 and W5500 integrated, the board supports networking demos (HTTP server, SNTP clock, MQTT) and is AWS IoT Core Qualified.
Why It Matters
For Japanese users: The original language and domestic links make the tutorial especially easy to follow and replicate in Japan.
For global makers: This English curation preserves all critical strings (URLs, board names, error messages), ensuring reproducibility across languages.
For beginners: It prevents common pitfalls—like upload failures due to missing BOOT mode—saving time and frustration.
Quick Reproduce (Checklist)
Install Arduino IDE → Add RP2040 Boards Manager URL.
Install Earle Philhower RP2040 (User) core.
Connect board → Enter BOOT mode (BOOT + RUN).
Select W55RP20-EVB-PICO board and port → Upload Blink.
If “No drive to deploy.” appears, repeat BOOT procedure.
References
Original (Japanese): Zenn — W55RP20-EVB-PICO の始め方 Arduino編 (by Yuta Kitagami, 2024-11-16)
WIZnet Docs: W55RP20-EVB-Pico Overview (Board features, AWS IoT Core Qualified)
Arduino-Pico Install Guide (Earle Philhower)
