
How to Use Ethernet Shields with Industrial Arduino in Modbus TCP over RTU Setups
This tutorial demonstrates how to control industrial Arduino systems using the WIZnet W5100 Ethernet Shield through Modbus TCP over RTU protocol.
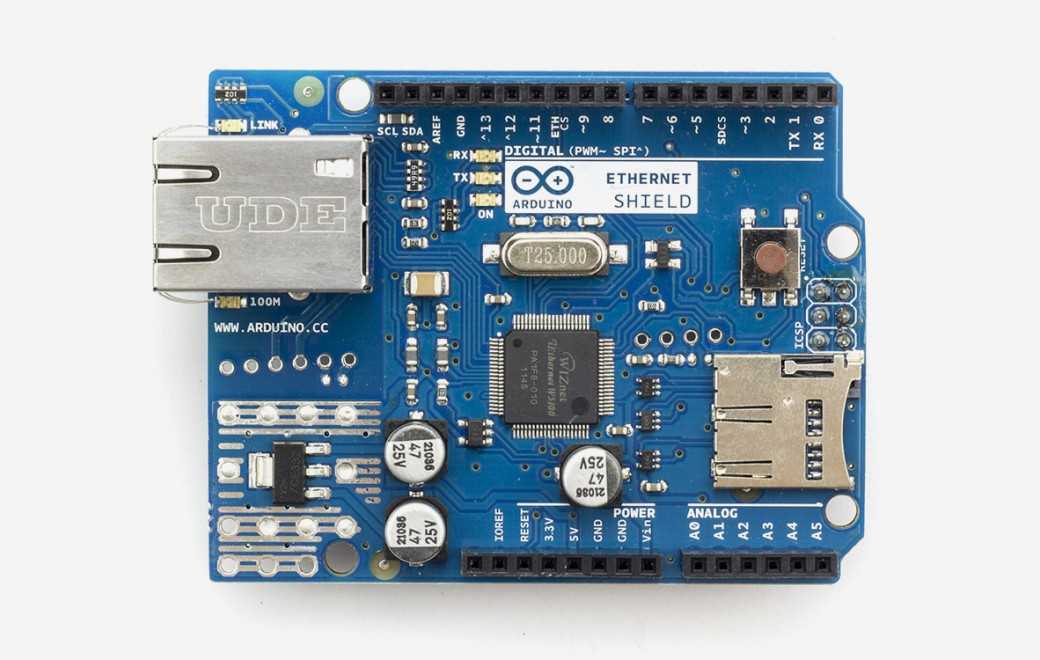
Arduino - Arduino Ethernet Shield
x 1
How to Use Ethernet Shields with Industrial Arduino in Modbus TCP over RTU Setups
In this 39th installment of Nokanda's Industrial Arduino series, we explore the integration of Ethernet shields with industrial-grade Arduino systems to implement Modbus TCP over RTU communication. This session extends the previously discussed setups by delving deeper into wired network solutions, offering a practical approach for real-world industrial environments that favor wired over wireless connections.
Why Ethernet Shields Matter in Industrial Settings
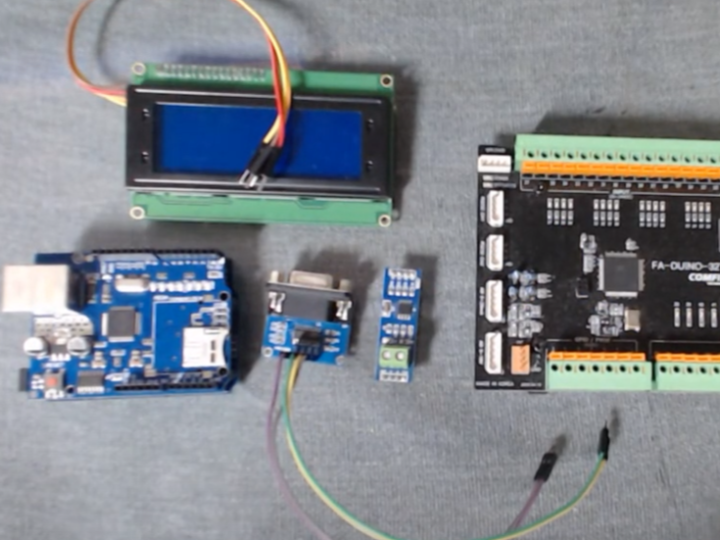
Nokanda kicks off the video by introducing a familiar setup: an Arduino Uno stacked with a W5100 Ethernet shield. This combination transforms the standard Arduino into a Modbus-capable device with Ethernet connectivity, essential for industrial scenarios where wired internet is preferred for its stability.
He points out that wireless IoT solutions, while common, often fall short in demanding industrial environments. Hence, today's session focuses on leveraging the W5100 Ethernet shield to communicate via Modbus TCP, which is then relayed via RS-232 or RS-485 to an industrial Arduino (Paduino) acting as the RTU slave.
Modbus TCP Over RTU: What It Means and How It Works
In simple terms, Modbus TCP over RTU involves:
A TCP Master (e.g., Node-RED) sending a Modbus TCP packet.
The Arduino + Ethernet Shield acting as a bridge, stripping the TCP header and sending the RTU data to the industrial Arduino.
The RTU slave responds back, and the bridge adds the TCP header before forwarding the response to the Master.
Nokanda shows how this configuration supports two physical communication protocols:
RS-232 using a MAX3232 module.
RS-485 using a MAX485 module with added flow control logic.
Code Considerations and Hardware Setup
To implement the setup:
Arduino communicates via Ethernet using the W5100 shield, operating as a TCP server.
It connects to the industrial Arduino via RS-232 or RS-485, depending on the example.
The code includes timeout handling: If no RTU response is received in time, the Arduino sends a Modbus exception code back to the TCP master.
Key libraries used:
Ethernet.h for network communication.
CRC16 for Modbus RTU data integrity checks.
Nokanda explains the differences in communication handling for RS-232 vs. RS-485, particularly emphasizing the need for directional control (transmit vs. receive) with RS-485, using DE/RE pins and Serial.flush() for safe transitions.
Visual Debugging with LEDs and LCDs
Nokanda also adds diagnostic LEDs:
One LED lights up when the TCP connection is active.
Another LED indicates successful communication with the RTU device.
To top it off, an I2C-based 20x4 LCD is integrated to display:
IP and port information.
TCP and RTU connection statuses.
A message counter showing how many packets have been handled.
This makes the system self-diagnostic, perfect for headless industrial devices.
Node-RED as the Modbus TCP Master
On the master side, **Node-RED is configured to:
Send Modbus TCP packets.
Interpret the RTU responses and display/control coils and registers.
Handle exceptions gracefully if the RTU slave fails to respond.
The user interface in Node-RED includes buttons for:
Turning coils on and off (single/multiple)
Reading/writing holding registers
Displaying real-time values using buffer parsers.
Lessons Learned and Final Takeaways
Despite some hiccups with RS-485 connectivity, Nokanda reiterates that RS-232 often proves more stable in breadboard-based test environments. He highlights that reliable wiring (e.g., soldered connections) is essential in industrial setups to avoid intermittent issues.
Finally, he invites viewers to his community chat and in-person meetup, encouraging collaboration and sharing of ideas.
Watch the full video for step-by-step guides, real-world insights, and full circuit/code examples:
🔗 Watch Now on YouTube
Explore more tutorials and join Nokanda’s growing community to stay updated on industrial Arduino innovations and Modbus-based solutions.