
How to program WIZnet Pico Board using ChatGPT [Arduino IDE]
How to program WIZnet Pico Board using ChatGPT [Arduino IDE]


WIZnet - W5100S-EVB-Pico
x 1
WIZnet Pico Board

Arduino - Arduino IDE
x 1
As of March 2023, there is a lot of interest in ChatGPT, a generative AI.
In this content, we will talk about how to use ChatGPT to generate C/C++ code that works with the WIZnet Pico Board in the Arduino IDE environment, and explain how to do simple LED control.
- Generate W5100S-EVB-Pico Built-in LED Control code using Chat GPT
If you type the following abstract commands into Ghat GPT, you may get a strange result (Python) rather than the C++ language available in the Arduino IDE, as shown below.

To get the answer you want, you'll need to enter specific commands, like the ones below.

Once you've entered the specific commands, you'll see the code generated in your preferred language.
However, it is possible for ChatGPT to apply incorrect board or device information, so you will need to verify this information further.
The result below is an example of incorrect Built-in LED information.
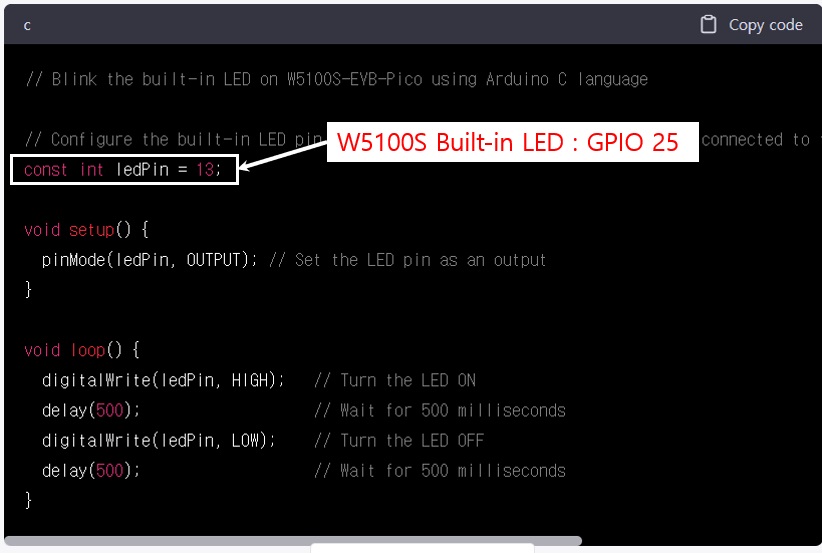
You can ask the wrong information again until you get the right information, but you can also enter the right information directly to get the answer you want, as shown below.
In the current Chat GPT, it can take a long time to get an answer, so it may be better to enter the incorrect information directly rather than repeating the question until the incorrect information is not displayed.
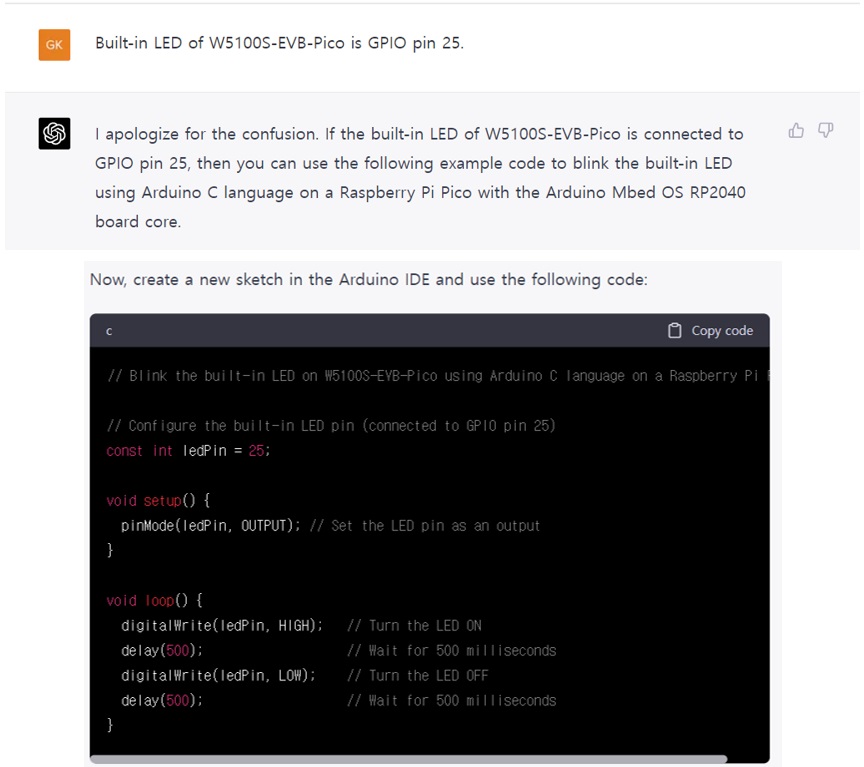
If you upload the generated code using Arduino IDE (Sketch), you can see that the built-in LED of WIZnet Pico Board blinks.
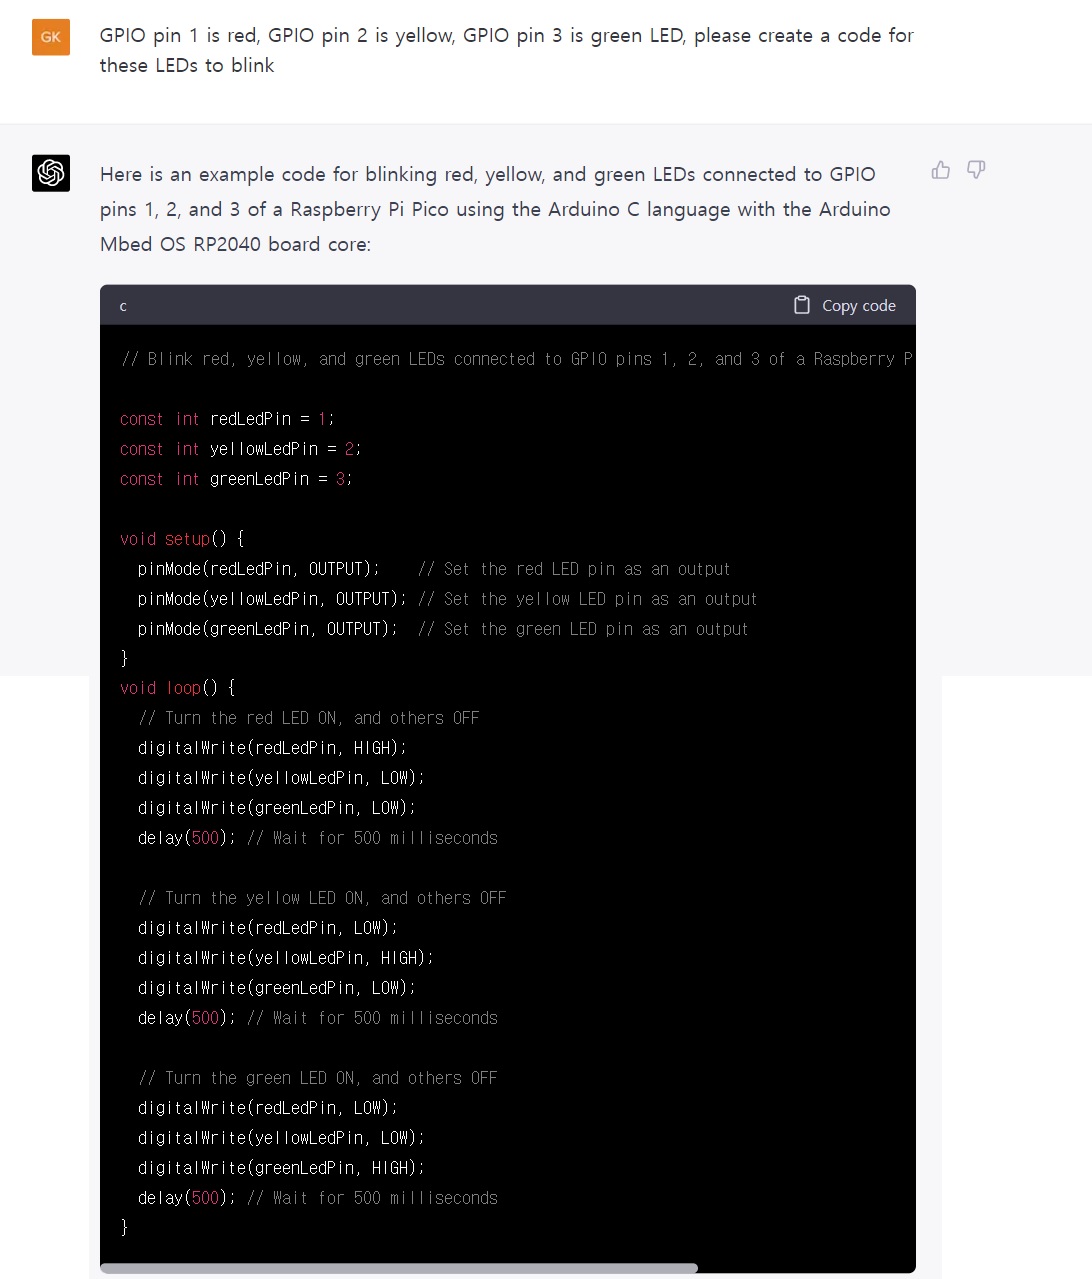
2. Create code to control 3 LEDs (RED, YELLOW, GREEN)
If you add the commands below, you can easily create a source to control the LEDs connected to GPIO 1, GPIO 2, and GPIO 3.
3. Upload and Result
If you upload that source using the Arduino IDE (Sketch), you can see the following behavior.
So far, we've learned how to run a very simple Blink example.
Next time, we'll post about creating a Connectivity source using ChatGPT.
Thank you :)