
W5100S-EVB-PICO + Tlink
This is a record of my work on how to communicate with a Chinese IOT platform called Tlink using W5100S-EVB-PICO

WIZnet - W5100S-EVB-Pico
x 1
Story
When I'm browsing different kind of websites and blogs, I specific found an interesting and easy to use IOT platform from CSDN (One of the famous Chinese engineer blog)
This IOT platform is called Tlink. This is a Chinese IOT platform that has english.
From my readings of this platform, it shows it is very easy to use and manage with any kind of device.
Thus, I had went to try it out with my W5100S-EVB-PICO using Circuitpython.
Structure:

From the above connection struture, it showed the major components for my developed application.
For showing the IOT platform that could communicate with my W5100S-EVB-PICO, it required to have the ability to upload data and download instructions or data with the IOT platform.
Thus, I had used two major components for my application.
Upload - I had used a SHT31 module to collect the temperature and humidity values and upload it to Tlink
Download - A small fan has been used for this application. It could controlled my Tlink's remote switch.
About the communication protocol for this applicaiton, I used MQTT protocol for this communication. By comparing with other protocol, it is easy to use for small amount data transfer.
By comparing with other IOT platforms, this platform has a lot of different kinds of communication protocol that could be used.
From the basic HTTP and TCP communication, it has some other communication protocols for industrial use. For details, please refer to this link.
Programming - SHT31
For setting a communication with SHT31 is simple, it just required to communicate in I2C method.
About this section, I found a circuitpython example codes made by adafruit.
By using this good resources, I just need to manage those information into the correct GPIOs and it could easily display the result.
Codes:
#Import this library with import board, it could easily display the result using I2C
import board
import busio
import adafruit_sht31d

# Create sensor object, communicating over the board's default I2C bus
i2c = busio.I2C(board.GP5, board.GP4)
sensor = adafruit_sht31d.SHT31D(i2c)

#Print the result (for the example testing code)
print("\nTemperature: %0.1f C" % sensor.temperature)
print("Humidity: %0.1f %%" % sensor.relative_humidity)
Programming - Fan
For controlling the Fan, it just required me to set the GPIO rights and provide correct voltage (5V) to the fan.
After everything is done, I just need to use digtialio to control with the feedbacks from Tlink.
Codes:
#Libraries
import board
import digitalio
import time

#Set the digitalio for the fan to output
fan = digitalio.DigitalInOut(board.GP0)
fan.direction = digitalio.Direction.OUTPUT

#Turn On
fan.value = True

#Turn Off
fan.value = False
Programming - Communicate with T-Link
Create Account:
After all the offline stuff has been done, I need to focus on developing a method to communicate with the Platform.
For making this happen, I firstly needs to create an account.
By doing the basic stuff of creating an account, the next step is creating a new device on the platform.
Create a device:
Please go to Device Management and add a new Device

In the creating page, please provide a device name for your device with the followings.
1. Give a name for your device
2. Set the protocol in MQTT
3. Add a sensor ( YOU cannot modify your sensor section after you had created the device)
4. Locate a location for your device.

Find and set all information for communication:

From the image above, it showed a lot of information.
1. IP - This will be the URL for you to communicate with the MQTT broker.
2. Port - The port number for the MQTT broker . Since it is not in SSL/ TLS, I will just use 1883 port
3. Serial Number - It is a very important information for communcating with Tlink. For more information, please refer to the information showed in Codings.
4. Set the sensor name - For easily communicate with Tlink, it is needed to create specific name for those sensor. These names will be the names to identify with the sensors that you are communicating.
5. 2 steps for getting an JSON example - At the right bottom corner, it shows there are 2 steps to create the JSON example. After you had created the variables, you just required to select "Read and Write Marks" and press "Generating examples".
It will generate the correct format for you to communicate with Tlink.

Codings:
The codings will be simple for communicating with Tlink.
From the resource of Adafruit IO and WIZnet's MQTT example code, I could easily communicate with different kind of MQTT broker.
Adafruit's MQTT publish and subscribe code
The part that I required to modified is changing the followings.
1. URL / IP address of the Tlink's MQTT broker
2. Set the username, password and client ID
3. Set the topics for subscribe and publish
URL / IP address code + username, password and client ID code:
#MQTT protocol setup
mqtt_client = MQTT.MQTT(
    broker=secrets["tlink_url"], #the URL provided by Tlink
    username=secrets["tlink_user"], #Tlink username for login to the console
    password=secrets["tlink_pass"], #Tlink password for login to the console
    client_id=secrets["tlink_id"], #Device's Serial number provided by Tlink
    is_ssl=False, #Port number is 1883
)
After all the information has been set, we need to set the subscribe and publish channel for communication.
The subscribe and publish channel are both using the Device's Serial Number provided by Tlink.
However, there will be a slightly difference between subscribe channel compare witth the publish channel.
The subscribe channel required to add a "/+" symbol at the end of serial number.
Subscribe and Publish code:
mqtt_push = secrets["tlink_id"] #Publish channel
mqtt_sub = secrets["tlink_id"] + "/+" #Subscribe channel
After the channels has been set, I just need to start upload SHT31 data to Tlink
Publish data:
#Based on the JSON format example with the correct sensor name
data = '{"sensorDatas":[{'+'"flag":"temp","value":{}'.format(sensor.temperature)+'},{' + '"flag":"humid","value":{}'.format(sensor.relative_humidity) + '}]}'
print("Publishing to TLink")
mqtt_client.publish(mqtt_push, data) #publish to Tlink
For the Subscribed channel, it is allowing me to get data from Tlink.
For this application, I am waiting for the switch a command to arrive and return a message for a confirmation of the changes.
Thus, the codes will showed link the following:
Receive Subscribe data from Tlink:
# Setup the callback methods above
mqtt_client.on_message = message

#The function for handling this method
def message(client, topic, message):
    # Method callled when a client's subscribed feed has a new value.
    print("New message on topic {0}: {1}".format(topic, message))
    #check the received data is it named switch
    if message.find('"flag":"switch"') > 0:
    # Find the key word switcher - This name will only available on switches variables
        if message.find("0",message.find('"switcher":')) > 0: #If I found a "0"
            fan.value = 0 #Turn off the Fan
            result = 0  #The return value to Tlink
        elif message.find("1",message.find('"switcher":')) > 0: "If I found a "1"
            fan.value = 1 #Turn on the Fan
            result = 1 #The return value to Tlink
    #Return message with the result back to Tlink for confirmation
    data = '{"sensorDatas":[{'+'"flag":"switch","switcher":{}'.format(result)+'}]}'
    print (data)
    mqtt_client.publish(mqtt_push, data) #Publish back to Tlink
Result:
After all these settings has been modified, I could easily communicate with to the console.
Publish Temperature and Humidity readings:

Switch Control

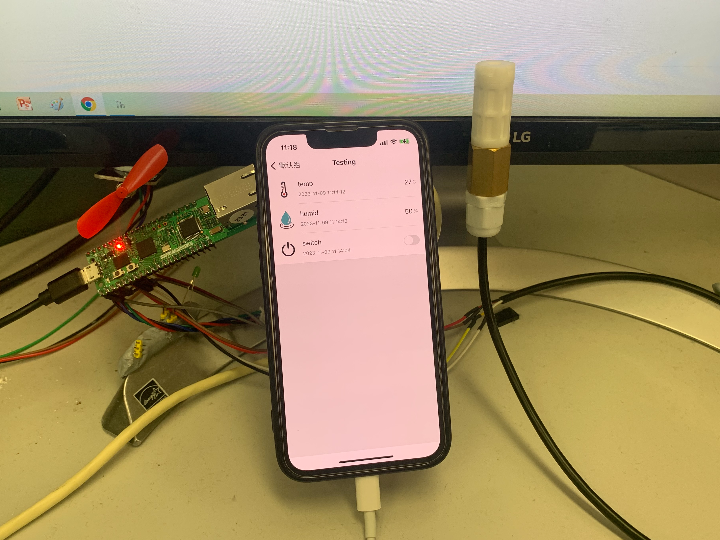
T-link Mobile App
This App could be downloaded from Apple store and Play store.

YouTube Demo:
FInally, please have a look on the demo that I made for this application.
-
Codes
