
W5500 Ethernet to Raspberry Pi Pico
W5500 Ethernet to Raspberry Pi Pico
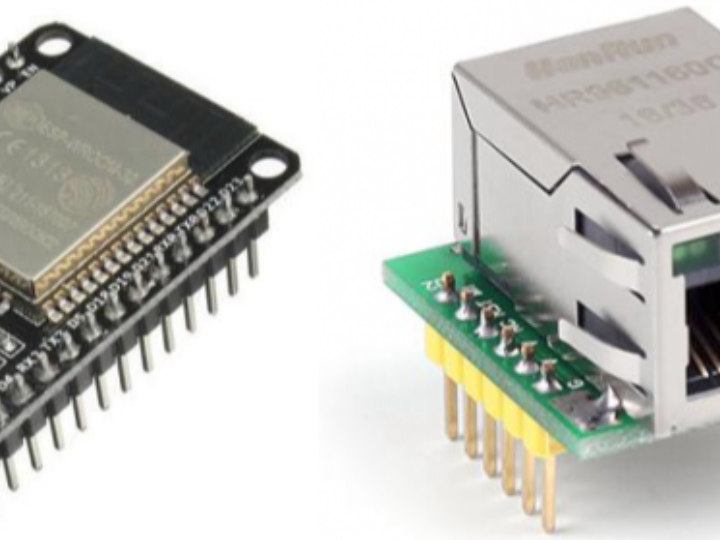
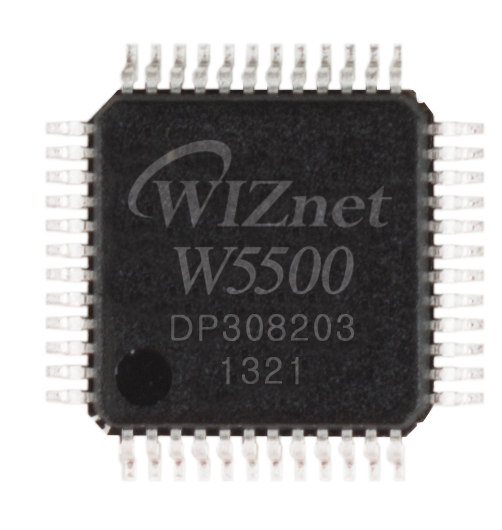
WIZnet - W5500
x 1
1. Circuit Python install first!
Reason: lots of examples with W5500
CircuitPython has a lot of examples and support!There are 260+ libraries for the standard CircuitPython API. Most of these will already work. Listed here
- 1. Download the below uf2 file link on your computer
CircuitPython 6.2.0 - adafruit-circuitpython-raspberry_pi_pico-en_US-6.2.0.uf2
- 2. Push and hold the BOOTSEL button and plug your Pico into the USB port of your Raspberry Pi or other computer. Release the BOOTSEL button after your Pico is connected.
- 3. It will mount as a Mass Storage Device called RPI-RP2.
- 4. Drag and drop the CircuitPython 6.2.0 UF2 file onto the RPI-RP2 volume. Your Pico will reboot. You are now running CircuitPython.
https://learn.adafruit.com/getting-started-with-raspberry-pi-pico-circuitpython/circuitpython
- if you want, you can install MU editor to make your python code. But I think, it's not necessary. Just use your Python IDE such as Notepad, VSCode, ...
Then, you can see "CIRCUITPY" drive on your system.
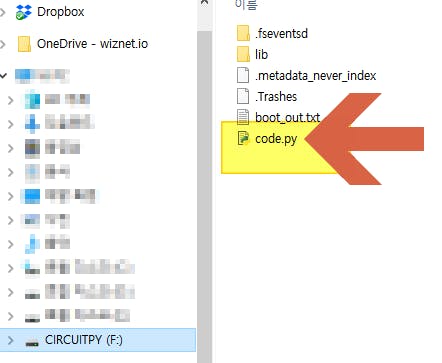
Now, we're ready to enjoy the code on python code.py with CircuitPython!!
Once you edit and save your code on code.py, run your code on the board.
Let's test "LED on" and "LED off" code.
actually, just visit the below page to blink led on your rpi pico board.
https://learn.adafruit.com/getting-started-with-raspberry-pi-pico-circuitpython/blinky-and-a-button
2. Pin connect to W5500, WIZ850io
use SPI1 on rpi pi board.

- SPI1_SCK => WIZ850io SCLK
- SPI1_TX => WIZ850io MOSI
- SPI1_RX => WIZ850io MISO
- SPI1_CSn => WIZ850io SCNn
- GP15 => WIZ850io RSTn
, and 3.3V, GND as well.
for your reference,

3. W5500 Reset Test
Copy below RESET_test code to code.py file on your rpi pico board.
https://github.com/bjnhur/pico-W5500/blob/main/W5500_Reset_Test.py
Every 6 second, RESET pin control => See the link on & off

4. W5500 adafruit_wiznet5k python library
Before, ping test we prepare some libraries from Adafruit learning page.
https://learn.adafruit.com/ethernet-for-circuitpython/circuitpython-setup
Before continuing, make sure your board's lib folder has at least the following files and folders copied over:
adafruit_wiznet5k
adafruit_bus_device
adafruit_requests.mpy
(Added 04-21, 2021) I put the latest files and folders on my github repo. download files from here.
For adafruit_wiznet5k, I forked & modified some code for DHCP operation. please visit & download code from
- https://github.com/bjnhur/Adafruit_CircuitPython_Wiznet5k
- Adafruit original lib - https://github.com/adafruit/Adafruit_CircuitPython_Wiznet5k
OR, original files can be download as belows.
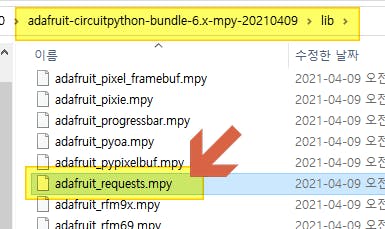
Find and copy adafruit_bus_device & adafruit_requests.mpy file from Adafruit's CircuitPython library bundle matching your version of CircuitPython. Don't copy all files and folder in the library.
- Download adafruit-circuitpython-bundle-6.x-mpy-20210409.zip
- unzip and find adafruit_requests.mpy.
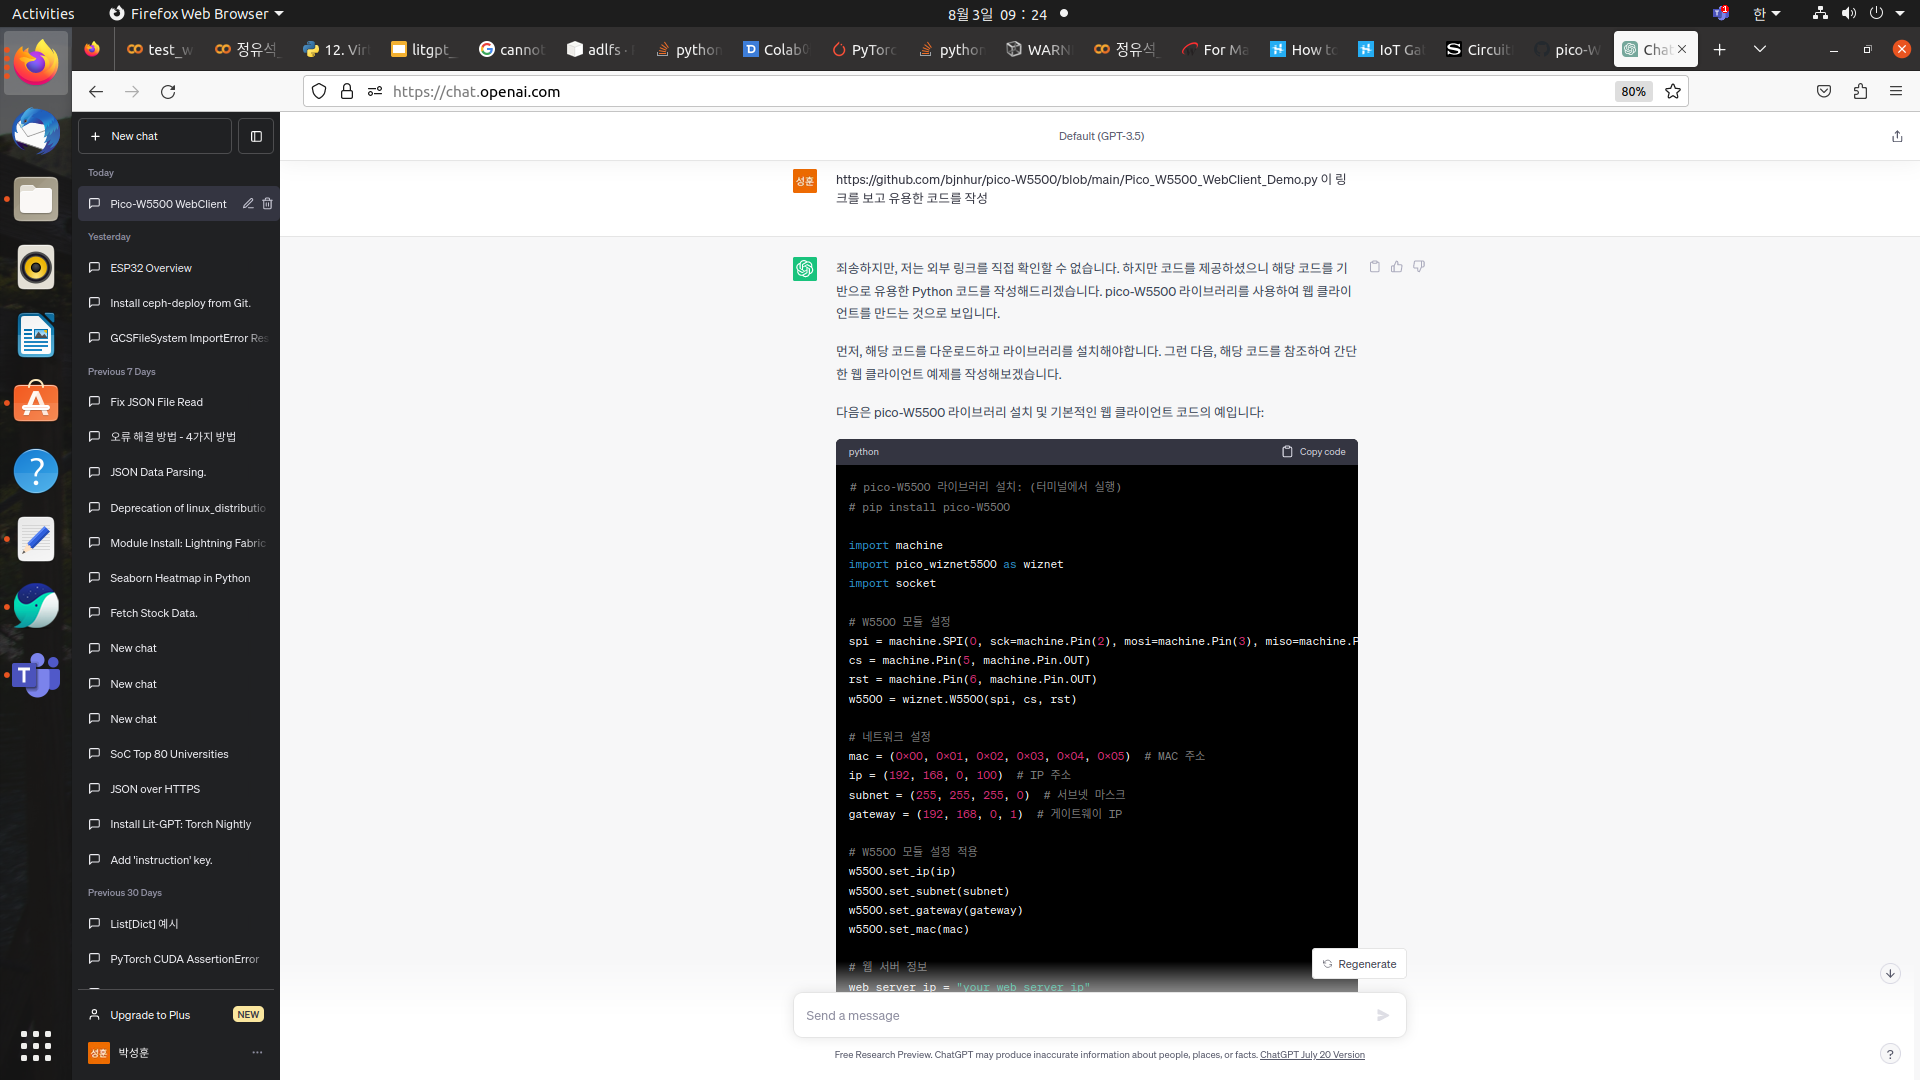
Here is the code what Chat-GPT created for HTTP request.
Chat-GPT looked this link: https://github.com/bjnhur/pico-W5500/blob/main/Pico_W5500_WebClient_Demo.py
# pico-W5500 라이브러리 설치: (터미널에서 실행)
# pip install pico-W5500

import machine
import pico_wiznet5500 as wiznet
import socket

# W5500 모듈 설정
spi = machine.SPI(0, sck=machine.Pin(2), mosi=machine.Pin(3), miso=machine.Pin(4))
cs = machine.Pin(5, machine.Pin.OUT)
rst = machine.Pin(6, machine.Pin.OUT)
w5500 = wiznet.W5500(spi, cs, rst)

# 네트워크 설정
mac = (0x00, 0x01, 0x02, 0x03, 0x04, 0x05)  # MAC 주소
ip = (192, 168, 0, 100)  # IP 주소
subnet = (255, 255, 255, 0)  # 서브넷 마스크
gateway = (192, 168, 0, 1)  # 게이트웨이 IP

# W5500 모듈 설정 적용
w5500.set_ip(ip)
w5500.set_subnet(subnet)
w5500.set_gateway(gateway)
w5500.set_mac(mac)

# 웹 서버 정보
web_server_ip = "your_web_server_ip"
web_server_port = 80

# 소켓 생성
sock = socket.socket(socket.AF_INET, socket.SOCK_STREAM)

try:
    # 웹 서버에 연결
    sock.connect((web_server_ip, web_server_port))

    # HTTP 요청 전송
    request = "GET / HTTP/1.1\r\nHost: {}\r\nConnection: close\r\n\r\n".format(web_server_ip)
    sock.send(request)

    # HTTP 응답 수신 및 출력
    response = sock.recv(4096)
    print(response.decode())

except Exception as e:
    print("Error:", e)

finally:
    sock.close()