
A bare metal programming guide using GCC compiler
A bare metal programming guide using GCC compiler
WIZnet - W5500-EVB-Pico
x 1
Hi, everyone.
I'd be happy to introduce this project.
I hope that our Wiznet forum supporting GCC compiler well.
So, Let's START!!
We want to update firmware to target device via this project.
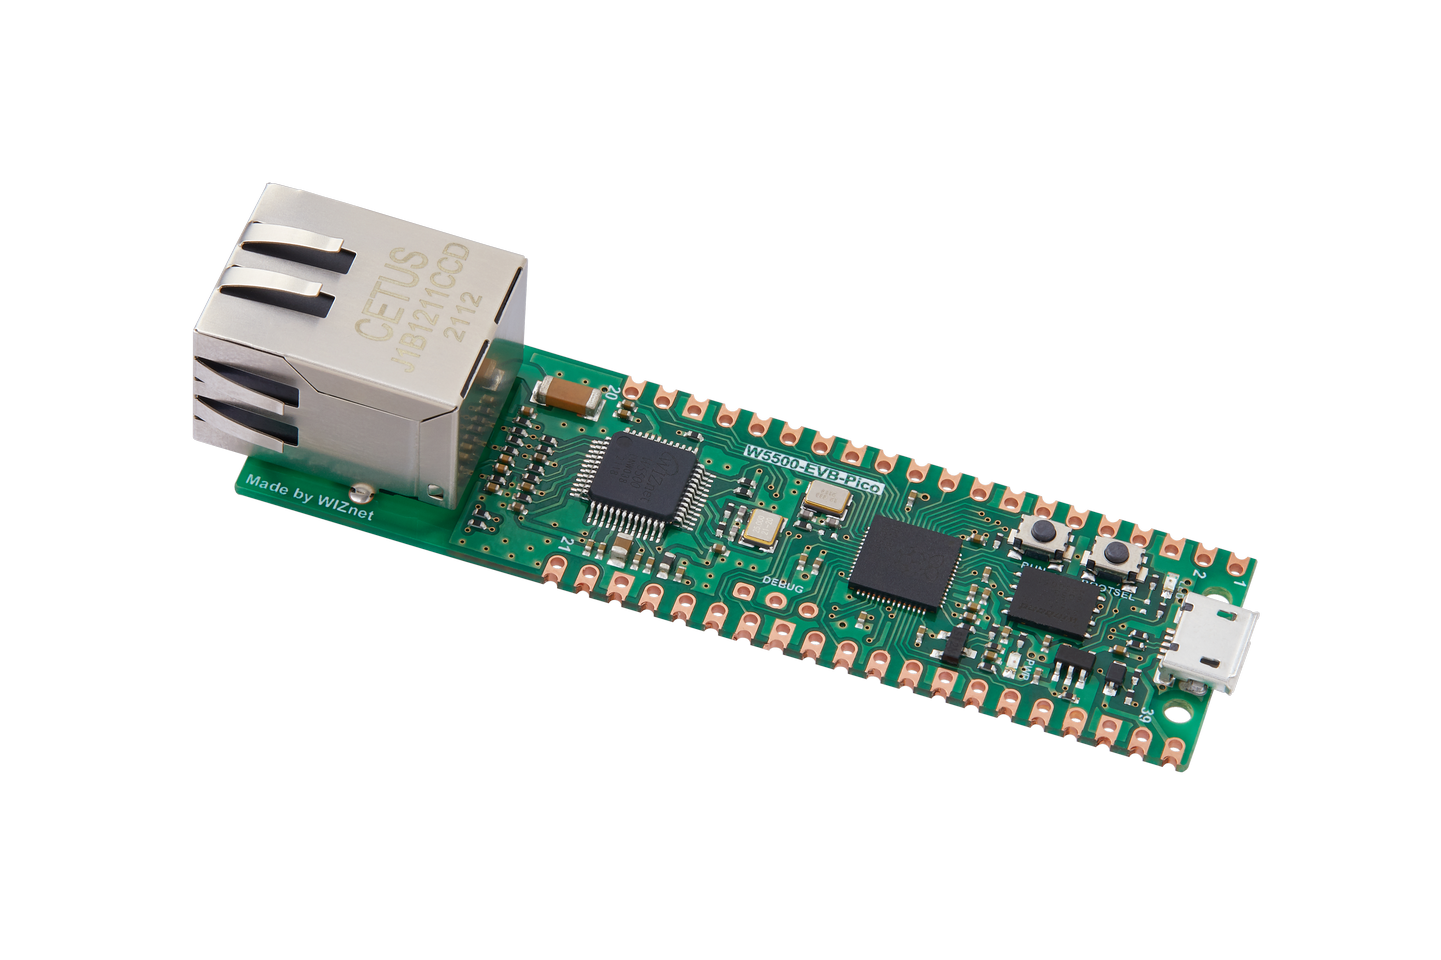
The target device is a Raspberry Pi W5500-EVB-Pico board with a built-in Ethernet interface.
This guide is written for developers who wish to start programming microcontrollers using a GCC compiler and a datasheet, without using any framework. This guide explains the fundamentals, and helps to understand how embedded frameworks like Cube, Keil, Arduino, and others, work.
Every chapter in this guide comes with a complete source code which gradually progress in functionality and completeness. In the end, I provide bare metal template projects for different architectures:
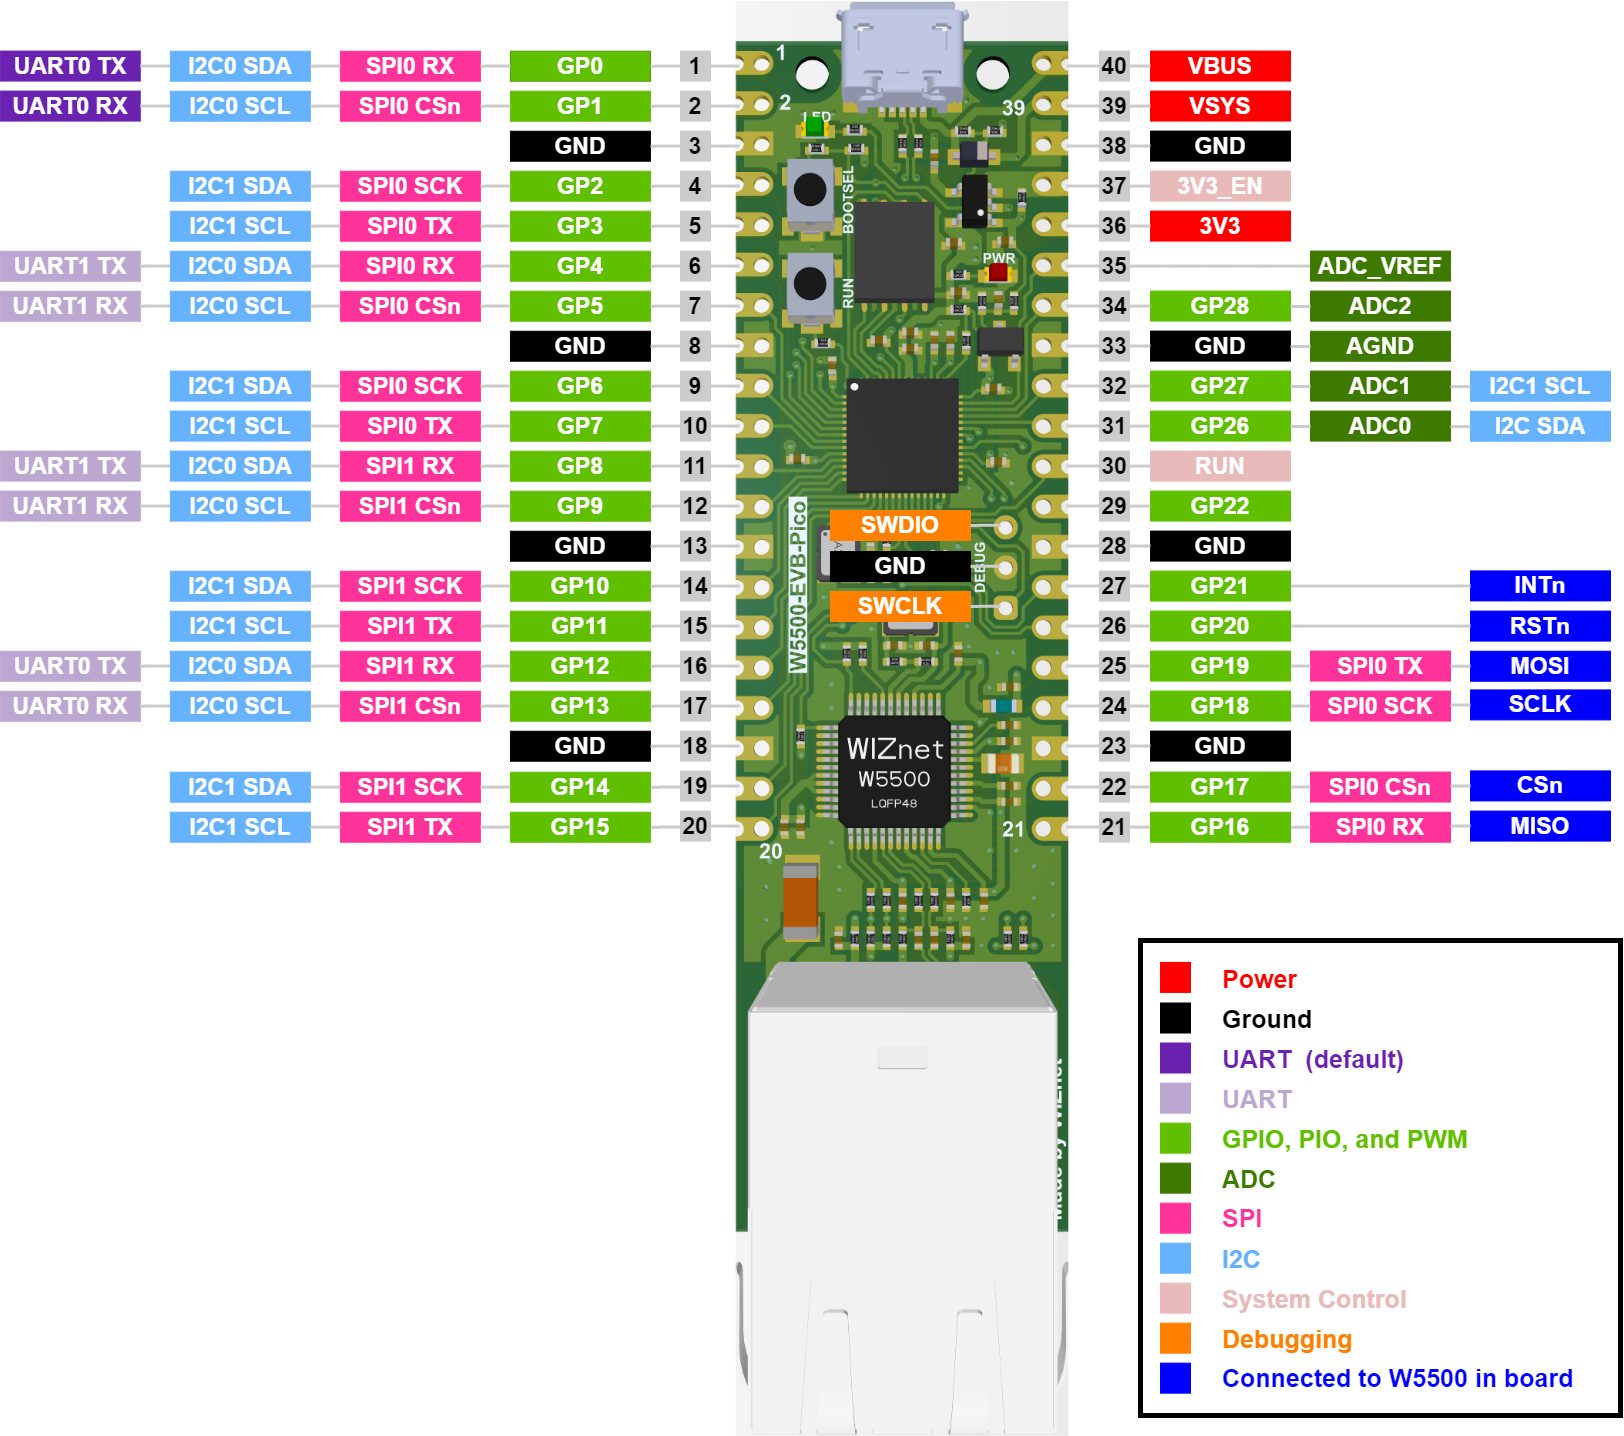
We need : RP2040 Pico-W5500
Board Datasheet :
Memory and registers
The 32-bit address space of the MCU is divided by regions.
For example, some region of memory is mapped to the internal MCU flash at a specific address.
Firmware code instructions are read and executed by reading from that memory region.
Another region is RAM, which is also mapped to a specific address. We can read and write any values to the RAM region.
From STM32F429 datasheet, we can take a look at section 2.3.1 and learn that RAM region starts at address 0x20000000 and has size of 192KB. From section 2.4 we can learn that flash is mapped at address 0x08000000. Our MCU has 2MB flash, so flash and RAM regions are located like this:

it is interesting that two memory in STM32F429. Non-volatile memory is Flash memory, volatile memory is RAM.
These memory regions correspond to a different "peripherals" inside the MCU - a piece of silicon circuitry that make certain pins behave in a special way.
A peripheral memory region is a collection of 32-bit registers. Each register is a 4-byte memory range at a certain address, that maps to a certain function of the given peripheral. By writing values into a register - in other words, by writing a 32-bit value at a certain memory address, we can control how given peripheral should behave. By reading registers, we can read back peripheral's data or configuration.
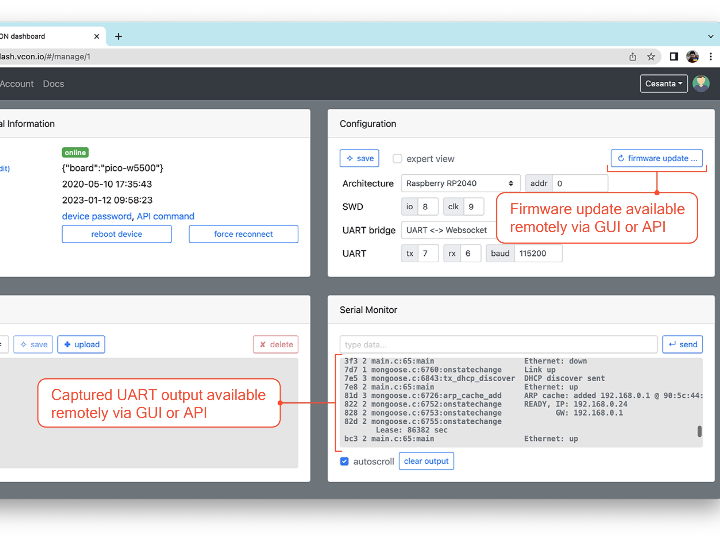
We should add few extra commands that use curl utility to send a built firmware to the test board, and then capture its debug output.
A curl command requires a secret API key, which we do not want to expose to the public. The right way to go is to:
- Go to the project settings / Secrets / Actions
- Click on "New repository secret" button
- Give it a name,
VCON_API_KEY, paste the value into a "Secret" box, click "Add secret"
our automatic tests ensure that the firmware can be built, that is it bootable, that it initialises the network stack correctly. This mechanism can be easily extended: just add more complex actions in your firmware binary, print the result to the UART, and check for the expected output in the test.
When an ARM MCU boots, it reads a so-called "vector table" from the beginning of flash memory. A vector table is a concept common to all ARM MCUs.
When MCU boots, it'll read that address from flash, and jump to our boot function.
If you read all repo , you will learned that we can read and write peripheral register by direct accessing certain memory addresses.