
Smart Parking System
In this project, our group created a smart parking system. In our days of driving
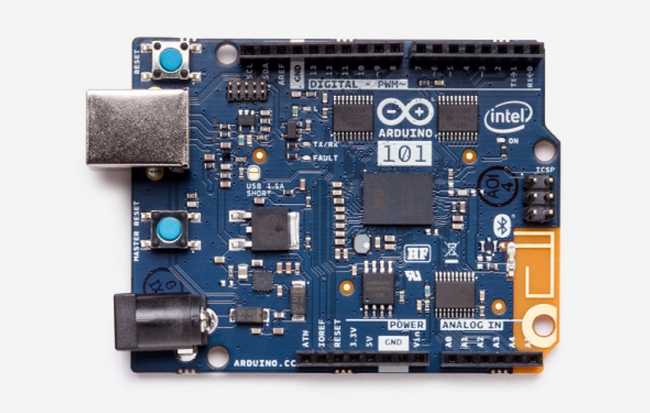
Arduino - Arduino 101
x 1
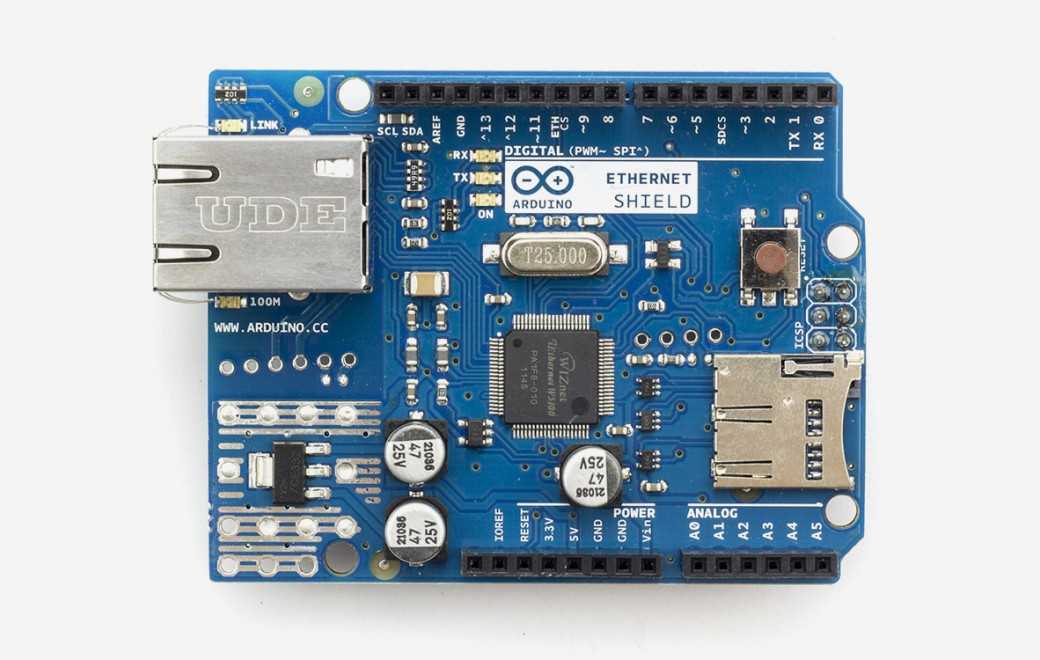
Arduino - Arduino Ethernet Shield
x 1


In this project, our group created a smart parking system. In our days of driving, we always come to the problem of getting to our destination, yet struggling to find a parking spot. This idea was inspired by our trips to Costco, as well as our University Campus. In these places especially, the parking seems to be endless. But there exists no efficient way to navigate through the endless spots to find one that is available. We wanted to address this problem using today's technology, so as to create something that is efficient, effective, and accessible to everyone.
Supplies


Here are the supplies needed to create this project. Note that these aren't necessarily the ones our group used, but they all provide the same function for what is needed to accomplish the project.
- Ultrasonic Sensor: http://www.ebay.com/itm/2PCS-Ultrasonic-HC-SR04-Distance-Transducer-Sensor-For-Arduino-Robot-/281683048595?hash=item41959e3893:g:8v8AAOSwgkRVSKAs
- Arduino Mega 2560: http://www.ebay.com/itm/MEGA-2560-R3-Board-ATmega2560-16AU-CH340G-USB-Cable-for-Arduino-/272114251255
- Jumper Wires: http://www.ebay.com/itm/40pcs-20cm-Male-to-Female-Pin-Header-Dupont-Wire-Color-Jumper-Cable-For-Arduino-/201402081637?hash=item2ee47fe165:g:EAgAAOSwjVVVw0cc
- Arduino Ethernet Shield: http://www.ebay.com/itm/Ethernet-Shield-W5100-For-Arduino-Main-Board-2009-UNO-ATMega-328-1280-MEGA2560-/400356634583?hash=item5d371d6fd7:g:A14AAOSwSclXL-HG
- Breadboard: http://www.ebay.com/itm/830-Tie-Points-Solderless-PCB-Breadboard-MB102-65Pcs-Jumper-cable-wires-/231412564779?hash=item35e143832b:g:tYIAAOSwZQxW6MB7
- Ethernet Cable (and USB Adapter if needed): http://www.ebay.com/itm/25FT-CAT6-Cable-Ethernet-Lan-Network-CAT-6-RJ45-Patch-Cord-Internet-Black-NEW-/331729510954?hash=item4d3c9ea22a:g:Vx0AAOSw7ehXR3Ds
Step 1: Setting Up the Electronics Hardware


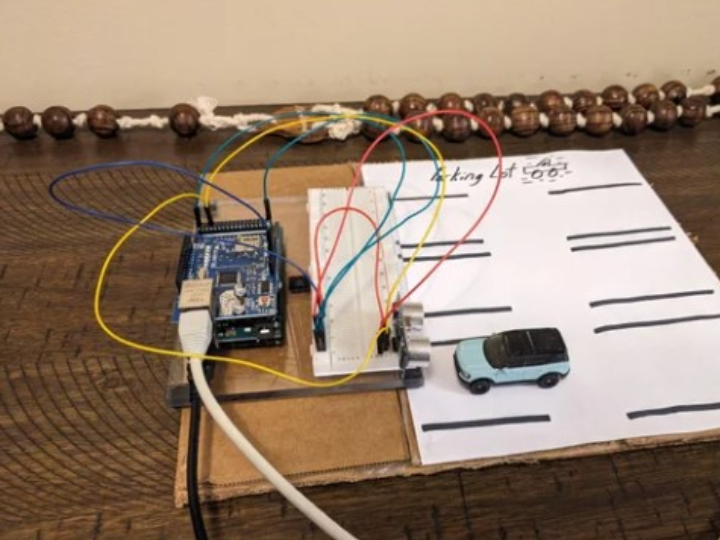
First, we need to setup all of the hardware required for the parking system to function electronically.
*Please be aware that breadboards are broken in half horizontally and vertically. Keep your connections on either side separate!
Connect your shield accordingly to the name of the pins. They should all line up. A0 goes to A0 on the Arduino Mega, 1 to 1, 2 to 2, etc.
Connect the pins of the Ultrasonic Sensor (there should be 4 of them!), and put them anywhere horizontally on the breadboard. We recommend not connecting the sensor between the gap, or in any of the positive/negative rails. Since the hidden wires run the long ways of the breadboard, spacing the gap wouldn't give you the full connection to the sensor. Also, putting the sensor in the positive/negative rails keeps you from connecting more sensors, as well as the other necessary connections for the Ultrasonic Sensor.
- Connect the VCC pin to the Positive rail on your breadboard
- Connect the GND pin to the Negative rail on your breadboard
- Connect the Trig pin to the 25 digital pin on the Arduino
- Connect the Echo pin to the 26 digital pin on the Arduino
See the above picture(s) for the connections from the Arduino Mega to the Sensor on the breadboard. If you have more sensors, we recommend connecting a jumper wire from the VCC pin to the Positive (+) pin line , and the GND pin to the Negative (-) pin line. From there, connect a jumper wire from the Positive (+) rail to a 5V pin on the Arduino, and another jumper wire from the Negative (-) rail to a GND pin.
Step 2: Setting Up the Mechanical Parts

Now that we have our electronics ready, we need some way of showing what our model will actually look like in a real world environment. Since this is just a model of that real world environment, our mechanical components will be very simple. Feel free to be more creative in the area, so as to make it how you want it to look! For our purposes, we are using cardboard and paper.
Using scissors, we cut cardboard to make our base, which has dimensions of 13 inches by 7 inches. We also wanted to show how the data moved physically, so we made 2 base connections from the bottom of the base that connects a side panel to the base. This piece is 13 inches by 4.5 inches. This is all connected via hot glue. Be careful!
From there, we made a drawing of a parking lot with spaces. This was then glued to the top of the base piece.
Step 3: Getting the Software Ready

Now that our hardware is all setup, we need to get the software to work. With the demands of this project, we wanted to create a webpage that could visible to anyone with a smartphone or laptop. So, for the purposes of our model, here are the programs you need to install to get your smart parking system working:
- Arduino: https://www.arduino.cc/en/software (this talks to the Arduino)
- Xampp: https://www.apachefriends.org/download.html (we used the 8.2.12 version)
Xampp has 2 applications within it that will be using, that being Apache, and MySQL.
As seen in the architecture above, our data will be captured form the Arduino IDE software, that come from the Arduino Mega and the Ethernet Shield. This then moves to PHP, which is a scripting language that interprets the data. Then the MySQL creates the connection between the PHP and the MariaDB Database. From the Database, the data is stored and turned into a table format in HTML.
Make sure your cables are all connected from the Arduino and the Shield (via ethernet) to your computer.
Step 4: Arduino Code
This is the Arduino Code for the IDE Software. The code is made for 5 different sensors, and will show up for each one according to how you pinned the sensors. If you're using less than 5, no worries. You can use the exact pins in the input section of the code to line up with the sensor(s). If everything is working right, you should get 3 different outputs. One should show the distances, the one below that the availability of the spot, and then the connection success. In the code, the main part to hit on is this: if there is a presence to the sensor measured less than 6 centimeters, then it is registered as a "0" in the availability output. If it is measured as greater than 6 centimeters, then it will show as a "1" in the availability output. This means that spot is available. The connection success will register as a "success" once we get the Xampp set up. Make sure to put your IP address for your computer in place of ours!

Step 5: Xampp Interface

In this step we will explore the Xampp interface. Xampp as previously mentioned has a web server which helps us use PHP and SQL for making projects. The web server we are using is called as Apache.
In order to create the table, you need to first install Xampp and then start MySQL and Apache. Make sure that those ports are available. You can find an image relating to this in the image bar above this.
Please note that if MySQL does not function properly, then it is probably because of Skype which also uses the same port as MySQL. So you need to right click on the Skype application in the task-bar and click on quit.
So, we need to create a table and then look at how to update the value. Note the word update. We cannot push values to a null (empty) variable. There should be some value in the table in the beginning so that we can change them accordingly later. Please follow these steps to create the table successfully. You may also look at the pictures above for easier understanding.
Click on new.
- Create a database name.
- Then create a table name. (remember this name as you will need it for the next step)
- Then you will be given a layout, just enter the name for each row and then choose which datatype you want. Then leave the rest as it is. (the row name will also be very important)
- Enter the default values and leave them aside.
- After creating the table, you will see that it has been added to the side bar.
Now that we have successfully created the table, we will move onto the next step. In the next step we will look at the SQL connection code.
Step 6: MySQL Connection
In this page , we will be adding the code which connects to the database. The database will need some code to connect to as it will have a password and a username, so we should connect to the database with those specifications. The ones here are the default with the program. Here is the code (it is the "dbcon.php" file): https://drive.google.com/drive/folders/1zJ3Pd-Y82btJbZqeF074tat5c-DVXCF0?usp=drive_link
Step 7: Getting New Values for Table
In this step we will go ahead and update the availability of the table so that we can look at the table which will be more easily understandable. We need to first get the values and then update them . Note that you have to use your table name and the names of the rows which was why I had cautioned you guys before. The only major step to make the whole program function is to add the data to the website. Let us do that in the next step before heading to make an awesome professional looking webpage with Bootstrap. Here is the link to this code (it is the "UpdateAvailability.php" code): https://drive.google.com/drive/folders/1zJ3Pd-Y82btJbZqeF074tat5c-DVXCF0?usp=drive_link
Step 8: Parking Lot Table Display

In order to show the values to the user we must select and fetch them from the database. So we can do that with PHP. Showing them to the screen is will not suffice as the user seeing the screen should understand what the program is trying to say. In order to make it decipherable, we must add a tiny bit of bootstrap into it. We will also be adding something called as a glyph-icon , it is a term in bootstrap which you can look into in more depth in this link: http://getbootstrap.com/components/
Here is the code for the display page (it is the "ParkingLotDisplay.php" file): https://drive.google.com/drive/folders/1zJ3Pd-Y82btJbZqeF074tat5c-DVXCF0?usp=drive_link
Note that your data display page should look like the one in the image. You are done! Congrats!