Surf5 pyOCD debug
[WIZnet W7500 SURF5] - pyOCD 디버깅

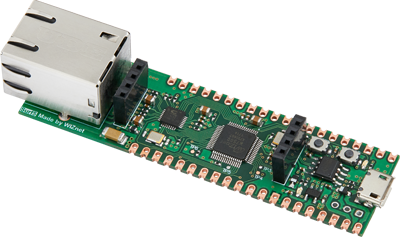
In an article written by an author who goes by the pseudonym "baram", he explains how to debug the SURF5 board using WIZnet's W7500 chip. This is an SoC developed by WIZnet that includes a Cortex-M0 core. Notably, "baram" is an accomplished developer who actively participates in WIZnet contests and has won awards for his high-quality projects.
The author shares how to build a debugging environment for the W7500 chip using pyOCD. Using the KEIL compiler was not possible for the author using macOS, but he found an alternative way to debug with the GCC version.
This article is based on the author's own experience running the guide on Surf5's default project, and includes some of the challenges and things to watch out for.
I will briefly explain what pyOCD, GDB and the debugger adapter (ex J-link) do and how they interact with each other to debug the MCU's FW.
GDB (GNU Debugger): GDB is an open source debugger, primarily used to debug programs written in programming languages such as C and C++. GDB helps you start, stop, and inspect the execution of a program and find and fix bugs within the code.
A GDB environment consists of a GDB client and a GDB server.
The GDB client is the user interface that allows developers to stop/run code or set breakpoints directly, as shown in the photo above, and the GDB server is responsible for reconstructing the commands entered by the user into a form compatible with SWD/JTAG. pyOCD or OpenOCD are examples of this.
The reconstructed commands are then sent to the MCU via an HW adapter (J-link or ST-link).
To use pyOCD, the author installed pyocd with the command below, assuming Python3 and pip are installed.
python3 -m pip install -U pyocd
We then applied Open-CMSIS-Pack to enable FLASH download and debugging.
This process is applicable by creating the WIZnet.W7500_DFP.1.0.0 folder and copying the firmware file for the FLM download provided by WIZnet.
We also specified the chip's name, FLASH information, and download firmware location in the CMSIS-Pack's configuration file (WIZnet.W7500_DFP.pdsc).
<?xml version="1.0" encoding="utf-8"?>
<package schemaVersion="1.2" xmlns:xs="http://www.w3.org/2001/XMLSchema-instance" xs:noNamespaceSchemaLocation="PACK.xsd">
  <vendor>Nuvoton</vendor>
  <url>https://github.com/OpenNuvoton/cmsis-packs/raw/master/Nuvoton_DFP/</url>
  <name>NuMicro_DFP</name>
  <description>Nuvoton ARM Cortex-M NuMicro Family Device Support</description>

  <releases>
    <release version="1.0.0" date="2023-12-02">
      First Released
    </release>
  </releases>

  <keywords>
    <!-- keywords for indexing -->
    <keyword>WIZnet</keyword>
    <keyword>Device Support</keyword>
    <keyword>Device Family Package W7500</keyword>
    <keyword>W7500</keyword>
  </keywords>

  <devices>
    <!-- generated, do not modify this section! -->
    <family Dfamily="W7500 Family" Dvendor="WIZnet:122">
      <!-- *************************  Subfamily 'Generic'  ***************************** -->
      <subFamily DsubFamily="Generic">
        <description>The WIZnet W7500 Series 32-bit microcontroller</description>
        <!-- *************************  Device 'Generic M051'  ***************************** -->
        <device Dname="W7500">
          <processor  Dcore="Cortex-M0"  Dclock="48000000"/>
          <memory     id="FLASH"   start="0x00000000"  size="0x20000"    startup="1"   default="1"/>
          <memory     id="SRAM"    start="0x20000000"  size="0x4000"     init   ="0"   default="1"/>
          <algorithm  name  ="Flash/W7500_128.FLM"     start="0x00000000"  size="0x20000"  RAMstart="0x20000000"  RAMsize="0x4000"  default="1"/>
        </device>
      </subFamily>
    </family>
  </devices>

</package>
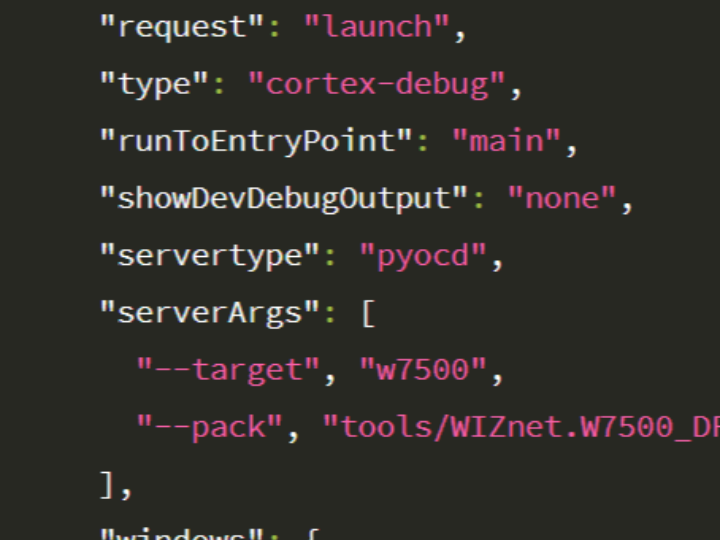
We created the gdbpath and settings in the launch.json file and used the
I used pyocd list to check the W7500s registered in the configuration file (WIZnet.W7500_DFP.pdsc).
You downloaded the firmware using the pyocd load command.
The author tested the SWD pin by connecting it to a STLINK-compatible product (I used a J-link) and configured a debugging environment in VSCode.
This article was written by the author, "baram", based on his own experience and is particularly useful for developers using the W7500 chip. More information can be found on the author's GitHub page.
Since it was based on the Surf5 default project, some modifications needed to be made, especially the Cmakelist, since .elf files for debugging are not generated by Surf5. default project.
With these improvements, the project was useful enough to be added to the official Surf5 documentation as a documentation for users.
"바람"이라는 필명의 저자가 작성한 글에서, WIZnet의 W7500 칩을 사용하는 SURF5 보드의 디버깅 방법에 대해 설명합니다. 이 칩은 Cortex-M0 코어를 포함한 WIZnet에서 개발한 SoC입니다. 특히, '바람' 님은 위즈네트 컨테스트에 적극적으로 참여하며, 수준 높은 프로젝트로 수상한 경험이 있는 뛰어난 개발자입니다.
저자는 pyOCD를 사용하여 W7500 칩을 위한 디버깅 환경을 구축하는 방법을 공유합니다. macOS를 사용하는 저자에게 KEIL 컴파일러 사용은 불가능했으나, GCC 버전에서 디버깅을 위한 대안적인 방법을 찾아냈습니다.
이 글은 Surf5의 기본 프로젝트를 기준으로 저자의 가이드를 직접 실행하면서 어려움을 느꼈던 점과 주의해야 할 점에 대해서도작성하였습니다.
pyOCD와 GDB 그리고 디버거 어댑터(ex J-link)가 서로 어떤 역할을 하고 어떠한 상호 작용으로 MCU의 FW를 디버깅 할 수 있는지 간략하게 설명 드리겠습니다.
GDB (GNU Debugger): GDB는 오픈 소스 디버거로, 주로 C, C++ 등의 프로그래밍 언어로 작성된 프로그램을 디버깅하는 데 사용됩니다. GDB는 프로그램의 실행을 시작, 중지, 검사하고 코드 내에서 버그를 찾아 수정하는 데 도움을 줍니다.
GDB 환경은 GDB 클라이언트와 GDB 서버로 구성되는데
위 사진처럼 개발자가 직접 코드를 중지/실행 또는 Breakpoint를 설정하는 등의 사용자 인터페이스를 GDB 클라이언트라고 하고 사용자가 입력한 명령어를 SWD/JTAG에 호환되는 형태로 재구성 하는 역할은 GDB 서버라고 합니다. pyOCD나 OpenOCD가 여기에 해당됩니다.
이후 재구성된 명령어는 HW 어댑터(J-link나 ST-link)를 통해 MCU로 전송됩니다.
pyOCD를 사용하기 위해, 저자는 파이썬3와 pip가 설치됐다는 가정하에 아래의 명령어로 pyocd를 설치하였습니다.
python3 -m pip install -U pyocd
이후에 Open-CMSIS-Pack을 적용하여 FLASH 다운로드와 디버깅을 가능하게 했습니다.
이 과정은 WIZnet.W7500_DFP.1.0.0 폴더를 생성하고, WIZnet에서 제공하는 FLM 다운로드용 펌웨어 파일을 복사함으로 적용 가능합니다.
또한, CMSIS-Pack의 설정 파일(WIZnet.W7500_DFP.pdsc)에 W7500 칩의 이름, FLASH 정보, 다운로드 펌웨어 위치를 지정했습니다.
<?xml version="1.0" encoding="utf-8"?>
<package schemaVersion="1.2" xmlns:xs="http://www.w3.org/2001/XMLSchema-instance" xs:noNamespaceSchemaLocation="PACK.xsd">
  <vendor>Nuvoton</vendor>
  <url>https://github.com/OpenNuvoton/cmsis-packs/raw/master/Nuvoton_DFP/</url>
  <name>NuMicro_DFP</name>
  <description>Nuvoton ARM Cortex-M NuMicro Family Device Support</description>

  <releases>
    <release version="1.0.0" date="2023-12-02">
      First Released
    </release>
  </releases>

  <keywords>
    <!-- keywords for indexing -->
    <keyword>WIZnet</keyword>
    <keyword>Device Support</keyword>
    <keyword>Device Family Package W7500</keyword>
    <keyword>W7500</keyword>
  </keywords>

  <devices>
    <!-- generated, do not modify this section! -->
    <family Dfamily="W7500 Family" Dvendor="WIZnet:122">
      <!-- *************************  Subfamily 'Generic'  ***************************** -->
      <subFamily DsubFamily="Generic">
        <description>The WIZnet W7500 Series 32-bit microcontroller</description>
        <!-- *************************  Device 'Generic M051'  ***************************** -->
        <device Dname="W7500">
          <processor  Dcore="Cortex-M0"  Dclock="48000000"/>
          <memory     id="FLASH"   start="0x00000000"  size="0x20000"    startup="1"   default="1"/>
          <memory     id="SRAM"    start="0x20000000"  size="0x4000"     init   ="0"   default="1"/>
          <algorithm  name  ="Flash/W7500_128.FLM"     start="0x00000000"  size="0x20000"  RAMstart="0x20000000"  RAMsize="0x4000"  default="1"/>
        </device>
      </subFamily>
    </family>
  </devices>

</package>
launch.json 파일로 gdbpath및 설정을 작성하였고
pyocd list를 사용하여 설정 파일(WIZnet.W7500_DFP.pdsc)에 등록한 W7500을 확인하였습니다.
pyocd load 명령어를 사용하여 펌웨어를 다운로드했습니다.
SWD 핀을 STLINK 호환 제품과 연결하여 테스트하고, VSCode에서 디버깅 환경을 구성했습니다.
이 글은 "바람"이라는 저자가 자신의 경험을 바탕으로 작성한 것으로, 특히 W7500 칩을 사용하는 개발자들에게 유용한 정보를 제공합니다. 자세한 내용은 저자의 GitHub 페이지에서 확인할 수 있습니다.
Surf5 기본 프로젝트를 기반으로 실행하다 보니 수정할 부분이 있었고 특히 디버깅을 위한 .elf파일이 Surf5에서는 생성되지 않아 Cmakelist를 수정해야 했습니다.
이러한 내용을 보완하여 Surf5 공식 문서에 사용자들을 위한 문서로 추가하면 좋을 정도로 유저들에게 유용한 프로젝트였습니다.

