
Operate Arduino from web browser (using Ethernet shield)
Operate Arduino from web browser (using Ethernet shield)
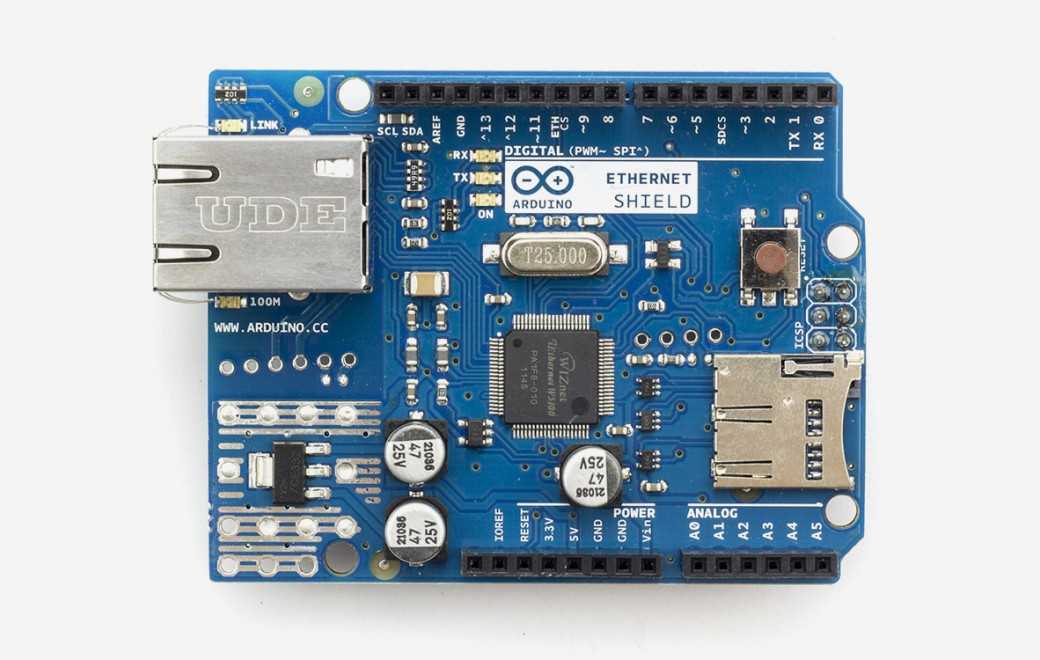
Arduino - Arduino Ethernet Shield
x 1
Operate Arduino from web browser (using Ethernet shield)
parts list
| part name | quantity | Product name | Reference price |
|---|---|---|---|
| Ethernet shield | 1 | Arduino Ethernet Shield | 4,200 yen |
| LED | 1 | Red LED 3mm OSDR3133A | 350 yen for 100 pieces |
| 150Ω resistor | 1 | Carbon resistor (carbon film resistor) 1/6W 150Ω | 100 yen 100 |
| Arduino board | 1 | Arduino Uno | 2,780 yen |
| bread board | 1 | EIC-801 | 250 yen |
| jumper wire | moderate amount | Jumper cord (male-male) set | 49 pieces of 100 mm 8 pieces of 150 mm 4 pieces of 200 mm 4 pieces of 250 mm 200 yen |
Connection example
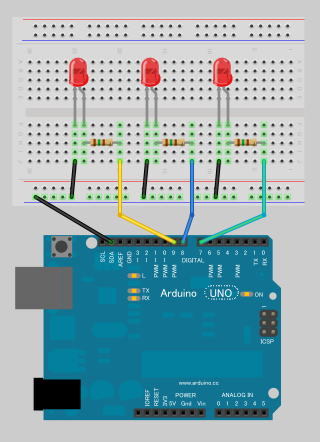
*Connections related to the Ethernet shield are omitted.
sample code
#include <SPI.h> // for Ethernet.h
#include <Ethernet.h> // for Ethernet
#define LED1PIN (7)
#define LED2PIN (8)
#define LED3PIN (9)
#define LINEBUFFERSIZE (128)
#define DELIMITER ("&")
unsigned char MACADDRESS[] = { 0x90, 0xA2, 0xDA, 0x00, 0x54, 0x65 };
unsigned char IPADDRESS[] = { 192, 168, 1, 50 };
EthernetServer g_server(80);
void setup()
{
Ethernet.begin(MACADDRESS, IPADDRESS);
g_server.begin();
pinMode(LED1PIN, OUTPUT);
pinMode(LED2PIN, OUTPUT);
pinMode(LED3PIN, OUTPUT);
// Serial.begin(9600);
}
// HTML出力
void PrintHtml( EthernetClient& client, boolean led1, boolean led2, boolean led3, int speed )
{
client.println("HTTP/1.1 200 OK");
client.println("Content-Type: text/html");
client.println();
client.println("<!DOCTYPE HTML PUBLIC \"-//W3C//DTD HTML 4.01 Transitional//EN\" \"http://www.w3.org/TR/html4/loose.dtd\">");
client.println("<html lang=\"ja\">");
client.println("<head>");
client.println("<meta http-equiv=\"Content-Type\" content=\"text/html; charset=UTF-8\">");
client.println("<meta http-equiv=\"Content-Style-Type\" content=\"text/css\">");
client.println("<title></title>");
client.println("</head>");
client.println("<body>");
client.println("<p>");
client.print("LED1 : "); client.print( led1 ? "ON" : "off" ); client.println("<br>");
client.print("LED2 : "); client.print( led2 ? "ON" : "off" ); client.println("<br>");
client.print("LED3 : "); client.print( led3 ? "ON" : "off" ); client.println("<br>");
client.println("<br>");
client.println("速さ:");
client.println(speed);
client.println("</p>");
client.println("<hr>");
client.println("<form method=\"post\" action=\"\">");
client.print("<input type=\"checkbox\" name=\"led1\" value=\"1\""); if(led1){ client.print(" checked"); } client.println(">LED1<br>");
client.print("<input type=\"checkbox\" name=\"led2\" value=\"1\""); if(led2){ client.print(" checked"); } client.println(">LED2<br>");
client.print("<input type=\"checkbox\" name=\"led3\" value=\"1\""); if(led3){ client.print(" checked"); } client.println(">LED3<br>");
client.println("<br>");
client.println("速さ<br>");
client.println("1 ");
client.print("<input type=\"radio\" name=\"speed\" value=\"1\""); if(1==speed){ client.print(" checked"); } client.println("> ");
client.print("<input type=\"radio\" name=\"speed\" value=\"2\""); if(2==speed){ client.print(" checked"); } client.println("> ");
client.print("<input type=\"radio\" name=\"speed\" value=\"3\""); if(3==speed){ client.print(" checked"); } client.println("> ");
client.print("<input type=\"radio\" name=\"speed\" value=\"4\""); if(4==speed){ client.print(" checked"); } client.println("> ");
client.print("<input type=\"radio\" name=\"speed\" value=\"5\""); if(5==speed){ client.print(" checked"); } client.println("> ");
client.print("<input type=\"radio\" name=\"speed\" value=\"6\""); if(6==speed){ client.print(" checked"); } client.println("> ");
client.print("<input type=\"radio\" name=\"speed\" value=\"7\""); if(7==speed){ client.print(" checked"); } client.println("> ");
client.print("<input type=\"radio\" name=\"speed\" value=\"8\""); if(8==speed){ client.print(" checked"); } client.println("> ");
client.print("<input type=\"radio\" name=\"speed\" value=\"9\""); if(9==speed){ client.print(" checked"); } client.println("> ");
client.println(" 10<br>");
client.println("<br>");
client.println("<input type=\"submit\" value=\"送信\">");
client.println("<input type=\"reset\" value=\"リセット\"></form>");
client.println("<hr>");
client.println("</body>");
client.println("</html>");
}
boolean AnalyzeLineString( char* pszLine, boolean& rbLed1, boolean& rbLed2, boolean& rbLed3, int& riSpeed )
{
char* pszToken = strtok(pszLine, DELIMITER);
while(pszToken)
{
if( 6 == strlen(pszToken)
&& 0 == strncmp(pszToken, "led", 3) )
{ // led?=1
if( '1' == pszToken[3] ){ rbLed1 = true; }
else if( '2' == pszToken[3] ){ rbLed2 = true; }
else if( '3' == pszToken[3] ){ rbLed3 = true; }
}
else if( 7 == strlen(pszToken)
&& 0 == strncmp(pszToken, "speed", 5) )
{ // speed=?
riSpeed = pszToken[6] - '0';
}
pszToken = strtok(NULL, DELIMITER);
}
return true;
}
boolean readHttpRequest( EthernetClient& client, boolean& rbLed1, boolean& rbLed2, boolean& rbLed3, int& riSpeed )
{
if( !client )
{
return false;
}
// HTTPリクエスト空行(\r\n\r\n)で終わる。ので、空行を探す。
boolean foundRNRN = false;
boolean currentLineIsBlank = true;
char szLine[LINEBUFFERSIZE];
int iIndex = 0;
while( client.connected() )
{
if( !client.available() )
{
//continue;
break;
}
char c = client.read();
// Serial.print(c);
if( '\n' == c && currentLineIsBlank )
{ // 空行発見。
foundRNRN = true;
}
if( '\n' == c )
{
// httpリクエストの1行の解析
if( foundRNRN
&& 0 != iIndex )
{
szLine[iIndex] = '\0';
AnalyzeLineString( szLine, rbLed1, rbLed2, rbLed3, riSpeed );
}
// 新しい行の始まり。
currentLineIsBlank = true;
iIndex = 0;
}
else if( '\r' != c )
{ // この行は空行ではなかった。
currentLineIsBlank = false;
if( foundRNRN )
{
if( LINEBUFFERSIZE - 1 > iIndex )
{
szLine[iIndex] = c;
++iIndex;
}
}
}
}
// httpリクエストの終端行の解析
if( foundRNRN
&& 0 != iIndex )
{
szLine[iIndex] = '\0';
AnalyzeLineString( szLine, rbLed1, rbLed2, rbLed3, riSpeed );
}
return foundRNRN;
}
void loop()
{
static boolean s_led1 = false;
static boolean s_led2 = false;
static boolean s_led3 = false;
static int s_interval = 0;
EthernetClient client = g_server.available();
boolean led1 = false;
boolean led2 = false;
boolean led3 = false;
int speed = 5;
if( readHttpRequest(client, led1, led2, led3, speed) )
{
// Html出力
PrintHtml(client, led1, led2, led3, speed);
// Webブラウザに対して、データを取得するための時間を与える。
delay(1);
// コネクションを閉じる。
client.stop();
s_led1 = led1;
s_led2 = led2;
s_led3 = led3;
// speed | 1 9
// 間隔[秒] | 0.5 0.01
// interval[ms] | 500 10
s_interval = (int)(500L + (speed - 1) * (10L - 500L) / (9-1));
}
if( s_led1 ){ digitalWrite(LED1PIN, HIGH); }
if( s_led2 ){ digitalWrite(LED2PIN, HIGH); }
if( s_led3 ){ digitalWrite(LED3PIN, HIGH); }
delay(s_interval);
digitalWrite(LED1PIN, LOW);
digitalWrite(LED2PIN, LOW);
digitalWrite(LED3PIN, LOW);
delay(s_interval);
}
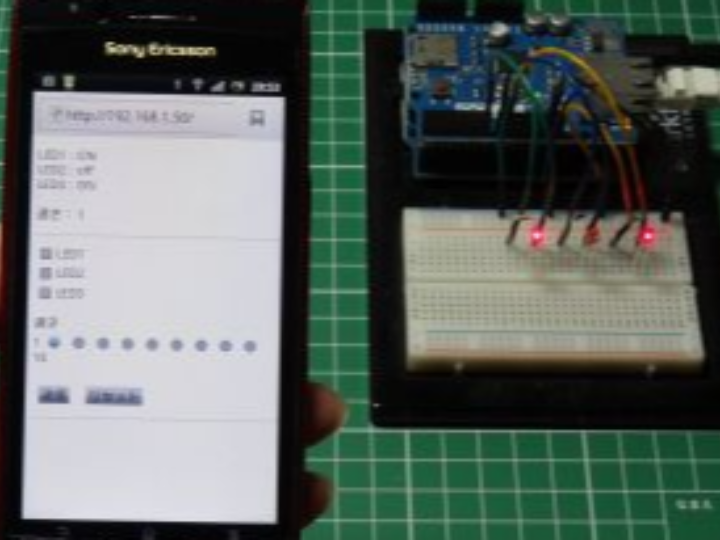
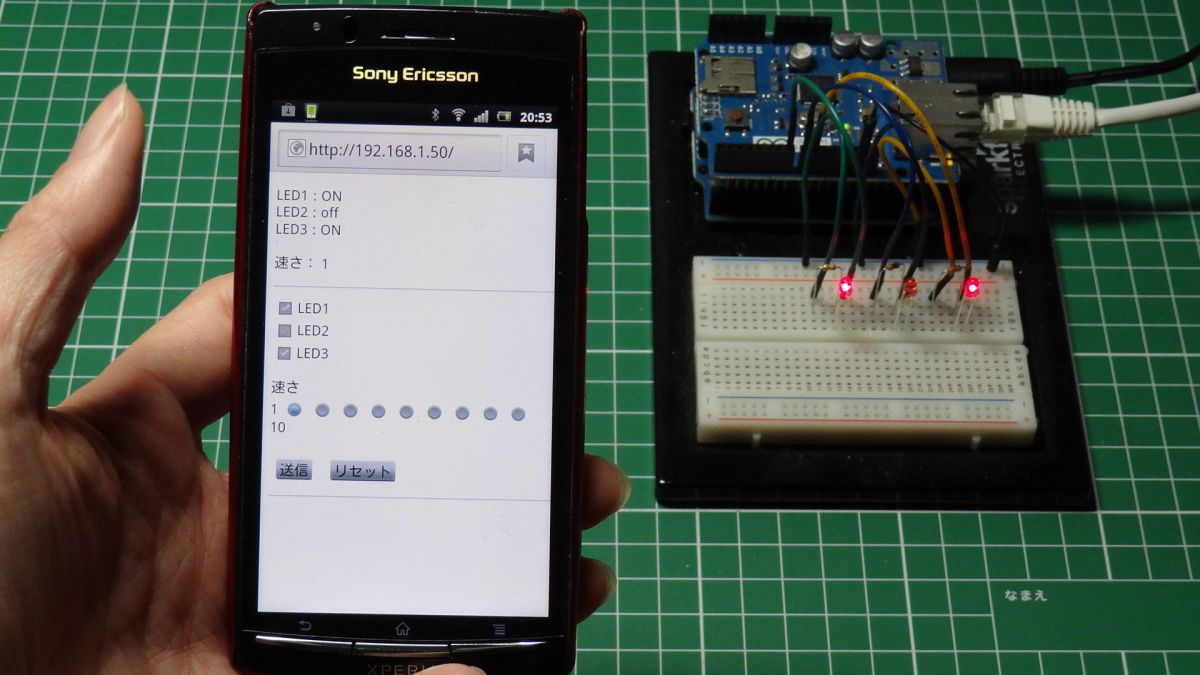
execution
this project is show how to control arduino via ethernet using ethernet shield.
very well explain, and good to see.
Also lot of users left comment.
unsigned char IPADDRESS[] = { 192, 168, 1, 50 };
IP address should be a number that does not conflict within the private network.
In my case, I set the IP address of my private network to 192.168.1.○, and number 50 is not assigned to other network devices, so I set it to 192.168.1.50.
Why?
To access from outside, you must first open port 80 on your router and enter the global IP address into your iPhone to access.
When I enter the global IP address and access it, the screen is displayed, but when
I try to turn on the LED, it does not turn on.
If you check the LED and click the send button, it will return to the initial screen.
So I suspect that the information sent from the iPhone to the ethernet shield is different when connected to WiFi and when connected to 3G.Is there a
way to find out the difference between the two?
I'm going to introduce an automatic curtain on our Wiznet blog with an Arduino+ Ethernet shield you built.
If it's okay, please send an email to jinhee.ahn@wiznet.co.kr.
boolean & too.
Since the strtok function is used, the return value is a pointer, so * is probably used.
For details, you should check pointers in C language.
>boolean& too.
Same here
. I would like
to know, but do you need another programming language to create a smartphone operation screen?
○Is it necessary to use some other programming language to create an operation screen for a smartphone?
→ The code here uses only HTML. It's the backbone of your web page, and that's the string you're sending with 'client.print'.
Check out the HTML language for more information. You don't have to think too hard if you just want to place buttons and display text.
If you want to make complex actions, Java and CSS are also included, but if it is too complicated, the memory on the Arduino side will be insufficient, so it will be difficult for Uno.
○ How to implement a reset button
→ If you just want to initialize the lighting state of the LEDs (all off) from your smartphone, just create a reset button and turn it off when pressed.
Check out the HTML for how to display the button. For how to receive input, refer to the function "AnalyzeLineString" in the source code.
If it works for the time being, put a sentence <input type="button" name="reset" value="LED reset"> on line 71 of the code, and select
"reset Isn't it better to search for the string ", and if you find it, put False in all led_1 to 3?
I think it's enough to change 2-3 lines. "type="reset" in the code ] is also good.
For a hard reset, using the RESET pin is the quickest way to do it.
○ Play music with a piezoelectric buzzer
→ Search for "Arduino music" to find out how to play music with Arduino. After that, the only difference is whether to light up the LED or make a sound.
For the time being, if you want to do it simply, create a function to play music. If it's a piezoelectric buzzer, you can refer to the sheet music of Dragon Quest to make sounds one by one with the tone function.
So, write like <input type="button" name="music" value="music"> in the HTML code to create an appropriate button.
After that, look for the button name ("music" if it is as described above) at "AnalyzeLineString", and execute the function when you find it.
I think that modifying the existing part except for the implementation of the music playback part (only describing the sound with the tone function) can be done in a few lines.
○ How to increase the number of LEDs
→ If you follow this code, line 6, line 21, line 55, line 88, line 167, line 173, line 188, line 197, line 201 Copy and paste each and change the number.
For example, "#define LED3PIN (9)" becomes "#define LED4PIN (10)".
Add the arguments for each function in the same way. It's too long to write everything in this comment section, so I'll omit it.
The basic work is to copy and paste the code into a notepad or Arduino, search for "led3", copy and paste the location found, and change the number.
If there are many LEDs that you want to turn on, it will be easier later if you put the LED-related variables in an array. perhaps.
LED1 check box and press the send button, LED1 ON
will be displayed. The actual LED also blinks, but turns off after a few seconds.
It seems that it is not latched, but where should I fix it?
Also, speed 1 to 8 gradually becomes faster, but 9 becomes slower.
Thank you for your guidance.
I apologize.
I saw your project, it's simple but good to refer for beginner
. shield/)
if you don't like this pls reply to my comment.in
addition, that site has a lot of user contents.I
think it will be helpfull to you.also
it has regularly hold contests with prizes, so participate if you want.
thanks!
-
sketch file
sample sketch file
