How to use Surf 5 as S2E
How to use Surf 5 as S2E
How to use Surf5 as S2E
This guide should be done after the user has read and worked through guides How to install USB driver and How to use ISP tool.
1. Download WIZ750SR-1xx FW
Download WIZ750SR-1xx FW last verson. You need WIZ750SR-1xxvxxx_incl_Boot.bin file that combined App and Boot.
2. Flashing Surf5
Enter Boot mode for using ISP tool
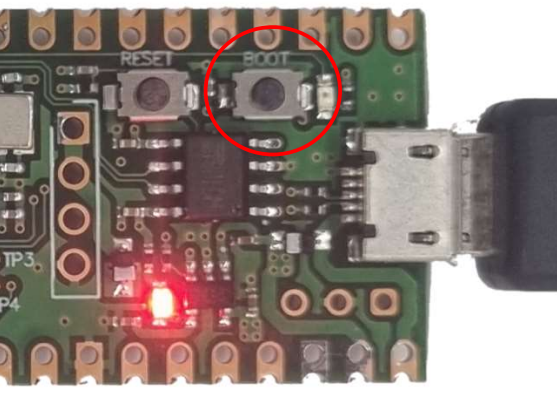
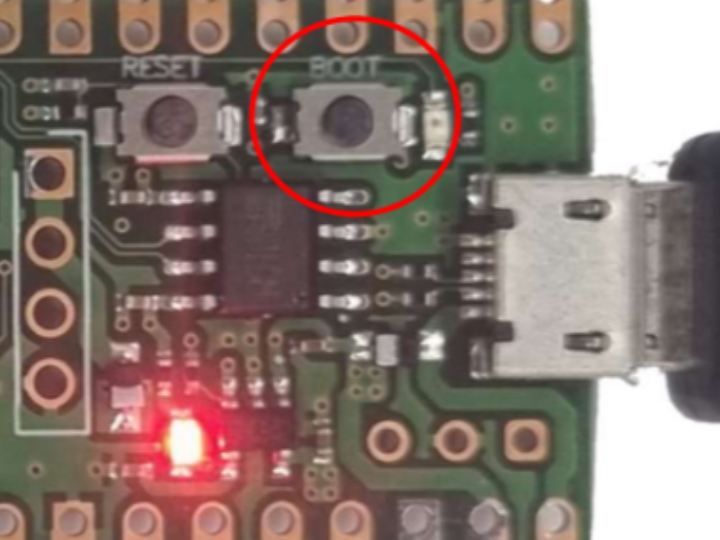
Press and hold the Boot SW and apply power, or press and hold the BOOT SW while power is applied and press the RESET SW shortly.
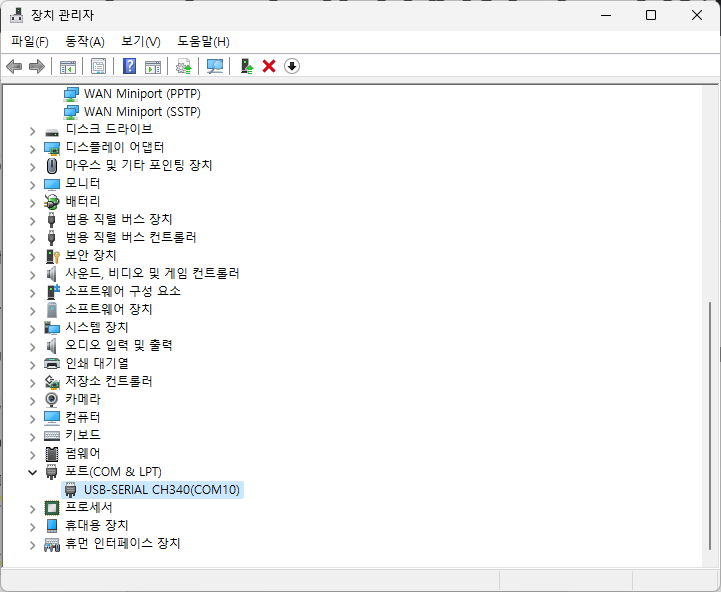
Check The com port number of Surf5 in Device manager.
The com port number can be differnet depending on the PC you're connecting to.
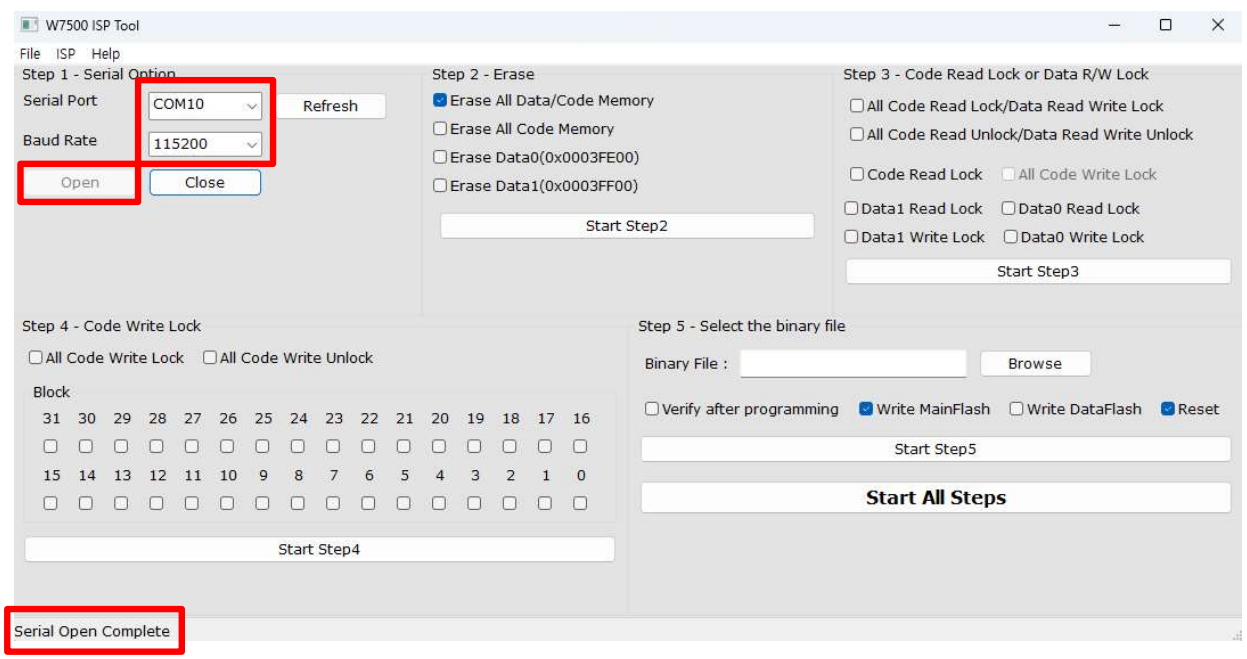
Select Serial port, set Baud Rate to 115200 and click Open.
If your Surf5 connect with ISP tool successfull, you can see Serial Open Complete message on the left bottom of ISP tool.
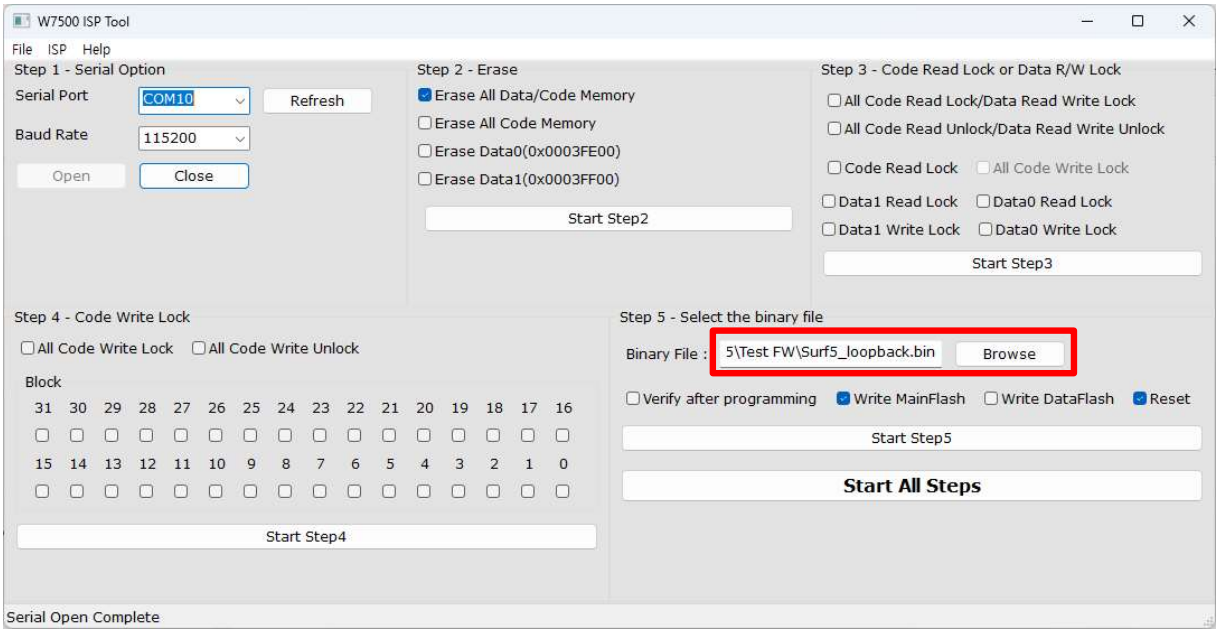
After ISP tool is connected, press the Browse button to select the binary file(WIZ750SR-1xxvxxx_incl_Boot.bin).
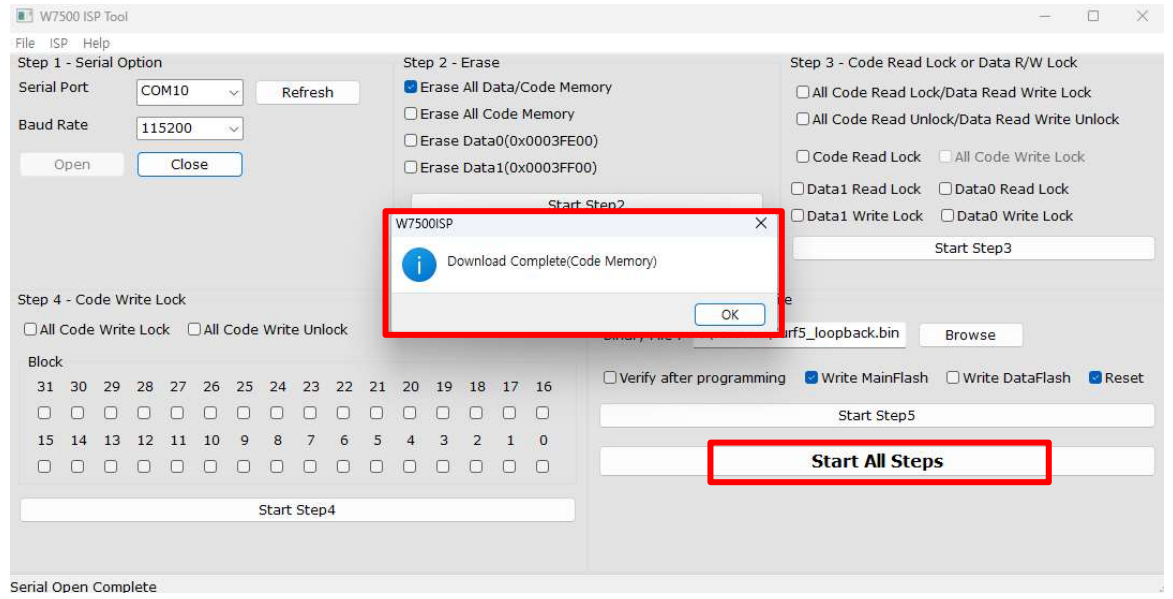
When you press the Start all steps button, Surf5 will erase old data and download the binary file you selected.
When the download completes successfully, the Download complete popup appears.
3. Enter MAC Address

When you receive the message INPUT FIRST MAC?, type MC00:08:DC:xx:xx:xx$0d$0a to enter your MAC.

After Enter the MAC address, you can see the status message.
4. Set Surf5 PA00 pin to LOW
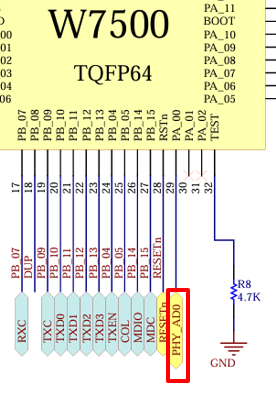
In the WIZ750SR-1xx FW, the W7500 uses PA00 to read the linkup signal from the IP101GRI (PHY IC) to verify linkup.
So the WIZ750SR-1xx modules are connected to Surf5's PA00 with a link signal from the IP101GRI.

However, the Surf5 does not have a Link signal connected to the PA00, and the Link signal from the IP101GRI(PHY) is not connected to the connector. Therefore, You need to force the Surf5 into a linked-up state by connecting the PA00 to GND to drive the S2E FW. (This will be improved in next revision by connecting the link signal to a connector)
5. Search Surf5

Search Surf5 using Wizconfig Tool. It is normal for Surf5 to be detected as WIZ750SR-1xx.
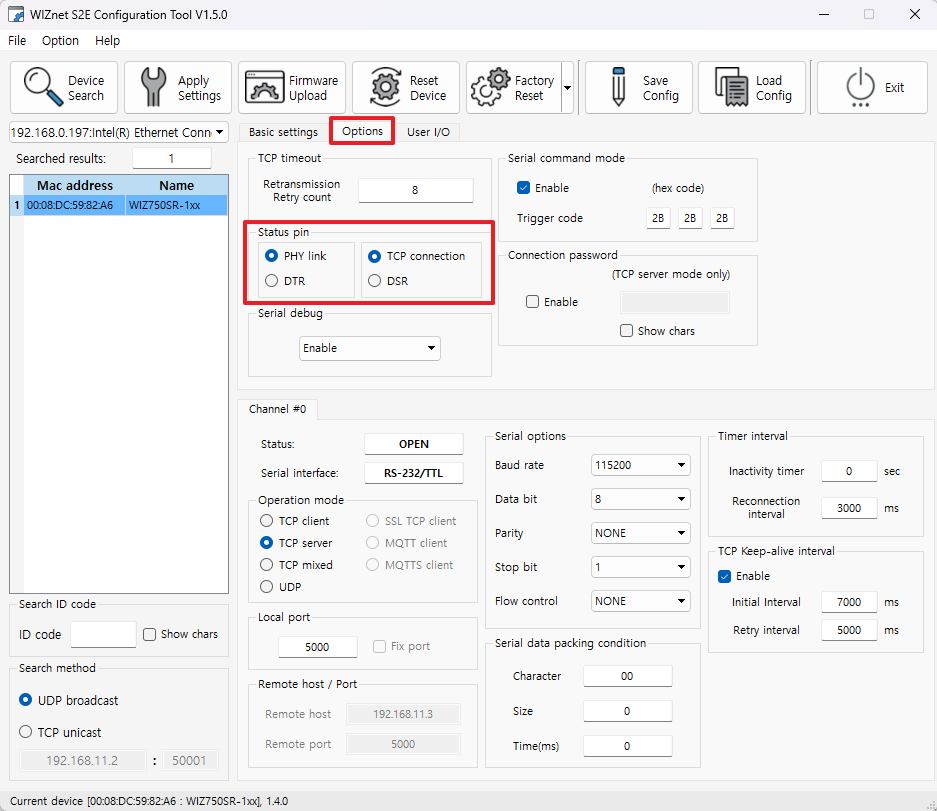
If you don't use DTR,DSR and only use UART TX and RX, please set the Status pin as shown in the picture.
