
W5100S-EVB-Pico & DHT11: Real-time Data Transmission
This is a tutorial on how to use a DHT11 sensor with a w5100s-evb-pico board to send temperature and humidity data to the Beebotte cloud.

WIZnet - W5100S-EVB-Pico
x 1

DFRobot - Gravity: DHT11 Temperature Humidity Sensor For Arduino
x 1

Arduino - Arduino IDE
x 1
0. Introduction
This is a tutorial on how to use a DHT11 sensor with a w5100s-evb-pico board to send temperature and humidity data to the Beebotte cloud. The tutorial covers importing necessary libraries, setting up pin numbers for the DHT11 sensor, and updating token values for Beebotte cloud connection. The real-time temperature and humidity data sent from the w5100s-evb-pico board can be monitored on the dashboard.
1. Hardware
1.1. Required component
- W5100S-EVB-Pico
- DHT11 - humidity & temperature sensor
- Bread board
- Ethernet cable
- USB 5pin cable
1.2. Hardware wiring
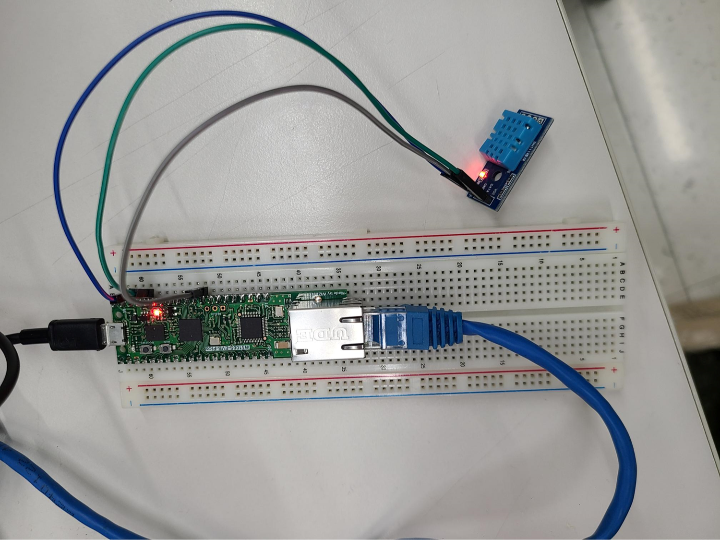
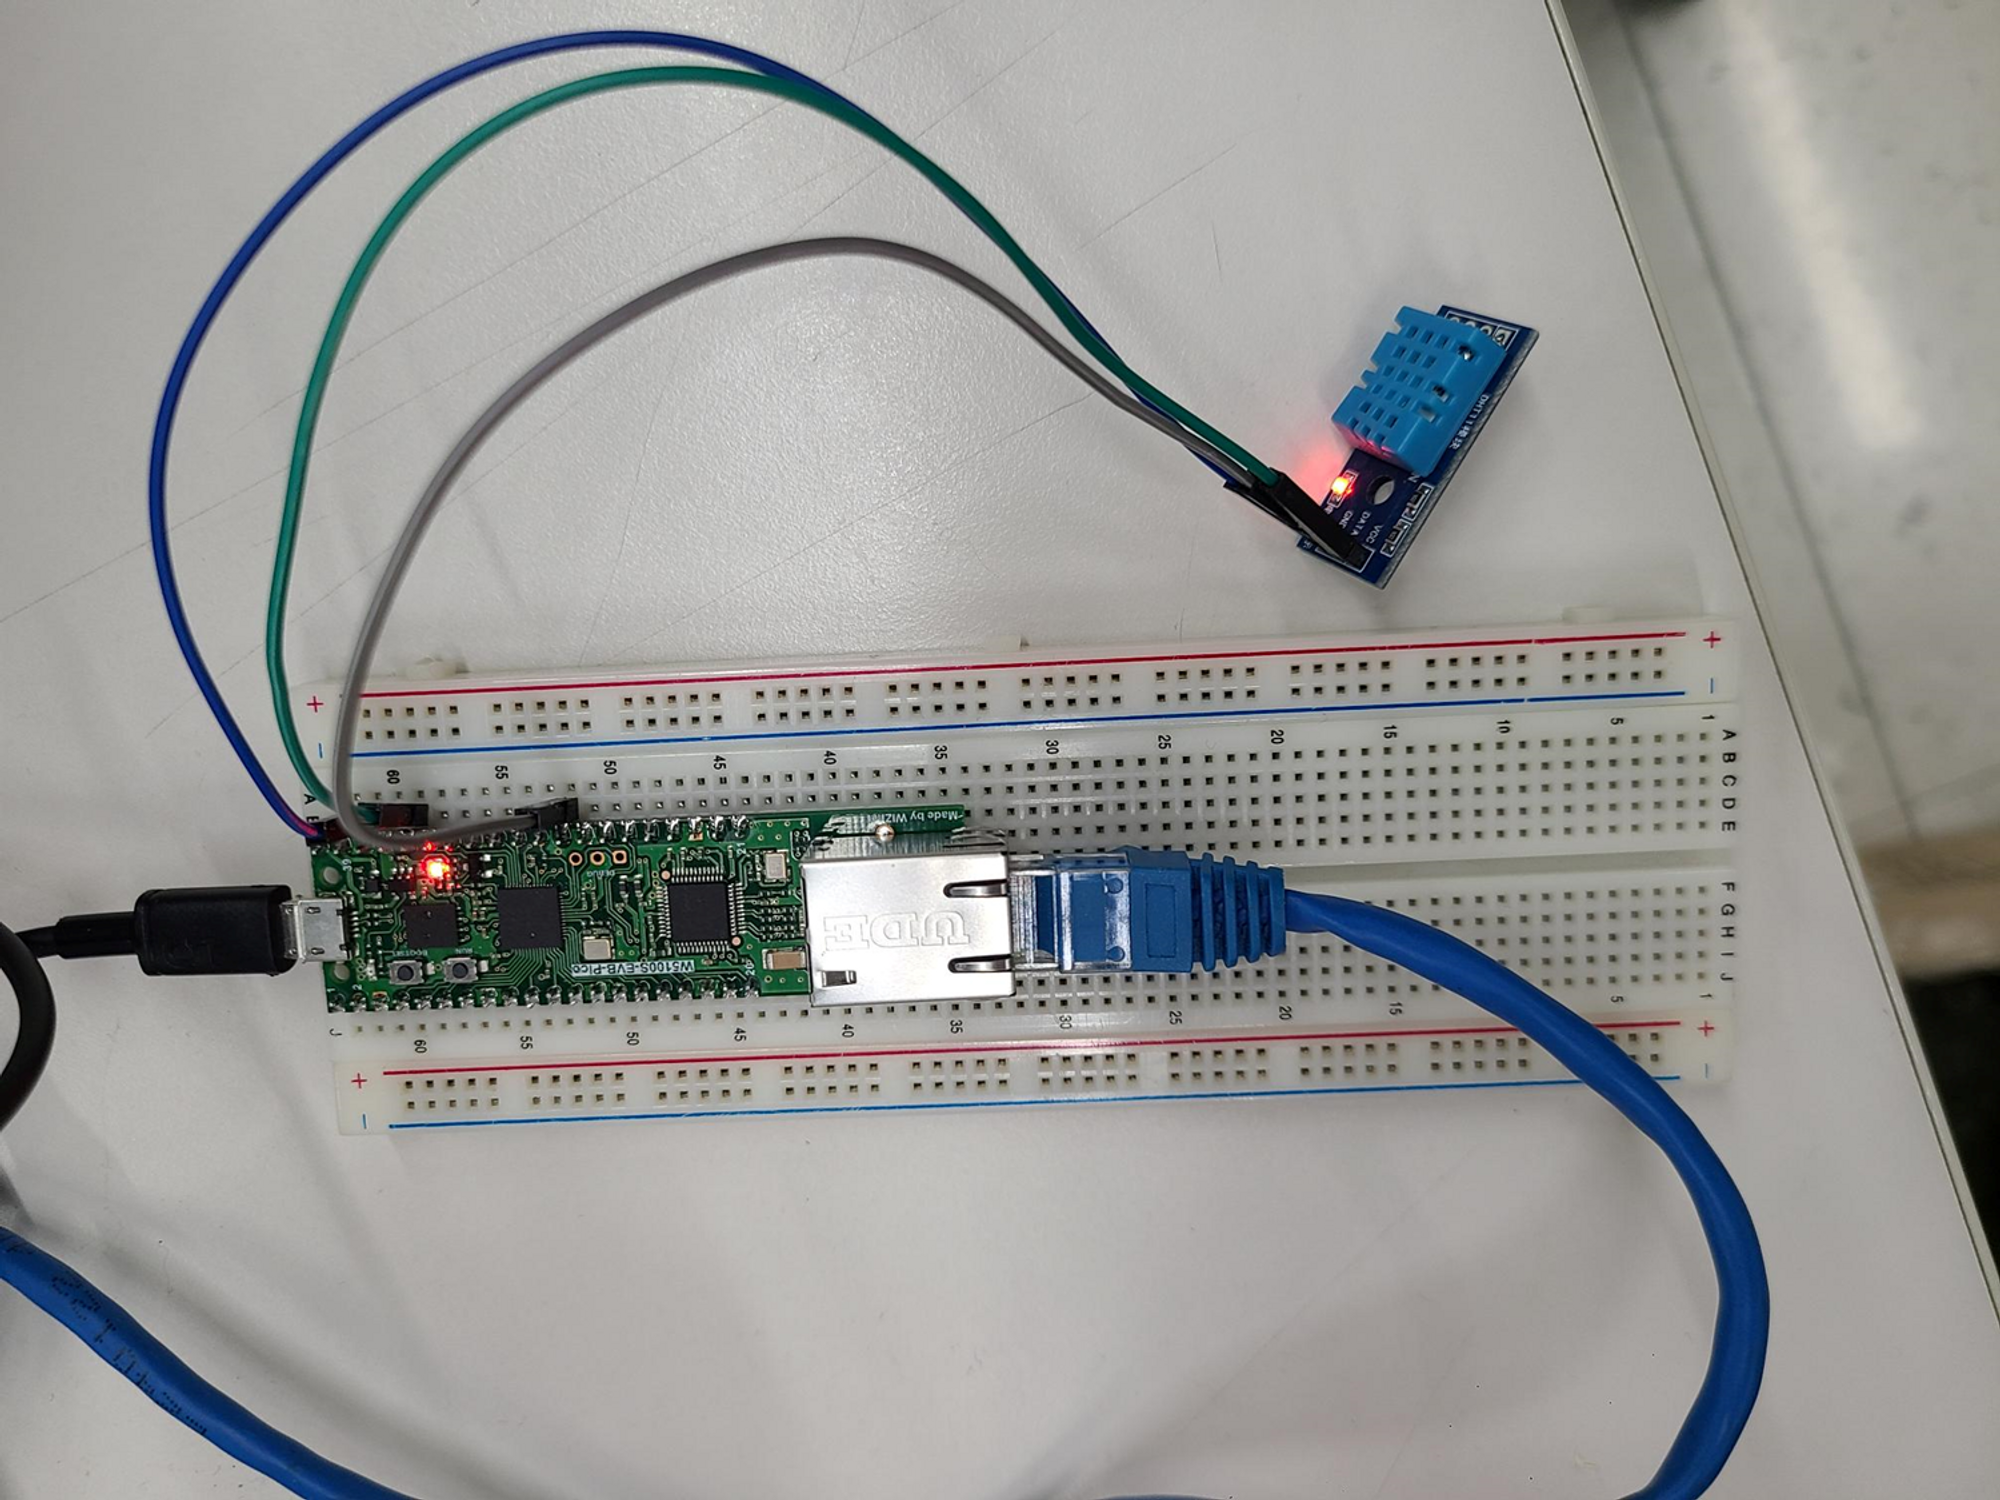
Connect the W5100S-EVB-Pico and DHT11 humidity & temperature sensor. Connect the pins as follows. In this example, we connected the GP22 pin on the board to the Data pin on the sensor, but you can use other GPIO pins as well.
W5100S-EVB-Pico | DHT11
3.3V | VCC
GND | GND
GP22 | DATA
Once you connect the power and Ethernet cable to the board, it should look like the photo below.
2. Cloud setting
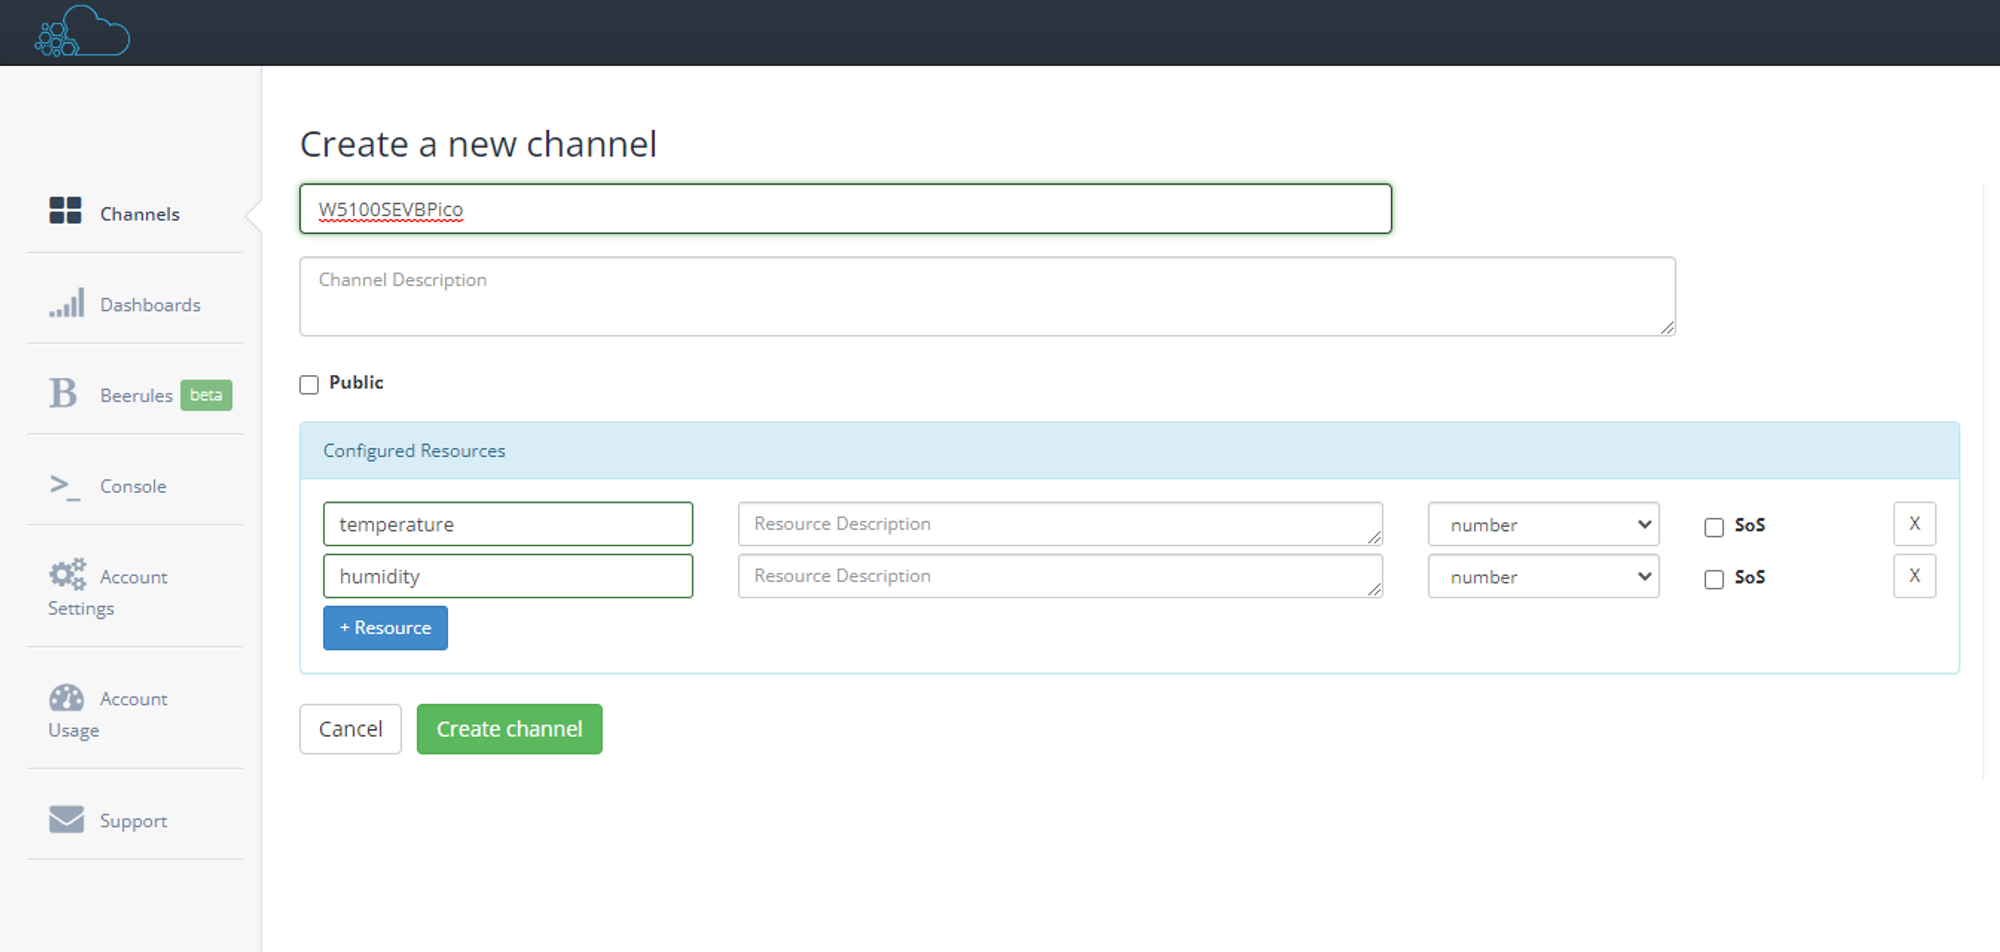
2.1. Create channel
Access Beebotte cloud, log in, and create a channel. Add sensor resources under the channel. Register temperature and humidity as number types.
After creating the channel, a token will be issued. You can use this token to send data to the cloud.
2.2. Create Dashboard
Go to the Dashboard menu, create a new dashboard, and select Basic Value widget and Timeline Chart widget. Add the resources from the created channel by selecting them, and add the widgets to the dashboard.
3. Arduino IDE
3.1. Configure Arduino IDE
Install the Arduino IDE on the Arduino IDE to use the W5100S-EVB-PICO board.
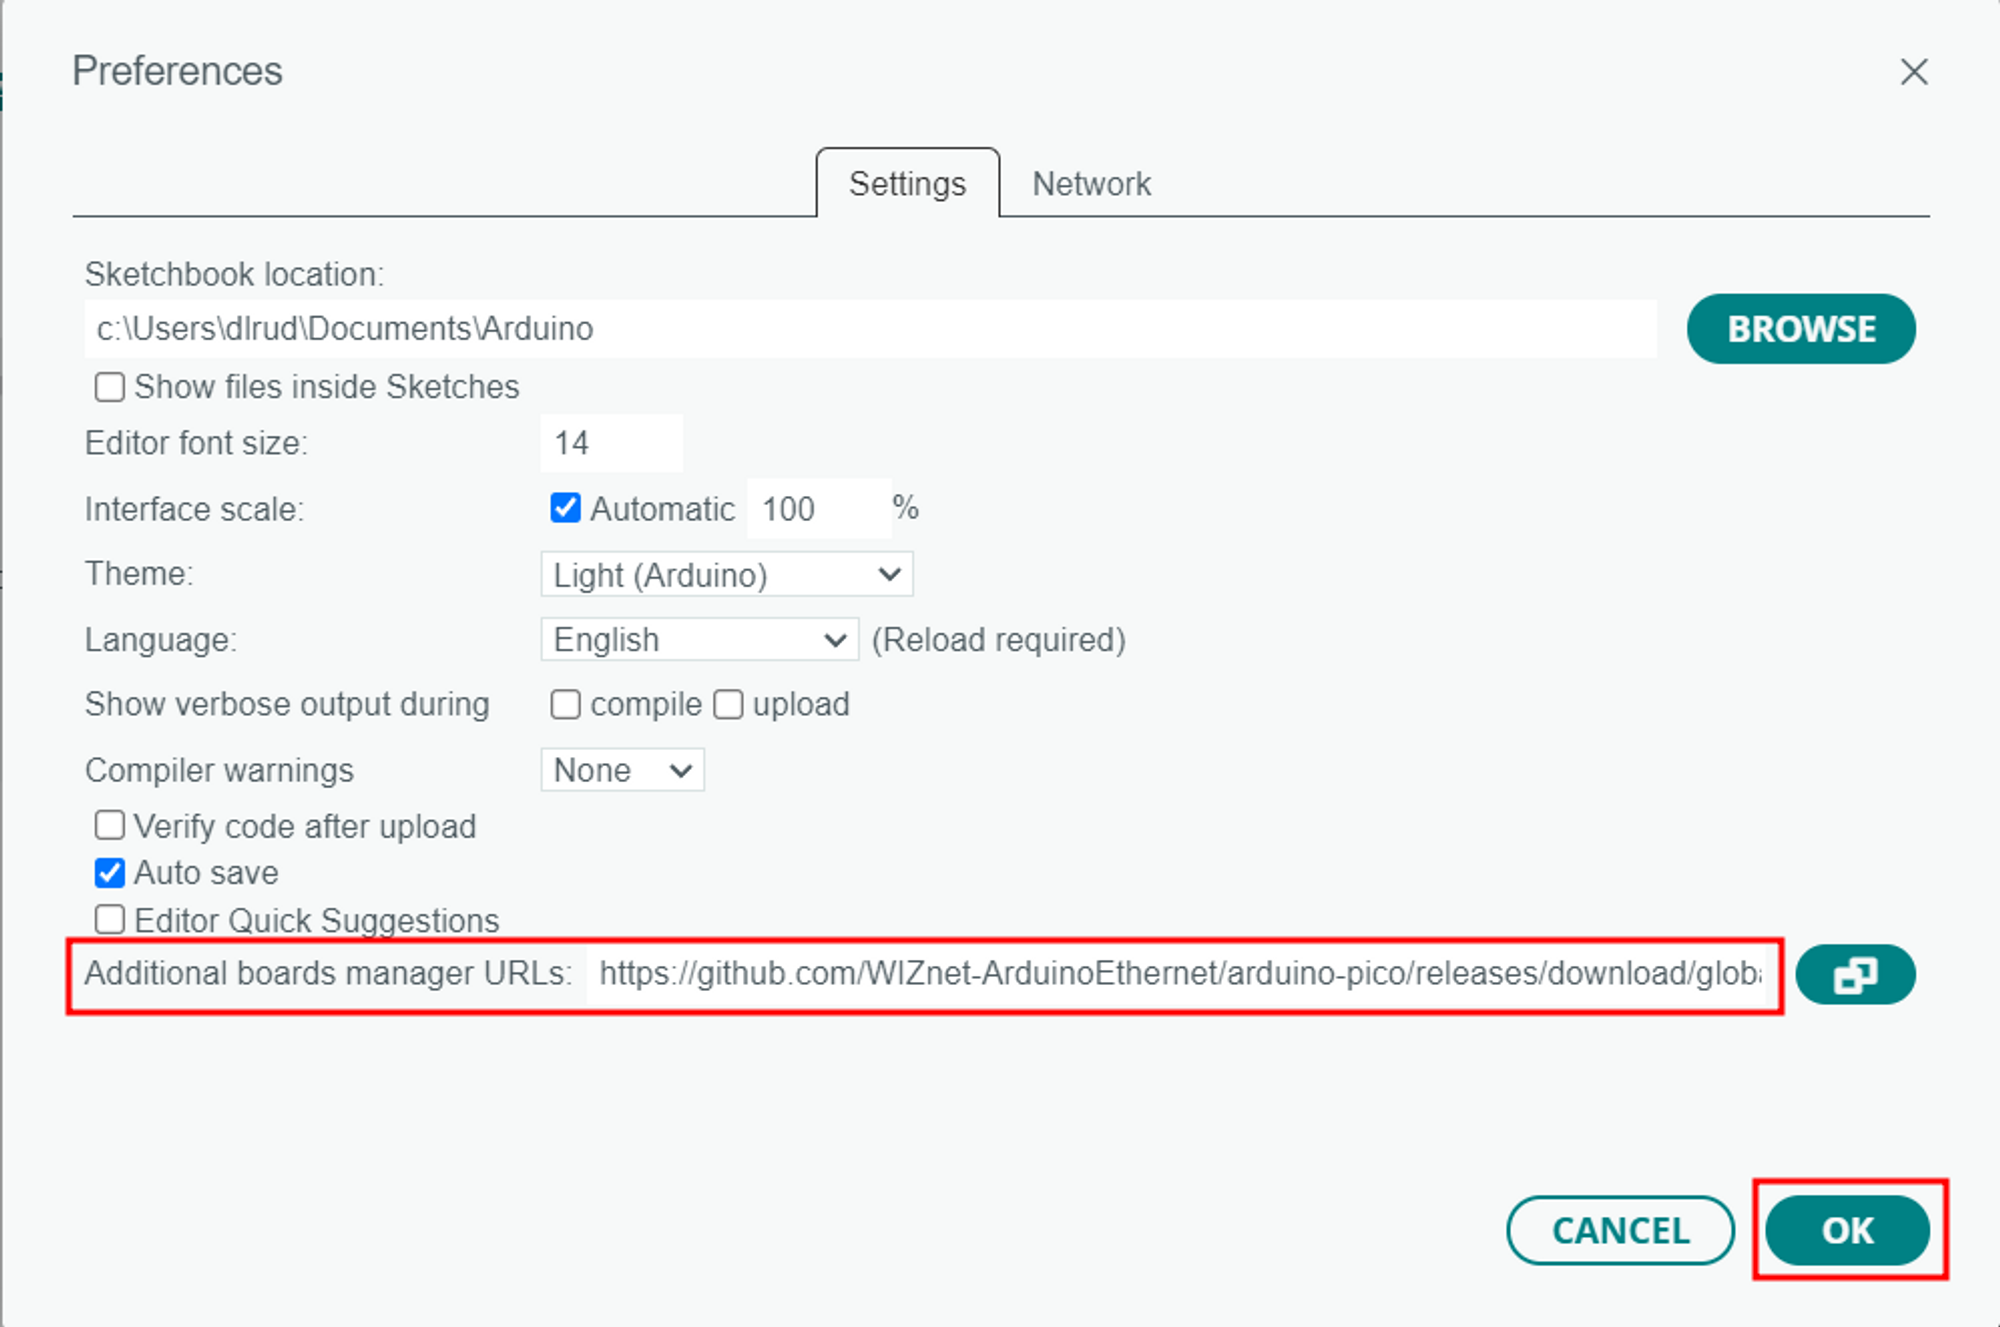
3.1.1. Add board manager URLs
Go to File -Preference in Arduino IDE and add the following link to the Additional Board Manger URLS.
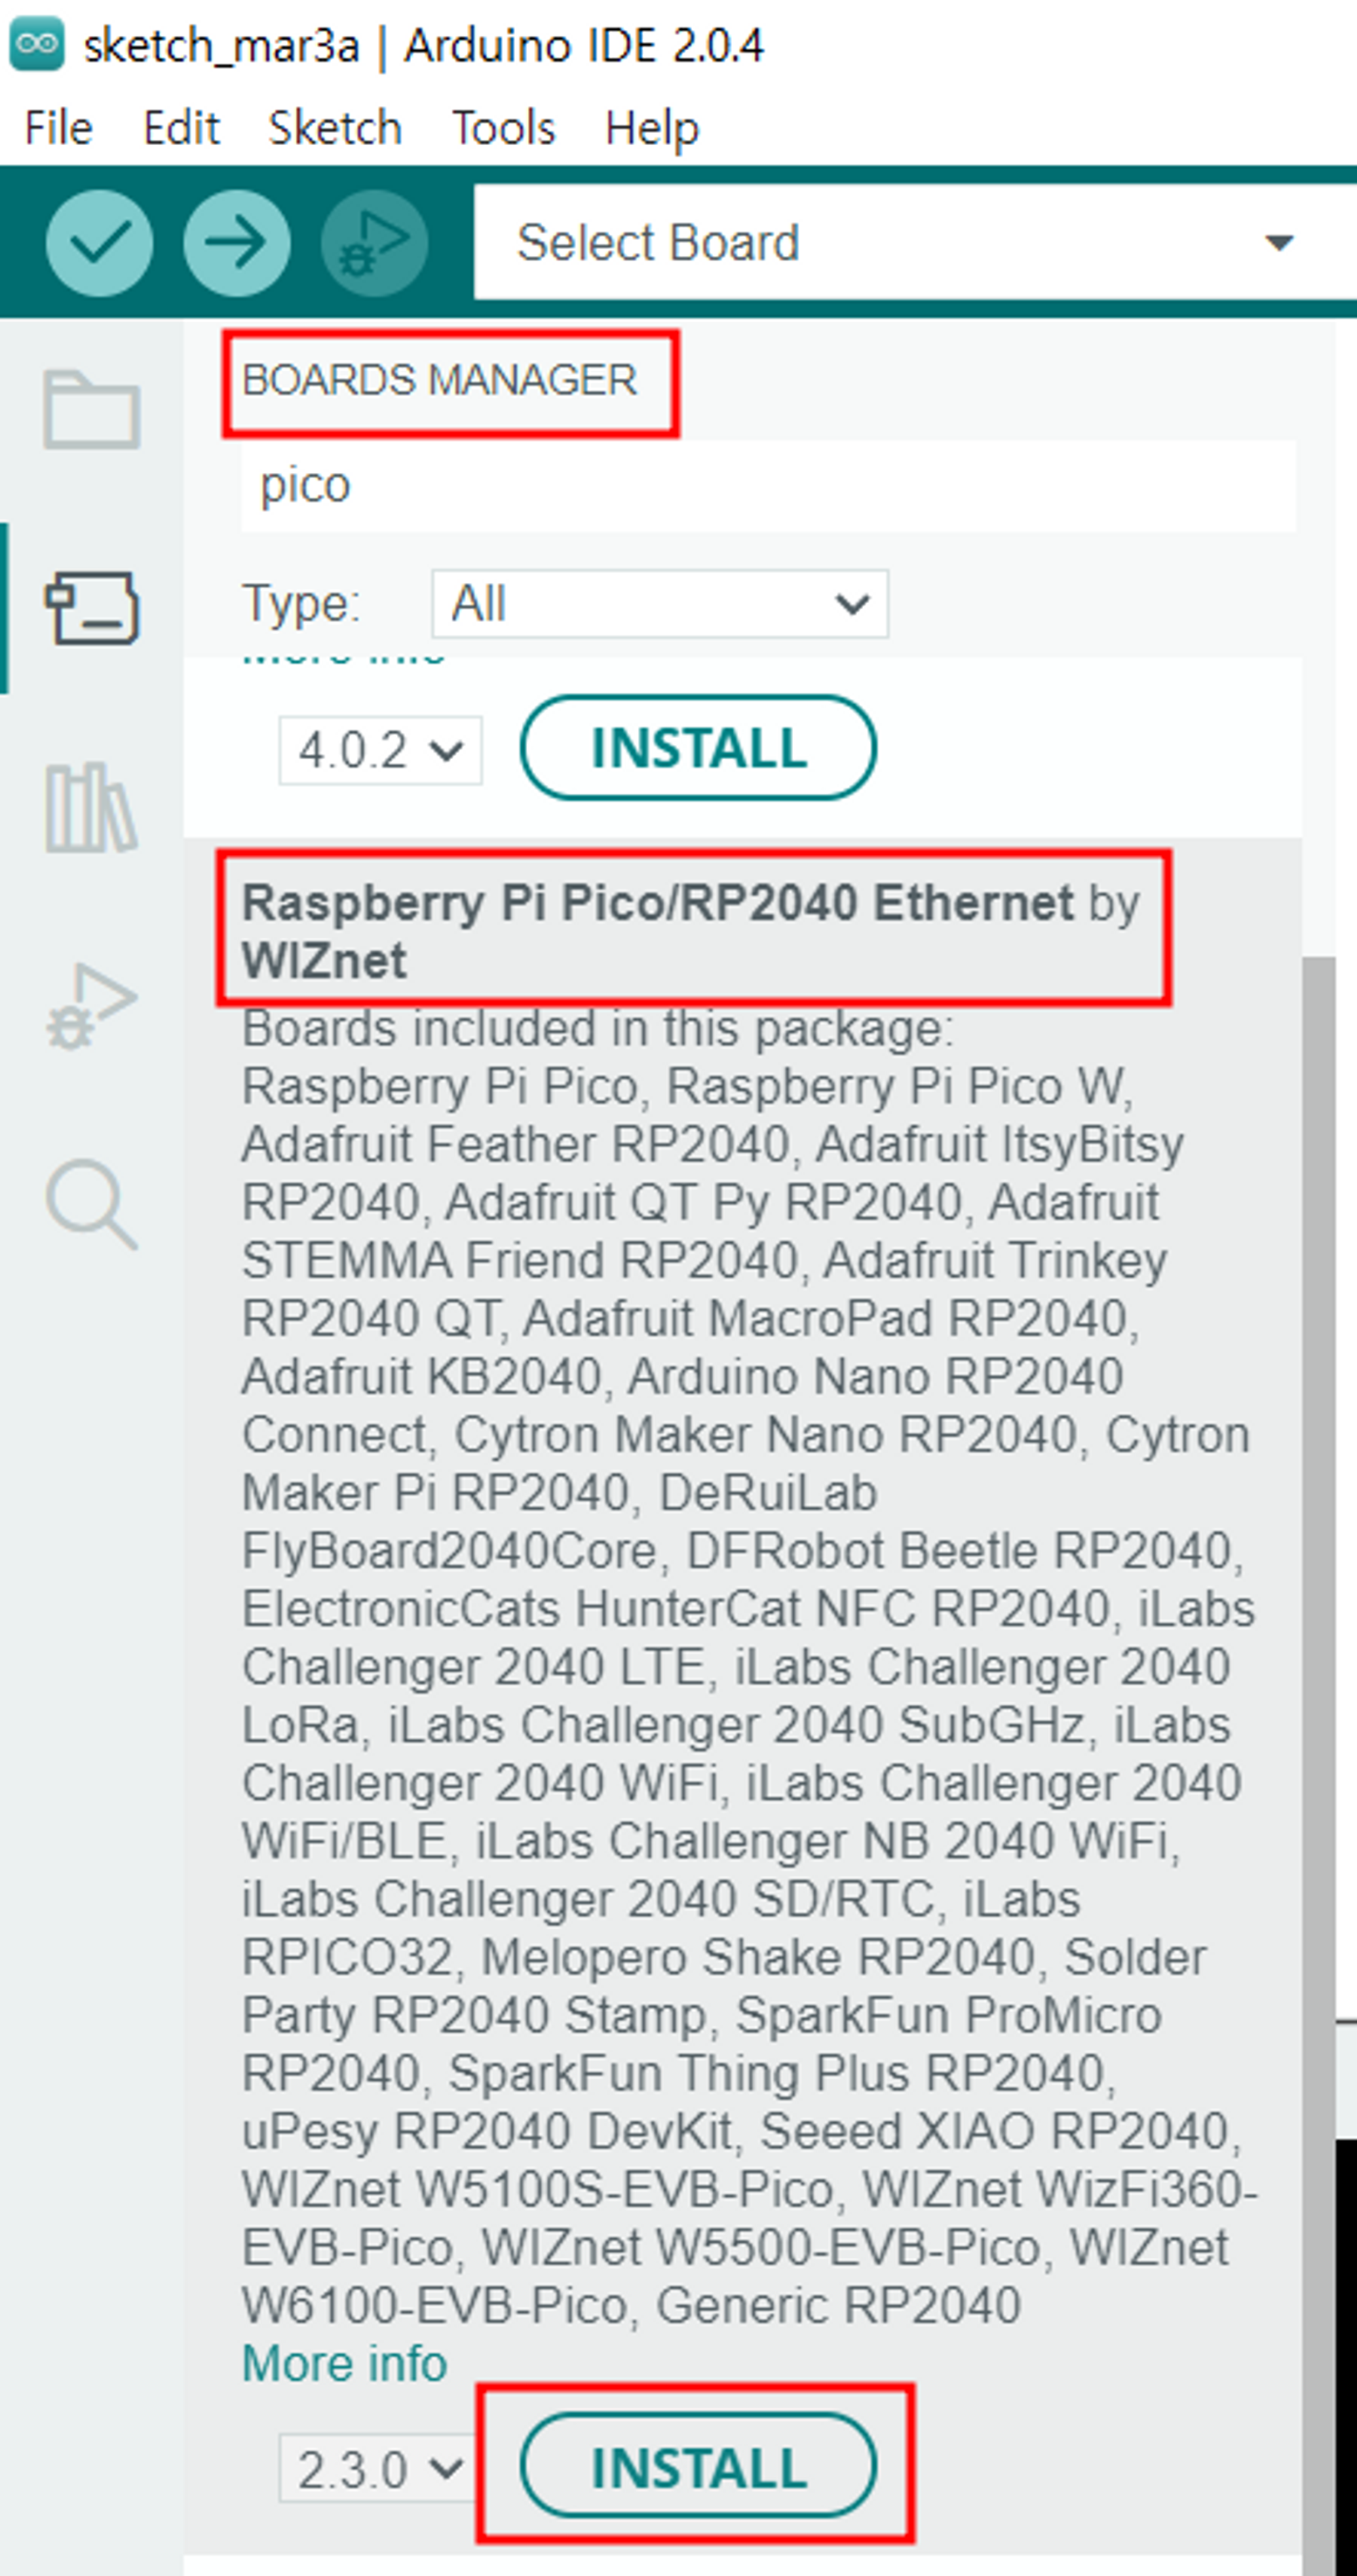
3.1.2. Add Board Manager
Go to Board Manager to search for PICO and install Raspberry PI PICO/RP2040 Ethernet by Wiznet.
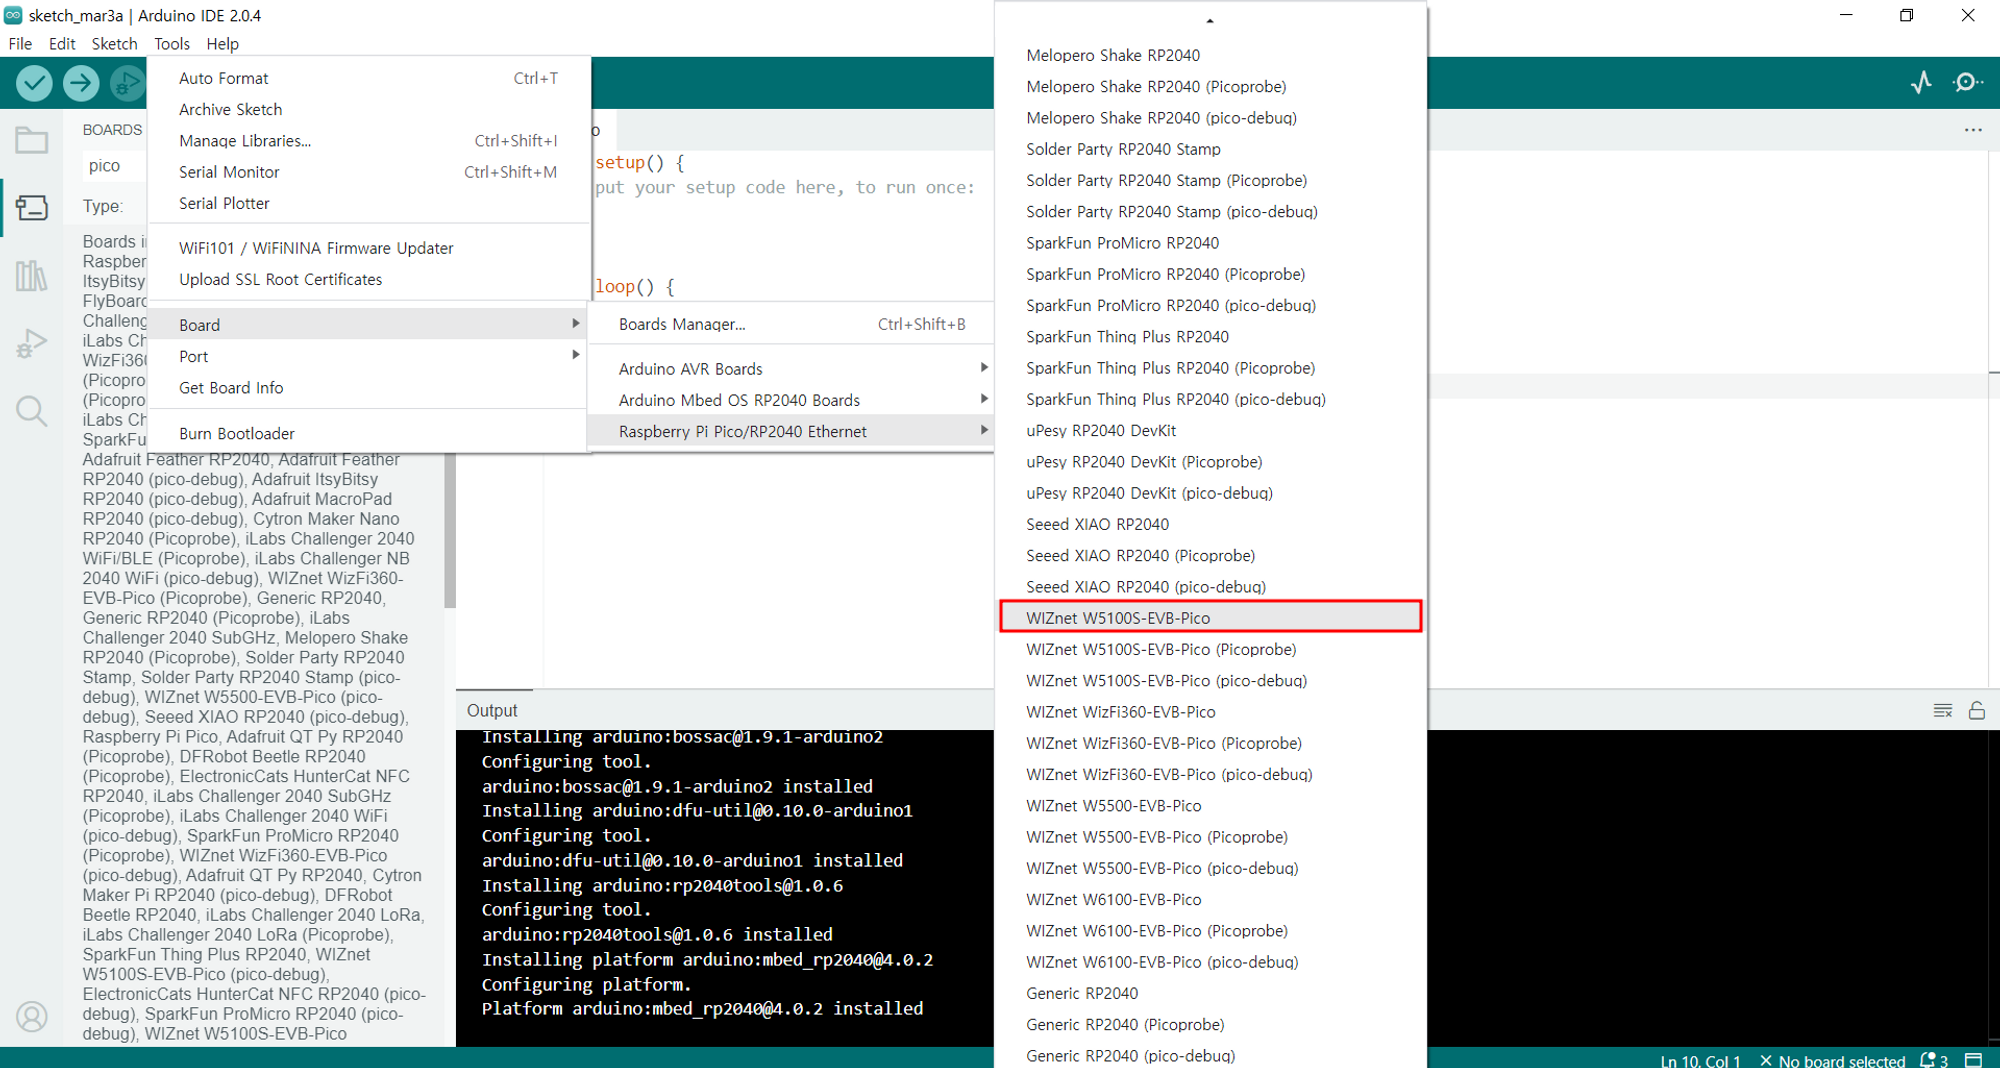
Go to Tools -Board, you can see that Raspberry PI PICO/RP2040 Ethernet is added. Now you can use the W5100S-EVB-PICO on the Arduino IDE.
3.1.3. Install Library
You need to install 3 libraries. Go to Library Manager in Arduino IDE and install each of the following:
- PubSubClient - MQTT Arduino library
- ArduinoJson - An elegant and efficient JSON library for embedded systems.
- DHT - Arduino library for DHT11
4. Sending Data to Beebotte Cloud
4.1. Connect to Ethernet
Connect the W5100S-EVB-Pico board to your computer using a USB 5-pin cable. Go to Tools - Port in Arduino IDE and select the corresponding port for the board.
4.2. Update Data and Publish
Update the temperature and humidity data from the DHT11 sensor and publish it to the Beebotte cloud.
The code is based on the example file uploaded on beebotte's github, with some modifications. The complete code I have written is uploaded on github.
Import necessary libraries, set the pin number for the DHT11 sensor, and update the token value for Beebotte cloud connection with the value obtained earlier.
#include <SPI.h>
#include <Ethernet.h>
#include <PubSubClient.h>
#include <ArduinoJson.h>
#include <DHT.h>

#define DHTPIN            22         // Pin which is connected to the DHT sensor.
#define DHTTYPE           DHT11     // DHT 11

#define BBT "mqtt.beebotte.com"     // Domain name of Beebotte MQTT service
#define TOKEN "token_xxxxxxxxxxxxxxxx"    // Set your channel token here

#define CHANNEL "W5100SEVBPico"          // Replace with your device name
#define TEMP_RESOURCE "temperature" // This is where we will store temperature
#define HUMID_RESOURCE "humidity"   // This is where we will store humidity

#define WRITE true // indicate if published data should be persisted or not

// Initialize DHT sensor.
DHT dht(DHTPIN, DHTTYPE);//

// Enter a MAC address of your shield
byte mac[] = { 0xDE, 0xAD, 0xBE, 0xEF, 0xFE, 0xED };
IPAddress ip(192, xxx, xxx, xxx);
IPAddress myDns(xxx, xxx, xxx, xxx);
IPAddress gateway(xxx, xxx, xxx, xxx);
IPAddress subnet(xxx, xxx,, xxx, xxx);

EthernetClient ethClient;
PubSubClient client(ethClient);
The loop() function reads the temperature and humidity data from the DHT11 sensor using the dht.readTemperature() and dht.readHumidity() functions. It then checks if the data is valid using the isnan() function. If the data is valid, it updates the data to the Beebotte cloud by publishing a JSON payload with the temperature and humidity values. The data is also printed to the Serial Monitor for debugging purposes. The delay() function is used to add a 5-second delay between data updates.
void loop() {
  // Read data from DHT11 sensor
  float temp = dht.readTemperature();
  float humid = dht.readHumidity();

  // Check if data is valid
  if (isnan(temp) || isnan(humid)) {
    Serial.println("Failed to read from DHT sensor!");
    return;
  }

  // Update data to Beebotte cloud
  char payload[50];
  snprintf(payload, sizeof(payload), "{\\"temperature\\": %.2f, \\"humidity\\": %.2f}", temp, humid);
  client.publish(channelResource, payload);

  // Print data to Serial Monitor
  Serial.print("Temperature: ");
  Serial.print(temp);
  Serial.print("°C, Humidity: ");
  Serial.print(humid);
  Serial.println("%");

  // Delay for 5 seconds
  delay(5000);
}
5. Monitoring Data on Beebotte Dashboard
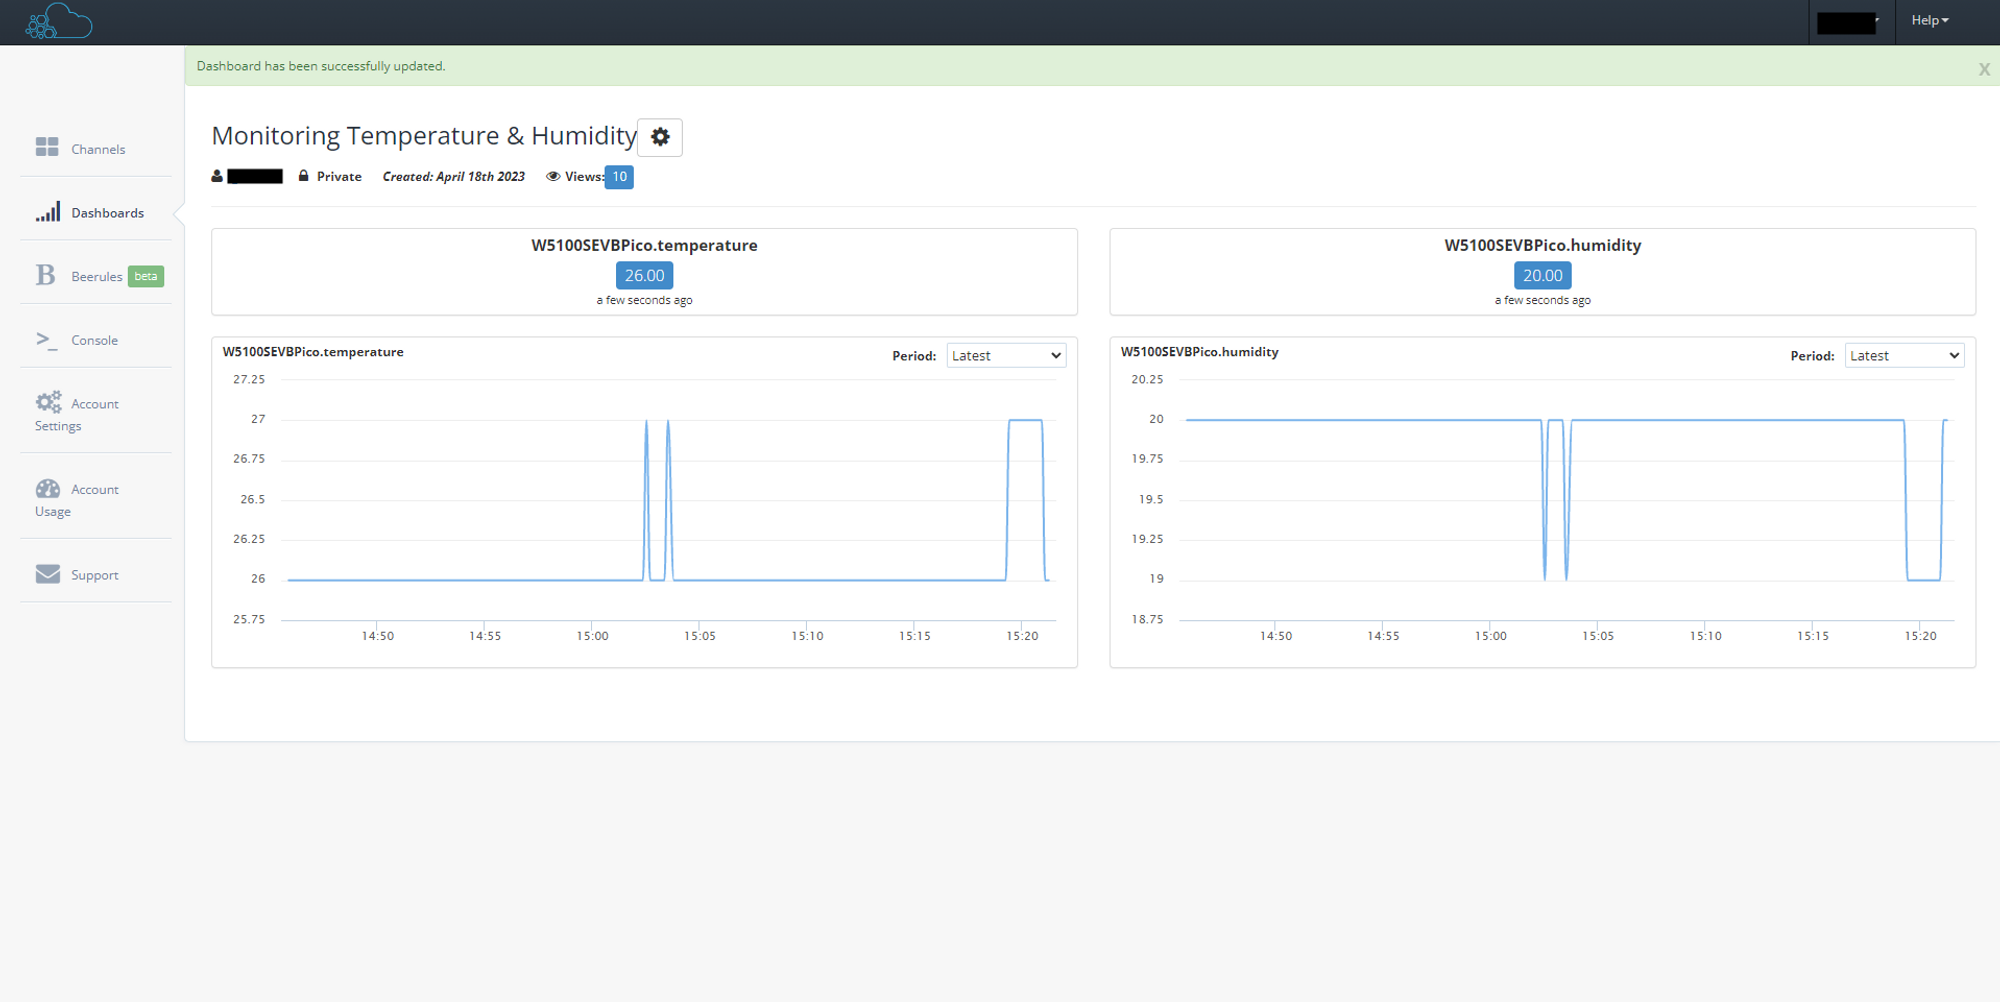
After uploading the code to the W5100S-EVB-Pico board, you can monitor the real-time temperature and humidity data on the Beebotte Dashboard.
The Basic Value widget displays the current temperature and humidity values, and the Timeline Chart widget shows the historical data in a graphical format.
That's it! You have successfully set up and configured the W5100S-EVB-Pico board with the DHT11 sensor to send temperature and humidity data to the Beebotte cloud and monitor it on the dashboard.
I hope this tutorial helps you in using the DHT11 sensor with the W5100S-EVB-Pico board and sending data to the Beebotte cloud. If you have any questions or need further clarification, feel free to ask!
-
Sketch code
